Table of Contents
Advertisement
Quick Links
To prevent accidents and machine damage, read these
instructions before installation or use. Use the washer only as
instructed in this owner's guide and installation instructions
included with your washer. Keep this guide for future reference
Front-Loading Automatic
Washer
Owner's Guide & Installation
Instructions
As an ENERGY STAR® partner,
BLOMBERG has determined that this
product meets the ENERGY STAR®
guidelines for energy efficiency.
WM 77110 NBL01
Advertisement
Table of Contents

Related Manuals for Blomberg WM77110NBL01


Summary of Contents for Blomberg WM77110NBL01
- Page 1 Keep this guide for future reference Front-Loading Automatic Washer Owner’s Guide & Installation Instructions As an ENERGY STAR® partner, BLOMBERG has determined that this product meets the ENERGY STAR® guidelines for energy efficiency. WM 77110 NBL01...
- Page 2 Please read this guide first! Dear Customer, We hope that your product which has been manufactured in modern facilities and passed through a strict quality control procedure will give you the best results. Therefore, we advise you to read through this document carefully before using your product and keep it for future reference.
-
Page 3: Table Of Contents
TABLE OF CONTENTS 1 Your Washer Overview..............5 Specifications . - Page 4 Descaling the washer ............42 8 Troubleshooting WARRANTY STATEMENT FOR THE BLOMBERG CLOTHES WASHERS 10 HOW TO GET SERVICE...
-
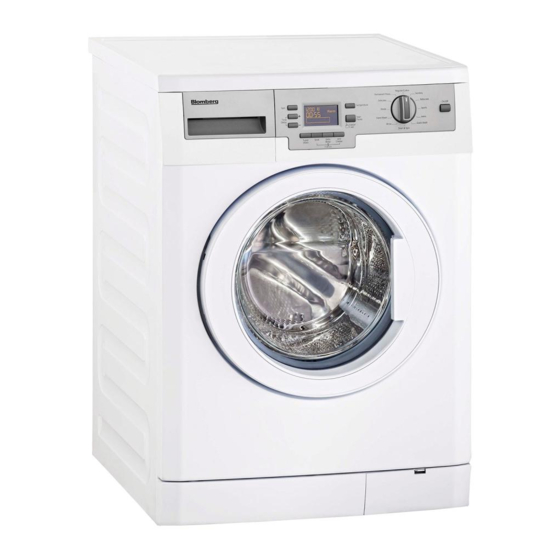
Page 5: Your Washer
Overview 1 - Power Cord 5 - Height-adjustable Feet 2 - Top Lid 6 - Loading Door 3 - Control Panel 7 - Detergent Dispenser 4 - Filter Cap 8 - Drain Hose Owner’s Guide & Installation Instructions 5 / English... -
Page 6: Specifications
Your Washer Specifications Front Loading Automatic Washer Models WM 77110 NBL01 Height (in) / (cm) 33.1 / 84 Width (in) / (cm) 23.6 / 60 Depth (in) / (cm) 21.7 / 55 Net Weight (lbs) / (kg) 159 / 72 Electricity (V/Hz.) 208-240 / 60 Total Current (A) -
Page 7: Important Safety Instructions
Important Safety Instructions WARNING ¾ To reduce the risk of fire, electric shock or injury to persons while using your appliance follow basic safety precautions, including the following: • Read all instructions before using the washer. • Do not wash articles that have been previously cleaned in, washed in, soaked in, or spotted with gasoline, dry-cleaning solvents, or other flammable or explosive substances (acetone, alcohol, kerosene, some liquid household cleaners, some spot removers, turpentine, waxes and wax removers) as they give off vapors that could ignite or explode. - Page 8 110/120V. A special junction box will be provided and used for the mains connection (See, Installation Instructions for Grounding Instructions and Requirements). • If an abnormal sound is heard during the washer operation, refer to the “Troubleshooting” of this guide. • Call service for checking any possible damage or fault if the appliance is dropped or bumped. • The end of drain hose should not contact the discharge water in any way as this might cause siphoning of water. • Always leave the property after checking that the wash cycle is completed and the washer is turned off. • Damaged or worn power cords and plugs must only be replaced by a Blomberg Service technician. 8 / English Front-Loading Automatic Washer...
- Page 9 Important Safety Instructions • Never use an extension cord or adapter to connect the appliance to the electrical power due to the risk of electric shock and/or fire. • All broken and faulty components, panels and parts must only be replaced with original Blomberg spare parts by a Blomberg Service technician. • Do not force the washer door open when it is locked. The door must be closed any time during the programme cycle. • Do not use fabric softeners or products to reduce static unless recommended by the manufacturers of the fabric softener product. • Check the drain pump filter occasionally to remove coins, buttons and such small objects. • Always drain off the water completely before cleaning the pump filter, before transporting the washer, when there is a danger of frost and when there is a power failure (For emergency draining, See User maintenance instructions).
-
Page 10: Installation Instructions
Installation Instructions Read this first ! This washer can be individually installed in free-standing and built-in installations. You can also install your washer with your dryer as a free-standing or built-in pair. Before you install your appliance, read the following instructions completely and carefully: • Save these instructions for future reference. -
Page 11: Allowable Clearances For Undercounter Installation
3 in (7.62 cm) from the bottom of closet door. Stacked Installation You can stack your Blomberg washer and dryer (model no: DV 16540 NBL00) by using a special stacking kit (Part No.2967100100). If necessary, consult your dealer or technical service for supplying the stack kit. In stacked closet installation, following configuration is necessary: A louver having minimum 23 in2 (148 cm2) air opening located at 3 in (7.62 cm) height from the... -
Page 12: Removing Shipping Bolts
Installation Instructions Removing shipping bolts WARNING ¾ Shipping bolts must be removed before operating the washer! Otherwise, the appliance will be damaged seriously! 1. Loosen all the bolts with a spanner until they rotate freely (“C”) 2. Remove the shipping bolts by turning them gently. 3. Bolt hole covers (supplied in the bag with the owner’s guide) are fitted into the holes on the rear panel with a special lock mechanism. To fit the cover, first insert it into the hole and then rotate it counterclockwise with a screwdriver until it is locked. -
Page 13: Electrical Connection
240V, 60Hz) located on the appliance. For this purpose, a junction box (as seen in picture below) must be obtained. Junction box is supplied with Blomberg Clothes Dryer (model no: DV 16540 NBL00) and it works as a voltage converter from 110/120V to 208/240V between the mains and appliance. -
Page 14: Power Supply And Circuit
Installation Instructions Power supply and circuit Connect the clothes washer to the junction box supplied. Junction box must be connected to an earthed outlet protected by a fuse of suitable capacity. Important: • Mains connection should comply with national regulations. • The voltage and maximum total current are specified in the section “Specifications”. • The appliance must not be directly connected to the mains in case of absence of junction box. • Connection via extension cords or multi-plugs should not be made. WARNING ¾... -
Page 15: Drainage
• Hot water supply temperature must not exceed 140˚F (60˚C). (Ideally 120˚F (48˚C)) • Do not connect the washer to an unpressurized water boiler since water pressure may not be adequate for proper operation. • Do not remove the filters located on the water supply hoses (on faucet/hose and hose/inlet valve connections). • Always use genuine “Blomberg” water supply hoses when connecting with this washer. Old or worn-out hoses must not be reused. It is not advised to extend inlet or drain hoses, if necessary consult your dealer or technical service about hose extensions. -
Page 16: Installation Checklist
Installation Instructions • Be sure to secure the drain hose tightly to the pipe (stand pipe, drain pipe/edge of the sink) with a strap etc. • The hose should be placed between 16 and 39 in. (40 and 100 cm) from the floor level • If you have floor drain system, you can place the drain hose in the hole located on the floor. Installation Checklist • Water inlet hoses and accessory bags must be removed from the wash drum. • Transportation/shipping bolts must be removed. • Washer must be properly leveled by using the adjustable feet. • Water inlet hoses are connected to the water faucets, secured and checked for any leaks by turning on both faucets. • Drain installation is done properly and drain hose is checked and secured to prevent any flooding. • Washer is connected the junction box which is plugged to a properly grounded live mains outlet. • Be sure that power outlet, water faucets and drain outlet must be always accessible to the user. Transportation Before you transport the washer, you should carry out the following: 1. -
Page 17: Disposal Information
Installation Instructions Disposal Information Packing Disposal WARNING ¾ Packing materials of the appliance are potentially dangerous for children. Materials such as plastic bags, films or wrappings must be kept away from children or disposed properly to prevent the danger of suffocation. CAUTION ¾ Packing materials are made of biodegradable and recyclable substances. You should consult your local authority or dealer about the environmental-friendly disposal of the packaging of your appliance. -
Page 18: Operating Instructions
Operating Instructions First Use WARNING ¾ To reduce the risk of fire, electric shock, or injury to persons, read the IMPORTANT SAFETY INSTRUCTIONS before operating this appliance. Before the first use, • Be sure that the washer is installed properly by a qualified installer or service technician in accordance with all national and local codes and requirements. • Read all instructions carefully before using the washer. • Check that shipping bolts are completely removed. • Be sure that the location of installation has proper electrical supply voltage (junction box must be used for connecting the washer to the mains) and plumbing system needed for the operation of the appliance. -
Page 19: Preparing The Laundry
Operating Instructions CAUTION ¾ Wash the items which are care labeled as “machine-washable”. Do not machine wash items that are having symbol on fabric care label. ¾ Sort the laundry according to the following fabric types, color groups and wash them separately: • White and color fast fabrics • Non-fast, colored fabrics • Permanent press items(mens shirt, dress pants, poly-cotton blends) • Delicate fabrics (silk, rayon etc.) • Woolens (only wash woolens that are labeled “machine washable” or “hand washable”... -
Page 20: Loading The Washer
Operating Instructions Loading the washer Maximum load capacity depends on the fabric type of laundry, soiling amount of laundry and program cycle you wish to use. CAUTION ¾ Do not exceed the maximum load capacity of the selected program cycle. Washing results are adversely affected by an overloaded drum. -
Page 21: Detergent Use
Operating Instructions Detergent Use About Detergent CAUTION ¾ Your washer is designed to use only HE (high efficiency) detergents. You should always look for the following symbol on the label of detergents: If you use a non-HE detergent with this washer, high sudsing will occur. High sudsing will decrease tumble action effectiveness, washing and rinsing performance worsen. -
Page 22: Detergent Dispenser
Operating Instructions Detergent Dispenser Detergent dispenser of your washer has three separate compartments for main wash detergent, fabric softener and liquid bleach. Each of these laundry additives are automatically dispensed at appropriate time during wash program. CAUTION ¾ Do not put laundry additives directly in the wash drum. Always use the detergent dispenser. - Page 23 Operating Instructions Liquid Fabric Softener Compartment Add the recommended amount of liquid fabric softener to the middle compartment marked as “ ” and dilute it with warm water to the maximum fill line. CAUTION ¾ Especially concentrated fabric softeners must be diluted with warm water otherwise siphon may be clogged in time. Do not fill the fabric softener above the maximum fill line as any excess amount will mix into the wash water and you will have to re-fill the compartment.
-
Page 24: Water Consumption
Operating Instructions (I) Liquid Chlorine Bleach Compartment Add liquid chlorine bleach to the right compartment numbered as “I”. Measure 1/3 cup (80 ml) of bleach and pour it into the special container located in the right compartment of the dispenser. This container ensures dispensing and dilution of bleach during the first rinse of wash cycle. There is a maximum fill line on the container. -
Page 25: Selecting A Program And Operating Your Washer
Selecting a Program and Operating Your Washer Control panel 1 - Spin Speed Adjustment Button 2 - Display 3 - Temperature Adjustment Button 4 - Program Selection Knob 5 - On/Off Button 6 - Time Delaying Button (+/-) 7 - Auxiliary Function Buttons 8 - Start/Pause/Cancel Button Owner’s Guide &... -
Page 26: Display Symbols
Selecting a Program and Operating Your Washer Display symbols a - Door Locked Symbol b - Time Delaying Symbol c - Temperature Indicator d – Water cut-off symbol (According to your machine’s model) e - Standby Symbol f - Start Symbol g - Auxiliary Function Symbols h - Program Indicator Symbols (Soak/main wash/rinse/softener/spin) i - Remaining Time and Delaying Time Indicator k - Spin Speed Indicator Turning the washer on Plug in your washer. Turn the tap on completely. Check if the hoses are connected tightly. Place the... -
Page 27: Wash Cycles
Selecting a Program and Operating Your Washer Wash Cycles Depending on the type of fabric, the following main programs are available. Each of these main programs comprise of a complete washing process, including washing, rinsing and, if required, spin cycles. WARNING ¾... -
Page 28: Special Programs
Selecting a Program and Operating Your Washer • Quick Wash This program is used to wash a few very lightly soiled and unstained cotton, synthetics or blended items in a short time. e.g.: daily clothes that have been used only once. •... -
Page 29: Program Cycle Selection Table
Selecting a Program and Operating Your Washer Program Cycle Selection Table Extra Hot Heavy 145F / 63°C White and colorfast items made Normal/ 122F / 50°C Regular/ of cotton and linen (towels, Heavy 1200 Full • SW,S,R,A Cotton jeans, T-shirts, sweatshirts, Warm Light Hot-cold... - Page 30 Selecting a Program and Operating Your Washer 1. Even if there is no hot water system, hot water inlet must still be connected to another cold water faucet. Otherwise a fault will occur on water intake. 2. Programs are limited with the maximum spin speed appropriate for that particular type of load. 3. Maximum load capacities are suggested for various load types. Wash cycles of full load (Regular/ Cotton, permanent press) should be half loaded for better wash results if the laundry is heavily soiled.
-
Page 31: Auxiliary Functions
Selecting a Program and Operating Your Washer Auxiliary functions Auxiliary Function Selection Buttons • Depending on the program, you can select the desired auxiliary function by pressing the buttons a, b, c, d. • Select the required auxiliary functions before starting the program. • Symbol of the selected auxiliary function will light up. Auxiliary function selection Auxiliary function that is not compatible with the program cannot be selected. (see, “Program Cycle Selection Table”) • Super Wash This function (a) increases washing times for heavily soiled items for better wash results. Washer will only take in cold water when this function is chosen. -
Page 32: Time Display
Selecting a Program and Operating Your Washer Time display The display shows the time remaining for the program to complete while a program is running. Time is 01:30 displayed in hours and minutes as “ ”. Time delay With the “Time delay” function you can delay the program start up to 24 hours. Setting can be made in intervals of 30 minutes. 1. Open the loading door, place the laundry inside and fill detergent drawer. 2. -
Page 33: Starting The Program
Selecting a Program and Operating Your Washer Starting the Program 1. Press Start/Pause/Cancel button to start the program. 2. The start symbol which indicates that the program has started will light up. 3. The door locks and the door locked symbol will light up. 4. The Symbol of the relevant step (prewash, main wash, rinse, softener and spin) that the program has started from will light up. -
Page 34: Child-Proof Lock
Selecting a Program and Operating Your Washer Door lock The Door Locked Symbol lights up when the loading door is locked. This symbol will flash until the door is allowed to open. Do not force the door at this stage. This symbol will fade out as soon as the door is allowed to open. -
Page 35: Ending The Program Through Canceling
Selecting a Program and Operating Your Washer To deactivate the child-proof lock, press the 2nd and 4th auxiliary function buttons for 3 sec. “C:OFF” (Child-proof lock is deactivated) label appears on the screen. Ending the program through canceling “Start/Pause/Cancel” button is pressed for 3 seconds to cancel the program. Start symbol will flash during cancellation. After cancellation, the symbol of the corresponding step at which the cancellation was made will remain lit and “... -
Page 36: Preparation
Preparation 1. Turn on both hot and cold water faucets fully. Check and be sure the water connection is tight. 2. Place the laundry in the drum. 3. Add laundry additives (e.g. detergent, fabric softener,bleach). Starting 1. Press the “On/Off” button. 2. Select the appropriate wash cycle and temperature suitable for your items. 3. -
Page 37: Adding More Laundry
Preparation Adding more laundry This is only possible under the following conditions: 1. during time delay, CAUTION ¾ You may add or remove laundry during the time delay (until the program starts). 2. At the beginning of a washing cycle, CAUTION ¾... -
Page 38: Re-Spinning The Laundry
Preparation Re-spinning the laundry The control system for an unbalanced load can pause the spinning in cases when the distribution of the laundry in the drum is not balanced. If you want to re-spin the clothes: 1. Rearrange the previously placed clothes in the drum. 2. -
Page 39: User Maintenance Instructions
User maintenance instructions WARNING ¾ Be sure to unplug the power cable before attempting maintenance or cleaning of your appliance to minimize the risk of electric shock. Cleaning detergent dispenser Remove any powder/liquid residue buildup in the dispenser drawer. To do this; 1. Press the dotted point on the siphon of the softener compartment and pull towards yourself until the it is removed from the dispenser. CAUTION ¾... -
Page 40: Cleaning The Outer Cabinet And Control Panel
User maintenance instructions materials while cleaning the inner surface of the drum. Use soapy water with a damp cloth to wipe the inner surface, then dry it and leave the door open to let inside dry properly. Sanitary cycle with extra rinse option should be used for monthly cleaning of drum. To carry out this procedure: First be sure that the drum is empty. -
Page 41: Cleaning The Drain Pump Filter
User maintenance instructions Cleaning the drain pump filter Filter system in your washer prevents solid items such as buttons, coins and fabric fibers clogging the pump impeller during discharging of the washing water. Thus, a good water discharge is achieved and the pump life is extended. -
Page 42: Descaling The Washer
User maintenance instructions Do the following as shown in the figure below: • Pull out the emergency drain hose from its housing. • Place a large container at the end of the hose. Drain the water off into the container by pulling out the plug at the end of the hose. If the amount of water to be drained off is greater than the volume of the container, replace the plug, pour the water out, then resume the draining process. • After draining process is completed, replace the plug into the end of the hose and fit the hose back into its place. -
Page 43: Troubleshooting
Troubleshooting Problem Cause Explanation / Suggestion There may be some water in your It is not harmful to your washer. You appliance when you receive it. This should run a “sanitary” cycle without Water in the washer. is from the quality control process any clothes and laundry additives and is normal. - Page 44 Troubleshooting Be sure the strainers and rubber seals Inlet hose connections may be of the water inlet hoses are solid and leaking. securely fitted. Tightly attach the drain hose to the End of the drain hose may be loosely waste pipe or sink (See “Installation inserted into the waste pipe or sink.
- Page 45 Troubleshooting The washer will wait until there is a sufficient amount of water, which may Water pressure may be low. lengthen the cycle time to avoid poor washing results due to insufficient water. Cycle time is lengthened to avoid Supply voltage may be low. poor washing results when the supply voltage is low.
- Page 46 Troubleshooting The automatic spin correction system might have been activated due to the unbalanced distribution of the laundry in the drum. The laundry in the drum may be tangled It continuously spins. There may be an imbalance of load up too much. Laundry should be Remaining time does not in the drum.
- Page 47 Troubleshooting The automatic spin correction system might have been activated due to the unbalanced distribution of the laundry in the drum. No spinning is performed when the laundry is not evenly There may be an imbalance of load distributed in the drum to prevent any in the drum.
- Page 48 Troubleshooting Select the proper program cycle Wrong program cycle and and temperature for the laundry to temperature might have been be washed (See “Laundry Tips” & selected. “Program Cycle Selection”). Use the recommended amount of Using insufficient amount of HE detergent appropriate for water detergent.
- Page 49 Troubleshooting If the water hardness is higher, using insufficient amount of detergent can Using insufficient amount of cause the laundry to become stiff detergent. in time. Use appropriate amount of detergent according to the water hardness. You may have added too much softener beyond max fill line.
- Page 50 Troubleshooting There may be an imbalance of laundry in the machine. The laundry in the drum may be tangled up too much. Laundry should be rearranged and re-spun. No Intermediate spins may be skipped. spinning is performed when the laundry is not evenly distributed in the drum to prevent any damage to the appliance and to its environment.
- Page 51 Troubleshooting Adjust the washer feet (See “Levelling Feet might require adjustment. the Washer”). Shipping bolts might not have been Remove the shipping bolts (See removed. “Removing Transport/Shipping Bolts”). Add more laundry to the drum for even There may be a small amount of Washer vibrates, shakes or load distribution next time you operate laundry in the drum.
- Page 52 Troubleshooting Excessive laundry might have been Do not load the washer in excess. loaded in. Select the proper program cycle Wrong program cycle and and temperature for the laundry to temperature might have been be washed (See “Laundry Tips” & selected.
-
Page 53: Warranty Statement For The Blomberg Clothes Washers
1 year * limited warranty from date of first installation Blomberg will repair or replace at no cost to the consumer any defective parts of the washer if used under normal household conditions (warranty is void if the product is used commercially e.g., bed + breakfast, nursing home etc.). -
Page 54: How To Get Service
0 HOW TO GET SERVICE Please contact the Distributor for your State or Province as listed on the Distributor Contact List, or call our Toll Free Number at 1 800 459 9848 for direction to an Authorized Blomberg Service Agent. 54 / English Front-Loading Automatic Washer... - Page 55 Owner’s Guide & Installation Instructions 55 / English...
- Page 56 www.blomberginternational.com info@blomberginternational.com 7-0 1 1--0- 1 2 282080--0334- Document 8umber 7...