Dell C2665dnf User Manual
Document hub color laser multifunction printer
Hide thumbs
Also See for C2665dnf:
- Manual (12 pages) ,
- Quick reference manual (8 pages) ,
- Specifications (6 pages)

Related Manuals for Dell C2665dnf


Summary of Contents for Dell C2665dnf
- Page 1 C2665dnf | Dell Document Hub Color Laser Multifunction Printer User's Guide Regulatory Model: C2665dnf...
-
Page 3: Table Of Contents
As for RSA BSAFE ............25 Dell™ C2665dnf Color Laser Multifunction Printer User's Guide . - Page 4 ......Reconfiguring the Wireless Setting Using Dell Printer Configuration Web Tool ......... .
- Page 5 Verifying the Settings Using System Settings Report ....Verifying the Settings Using Ping Command ....Loading Paper .
- Page 6 Uninstalling the Printer Driver 102 ......Operation on SUSE Linux Enterprise Desktop 11 102 ....Setup Overview 102 .
- Page 7 ........Setting Up the Dell Printer Configuration Web Tool 118 .
- Page 8 Tray Management 183 ....... 15 Understanding the Tool Box Menus 185 .
- Page 9 PDF Fonts List 213 ....... . . Job History 213 .
- Page 10 284 ....... . . Dell Document Hub 284 ....... . .
- Page 11 Browse for Files 285 ....... . Scan 285 ........Smart OCR Scan 286 .
- Page 12 ........Printing, Copying, Scanning, Faxing, and Dell Document Hub .
- Page 13 323 ..Using the Dell Printer Configuration Web Tool to Change the Printer Settings 324 .........
- Page 14 ........Specifying the Fax Initial Settings Using the Dell Printer Setup 367 .
- Page 15 Setting the Printer ID 368 ....... . Setting the Time and Date 368 .
- Page 16 394 ..... When the Favorites Screen is Displayed When You Tap the Tile on the Dell Document Hub Screen 394 .
- Page 17 ........Preparing to use the App Manager - Dell C2665dnf 411 .
-
Page 18: Using The Server Address Book And Server Phone Book
Preparing the Printer to Access the External LDAP Server 429 ... . Starting the Dell Printer Configuration Web Tool 429 .... - Page 19 Weight and Style 443 ....... Pitch and Point Size 443 .
- Page 20 Maintaining Your Printer ..... . . 465 32 Maintaining Your Printer 467 ......Determining the Status of Supplies 467 .
- Page 21 Determining Values 503 ......Entering Values 505 ....... . 33 Removing Options 507 .
- Page 22 Appendix ......... . 563 Dell™ Technical Support Policy 563 .
-
Page 23: Contents
564 ......Contacting Dell 564 ........ - Page 24 Contents Template Last Updated - 2/7/2007...
-
Page 25: Before Beginning
Before Beginning Notes, Cautions, and Warnings ............. 25 1 Dell™ C2665dnf Color Laser Multifunction Printer User's Guide..27 2 Finding Information..............29 3 Product Features................. 33 4 About the Printer................. 35... -
Page 27: Notes, Cautions, And Warnings
A WARNING indicates a potential for property damage, personal injury, or death. Information in this document is subject to change without notice. © 2013 Dell Inc. All rights reserved. Reproduction of these materials in any manner whatsoever without the written permission of Dell Inc. is strictly forbidden. Dell DELL... - Page 28 Notes, Cautions, and Warnings...
-
Page 29: Dell™ C2665Dnf Color Laser Multifunction Printer User's Guide
Dell™ C2665dnf Color Laser Multifunction Printer User's Guide Click the links to the left for information on the features, options, and operation of your Dell C2665dnf Color Laser Multifunction Printer. For information on other documentation included with your Dell C2665dnf Color Laser Multifunction Printer, see "Finding Information."... - Page 30 Dell™ C2665dnf Color Laser Multifunction Printer User's Guide...
-
Page 31: Finding Information
Quick Reference Guide • How to use my printer C 2665dn C2665dnf Color Laser Multifunction Printer | Dell C2665dnf C2665dnf C2665dnf 2665dnf... - Page 32 Setup diagram • How to set up my printer C2665dnf Color Laser Multifunction Printer | DELL Document Hub Setting Up Your Printer Configuration de votre imprimante | Configurazione della stampante | Einrichten des Druckers | Configuración de la impresora...
- Page 33 • Customer Care — Contact information, order status, warranty, and repair information • Downloads — Drivers • Manuals— Printer documentation and product specifications Go to dell.com/support. Select your region, and fill in the requested details to access help tools and information. Finding Information...
- Page 34 Finding Information...
-
Page 35: Product Features
Converting and storing with Dell Document Hub Printing with Dell Document Hub With the Dell Document Hub, you can scan hard copy With the Dell Document Hub, you can easily locate and documents and store them directly in your preferred cloud print documents stored in cloud storage. - Page 36 Scanning to a USB Memory (Scan to USB) Making Copies From the Document Glass (Scan From Document Glass) With the Scan to USB feature, you don't need a PC to You can scan the pages of a book or a brochure from the connect a USB memory.
-
Page 37: About The Printer
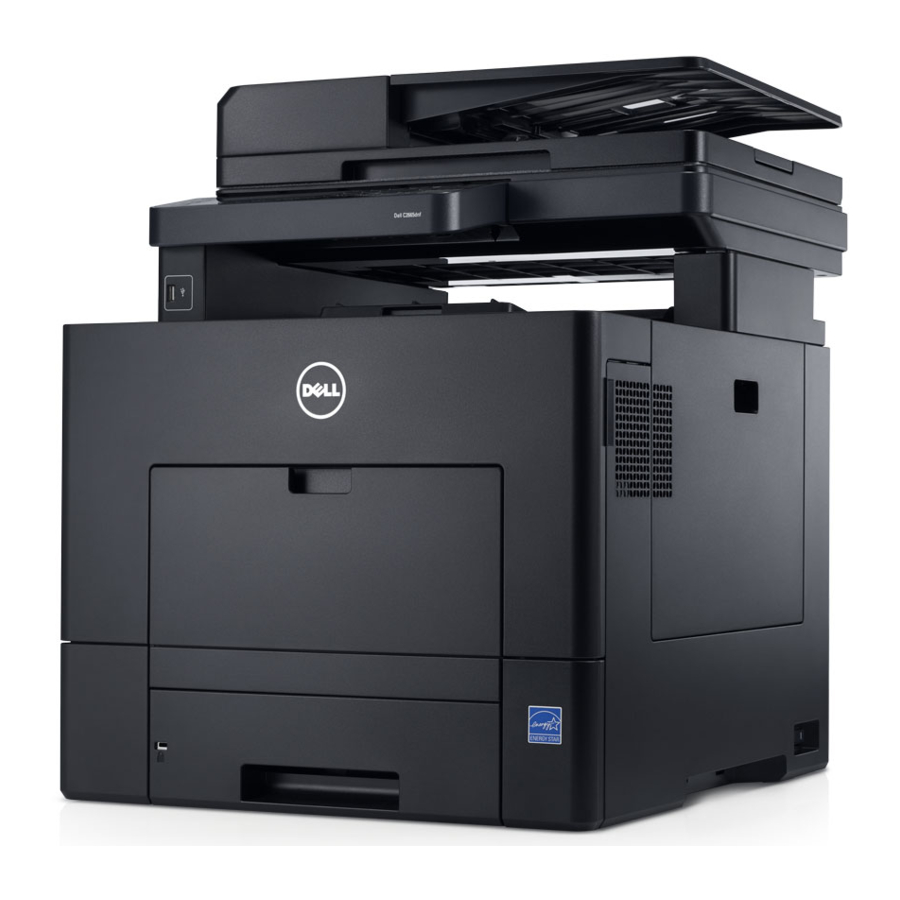
About the Printer This chapter provides an overview of your Dell™ C2665dnf Color Laser Multifunction Printer. Front and Rear View Front View Duplex Automatic Document Feeder (DADF) Multipurpose Feeder (MPF) Transfer Belt Unit Toner Cartridges Drum Cartridges Front Cover Waste Toner Box... -
Page 38: Rear View
Rear View Control Board "Blue" Plug Left Side Cover Duplex Unit Ethernet Port 2nd Belt Transfer Roller (2nd BTR) USB Port Fusing Unit Wireless Adapter Socket Power Connector Phone Connector Rear Cover Wall Jack Connector About the Printer... -
Page 39: Duplex Automatic Document Feeder (Dadf)
Duplex Automatic Document Feeder (DADF) DADF Cover Document Feeder Tray Document Guides DADF Feed Roller Document Glass Space Requirements Provide enough room to open the printer trays, covers, and optional accessories, and for proper ventilation. 320 mm/ 12.60 inches 558 mm/ 21.97 inches 400 mm/15.75 inches 400 mm/15.75 inches... -
Page 40: Operator Panel
Operator Panel For more information on the operator panel, see "About the Operator Panel." Additional Components Optional Accessories The following optional accessories are available for the printer. • Wireless adapter • Optional 550-sheet feeder Non-bundled Items The following items are required for connecting the printer to a computer or a network. Please purchase them as needed. -
Page 41: Securing The Printer
Ordering Supplies You can order consumables from Dell online when using a networked printer. Enter the IP address of your printer in your web browser, launch the Dell Printer Configuration Web Tool, and click the web address under Order Supplies at: to order toner or supplies for your printer. - Page 42 About the Printer...
-
Page 43: Setting Up The Printer (Printer Setup)
Setting up the Printer (Printer Setup) 5 Preparing Printer Hardware............43 6 Installing Optional Accessories..........45 7 Connecting Your Printer ............. 59 8 Setting the IP Address ............... 71 9 Loading Paper................75 ® 10 Installing Printer Drivers on Windows Computers ..... -
Page 45: Preparing Printer Hardware
Preparing Printer Hardware Removing Tape NOTE: The Software and Documentation disc also contains video instructions. On Dell Printer Setup, click Installation Video. Remove tapes and the protective sheet from the printer. Preparing Printer Hardware... - Page 46 Preparing Printer Hardware...
-
Page 47: Installing Optional Accessories
NOTE: The Software and Documentation disc also contains video instructions. On Dell Printer Setup, click Installation Video. 1 Ensure that the printer is turned off, and then disconnect all cables from the back of the printer. - Page 48 Lift the printer and align the five guide pins of the optional 550-sheet feeder with the holes at the bottom of the printer. Gently lower the printer onto the optional 550-sheet feeder. WARNING: Two people are required to lift the printer. WARNING: Be careful not to pinch your fingers when lowering the printer onto the optional 550-sheet feeder.
-
Page 49: Updating Your Driver To Detect 550-Sheet Feeder
Windows 8 x64/ Windows Server 2012 and Printers. Right-click the printer icon of the Dell C2665dnf Color Laser Multifunction Printer, and then select Printer properties. Click the Configuration tab, and then select Bi-Directional Setup. Select Get Information from Printer and then click OK. - Page 50 Click Start → Devices and Printers. Windows 7/ 7 x64/ Right-click the printer icon of the Dell C2665dnf Color Laser Multifunction Printer, and Server 2008 R2 x64 then select Printer properties. Click the Configuration tab, and then select Bi-Directional Setup.
- Page 51 Click Start → Devices and Printers. Windows 7/ 7 x64/ Right-click the printer icon of the Dell C2665dnf Color Laser Multifunction Printer, and Server 2008 R2 x64 then select Printer properties. Click the Configuration tab, and then select Bi-Directional Setup.
-
Page 52: Installing The Optional Wireless Adapter
Windows 8 x64/ Windows Server 2012 and Printers. Right-click the printer icon of the Dell C2665dnf Color Laser Multifunction Printer, and then select Printer properties. Click the Device Setting tab, and then select Available in Tray2 drop-down menu. Click Apply, and then click OK. -
Page 53: Verifying The Contents Of The Box
Installing the Optional Wireless Adapter NOTE: The Software and Documentation disc also contains video instructions. On Dell Printer Setup, click Installation Video. 1 Ensure that the printer is turned off. 2 Align the connector and the three protrusions of the wireless adapter with the four holes and insert the adapter. -
Page 54: Determining The Wireless Network Settings
Confirm that the Network (Wireless) section exists. Configure the wireless adapter to connect to a wireless network. For details, see "Configuring the Optional Wireless Adapter." Determining the Wireless Network Settings You need to know the settings for the wireless network to set up the wireless printer. For details of the settings, contact your network administrator. -
Page 55: Configuring The Optional Wireless Adapter
The Dell Printer Setup program launches automatically. 2 Click Setup. Click Wireless. Follow the on-screen instructions, and configure the wireless setting of the printer. For WPS-PIN, WPS-PBC, Operator Panel, and Dell Printer Configuration Web Tool, see the following instructions. Installing Optional Accessories... -
Page 56: Configuring The Wireless Adapter Without Using Dell Printer Setup
Configuring the Wireless Adapter Without Using Dell Printer Setup WPS-PIN The PIN code of WPS-PIN can only be configured from the operator panel. NOTE: WPS-PIN (Wi-Fi Protected Setup-Personal Identification Number) is a method to authenticate and register devices required for wireless configuration by entering PIN assignments to a printer and computer. This setting, performed through an access point, is available only when the access points of your wireless router support WPS. - Page 57 Operator Panel Auto SSID Setup 1 Press the (Information) button. 2 Tap the Tools tab, and then tap Admin Settings. 3 Tap Network. 4 Tap Wireless. 5 Tap Wireless Setup Wizard. The printer automatically searches the access points on wireless network. 6 Tap until the desired access point appears, and then select the access point.
- Page 58 For details about how to connect the Ethernet cable, see "Connecting Printer to Computer or Network." 3 Turn on the printer. 4 Launch the Dell Printer Configuration Web Tool by entering the IP address of the printer in your web browser. 5 Click Print Server Settings.
-
Page 59: Reconfiguring The Wireless Setting
IP(v4) Address appears, and then check the IP address displayed in the IP(v4) Address. 2 Launch the Dell Printer Configuration Web Tool by entering the IP address of the printer in your web browser. Click Print Server Settings. -
Page 60: Reconfiguring The Wireless Setting Using Dell Printer Setup
Reconfiguring the Wireless Setting Using Dell Printer Setup 1 Insert the Software and Documentation disc provided with the printer in your computer. The Dell Printer Setup program launches automatically. 2 Click Configure Printer. 3 Click Wireless Configuration. -
Page 61: Connecting Your Printer
Connecting Your Printer To connect your Dell™ C2665dnf Color Laser Multifunction Printer to a computer or device, the following specification must be met for each of the connection type: Connection type Connection specifications Ethernet 10 Base-T/100 Base-TX/1000 Base-T USB 2.0 Wireless (optional) IEEE 802.11b/802.11g/802.11n... -
Page 62: Connecting Printer To Computer Or Network
Connecting Printer to Computer or Network NOTE: The Software and Documentation disc also contains video instructions. On Dell Printer Setup, click Installation Video. Direct Connection A local printer is a printer which is directly connected to your computer using the USB cable. If your printer is connected to a network instead of your computer, skip this section and go to "Network Connection."... -
Page 63: Network Connection
NOTE: The Software and Documentation disc also contains video instructions. On Dell Printer Setup, click Installation Video. 1 Connect one end of a telephone line cord into the wall jack connector and the other end into an active wall jack. - Page 64 Remove the "Blue" plug from the phone connector. Phone connector "Blue" plug To connect a telephone and/or answering machine to your printer, connect the telephone or answering machine line cord into the phone connector ( Phone connector To an external telephone or answering machine If the phone communication is serial in your country (such as Germany, Sweden, Denmark, Austria, Belgium, Italy, France and Switzerland), and that you are supplied with a "Yellow"...
-
Page 65: Turning On The Printer
The printer should not be connected to an Uninterruptible Power Supply (UPS) system. NOTE: The Software and Documentation disc also contains video instructions. On Dell Printer Setup, click Installation Video. Connect the power cable to the power connector on the rear of the printer, and then to a power source. - Page 66 Norsk Svenska Tap Next. 2 The Date & Time screen appears. Tap Time Zone. until the desired geographic region appears, and then tap the desired geographic region. until the desired time zone appears, and then tap the desired time zone. Geographic Region Time Zone Africa...
- Page 67 Geographic Region Time Zone Americas (UTC -04:00) Georgetown, La Paz, Manaus (UTC -04:00) Thule (UTC -03:30) St. John's (UTC -03:00) Brasilia, Cayenne, Paramaribo (UTC -03:00) Buenos Aires (UTC -03:00) Greenland (UTC -03:00) Miquelon (UTC -03:00) Montevideo (UTC -02:00) Noronha Antarctica (UTC -04:00) Palmer Archipelago, Santiago (UTC -03:00) Rothera (UTC +03:00) Syowa...
- Page 68 Geographic Region Time Zone Asia (UTC +08:00) Kuala Lumpur, Makassar, Manila, Singapore (UTC +08:00) Taipei (UTC +08:00) Ulaan Baatar (UTC +09:00) Dili, Jayapura (UTC +09:00) Pyongyang (UTC +09:00) Seoul (UTC +09:00) Tokyo (UTC +09:00) Yakutsk (UTC +10:00) Sakhalin, Vladivostok (UTC +11:00) Magadan (UTC +12:00) Anadyr, Kamchatka Atlantic Ocean (UTC -04:00) Bermuda...
- Page 69 Geographic Region Time Zone Pacific Ocean (UTC -11:00) Midway Island, Niue, Samoa (UTC -10:00) Cook Islands, Hawaii, Tahiti (UTC -09:30) Marquesas Islands (UTC -09:00) Gambier Islands (UTC -08:00) Pitcairn Islands (UTC -06:00) Easter Island (UTC -06:00) Galapagos Islands (UTC +09:00) Palau (UTC +10:00) Guam, Port Moresby, Saipan (UTC +11:00) Efate, Guadalcanal, Kosrae (UTC +11:30) Norfolk Island...
- Page 70 Algeria Australia Austria Belgium Bulgaria Canada Letter Colombia Letter Costa Rica Letter Cyprus Czech Republic Denmark Dominican Republic Letter Egypt Estonia Finland France Germany Greece Guatemala Letter Hungary Iceland Ireland Italy Jamaica Letter Jordan Latvia Liechtenstein Lithuania Luxembourg Malaysia Malta Mexico Letter Netherlands...
- Page 71 Russia Saudi Arabia Singapore Slovakia Slovenia South Africa Spain Sweden Switzerland Thailand Tunisia Turkey U.A.E. United Kingdom United States Letter Unknown Letter Tap Next. 4 The Setup Complete (Congratulations, setup is complete.) screen appears. 5 Tap OK. The printer automatically restarts after tapping OK. Connecting Your Printer...
- Page 72 Connecting Your Printer...
-
Page 73: Setting The Ip Address
NOTE: When you assign an IP address manually in IPv6 mode, use the Dell™ Printer Configuration Web Tool. To display the Dell Printer Configuration Web Tool, use the link-local address. To confirm the link-local address, print a system settings report and check the Link-Local Address under Network (Wired) or Network (Wireless). -
Page 74: When Using The Tool Box
16 Repeat steps 11 and 12 to set Gateway Address. 17 Turn off the printer, and then turn it on again. When Using the Tool Box 1 Click Start All Programs Dell Printers Dell C2665dnf Color Laser Multifunction Printer Tool Box. → → → →... -
Page 75: Verifying The Ip Settings
Verifying the IP Settings You can confirm the settings by using the operator panel, printing the system settings report, or using the ping command. Verifying the Settings Using Operator Panel 1 Press the (Information) button. 2 Tap About This MFP. 3 Tap the Network tab. - Page 76 Setting the IP Address...
-
Page 77: Loading Paper
To avoid paper jams, do not remove the tray while printing is in progress. NOTE: The Software and Documentation disc also contains video instructions. On Dell Printer Setup, click Installation Video. Pull the tray out of the printer about 200 mm. - Page 78 Adjust the paper guides. NOTE: Extend the front side of the tray when you load Legal-size paper. Before loading the print media, flex the sheets and fan them. Straighten the edges of the stack on a level surface. 5 Load the print media into the tray with the recommended print side facing up. NOTE: Do not exceed the maximum fill line in the tray.
- Page 79 7 After confirming that the guides are securely adjusted, insert the tray into the printer. NOTE: If the front side of the tray is extended, the tray protrudes when it is inserted into the printer. 8 On the touch panel, tap Size. NOTE: Set the same paper size and type as the actual paper being loaded.
- Page 80 Loading Paper...
-
Page 81: Installing Printer Drivers On Windows ® Computers
8 Click Add, and then click OK. Inserting the Software and Documentation Disc Software and Documentation 1 Insert the disc into your computer and click setup_assist.exe to start Dell Printer Setup. NOTE: If the Software and Documentation disc does not launch automatically, follow the procedure below. -
Page 82: Direct Connection Setup
Direct Connection Setup For installing PCL, PS and Fax printer driver 1 In the Dell Printer Setup window, click Install Printer Driver and Software to launch the installation software. 2 Select Personal Installation, and then click Next. 3 Follow the on-screen instructions to connect the computer and the printer with a USB cable, and then turn the printer on. - Page 83 For installing XML Paper Specification (XPS) printer driver NOTE: XPS driver is supported on the following operating systems: Windows Vista, Windows Vista 64-bit Edition, Windows Server 2008, Windows Server 2008 64-bit Edition, Windows Server 2008 R2, Windows 7, Windows 7 64-bit Edition, Windows 8, Windows 8 64-bit Edition, and Windows Server 2012.
- Page 84 11 If you do not share your printer, select Do not share this printer. If you share your printer, select Share this printer so that others on your network can find and use it. 12 Click Next. Installation starts. 13 As the driver installation is completed, click Print a test page to print a test page. 14 Click Finish.
-
Page 85: Network Connection Setup
Network Printer Setup on a Local Network For installing PCL, PS and Fax printer driver 1 In the Dell Printer Setup window, click Install Printer Driver and Software to launch the installation software. 2 Select Network Installation, and then click Next. - Page 86 For installing XML Paper Specification (XPS) printer driver NOTE: XPS driver is supported on the following operating systems: Windows Vista, Windows Vista 64-bit Edition, Windows Server 2008, Windows Server 2008 64-bit Edition, Windows Server 2008 R2, Windows 7, Windows 7 64-bit Edition, Windows 8, Windows 8 64-bit Edition, and Windows Server 2012.
- Page 87 NOTE: If you are an administrator on the computer, click Continue; otherwise, contact your administrator to continue the desired action. 8 Click Have Disk to display the Install From Disk dialog box. 9 Click Browse, and then select the extracted folder in step 1. 10 Click OK.
- Page 88 Windows 7 or Windows 7 64-bit Edition 1 Extract the following zip file to your desired location. D:\Drivers\XPS\Win_7Vista\XPS-V3_C2665.zip (where D is the drive letter of the optical drive) 2 Click Start→ Devices and Printers. 3 Click Add a printer. 4 Click Add a network, wireless or Bluetooth printer. 5 Select printer or click The printer that I want isn't listed.
- Page 89 To launch the Dell Printer Configuration Web Tool, type the printer's IP address in your web browser. The printer configuration appears on the screen. You can set up the Dell Printer Configuration Web Tool to send you an e-mail when the printer needs supplies or intervention.
-
Page 90: Setting Up For Shared Printing
Setting Up for Shared Printing Software and Documentation You can share your new printer on the network using the disc that comes with your ® printer, or using Microsoft point-and-print or peer-to-peer method. However, if you use one of the Microsoft Software and methods, some features, such as the status monitor and other printer utilities, installed with the Documentation... -
Page 91: Point And Print
4 Click Additional Drivers and select the operating systems of all network clients that print to the printer. 5 Click Apply, and then click OK. Windows 8, Windows 8 64-bit Edition, or Windows Server 2012 1 Under Desktop mode, right-click the bottom left corner of the screen, and then click Control Panel → Hardware and Sound (Hardware for Windows Server 2012) →... - Page 92 Wait for the driver information to be copied from the server computer to the client computer, and for a new printer object to be added to the Printers and Faxes folder. The copy time varies, based on network traffic and other factors.
- Page 93 Windows Server 2008 or Windows Server 2008 64-bit Edition 1 On the Windows desktop of the client computer, click Start→ Network. 2 Locate the host name of the server computer, and then double-click the host name. 3 Right-click the shared printer name, and then click Connect. 4 Click Install driver.
-
Page 94: Peer-To-Peer
On the General tab, click Print Test Page. When a test page is printed successfully, installation is complete. Peer-to-Peer If you use the peer-to-peer method, the printer driver is fully installed on each client computer. Network clients retain control of driver modifications. The client computer handles the print job processing. Windows XP, Windows XP 64-bit Edition, Windows Server 2003, or Windows Server 2003 x64 Edition 1 Click start→... - Page 95 Windows Vista or Windows Vista 64-bit Edition 1 Click Start→ Control Panel→ Hardware and Sound→ Printers. 2 Click Add a Printer to launch the Add Printer wizard. 3 Select Add a network, wireless or Bluetooth printer, and then click Next. If the printer is listed, select the printer and click Next, or select The printer that I want isn't listed and type in the path of the printer in the Select a shared printer by name text box and click Next.
- Page 96 Windows 7, Windows 7 64-bit Edition, or Windows Server 2008 R2 1 Click Start → Devices and Printers. 2 Click Add a Printer. 3 Select Add a network, wireless or Bluetooth printer. If the printer is listed, select the printer and click Next, or select The printer that I want isn't listed.
-
Page 97: Installing Printer Drivers On Macintosh Computers
1 Run the Software and Documentation disc on the Macintosh computer. 2 Double-click the Dell C2665 Installer icon, and then click Continue. 3 When the popup dialog box prompts you for confirming the program included in the installation package, click Continue. -
Page 98: Configuring Settings
7 Select Dell C2665dnf Color MFP for Print Using (Use for Mac OS X 10.8). NOTE: When printing is set up using IP printing, the queue name is displayed as blank. You do not need to specify it. 8 Click Add. -
Page 99: Installing Printer Drivers On Linux Computers (Cups)
1 Select Applications→ System Tools (Accessories for Red Hat Enterprise Linux 5 Desktop)→ Terminal. 2 Type the following command in the terminal window. (Type the administrator password) rpm -ivh (Type the file path)/Dell-C2665-Color- MFP-x.x-x.noarch.rpm The printer driver is installed. Setting Up the Queue To execute printing, you must set up the print queue on your workstation. -
Page 100: Setting The Default Queue
For USB connections: Select Dell C2665dnf Color MFP USB #1 or Dell C2665dnf Color MFP from the Device menu, and click Continue. 4 Select Dell C2665dnf Color MFP PS vx.x (en) from the Model menu, and click Add Printer. 5 Type root as the user name, type the administrator password, and click OK. -
Page 101: Specifying The Printing Options
3 Repeat the command above for all queues for the same model. 4 Type the following command in the terminal window. (Type the administrator password) rpm -e Dell-C2665-Color-MFP The printer driver is uninstalled. Installing Printer Drivers on Linux Computers (CUPS) -
Page 102: Operation On Suse Linux Enterprise Desktop 10
Printer Description and Printer Location do not have to be specified. Select the Do Local Filtering check box, and click Next. Select DELL as Manufacturer. Select C2665dnf Color MFP as Model, and click Next. Confirm the settings in Configuration, and click OK. -
Page 103: Setting The Default Queue
For USB connections: Select Dell C2665dnf Color MFP on USB (//Dell/C2665dnf%20Color%20MFP or /dev/usblp*) as Available are, and click Configure…. Confirm the settings in Edit configuration, and click OK. 4 Click Finish. Printing From the Applications When you have finished setting up the queue you can print jobs from the applications. Start the print job from the application, and specify the queue in the print dialog box. -
Page 104: Setting The Password For Authority As The Printer Administrator
3 Repeat the command above for all queues for the same model. 4 Type the following command in the terminal window. (Type the administrator password) rpm -e Dell-C2665-Color-MFP The printer driver is uninstalled. Operation on SUSE Linux Enterprise Desktop 11... -
Page 105: Installing The Printer Driver
Select Dell in the Select the printer manufacturer: drop-down menu. Click OK. The Add New Printer Configuration dialog box appears. Select Dell C2665dnf Color MFP PS vx.x [Dell/Dell_C2665dnf_Color_MFP.ppd.gz] from the Assign Driver list. NOTE: You can specify the printer name in Set Name:. -
Page 106: Setting The Default Queue
Printing From the Applications When you have finished setting up the queue you can print jobs from the applications. Start the print job from the application, and specify the queue in the print dialog box. However, sometimes you can print only from the default queue depending on the application (for example Mozilla). In these cases, before you start printing, set queue you want to print to as the default queue. -
Page 107: Setting The Password For Authority As The Printer Administrator
3 Repeat the command above for all queues for the same model. 4 Type the following command in the terminal window. (Type the administrator password) rpm -e Dell-C2665-Color-MFP The printer driver is uninstalled. Installing Printer Drivers on Linux Computers (CUPS) - Page 108 Installing Printer Drivers on Linux Computers (CUPS)
-
Page 109: Using Your Printer
Using Your Printer 13 Operator Panel ................109 14 Dell™ Printer Configuration Web Tool........117 15 Understanding the Tool Box Menus........185 16 Understanding the Printer Menus.......... 213 17 Print Media Guidelines............. 293 18 Loading Print Media ..............299... - Page 110 108...
-
Page 111: Operator Panel
Operator Panel About the Operator Panel The operator panel has a touch panel, a status LED, control buttons, and a number pad, which allows you to control the printer. (Home) button • Moves to the Home screen. (Login/Logout) button • Logs out if pressed while the user is logged in. -
Page 112: Basic Operations On The Touch Panel
(NFC) reader • Starts communication between the card and the printer when an NFC card is waved over the reader. (Quick Dial 1 / Quick Dial 2) button • Starts faxing the document to the number registered as "001" and "002" respectively of the FAX Speed Dial. Effective only when the Home screen is displayed. -
Page 113: About The Home Screen
To scroll faster, flick the screen. Home Guest Scan to E Copy Scan to USB mail ID Copy Print NOTE: You cannot swipe or flick on some screens depending on the screen design and specifications. In this case, operate by tapping the buttons shown on the screen. -
Page 114: Lock Icon
Lock Icon Shows that any of the functions controlled by the Function Enabled setting has been enabled. While the Lock icon is displayed on the left to the account name, you can access the password-locked functions without entering the password. Wi-Fi Direct Connection Status Icon Displays the Wi-Fi Direct connection status. -
Page 115: To Add The Tiles
To Add the Tiles Find the Add App tile in the last page of the Home screen, and tap it. The Apps List screen appears. Tap the tile you want to add to the Home screen. To Delete the Tiles Tap and hold the tile you want to delete. -
Page 116: To Change The Keyboard Layout
To Change the Keyboard Layout 1 Press the (Information) button. 2 Tap the Tools tab, and then tap Language Settings. 3 Tap Keyboard Layout. 4 Tap the desired keyboard layout. 5 Tap OK. Using the Number Pad As you perform various tasks, you may need to enter numbers. For example, when you enter fax number directly. Number Pad Numbers ∗... -
Page 117: Printing A Panel Settings Report
4 Tap until the desired language appears, and then tap the desired language. 5 Tap OK. When Using the Tool Box 1 Click Start All Programs Dell Printers Dell C2665dnf Color Laser Multifunction Printer Tool Box. → → → → NOTE: For details about starting the Tool Box, see "Starting the Tool Box."... -
Page 118: About The Concurrent Jobs Feature
About the Concurrent Jobs Feature This feature enables you to start a concurrent job while a fax job is running. This is done by temporarily displaying the Home screen and switching to a different function that can be run concurrently such as copy or scan. 1 While the printer is sending or receiving a fax, press the (Home) button. -
Page 119: Dell™ Printer Configuration Web Tool
This web tool is available only when the printer is connected to a network using an Ethernet cable or the wireless printer adapter. One of the features of the Dell Printer Configuration Web Tool is E-Mail Alert Setup, which sends e-mail to you or the key operator when the printer needs supplies or intervention. -
Page 120: Setting Up The Dell Printer Configuration Web Tool
Dell Printer Configuration Web Tool. NOTE: The Dell Printer Configuration Web Tool pages may be displayed unreadable if the pages were configured by the language different from the language of your web browser. Setting Up From Web Browser ®... -
Page 121: Setting Up From Operator Panel
Setting Up From Operator Panel You can launch the Dell Printer Configuration Web Tool only when the operator panel setting is set to Enable. Confirm the operator panel setting if you cannot launch the Dell Printer Configuration Web Tool. For more information, see "Understanding the Printer Menus. -
Page 122: Starting The Dell Printer Configuration Web Tool
Starting the Dell Printer Configuration Web Tool To launch the Dell Printer Configuration Web Tool, enter the IP address of your printer in your web browser. If you do not know the IP address of your printer, print the system settings report or display the TCP/IP Settings page, which lists the IP address. -
Page 123: Copy Printer Settings
To receive alerts or reports, specify your e-mail address or the e-mail address of the key operator in the E-Mail Server menu. Set Password Use the Set Password menu to lock the Dell Printer Configuration Web Tool with a password so that other users do not inadvertently change the printer settings that you have selected. NOTE: You must log in as an administrator to use this feature. -
Page 124: Page Display Format
Right Frame Top Frame The top frame is located at the top of all pages. When the Dell Printer Configuration Web Tool is activated, the current status and specifications of the printer are displayed in the top frame on every page. -
Page 125: Left Frame
Links to the Print Server Settings menu. Overview Set Password Links to the Security menu. Online Help Links to the Dell Support website. Order Supplies at: Links to the Dell web page. Contact Dell Support at: Links to the Dell Support website. -
Page 126: Changing The Settings Of The Menu Items
Changing the Settings of the Menu Items Some menus allow you to change the printer settings through the Dell Printer Configuration Web Tool. When you access these menus, the authentication window appears on the screen. Type a user name and password for the printer administrator by following the prompts displayed in the dialog box. - Page 127 "MIFARE Customized Card" "Printer Maintenance" "Paper Density" "Adjust Transfer Belt Unit" "Adjust 2nd BTR" "Adjust Fusing Unit" "Auto Registration Adjustment" "Color Registration Adjustments" "Reset Defaults" "Initialize PrintMeter" "Storage" "Non-Dell Toner" "Adjust Altitude" "Clock Settings" "Web Link Customization" Dell™ Printer Configuration Web Tool...
- Page 128 "Copy Printer Settings Report" "Print Volume" "Print Volume" "Print Volume" "Dell ColorTrack" "Address Book" "E-Mail Address" "E-Mail Address" "E-Mail Group" "Default Setup" "Server Address" "Server Address" "Phone Book" "FAX Speed Dial" "FAX Group" "Tray Management" "Tray Management" Dell™ Printer Configuration Web Tool...
-
Page 129: Printer Status
Cover Status Closed Indicates that the cover is closed. Open Indicates that the cover is open. Printer Type Displays the type of the printer. Color Laser is displayed normally. Printing Speed Displays the printing speed. Dell™ Printer Configuration Web Tool... -
Page 130: Printer Jobs
To verify the printer details such as the hardware configuration and software version. This page can also be displayed by clicking on the Printer Information tab in the left frame. Values: Dell Service Tag Number Displays Dell service tag number. Express Service Code Displays Dell express service code. Asset Tag Number Displays the asset tag number of the printer. -
Page 131: Printer Settings
Off indicates that the tone is disabled. Job Completed Tone Displays the volume of the tone that is emitted when a job other than a copy job is complete. Off indicates that the tone is disabled. Dell™ Printer Configuration Web Tool... - Page 132 Displays whether to print reports on both sides a sheet of paper. Use Another Tray Displays whether to show a message to select another tray when the specified paper is not available in the paper tray. Dell™ Printer Configuration Web Tool...
- Page 133 Displays whether to lock the Copy function with a password. Scan to E-mail Displays whether to lock the Scan to E-mail function with a password. Displays whether to lock the Fax function with a password. Dell™ Printer Configuration Web Tool...
- Page 134 Displays the paper size of the original. Original Type Displays the type of the original. Darken/Lighten Displays the default copy density. Sharpness Displays the default sharpness level. Color Saturation Displays the default color saturation level. Dell™ Printer Configuration Web Tool...
- Page 135 Displays the interval at which the printer goes into the fax receive mode after receiving an incoming call. Auto Receive Tel/Fax Displays the interval at which the printer goes into the fax receive mode after the external telephone receives an incoming call. Dell™ Printer Configuration Web Tool...
- Page 136 Sending Fax screen when manually sending a fax. Fax Activity Displays whether to automatically print a fax activity report after every 50 incoming and outgoing fax communications. Fax Transmit Displays whether to print a transmission result after a fax transmission. Dell™ Printer Configuration Web Tool...
- Page 137 Displays the voltage setting of the transfer roller (-5 to 10) for plain paper. Plain Thick Displays the voltage setting of the transfer roller (-5 to 10) for thick plain paper. Covers (106-163g/m Displays the voltage setting of the transfer roller (-5 to 10) for cover paper. Dell™ Printer Configuration Web Tool...
- Page 138 Order Supplies at: in the left frame. Regular Displays the regular URL (http://accessories.us.dell.com/sna) that can be linked to Order Supplies at:. Premier Displays the premier URL (http://premier.dell.com) that can be linked to Order Supplies at:. Dell™ Printer Configuration Web Tool...
- Page 139 For paper weight specifications, see "Paper Type Specifications." This item is available only when Off in MPF Use Driver Settings for Print Job is selected. This item is available only when the optional 550-sheet feeder is installed. Dell™ Printer Configuration Web Tool...
-
Page 140: Print Meter
Sets the volume of the tone that is emitted when the operator panel input is correct, or disables the tone. Invalid Key Tone Sets the volume of the tone that is emitted when the operator panel input is incorrect, or disables the tone. Dell™ Printer Configuration Web Tool... - Page 141 Sets whether to print reports on both sides a sheet of paper. Use Another Tray Sets whether to show a message to select another tray when the specified paper is not available in the paper tray. Dell™ Printer Configuration Web Tool...
- Page 142 Sets the print color mode as Color or Black. This setting is used for print jobs without a specified color print mode. Ignore Form Feed Sets whether to ignore blank pages that only contain Form Feed control codes. Dell™ Printer Configuration Web Tool...
- Page 143 Some setting items in the Secure Settings are displayed only when this setting item is enabled. NOTE: You can set the password for the Dell Printer Configuration Web Tool from Set Password in Print Server Settings. Dell™ Printer Configuration Web Tool...
- Page 144 Re-enter Password Confirms the set password. NOTE: You can set the password for the Dell Printer Configuration Web Tool from Set Password in Print Server Settings. Secure Receive Purpose: Allows you to password protect all the incoming faxes. When the Secure Receive feature is enabled, the printer stores incoming faxes and prints them when the correct password is entered on the operator panel.
- Page 145 Sets the time to delete the files stored as Secure Print in the RAM disk. Recurrence Sets the period to repeat the setting. Weekly Settings Sets the day of the week to repeat the setting. Monthly Settings Sets the day of the month to repeat the setting. Dell™ Printer Configuration Web Tool...
- Page 146 Black Low Density Sets the color balance level of low density black. Black Medium Density Sets the color balance level of medium density black. Black High Density Sets the color balance level of high density black. Dell™ Printer Configuration Web Tool...
- Page 147 Values marked by an asterisk (*) are the factory default menu settings. Values: Fax Number Allows you to enter the fax number of the printer, which will be printed on the header of faxes. Country Sets the country where the printer is used. Dell™ Printer Configuration Web Tool...
- Page 148 Allows you to enter the e-mail address to which incoming faxes are to be forwarded. Address 2 Forwarding E-mail Allows you to enter the e-mail address to which incoming faxes are to be forwarded. Address 3 Dell™ Printer Configuration Web Tool...
- Page 149 Sets the file format in which scanned documents are to be saved. Output Color Sets whether to scan in color or in black and white. Resolution Sets the default scan resolution. Original Size Sets the paper size of the original. Dell™ Printer Configuration Web Tool...
- Page 150 The Printer Maintenance tab includes the Paper Density, Adjust Transfer Belt Unit, Adjust 2nd BTR, Adjust Fusing Unit, Auto Registration Adjustment, Color Registration Adjustments, Reset Defaults, Initialize PrintMeter, Storage, Non-Dell Toner, Adjust Altitude, Clock Settings, and Web Link Customization pages. Dell™ Printer Configuration Web Tool...
- Page 151 Sets the reference voltage setting for the transfer roller for envelopes within the range of -5 to 10. Recycled Sets the reference voltage setting for the transfer roller for recycled paper within the range of -5 to 10. Dell™ Printer Configuration Web Tool...
- Page 152 Color Registration Adjustments. Color Registration Sets lateral (perpendicular to paper feed direction) and process (paper feed direction) color Adjustments adjustment values individually for Yellow, Magenta, and Cyan within the range of -9 to 9. Dell™ Printer Configuration Web Tool...
- Page 153 Non-Dell Toner Purpose: To use toner cartridge of another manufacturer. WARNING: Using a non-Dell toner cartridge may severely damage your printer. The warranty does not cover damages caused by using non-Dell toner cartridges. Adjust Altitude Purpose: To specify the altitude of the location where the printer is installed.
-
Page 154: Print Server Settings
Displays the regular URL (http://accessories.us.dell.com/sna) that can be linked to Order Supplies at:. Premier Displays the premier URL (http://premier.dell.com) that can be linked to Order Supplies at:. Print Server Settings Use the Print Server Settings menu to set the type of printer interface and the necessary conditions for communication. - Page 155 Stateless Address 1-3 Displays the stateless addresses. Stateful Address 1-3 Displays the stateful addresses. Link Local Address Displays the link local address. Manual Gateway Displays the gateway address. Address Auto Configure Gateway Displays the gateway address. Address Dell™ Printer Configuration Web Tool...
- Page 156 Displays whether to use Web Services on Devices (WSD) for scanning. WSD Print Displays whether to use WSD for printing. Port Number Displays the WSD port number. Receive Time-Out Displays the receive time-out period. Notification Time-Out Displays the notification time-out period. Dell™ Printer Configuration Web Tool...
- Page 157 Connection Time-Out Displays the connection time-out period. FTP Client Connection Time-Out Displays the connection time-out period. FTP Passive Displays whether to enable the FTP Passive mode. SMB Client Connection Time-Out Displays the connection time-out period. Dell™ Printer Configuration Web Tool...
- Page 158 Displays the port status. Registration state Displays the registration state. Dell Document Hub Print from Dell Displays whether to enable Print from Dell Document Hub. Document Hub Scan to Dell Document Displays whether to enable Scan to Dell Document Hub. Connection Time-Out Displays the time duration until the connection becomes time-out.
- Page 159 Select Alerts for List 2 Supplies Alerts Displays the e-mail alert receive status for consumables. Paper Handling Alerts Displays the e-mail alert receive status for paper handling. Service Call Displays the e-mail alert receive status for service calls. Dell™ Printer Configuration Web Tool...
- Page 160 The Print Server Settings tab includes the Basic Information, Port Settings, TCP/IP , SMB, E-Mail Server, Bonjour (mDNS), SNMP , Scan to PC, SNTP , AirPrint, Google Cloud Print, Dell Document Hub, Proxy Server, Wireless LAN, Wi-Fi Direct, and Reset Print Server pages.
- Page 161 Print from Dell Sets whether to enable Print from Dell Document Hub. Document Hub Scan to Dell Document Sets whether to enable Scan to Dell Document Hub. This item is available only when the printer is connected using an Ethernet cable. NOTE: The settings in the Port Settings page will be valid only when the printer is rebooted.
- Page 162 Manual DNS Server Sets the DNS server address. Address DNS Dynamic Update Select the check box to enable dynamic updates to DNS. (IPv4) DNS Dynamic Update Select the check box to enable dynamic updates to DNS. (IPv6) Dell™ Printer Configuration Web Tool...
- Page 163 HTTP Port Number Sets the port number to 80 or from 8,000 to 9,999. Simultaneous Displays the maximum number of simultaneous connections. Connections Connection Time- Sets the connection time-out period from 1 to 255 seconds. Dell™ Printer Configuration Web Tool...
- Page 164 6 Select Reject. 7 Click the first column of the Access List row 3. 8 Enter "192.168.0.0" in the Address field and "255.255.0.0" in the Address Mask field. 9 Select Accept. 10 Click Apply New Settings. Dell™ Printer Configuration Web Tool...
- Page 165 Sets the POP3 account password using up to 31 alphanumeric characters. Re-enter POP User Confirms the set password. Password Reply Address Designates the reply e-mail address sent with each E-mail Alert. SMTP Server Displays the status of the SMTP server connection. Connection Dell™ Printer Configuration Web Tool...
- Page 166 Sets the printer name up to 63 alphanumeric characters and symbol sets. The original setting will remain valid if no input is made. Wide-Area Bonjour Select the check box to enable the Wide-Area Bonjour protocol. Dell™ Printer Configuration Web Tool...
- Page 167 Community Name (Trap) in the previous settings will not be displayed on the screen. The default Trap Community is " " (NULL). Re-enter Community Enters the community name used for trap again to confirm it. Name (Trap) Dell™ Printer Configuration Web Tool...
- Page 168 0 and 65,535. Authenticate Error Trap Select the check box to notify Authenticate Error Trap. The default value can be changed by using Dell Printer Configuration Web Tool. This item is available only when Wi-Fi Direct is set to Enable.
- Page 169 Displays the Google Cloud Print registration state. Register This Device to Click to register the printer to Google Cloud Print. Google Cloud Print Google Cloud Print can only be used when the machine is using IPv4. Dell™ Printer Configuration Web Tool...
- Page 170 Dell Document Hub Purpose: To configure the connections to the Dell Document Hub Server. Values: Dell Document Hub Connection Time-Out Sets the time duration until the connection becomes time-out. Polling Interval Sets the interval time for polling. Proxy Server Purpose: To configure the Proxy Server settings.
- Page 171 EAP-Identity Sets the EAP-Identity for the authentication. Authentication Method Shows the authentication method. Login Name Sets the login name for the authentication. Password Sets the password. Re-enter Password Enters the password again to confirm it. Dell™ Printer Configuration Web Tool...
- Page 172 Restart Printer Click Start to reboot the printer. Security The Security tab includes Set Password, Authentication System, Kerberos Server, LDAP Server, LDAP Authentication, LDAP User Mapping, SSL/TLS, IPsec, 802.1x, IP Filter (IPv4), and SMTP Domain Filtering. Dell™ Printer Configuration Web Tool...
- Page 173 Set Password Purpose: To set or change the password that is required to access the setup parameters of the printer from the Dell Printer Configuration Web Tool. This page can also be displayed by clicking Set Password in the left frame.
- Page 174 Sets the attribute type of the given name set for the LDAP server. E-mail Address Sets the attribute type of the e-mail address set for the LDAP server. Fax Phone Sets the attribute type of the fax phone number set for the LDAP server. Dell™ Printer Configuration Web Tool...
- Page 175 Displays the list of certificate order. Validity Displays whether certificate is valid or not. Certificate Details Click to display the Certificate Details page. The SSL/TLS page is displayed when no item in the Issued To column is selected. Dell™ Printer Configuration Web Tool...
- Page 176 Remote peers IPv6 address Sets the IP address to connect to. Non IPsec communication Allows communication with a device which does not support IPsec. policy NOTE: If IPsec is enabled with incorrect settings, you must disable it using the IPsec menu on the operator panel. Dell™ Printer Configuration Web Tool...
-
Page 177: Copy Printer Settings
Select the check box to enable Domain Filtering. Allow Domain List Allows you to register up to five domains allowed for sending e-mails. Copy Printer Settings The Copy Printer Settings menu includes the Copy Printer Settings and Copy Printer Settings Report pages. Dell™ Printer Configuration Web Tool... -
Page 178: Print Volume
And you need to check the Copy the settings to the Host in the above list and reboot the printer menu of the Dell Printer Configuration Web Tool in the destination printer to verify if the settings were actually copied or not. -
Page 179: Address Book
Allows you to view, edit, or create e-mail address entries. E-Mail Group Allows you to view, edit, or create e-mail group entries. Default Setup Allows you to view, edit, or set the default e-mail subject and message. Dell™ Printer Configuration Web Tool... - Page 180 Displays the name of the user registered under the selected user ID. Address Displays the e-mail address of the user. Apply New Settings Click this button to apply the new settings. Back Click this button to return to the top page. Dell™ Printer Configuration Web Tool...
- Page 181 Displays the selected group ID. Name Displays the name assigned for the group ID. Apply New Settings Click this button to apply the new settings. Back Click this button to return to the top page. Dell™ Printer Configuration Web Tool...
- Page 182 Allows you to view or edit the assigned server port number, or enter a new port number. If you leave the text box blank, the default port number (FTP: 21, SMB: 139) will be used. Dell™ Printer Configuration Web Tool...
- Page 183 Confirm / Change Displays a dialog box where you can edit the entry for the selected speed dial code. Create Displays a dialog box where you can create a new entry under the selected speed dial code. Dell™ Printer Configuration Web Tool...
- Page 184 Confirm / Change Displays a dialog box where you can edit the entry for the selected group ID. Create Displays a dialog box where you can create a new entry under the selected group ID. Dell™ Printer Configuration Web Tool...
-
Page 185: Tray Management
Sets the size of paper loaded in the MPF. MPF Paper Type Sets the type of paper loaded in the MPF. MPF Custom Paper Sets the length of custom size paper loaded in the MPF. Size - Y Dell™ Printer Configuration Web Tool... - Page 186 Sets the paper source to be used as the third priority. This item is available only when Off in MPF Use Driver Settings for Print Job is selected. This item is available only when the optional 550-sheet feeder is installed. Dell™ Printer Configuration Web Tool...
-
Page 187: Understanding The Tool Box Menus
In this case, input the password that you have already specified, and click OK to apply the settings. Starting the Tool Box 1 Click Start All Programs Dell Printers Dell C2665dnf Color Laser Multifunction Printer Tool Box. → → →... -
Page 188: Menu Settings
Menu Settings Purpose: To display the menu settings of the printer. Values: System Settings - Power Saver Timer - Sleep Displays the amount of transition time to the Sleep mode General after the printer finishes a job. Power Saver Timer - Deep Sleep Displays the amount of transition time between the Sleep mode and the Deep Sleep mode. - Page 189 Displays the label paper density settings. Service Tools - Auto Auto Registration Adjustment Displays whether to automatically adjust color Registration Adjustment registration. Service Tools - Non-Dell Non-Dell Toner Displays whether to use toner cartridge of another Toner manufacturer. Service Tools - Adjust Adjust Altitude...
-
Page 190: Reports
Reports Purpose: To print the settings and history information of the printer. The reports are printed in the paper size specified in system settings. Values: System Settings Click this button to print a detailed list of the system settings. Panel Settings Click this button to print a detailed list of the panel settings. -
Page 191: Tray Settings
Tray Settings Purpose: To display the tray settings of the printer. Values: Tray Settings MPF Display Tray Displays a popup menu that prompts to set the paper size and type when Prompt paper is loaded in the multipurpose feeder (MPF). MPF Use Driver Displays whether to use the printer driver settings for the size and type of Settings for Print Job... - Page 192 Color Saturation Displays the default color saturation level. Auto Exposure Displays whether to suppress the background of the original to enhance text on the copy. Auto Exposure Level Displays the background suppression level. Color Balance Displays the color balance level of low density yellow. (Yellow Low) Color Balance Displays the color balance level of medium density yellow.
-
Page 193: Fax Settings
Margin Left / Right Displays the value of the left and right margins. Margin Middle Displays the value of the middle margin. TIFF File Format Displays the TIFF file format; TIFF V6 or TTN2. Image Compression Displays the image compression level. Max E-mail Size Displays the maximum size of e-mail that can be sent. -
Page 194: Panel Language
Fax Forwarding Number Displays the fax number of the destination to which incoming faxes are to be forwarded. 2 Sided Printing Displays whether to print the received fax on both sides of a sheet of paper. Remote Receive Displays whether to receive faxes by pressing a remote receive code on the external telephone. -
Page 195: Printer Maintenance
Printer Maintenance The Printer Maintenance tab includes the System Settings - General, System Settings - Timers, System Settings - Output Settings, Service Tools, Tray Management, Panel Language, TCP/IP Settings, Network Settings, Copy Defaults, Scan Defaults, Fax Defaults, USB Direct Print Defaults, and Fax Settings pages. System Settings - General Purpose: To configure the power management of the printer, date and time, mm/inch setting, alarm tones, job log auto print,... - Page 196 Copy Completed Does not emit a tone when copying is complete. Tone Soft Emits a tone at the specified volume when copying is complete. Normal Loud Job Completed Does not emit a tone when any other job except copying is Tone complete.
-
Page 197: System Settings - Timers
Auto Log Print Automatically prints a job history report after every 20 jobs. Does not automatically print a job history report after every 20 jobs. RAM Disk Off Does not allocate RAM for the disk file system. Secure Print, Private Mail Box Print, Public Mail Box Print, and Proof Print jobs will abort and be recorded to the job log. -
Page 198: System Settings - Output Settings
System Settings - Output Settings Purpose: To configure the setting of the print ID, substitute tray, and other settings. Values: Default Paper Size A4 (210x297mm) Sets the default paper size. Letter (8.5x11") Print ID Off Does not print the user ID. Top Left Prints the user ID on the specified location. -
Page 199: Service Tools
Service Tools CAUTION: Using a non-Dell™ toner cartridge may severely damage your printer. The warranty does not cover damages caused by using non-Dell toner cartridges. Purpose: To configure the paper density, the color registration adjustments, the initialization of the printer, and other settings. -
Page 200: Tray Management
Adjust Altitude 0 meter Sets the altitude of the location where the printer is installed. 1000 meters 2000 meters 3000 meters Apply New Settings After you change the settings, click this button to apply the changes. Restart printer to apply new settings Click this button to apply the changes. - Page 201 Recycled Letterhead Preprinted Prepunched Color Plain - Side 2 Color - Side 2 Plain Thick - Side 2 Recycled - Side 2 Tray 1 Display Tray Displays a popup message that prompts the user Prompt to set Paper Type and Paper Size when the paper is loaded in tray1.
- Page 202 Tray 2 Paper Size Auto Sensed Sets the size of paper loaded in the optional 550-sheet feeder. Custom Size Tray 2 Custom Size - Available Range: Sets the length of custom size paper loaded in 210–355 mm (8.3–14.0 inches) the optional 550-sheet feeder. Tray 2 Custom Size - Available Range: Sets the width of custom size paper loaded in 148–215 mm (5.8–8.5 inches)
-
Page 203: Panel Language
Panel Language Purpose: To determine the language of the text on the touch panel. Values: Panel Language English Sets the language to be used on the touch panel. French Italian German Spanish Danish Dutch Norwegian Swedish Apply New Settings After you change the settings, click this button to apply the changes. Restart printer to apply new settings Click this button to apply the changes. -
Page 204: Network Settings
After you change the settings, click this button to apply the changes. Restart printer to apply new settings Click this button to restart the printer and apply the changes. This item is available only when Display of Dell Configuration Web Tool is set to On. Copy Defaults Purpose: To create your own copy settings. - Page 205 Statement->Letter (129 %) Sets the default enlargement ratio. Statement->Legal (154 %) 200% Custom Sets the default enlargement / reduction ratio to a custom ratio. Custom Reduce / Available Range: 25–400% Sets the custom enlargement / reduction ratio when Enlarge you set Reduce / Enlarge to Custom. Original Size Auto Sets the document size automatically.
- Page 206 Yellow Medium Available Range: Sets the color balance level of medium density yellow. Density -3 to +3 Yellow High Density Available Range: Sets the color balance level of high density yellow. -3 to +3 Magenta Low Available Range: Sets the color balance level of low density magenta. Density -3 to +3 Magenta Medium...
-
Page 207: Scan Defaults
This item is available only when the optional 550-sheet feeder is installed. This item is available only when 2 Sided Copying is set to 1 -> 2 Sided in the Copy Defaults page. This item is available only when 2 Sided Copying is set to 2 -> 1 Sided or 2 -> 2 Sided in the Copy Defaults page. Scan Defaults Purpose: To create your own scan settings. -
Page 208: Fax Defaults
Contrast High Adjusts the amount of colors to make the contrast of colors darker than the original. Medium Does not adjust the amount of colors to make the contrast of colors darker or lighter than the original. Adjusts the amount of colors to make the contrast of colors lighter than the original. -
Page 209: Usb Direct Print Defaults
Super Fine Improves the output quality of the original. For documents containing extremely fine detail. The super fine mode is enabled only if the remote machine also supports the Super Fine resolution. Photo Improves the output quality of the original. For documents containing photographic images. -
Page 210: Fax Settings
4-Up Prints four pages on one side of a sheet of paper. Collation Collated Sorts the print job. Uncollated Does not sort the print job. Image Types Auto Prints files in the Text mode and in the Photos (Standard Quality) mode. - Page 211 Auto Receive Tel/Fax Available Range: 0–255 seconds Sets the interval at which the printer goes into the fax receive mode after the external telephone receives an incoming call in 0 to 255 seconds. Auto Receive Available Range: 0–255 seconds Sets the interval at which the printer goes into the fax mode after the Ans/Fax external answering machine receives an incoming call in 0 to 255 seconds.
-
Page 212: Diagnosis
Enables the ECM (Error Correction Mode). To use the ECM, the remote machines must also support the ECM. Off Disables the ECM. Modem Speed 2.4 kbps Allows you to adjust the fax modem speed when a fax transmission or reception error occurs. 4.8 kbps 9.6 kbps 14.4 kbps... -
Page 213: Environment Sensor Info
• ColorTrack Mode settings • ColorTrack Error Report settings • Non Registered User settings When Using the Tool Box 1 Click Start All Programs Dell Printers Dell C2665dnf Color Laser Multifunction Printer Tool Box. → → → → NOTE: For details about starting the Tool Box, see "Starting the Tool Box."... - Page 214 Understanding the Tool Box Menus...
-
Page 215: Understanding The Printer Menus
Understanding the Printer Menus When your printer is connected to a network and available to a number of users, the access to the Admin Settings can be limited. This prevents other users from using the operator panel to inadvertently change a user default that has been set by the administrator. -
Page 216: Error History
Error History Purpose: To print a detailed list of paper jams and fatal errors. Print Meter Purpose: To print the reports for the total number of pages printed. Color Test Page Purpose: To print a page for testing colors. Protocol Monitor Purpose: To print a detailed list of monitored protocols. -
Page 217: Printing A Report/List Using The Operator Panel
The selected report or list is printed. Printing a Report/List Using the Tool Box 1 Click Start→ All Programs→ Dell Printers→ Dell C2665dnf Color Laser Multifunction Printer→ Tool Box. NOTE: For details about starting the Tool Box, see "Starting the Tool Box."... - Page 218 Groups Purpose: To create a group of fax destinations and register it under a two-digit dial code. Up to six group dial codes can be registered. Use the PCL menu to change printer settings that only affect jobs using the PCL emulation printer language. NOTE: Values marked by an asterisk (*) are the factory default menu settings.
- Page 219 Monarch Env. (3.9x7.5") DL Env. (110x220mm) C5 Env. (162x229mm) Custom Paper Size Denotes country-specific factory default value. inch series Letter (8.5x11") Folio (8.5x13") Legal (8.5x14") (210x297mm) (148x210mm) (182x257mm) Executive (7.3x10.5") Envelope #10 (4.1x9.5") Monarch Env. (3.9x7.5") DL Env. (110x220mm) C5 Env. (162x229mm) Custom Paper Size Denotes country-specific factory default value.
- Page 220 Orientation Purpose: To specify how text and graphics are oriented on the page. Values: Portrait Prints text and graphics parallel to the short edge of the paper. Landscape Prints text and graphics parallel to the long edge of the paper. 2 Sided Print Purpose: To specify whether to print on both sides of a sheet of paper.
- Page 221 Garamond Hlb Times Bd ITC A G Go Bk GaramondKrsvHlb Times BdIt ITC A G Go BkOb Courier Helvetica ITC A G Go Dm Courier It Helvetica Ob ITC A G Go DmOb Courier Bd Helvetica Bd ZapfC MdIt Courier BdIt Helvetica BdOb ZapfDingbats Symbol Set...
- Page 222 Font Pitch Purpose: To specify the font pitch for scalable mono spaced fonts. Values: 10.00 Sets the value in increments of 0.01. Available Range: 6.00–24.00 Font pitch refers to the number of fixed-space characters in a horizontal inch of type. For non-scalable mono spaced fonts, the pitch is displayed, but cannot be changed.
- Page 223 Image Enhance Purpose: To specify whether to enable the Image Enhance feature, which makes the boundary line between black and white smoother to decrease jagged edges and enhance the visual appearance. Values: Disables the Image Enhance feature. Enables the Image Enhance feature. Hex Dump Purpose: To help isolate the source of a print job problem.
- Page 224 Default Color Purpose: To specify the color mode to Color or Black. This setting is used for a print job that does not specify a print mode. Values: Black Prints in the black and white mode. Color Prints in the color mode. Ignore Form Feed Purpose: To specify whether to ignore blank pages that only contain Form Feed control codes.
- Page 225 Paper Select Mode Purpose: To specify the way to select the tray for PostScript Level3 Compatible mode. The change becomes effective after the printer is turned off and then on again. Values: Auto The tray is selected as the same setting as in the PCL mode. Select From Tray The tray is selected in a method compatible with regular PostScript Level3 Compatible printers.
- Page 226 Print Mode Purpose: To specify the print mode. Values: Normal For documents with normal sized characters. High Quality For documents with small characters or thin lines, or documents printed using a dot-matrix printer. High Speed Prints with the higher speed than the Normal mode, but the quality is less. PDF Password Purpose: To specify the password to print a PDF file secured with a document open password (password to open the PDF file).
-
Page 227: Network
Layout Purpose: To specify the output layout. Values: Auto % 100% (No Zoom) Booklet 2 Pages Up 4 Pages Up Default Color Purpose: To specify the default output color. Values: Color (Auto) Black Network Use the Network menu to change the printer settings affecting jobs sent to the printer through the wired or wireless network. - Page 228 Wireless Setup Wizard NOTE: Wireless Setup Wizard is available only when the printer is connected using the wireless network. Purpose: To configure the wireless network interface. Values: Select access point Select the access point from the list. WEP Key When you select an access point using WEP as the encryption type, enter the WEP key.
- Page 229 Transmit Key Specifies the transmit key from WEP Key 1 , WEP Key 2, WEP Key 3, and WEP Key 4. WPS Setup NOTE: WPS Setup is available only when the printer is connected using the wireless network. Purpose: To configure the wireless network using WPS. Values: Push Button Control Start Configuration...
- Page 230 224 to 254 cannot be specified for the first octet of a gateway address. IPsec NOTE: IPsec feature is available only when IPsec is enabled on the Dell Printer Configuration Web Tool. Purpose: Disables IPsec. Reset Wireless NOTE: Reset Wireless feature is available only when the printer is connected using the wireless network.
- Page 231 Device Name Specifies the printer name that identifies the Wi-Fi Direct network with up to 32 alphanumeric characters. Confirm it when selecting the printer name on your Wi-Fi certified device. Connection Status Displays the status of the Wi-Fi Direct connection between the printer and your Wi-Fi mobile device.
- Page 232 Disables the E-mail Alert feature. Enable Enables the E-mail Alert feature. Dell Printer Configuration Disable Disables an access to Dell Printer Configuration Web Tool embedded in the Web Tool printer. Enable Enables an access to Dell Printer Configuration Web Tool embedded in the printer.
-
Page 233: Fax Settings
IEEE 802.1x NOTE: IEEE 802.1x feature is available only when the printer is connected using Ethernet cable and it is available only when the IEEE 802.1x authentication is enabled. Purpose: To disable IEEE 802.1x authentication. The change becomes effective after the printer is turned off and then on again. - Page 234 Country Purpose: To select the country where the printer is used. Values: Algeria Hungary Portugal Australia Iceland Puerto Rico Austria Ireland Romania Belgium Italy Russia Bulgaria Jamaica Saudi Arabia Canada Jordan Singapore Colombia Latvia Slovakia Costa Rica Liechtenstein Slovenia Cyprus Lithuania South Africa Czech Republic...
- Page 235 Line Monitor Purpose: To set the volume of the line monitor, which audibly monitors a transmission through the internal speaker until a connection is made. Values: Turns off the volume of the line monitor. Sets the volume of the line monitor to Low. Medium Sets the volume of the line monitor to Medium.
- Page 236 Incoming Defaults Purpose: To configure settings for incoming fax. Receive Mode Purpose: To select the default fax receiving mode. Values: Telephone Automatic fax reception is turned off. You can receive a fax by picking up the handset of the external telephone and then pressing the remote receive code, or by tapping Manual Receive and then tapping...
- Page 237 Auto Receive Tel/Fax 6 seconds Sets the interval at which the printer goes into the fax receive mode after the external telephone receives an incoming call. The value is set in increments of 1 second. Available Range: 0-255 seconds Auto Receive Ans/Fax 21 seconds Sets the interval at which the printer goes into the fax receive mode after the external answering machine receives...
- Page 238 Print and Forward to Prints incoming faxes and also forward them to a specified server address. Server This item is available only when the E-Mail Server information is registered. This item is available only when Forwarding E-mail Address is registered. 2 Sided Print To set the duplex printing for fax.
- Page 239 Auto Redial Setup Purpose: To configure settings for automatic redial. Values: Redial Attempts Sets the number of redial attempts to make when the destination fax number is busy. If you enter 0, the printer will not redial. The value is set in increments of 1. Available Range: 0-13 Interval of Redial 1 minute...
- Page 240 Fax Header Purpose: To print the information of the sender on the header of the faxes. Values: Does not print the sender s information on the header of faxes. Prints the sender s information on the header of faxes. NOTE: If United States is selected for the setting of Country, this option does not appear on the menu.
-
Page 241: System Settings
Fax Activity Purpose: To set whether to automatically print a fax activity report after every 50 incoming and outgoing fax communications. Values: Auto Print Automatically prints a fax activity report after every 50 incoming and outgoing fax communications. No Auto Print Does not automatically print a fax activity report after every 50 incoming and outgoing fax communications. - Page 242 Power Saver Timer Purpose: To specify the time for transition to power saver mode. Values: Sleep 10 minutes Specifies the time taken by the printer to enter Sleep mode after it finishes a job. Available Range: 1–30 minutes Deep Sleep 20 minutes Specifies the time taken by the printer to enter Deep Sleep mode after it has entered Sleep mode.
- Page 243 Display Brightness Purpose: To adjust the screen brightness of the touch panel. Values: Sets the brightness in ten levels, with ten being the brightest. Available Range: 1-10 Audio Tone Purpose: To configure settings for tones emitted by the printer during operation or when a warning message appears. Values: Control Panel Does not emit a tone when the operator panel input is correct.
- Page 244 Out of Paper Does not emit a tone when the printer runs out of paper. Soft Emits a tone when the printer runs out of paper. Normal Loud Low Toner Alert Does not emit a tone when a toner is low. Soft Emits a tone when a toner is low.
- Page 245 Auto Log Print Purpose: To automatically print a job history report after every 20 jobs. Values: automatically print a job history report Does not Automatically prints a job history report Print logs can also be printed using the Report/List menu. RAM Disk Purpose: To allocate memory to the RAM disk file system for the Secure Print, Private Mail Box Print, Public Mail Box Print,...
- Page 246 Power On Wizard Purpose: To perform initial setup for the printer. Max E-mail Size Purpose: To specify the maximum size of e-mail that can be sent. Values: 2048 KB Sets the maximum size of e-mail that can be sent, in increments of 1 KB. 50-16384 KB Timers Purpose:...
- Page 247 Default Paper Size Purpose: To specify the default paper size. Values: mm series A4 (210x297mm) Letter(8.5x11") Denotes country-specific factory default values. inch series A4 (210x297mm) Letter(8.5x11") Denotes country-specific factory default values. Print ID Purpose: To specify a location where the user ID is printed. Values: Does not print the user ID.
- Page 248 Banner Sheet Purpose: To specify the position of banner sheet, and also specify the tray in which the banner sheet is loaded. Values: Insert Position Does not print the banner sheet. Front Inserted before the first page of every copy. Back Inserted after the last page of every copy.
- Page 249 A4<>Letter Switch Purpose: To print A4 size jobs on Letter size paper if A4 size paper is not available or to print Letter size jobs on A4 size paper if Letter size paper is not available. Values: Does not print A4 size jobs on Letter size paper or Letter size jobs on A4 paper. Prints A4 size jobs on Letter size paper if A4 is not available in the paper trays and vice versa (Letter size job on A4 size paper).
- Page 250 Secure Job Expiration NOTE: Secure Job Expiration feature is available only when RAM Disk is set to Purpose: To specify the date and time to delete the files stored as Secure Print in the RAM disk. Values: Expiration Mode Does not set the date and time to delete the files stored as Secure Print in the RAM disk.
-
Page 251: Maintenance
Set Non Account User Password using the Dell Printer Configuration Web Tool. Auto Color To Mono Print NOTE: Auto Color To Mono Print feature is available when Dell ColorTrack is disabled. Purpose: To specify whether to print all print jobs in black and white even when color print is specified. - Page 252 Adjust Transfer Belt Unit Purpose: To adjust the transfer bias when ghosting occur. (The ghost image may be the image of the previous page, or a part of the page currently printing) Values: K Offset If faint black colored ghosts appear, try to decrease the value. Available Range: -5 to +5 YMC Offset If faint ghosts in color (yellow, magenta, or cyan) appear, try to decrease...
- Page 253 Adjust Fusing Unit NOTE: The print quality changes depending on the setting values you select for this item. Purpose: To adjust the temperature setting of the fusing unit for each paper type. Values: Plain Sets the fusing unit temperature in increments of 1. The default settings may not give the best output on all paper types.
-
Page 254: Auto Correct
Color Regi Chart Print Prints a color registration chart. The color registration chart prints a lattice pattern of yellow, magenta, and cyan lines. On the chart, find the values on the right side that are next to the line that is perfectly straight for each of the three colors. - Page 255 Purpose: To use toner cartridge of another manufacturer. CAUTION: Using a non-Dell™ toner cartridge may severely damage your printer. The warranty does not cover damages caused by using non-Dell toner cartridges. Values: Does not use toner cartridge of another manufacturer.
-
Page 256: Secure Settings
Secure Settings Use the Secure Settings menu to set a password to limit access to the menus. This prevents items from being changed accidentally. NOTE: Values marked by an asterisk (*) are the factory default menu settings. See also: "Panel Lock" Panel Lock Purpose: To set a limited access to Admin Settings with a password, and to set or change the password. - Page 257 Scan To Network Enables the Scan To Network function. On (Password) Enables the Scan To Network function, but requires a password. Disables the Scan To Network function. Scan To Application Enables the Scan To Application and WSD Scan function. On (Password) Enables the Scan To Application function, but requires a password.
- Page 258 Domain Filtering Purpose: To specify whether to only send e-mails to specified domains. NOTE: Set the domains from SMTP Domain Filtering on the Dell Printer Configuration Web Tool. Values: Disables Domain Filtering. Allow Domains Only allows e-mails to be sent to specified domains.
-
Page 259: Usb Settings
Login Error NOTE: Login Error feature is available only when Panel Lock Control is set to Enable. Purpose: To specify the number of error entry attempts allowed when you log in as an administrator in the Admin Settings and Report/List menu. Values: Does not allow an administrator to log in after one error entry attempt. -
Page 260: Default Settings
Binary Used when no special processing is required for data. Job Time-out Purpose: To specify the amount of time the printer waits for data to arrive from the computer. The print job is canceled if the time-out time is exceeded. Values: Disables the job time-out. -
Page 261: Fax Defaults
Magenta Low Density Sets the color balance level of low density magenta. Available Range: -3 to +3 Med. Density Sets the color balance level of medium density magenta. Available Range: -3 to +3 High Density Sets the color balance level of high density magenta. Available Range: -3 to +3 Cyan Low Density... -
Page 262: Usb Direct Print Defaults
TIFF File Format Purpose: To specify the default TIFF file format. Values: TIFF V6 Sets the default TIFF file format to TIFF V6. TTN2 Sets the default TIFF file format to TTN2. Image Compression Purpose: To specify the image compression level. Values: High Sets the image compression level to High. - Page 263 Letter (8.5x11") Folio (8.5x13") Legal (8.5x14") Executive (7.3x10.5") Envelope #10 (4.1x9.5") Monarch Env. (3.9x7.5") DL Env. (110x220mm) C5 Env. (162x229mm) Custom inch series Letter (8.5x11") Folio (8.5x13") Legal (8.5x14") (210x297mm) (148x210mm) (182x257mm) Executive (7.3x10.5") Envelope #10 (4.1x9.5") Monarch Env. (3.9x7.5") DL Env.
- Page 264 Covers (106-163g/m Covers Thick (164-216g/m Coated (106-163g/m Coated Thick (164-216g/m Label Envelope Recycled Letterhead Preprinted Prepunched Color Plain S2 Color S2 Plain Thick S2 Recycled S2 Denotes country-specific factory default value. Tray1 Purpose: To specify the paper loaded in tray1. Values: Display Tray Prompt Enter a check to display a popup message that...
- Page 265 Executive (7.3x10.5") Custom inch series Letter (8.5x11") Folio (8.5x13") Legal (8.5x14") (210x297mm) (148x210mm) (182x257mm) Executive (7.3x10.5") Custom Type Plain Plain Thick Covers (106-163g/m Covers Thick (164-216g/m Coated (106-163g/m Coated Thick (164-216g/m Recycled Letterhead Preprinted Prepunched Color Plain S2 Color S2 Plain Thick S2 Recycled S2 Denotes country-specific factory default value.
-
Page 266: Tray Priority
Tray2 NOTE: Tray2 feature is available only when the optional 550-sheet feeder is installed. Purpose: To specify the paper loaded in the optional 550-sheet feeder. Values: Display Tray Prompt Enter a check to display a popup message that prompts to set Paper Type and Paper Size when paper is loaded in the optional 550-sheet feeder. -
Page 267: Language Settings
Tray2 Sets the optional 550-sheet feeder as the second priority. Third Sets the MPF as the third priority. Tray1 Sets tray1 as the third priority. Tray2 Sets the optional 550-sheet feeder as the third priority. The factory default when the optional 550-sheet feeder is installed. Language Settings Use the Language Settings menu to configure Panel Language, or Keyboard Layout. -
Page 268: Private Mailbox
Private Mailbox NOTE: Private Mailbox feature is available only when is set to RAM Disk Purpose: To specify whether and how to print the job stored in the Private Mailbox. Values: Select User ID Enter the password you specified on the printer driver. Select a Job Selects a job to print. -
Page 269: Secure Print
Quantity Specifies the quantity of prints in increments of 1. Available Range: 1-999 Use Driver Settings Sets the quantity of prints specified on the printer driver. Print Prints the selected job. Print and Delete Deletes the document after it is printed. Delete Deletes the specified document from print memory. -
Page 270: Darken / Lighten
Darken / Lighten Purpose: To make the copy darker or lighter than the original. Values: Darken 3 Works well with light documents or faint pencil markings. Darken 2 Darken 1 Normal Works well with standard typed or printed documents. Lighten 1 Works well with dark documents. - Page 271 Executive (7.3x10.5") Envelope #10 (4.1x9.5") Monarch Env. (3.9x7.5") DL Env. (110x220mm) C5 Env. (162x229mm) Custom inch series Letter (8.5x11") Folio (8.5x13") Legal (8.5x14") (210x297mm) (148x210mm) (182x257mm) Executive (7.3x10.5") Envelope #10 (4.1x9.5") Monarch Env. (3.9x7.5") DL Env. (110x220mm) C5 Env. (162x229mm) Custom Paper Type Plain...
-
Page 272: Sided Copying
Coated Thick (164-216g/m Label Envelope Recycled Letterhead Preprinted Prepunched Color Plain S2 Color S2 Plain Thick S2 Recycled S2 Tray1 The paper is fed from tray1. Tray2 The paper is fed from the optional 550-sheet feeder. Denotes country-specific factory default value. This item is available only when the optional 550-sheet feeder is installed. -
Page 273: Reduce/Enlarge
Reduce/Enlarge Purpose: To reduce or enlarge the size of a copied image. Values: Custom ratio Enter a custom ratio in increments of 1 percent. 25-400 % mm series 100% A4→A5 B5→A5 122% A5→B5 141% A5→A4 200% inch series 100% Ledger→Letter Legal→Letter 129% Statement→Letter... -
Page 274: Original Type
Legal (8.5x14") Executive (7.3x10.5") inch series Auto Letter (8.5x11") Folio (8.5x13") Legal (8.5x14") A4 (210x297mm) A5 (148x210mm) B5 (182x257mm) Executive (7.3x10.5") Denotes country-specific factory default values. NOTE: When is selected, the printer assumes that the document size is the size of the print media loaded in tray1 or the Auto MPF. -
Page 275: 2-Up
2-Up Purpose: To print two original pages to fit onto one sheet of paper. Values: Does not perform 2-up printing. Auto Automatically reduces the original pages to fit onto one sheet of paper. Manual Prints the original pages onto the one sheet of paper in the size specified in Reduce/Enlarge Color Saturation Purpose:... -
Page 276: Id Copy
ID Copy Use the ID Copy menus to configure a variety of ID Copy features. Values: Quantity For details about each menu, see "Copy." Darken / Lighten Output Color Select Tray Sharpness Color Saturation Auto Exposure Save Settings Use the save settings to save a variety of ID Copy features. And also use to create and edit custom tiles for ID Copy. Scan Scan to E-mail Purpose:... -
Page 277: Scan To Pc
Scan to PC Purpose: To save scanned data on a computer. The Scan to PC feature allows you to import scanned data from the printer to a computer connected via a USB cable. The computer must have ScanButton Manager installed to receive the data. See "Scan Settings"... - Page 278 File Format Purpose: To specify the file format to save the scanned image. Values: Multi-Page TIFF TIFF (1 File per Page) JPEG (1 File per Page) 2 Sided Scanning Purpose: To specify whether to scan both sides of a document. Values: 1 Sided Scans one side of a document.
- Page 279 Sharpness Purpose: To adjust the sharpness to make the scanned image sharper or softer than the original. Values: Sharpen Makes the scanned image sharper than the original. Normal Does not make the scanned image sharper or softer than the original. Soften Makes the scanned image softer than the original.
-
Page 280: Save Settings
Margin Purpose: To specify the top, bottom, right, left, and middle margins of the scanned image. Values: Top/Bottom 0.1 inch (2 mm Sets the value in increments of 0.1 inch (1 mm). Available Range: 0.0–2.0 inches (0–50 mm) Left/Right 0.1 inch (2 mm Sets the value in increments of 0.1 inch (1 mm). -
Page 281: Scan To Wsd
Scan to WSD Purpose: To save scanned data on a computer using WSD. NOTE: Scan to WSD is available when the OS of the client computer is Windows Vista SP2 (or later), Windows 7, and Windows 8. Values: Computer Name Selects which computer the scanned image is saved to. - Page 282 Darken / Lighten Purpose: To adjust the density to make the copy darker or lighter than the original. Values: Darken 3 Works well with light documents or faint pencil markings. Darken 2 Darken 1 Normal Works well with standard typed or printed documents. Lighten 1 Works well with dark documents.
-
Page 283: Save Settings
Sets the fax transmission start time when sending a fax at a specified time. NOTE: A maximum of 19 delayed fax jobs can be stored in the Dell C2665dnf Color Laser Multifunction Printer. Save Settings Use the save settings to save a variety of fax features. And also use to create and edit custom tiles for faxing. - Page 284 Output Color Purpose: To select color or black and white printing. Values: Full Color Prints in color mode. Black & White Prints in black and white mode. Select Tray Purpose: To specify the input tray. Values: MPF The paper is fed from the MPF. When Use Driver Settings for Print Job is set in...
- Page 285 (182x257mm) Type Plain Plain Thick Covers (106-163g/m Covers Thick (164-216g/m Coated (106-163g/m Coated Thick (164-216g/m Envelope Recycled Letterhead Prepunched Color Plain S2 Color S2 Plain Thick S2 Recycled S2 Tray1 The paper is fed from tray1. Tray2 The paper is fed from the optional 550-sheet feeder. Denotes country-specific factory default value.
-
Page 286: Save Settings
Use the save settings to save a variety of USB Direct Print features. And also use to create and edit custom tiles for USB Direct Print. Dell Document Hub Use the Dell Document Hub menus to configure a variety of Dell Document Hub features. Understanding the Printer Menus... -
Page 287: Search For Files
Search for Files Purpose: To search the files saved in the cloud services, and print them from the printer. Values: Text Box Enters the keywords, such as the words including the file name. Sorts the searching results by selecting the sorting order. Sets the settings of the Print Settings. -
Page 288: Smart Ocr Scan
File Name Option Purpose: To specify the way to name the scanned document. Values: Adds no text in front of the file name or after the file name. Add Prefix Adds texts in front of the file name. Prefix/Suffix String Specifies the texts that are added when Add Prefix is selected. - Page 289 OCR Language Purpose: To specify the language for the OCR. Values: Auto English Français Italiano Deutsch Español Dansk Nederlands Norsk Svenska PDF Password Purpose: To enter the password when you print a PDF file secured with a document open password (password to open the PDF file).
-
Page 290: E-Mail Me
Add Suffix Adds texts after the file name. Prefix/Suffix String Specifies the texts that are added when Add Suffix is selected. For more information on other settings, see "Scan Settings". E-mail Me Purpose: To scan the document and send to you as an attached file of an e-mail. Values: File Format Selects the file format from the list to save the scanned image. -
Page 291: Business Card Reader
OCR Language Purpose: To specify the language for the OCR. Values: Auto English Français Italiano Deutsch Español Dansk Nederlands Norsk Svenska PDF Password Purpose: To enter the password when you print a PDF file secured with a document open password (password to open the PDF file). -
Page 292: Add Apps
Add Apps Use the Add Apps menus to add a variety of tiles on the Home screen. Panel Lock This feature prevents unauthorized personnel from changing the settings made by the administrator. For regular printing, items can be selected from the menu and printer settings remain unchanged. For regular printing, items can be configured using the printer driver. -
Page 293: Resetting Defaults
Resetting Defaults After executing this function and rebooting the printer, the phone book, address book, or menu parameters are reset to their default values. The following menu parameters are exceptions and are not reset. • Network settings • Panel Lock settings and password • Function Enabled settings (Copy, Scan to E-mail, Fax, Scan to Network, Scan to PC, PC Scan, Scan to USB, USB Direct Print) and passwords • Secure Receive settings and password... - Page 294 Understanding the Printer Menus...
-
Page 295: Print Media Guidelines
Print Media Guidelines Print media refers to paper, labels, envelopes, and coated paper among others. Your printer provides high-quality printing on a variety of print media. Selecting the appropriate print media for your printer helps avoid printing troubles. This section describes selecting and caring for print media. NOTE: Use only laser print media. -
Page 296: Recommended Paper
Fiber Content Most high-quality xerographic paper is made from 100 % chemically pulped wood. Paper containing fibers such as cotton may lead to degraded paper handling. Recommended Paper To ensure the best print quality and feed reliability, use 75 g/m (20 lb) xerographic paper. -
Page 297: Selecting Pre-Printed Media And Letterheads
Selecting Pre-Printed Media and Letterheads When selecting pre-printed and letterhead paper for the printer: • Use grain long paper for best results. • Use only forms and letterheads printed using an offset lithographic or engraved printing process. • Select paper that absorb ink, but does not bleed. • Avoid paper with rough or heavily textured surfaces. -
Page 298: Labels
• Adjust the guide to fit the width of the envelopes. • To load an envelope into the MPF, insert the envelope with the flaps closed or open and the short-edge of the envelope facing into the printer. The print side must be facing up. • See "Loading an Envelope in the MPF"... -
Page 299: Storing Print Media
• Do not use label sheets that have adhesive to the edge of the sheet. It is recommended that zone coating of the adhesive is done at least 1 mm (0.04 inches) away from edges. Adhesive material contaminates your printer and could void your warranty. -
Page 300: Supported Paper Types
For Plain and Label paper, you can set the paper density by selecting the Paper Density (Light or Normal) under Maintenance from the operator panel, Tool Box, or Dell™ Printer Configuration Web Tool. Once you set the Paper Density settings, the printer uses the settings for Plain and Label paper. -
Page 301: Loading Print Media
Loading Print Media Loading print media properly helps prevent jams and ensures trouble-free printing. Before loading any print media, identify the recommended print side of the print media. This information is usually indicated on the print media package. Capacity Tray1 can hold: •... -
Page 302: Loading Print Media In The Mpf
Print media source Print side Page orientation Tray1 and optional 550-sheet Letterhead enters the printer Face down feeder last Letterhead enters the printer Face down last Loading Print Media in the MPF 1 Gently pull open the MPF cover. Loading Print Media... - Page 303 2 Extend the extension tray as necessary. 3 Slide the width guides to the edge of the tray. Th width guides should be fully extended. 4 Insert all media facing up and top edge first into the MPF. NOTE: Do not force the print media into the MPF. Loading Print Media...
-
Page 304: Loading An Envelope In The Mpf
5 Slide both width guides until they rest lightly against the edge of the print media stack. NOTE: Do not force the print media into the MPF. 6 On the touch panel, tap Size. 7 Tap until the desired paper size appears, and then select the size. 8 Tap Type. -
Page 305: Envelope #10, Monarch, Or Dl
Envelope #10, Monarch, or DL Load the envelopes short edge feed with the flaps closed and the print side up. Ensure that the flaps come at the left when you face towards the printer. Load the envelopes short edge feed with the flaps open or closed and the print side up. Ensure that the flaps come at the bottom with the flaps open or at the top with the flaps closed when you face towards the printer. -
Page 306: Using The Mpf
Using the MPF • Load only one size and type of print media during a single print job. • To achieve the best possible print quality, use only high-quality print media that is designed for use in laser printer. For more guidelines on print media, see "Print Media Guidelines." • Do not add or remove print media when there is still print media in the MPF or when the printer is printing from the MPF. - Page 307 Printing, Copying, Scanning, Faxing, and Dell Document Hub 19 Printing..................307 20 Copying ..................325 21 Scanning..................337 22 Faxing..................367 23 Dell™ Document Hub ............... 393...
- Page 308 306...
-
Page 309: Printing
Printing This chapter covers tips for printing, how to print certain information from your printer, and how to cancel a job. Tips for Successful Printing Tips on Storing Print Media Store your print media properly. For more information, see "Storing Print Media." Avoiding Paper Jams CAUTION: Before buying large quantities of any print media, it is recommended that you try a sample first. -
Page 310: Canceling A Print Job
Canceling a Print Job There are several methods for canceling a job. • Canceling a Job From the Operator Panel • Canceling a Job From a Computer Running Windows Canceling a Job From the Operator Panel To cancel a job after it has started printing: 1 Tap Stop. -
Page 311: Duplex Printing
5 Press the <Delete> key. Duplex Printing Duplex printing (or two-sided printing) allows you to print on both sides of a sheet of paper. For sizes that are acceptable for duplex printing, see "Supported Paper Sizes." Duplex Printing With Duplex Unit 1 Click Start→... -
Page 312: Using The Stored Print Feature
Flip on Long Edge Assumes binding along the long edge of the page (left edge for portrait orientation and top edge for landscape orientation). The following illustration shows long-edge binding for portrait and landscape pages: Portrait Landscape Flip on Short Edge Assumes binding along the short edge of the page (top edge for portrait orientation and left edge for landscape orientation). - Page 313 Secure Print You can temporarily store print jobs secured with a password in the memory. Users with the password can print them from the operator panel. This feature can be used to print confidential documents. A stored print job will be deleted after you print it or at a designated time.
-
Page 314: Procedures For Printing Stored Print
Proof Print The collated print job is stored in the memory, but a single copy is printed automatically so you can check the print result. If you do not have problems with the print result, you can choose to print more copies. This prevents large number of misprinted copies from being printed at one time. -
Page 315: Printing From Usb Memory
4 Tap until the desired user ID appears, and then tap that user ID. NOTE: Secure Print and Private Mail Box Print require specifying a password for confidentiality. If you select Public Mail Box Print or Proof Print, proceed to step 6. 5 Enter the password using the number pad, and then tap OK. -
Page 316: Supported File Formats
Supported File Formats Files in the following file formats can be printed directly from a USB memory. • • TIFF • JPEG Inserting and Removing a USB Memory You can insert the USB memory before printing or scanning images. Before removing the USB memory, ensure that the printer is not accessing the USB memory. CAUTION: If you remove the USB memory while the printer is accessing, the data in the USB memory or the USB memory device itself may be destroyed. -
Page 317: Printing A Jpeg File In A Usb Memory
Printing a JPEG File in a USB Memory 1 Press (Home) button. 2 Insert a USB memory to the front USB port of the printer. For details about inserting a USB memory, see "Inserting and Removing a USB Memory." 3 Tap Print JPEG. 4 Scroll through the page or select a folder until the desired files appear, and then tap those files. -
Page 318: Printer Setup
For Windows Server 2012: 1 Click Server Manager of the Start screen. 2 Select Add Roles and Features from the Manage menu. 3 Click Next on the Before You Begin window → Select installation type on the Installation Type window → Select destination server on the Server Selection window in the Add Roles and Features Wizard. -
Page 319: Printing With Wi-Fi Direct
NOTE: The printer connected with Wi-Fi Direct supports the following protocols; LPD, Port9100, WSD (print), Bonjour (mDNS), SNMPv1/v2c, Dell Printer Configuration Web Tool. Setting Up Wi-Fi Direct To use Wi-Fi Direct, you need to first set up the Wi-Fi Direct settings from the operator panel of the printer. To connect the mobile device to the printer via Wi-Fi Direct, select the SSID of the printer from the list of wireless networks on the mobile device and enter the passphrase necessary for connection. - Page 320 Connecting the Mobile Device 1 Connect the mobile device to the Wi-Fi Direct network. For Windows 8, Windows RT Tap Settings in the PC settings menu. Tap the Wi-Fi icon. Tap the printer's SSID, and then tap Connect. Enter the passphrase, and then tap Next. The mobile device will connect to the printer.
-
Page 321: Printing Via Wi-Fi Direct
Computers." For iOS You need to install the printing application such as Mobile Print App for Dell, and then the printer is ready for use. For Android You need to install the printing application such as Dell Mobile Print, and then the printer is ready for use. -
Page 322: Resetting The Pin
Android OS Download the Dell Mobile Print app for free from Google Play™. Easy to use and navigate, the Dell Mobile Print app enables direct printing of photos, documents web content and more, to supported Dell printers on a Wi-Fi or Ethernet network. -
Page 323: Printing With Airprint
1 Ensure that the printer is connected to the network. 2 Launch the Dell Printer Configuration Web Tool by entering the IP address of the printer in your web browser. For more information, see "Setting Up the Dell Printer Configuration Web Tool" and "Starting the Dell Printer Configuration Web Tool."... -
Page 324: Registering The Printer To Your Google Account
"Setting Up the Dell Printer Configuration Web Tool" and "Starting the Dell Printer Configuration Web Tool." 2 When the Dell Printer Configuration Web Tool opens, go to the pages in the Print Server Settings tab. Click Port Settings. In Port Status, select the On check box for Google Cloud Print. -
Page 325: Using The Operator Panel To Change The Printer Settings
You can change most of the print settings from the application you are printing from. If your printer is attached to the network, you can also change settings from the Dell Printer Configuration Web Tool. To launch the Dell Printer Configuration Web Tool, type the printer's IP address in your web browser. To find your printer's IP address, see "Verifying the IP Settings."... -
Page 326: Using The Dell Printer Configuration Web Tool To Change The Printer Settings
To change the paper type and size, choose Tray Management from the topics list. To change the ColorTrack settings, choose Print Volume from the topics list, and then select the Dell ColorTrack tab. To copy your system settings to another printer on the network, choose Copy Printer Settings from the topics list, and then type the other printer's IP address. -
Page 327: Copying
Copying NOTE: If the Function Enabled setting for is set to , you need to enter the four digit password to use Copy On(Password) the copy function. If the Function Enabled setting for is set to , the copy function is disabled and the menu is also Copy disabled on the screen. -
Page 328: Making Copies From The Document Glass
Making Copies From the Document Glass NOTE: A computer connection is not required for copying. NOTE: Remove any documents from the DADF before copying from the document glass. NOTE: Contaminants on the document glass may cause black spots on the copy output. For best results, clean the document glass before use. -
Page 329: Making Copies From The Dadf
5 Tap Copy. To customize the copy settings such as Output Color, Select Tray, and Darken/Lighten, see "Setting Copy Options." NOTE: The copy options automatically return to their default status after the auto clear timer is expired. 6 Tap – or + to specify the number of copies from 1 to 99 in the Quantity tile. 7 Tap Copy to begin copying. -
Page 330: Setting Copy Options
Setting Copy Options Set the following options for the current copy job before tapping Copy to begin copying. For details about making copies, see "Making Copies From the Document Glass" and "Making Copies From the DADF." NOTE: The copy options automatically return to their default status after the auto clear timer is expired. Options on each tile are below: •... -
Page 331: Output Color
Output Color To select mode for color or black and white copying: 1 Tap Output Color. 2 Tap Full Color or Black & White. NOTE: Color copy is secured with a password if the Function Enabled setting for is set to Copy On(Color . -
Page 332: Sharpness
Sharpness To adjust the sharpness to make the copy image sharper or softer than the original: 1 Swipe the screen until Sharpness appears, and then tap Sharpness. 2 Tap the desired setting. Sharpen Makes the copy image sharper than the original. Normal* The color clarity of the image is the same as the original. -
Page 333: Original Size
Original Size To select the default document size: 1 Swipe the screen until Original Size appears, and then tap Original Size. 2 Tap the desired setting. (Inch series) Auto* Letter (8.5x11") Folio (8.5x13") Legal (8.5x14") A4 (210x297mm) A5 (148x210mm) B5 (182x257mm) Executive (7.3x10.5") (mm series) Auto*... -
Page 334: Collation
Collation To sort the copy output: For example, if you make two copies of three page documents, one complete three page document will be printed followed by the second complete document: 1 Swipe the screen until Collation appears, and then tap Collation. 2 Tap the desired setting. - Page 335 2-Up To print two original images to fit onto one sheet of paper: Auto: Manual: Automatically Reduces the reduces the pages in the pages to fit in custom size one page. depending on the setting of the Reduce / Enlarge menu.
-
Page 336: Margin
Color Saturation To adjust the amount of colors of the copy to make the colors darker or lighter than the original: 1 Swipe the screen until Color Saturation appears, and then tap Color Saturation. 2 Tap the desired setting. High Makes the color of the copy more vivid. -
Page 337: Changing The Default Settings
4 Specify the copy settings below as required. • Quantity • Darken / Lighten • Output Color • Select Tray • Sharpness • Color Saturation • Auto Exposure For details, see "Setting Copy Options." 5 Tap Copy to begin copying. After the front side of the ID card is scanned, the display prompts you to turn over the card. - Page 338 336 Copying...
-
Page 339: Scanning Overview
For details, see "Function Enabled." Scanning Overview Use your Dell™ C2665dnf Color Laser Multifunction Printer to turn pictures and text into editable images on your computer. The Dell C2665dnf Color Laser Multifunction Printer provides several ways to scan your document. There are two main scanning types. -
Page 340: Scanning From The Operator Panel - Scan To Pc
Darken/Lighten, Contrast, Sharpness, Auto Exposure, Original Size, Margin, and File Naming Mode. For details, see "Scan Settings." 5 Tap Scan to begin scanning the document. NOTE: If the following dialog box appears on your computer, select Dell C2665dnf Color MFP ScanButton Manager, and then click OK. Scanning... - Page 341 For Microsoft Windows: NOTE: Once you select Dell C2665dnf Color MFP ScanButton Manager with the Always use this program for this action check box selected, Dell C2665dnf Color MFP ScanButton Manager will automatically open without selecting an application. NOTE: You must use ScanButton Manager on your computer to change the settings for scanning. For details, see "ScanButton Manager."...
-
Page 342: Scanning From The Operator Panel - Scan To Wsd
Scanning from the Operator Panel - Scan to WSD If the printer is connected to a computer via network using WSD (Web Services on Devices), you can use the Scan to WSD function to send scanned images to a computer. NOTE: To use Scan to WSD, you need to setup connection using WSD. -
Page 343: Scanning Using The Twain Driver
Click Desktop→ Scan Settings→ Select... In the Available Scanners dialog box, select TWAIN: Dell C2665dnf Color MFP, and then click OK. 5 Make sure that Display scanner dialog box check box is selected on the Scan or Get Photo panel. - Page 344 For Apple Macintosh: NOTE: The screen image may vary depending on the operating system. 7 In the Basic Scanning tab, set the desired preferences, and click Preview to display the preview image. NOTE: The Preview feature cannot be used when performing duplex (two-sided) scanning from the DADF. Adjust the settings in the Image Quality and Image Option tabs.
-
Page 345: Scan Settings Tool
You can check the IP address of the printer or set the password using the Scan Settings Tool. To open the Scan Settings Tool: For Microsoft Windows: Click Start→ All Programs→ Dell Printers→ Dell C2665dnf Color Laser Multifunction Printer→ Scan Settings Tool. For Apple Macintosh: Click Settings on the main scanning window of the Dell C2665dnf Color MFP window. -
Page 346: Password Setting
• Search Criteria (Windows only) Displays the Search Criteria dialog box for setting the search condition. Search Criteria Dialog Box (Windows only) • Subnet Address Enter the subnet address. • IPv4: Broadcast Address such as "192.168.1.255" • IPv6: Multicast Address such as "ff02::1" • Search Time Specify a time period for searching a scanner. -
Page 347: Scanning Using The Windows Image Acquisition (Wia) Driver
For Apple Macintosh: • Password for Scanner Enter the password. Scanning Using the Windows Image Acquisition (WIA) Driver Your printer also supports the WIA driver for scanning images. WIA is one of the standard components provided by Microsoft Windows XP and later operating systems and works with digital cameras and scanners. Unlike the TWAIN driver, the WIA driver allows you to scan an image and easily manipulate those images without using additional software. - Page 348 3 Click File→ From Scanner or Camera (Paint button→ From scanner or camera for Windows 7, Windows 8, Windows Server 2008 R2, and Windows Server 2012). USB or LAN The Scan using Dell C2665dnf Color MFP ( ) window appears. NOTE: The screen image may vary depending on the operating system.
-
Page 349: Scanning To A Pc Or Server Via Smb/Ftp
4 Click Next to display the Choose Scanning Preferences page. NOTE: The screen image may vary depending on the operating system. 5 Select your desired type of picture, paper source, and paper size, and click Next. 6 Enter a picture name, select a file format, and specify the desired location to save the scanned document. 7 Click Next to start scanning. -
Page 350: Procedures
Required operating systems: For FTP: NOTE: For information on how to configure the FTP service, refer to the manual provided with the software. NOTE: Microsoft Windows Server 2003, Windows XP, Windows Vista, Mac OS X 10.5 support IPv4 only. • Microsoft Windows XP Professional FTP service of Microsoft Internet Information Services 5.1 • Microsoft Windows Server 2003 Service Pack 1 FTP service of Microsoft Internet Information Services 6.0... -
Page 351: Setting A Login Name And A Password (Smb Only)
3 "Setting a Destination Using an Address Book" 4 "Sending the Scanned File on the Network" Setting a Login Name and a Password (SMB Only) The Scan to Network feature requires a user login account with a valid and non-empty password for authentication. Confirm a login user name and password. -
Page 352: Creating A Shared Folder (Smb Only)
2 Click Change PC settings. 3 Click Users. 4 Click Create a Password and add in a password for your user login account. For Mac OS X 10.5/10.6: 1 Click System Preferences→ Accounts. 2 Select Change Password. 3 Enter a password for your user login account in New password. 4 Re-enter the password in Verify. - Page 353 NOTE: To add sub-folders, create new folders in the shared folder you have created. For example: Folder name: MyShare Second-level folder name: MyPic , Third-level folder name: John You should now see MyShare\MyPic\John in your directory. For Microsoft Windows XP Professional: 1 Create a folder in the desired directory on your computer (Example of folder name, MyShare) and double-click the folder.
- Page 354 5 Right-click the folder, and then select Properties. The Properties dialog box appears. Select the Sharing tab, and then select Share this folder. Enter a shared name in the Share name box. NOTE: Write down this shared name because you will use this name in the next setting procedure. 8 Click on Permissions to create a write permission for this folder.
- Page 355 12 Click on the user login name that you have just entered. Select Full Control check box. This will grant you permission to send the document into this folder. 13 Click OK. NOTE: To add sub-folders, create new folders in the shared folder you have created. For example: Folder name: MyShare Second-level folder name: MyPic...
- Page 356 5 Enter a shared name in the Share name box. NOTE: Write down the shared name as you need to use this name in the next setting procedure. 6 Click on Permissions to create a write permission for this folder. 7 Click Add.
-
Page 357: Setting A Destination Using An Address Book
7 Click Done. Setting a Destination Using an Address Book You can register the connection details for SMB and FTP server in the address book using Dell Printer Configuration Web Tool or Address Book Editor. Before beginning to setup a destination, make sure you have the IP addresses you need such as printer and computer. - Page 358 Click Address Book. If a security login dialog box appears, type in the correct User Name and Password. NOTE: The default user name is "admin", and the default password is left blank (NULL). Click the Server Address tab, and then click Create of an ID. Scanning...
- Page 359 Server Address page appears. To fill in the fields, enter the information as follows: (1) Name Enter a friendly name that you want it to appear on the Server address book. (2) Server Type Select FTP if you store document on a FTP server. Select SMB if you store documents in a shared folder on your computer.
- Page 360 (9) Re-enter Re-enter your password. Password Using Address Book Editor 1 Click Start→ All Programs→ Dell Printers→ Dell C2665dnf Color Laser Multifunction Printer→ Address Book Editor. 2 Click Tool→ New (Device Address Book)→ Server. For Microsoft Windows: For Apple Macintosh: Server Address dialog box appears.
- Page 361 For Microsoft Windows: For Apple Macintosh: To fill in the fields, enter the information as follows: (1) Name Enter a friendly name that you want it to appear on the Server address book. (2) Server Type Select Computer if you store documents in a shared folder on your computer. Select Server if you store documents on a FTP server.
-
Page 362: Sending The Scanned File On The Network
(4) Share Name Enter the name of the shared folder on the recipient computer. For SMB only. • For SMB: e.g. Share, Sharefolder (5) Path Enter the subdirectory path where you want the scanned document to be stored. Ensure that the subdirectory path is already created in the shared folder or FTP server. -
Page 363: Specifying A Folder To Save The Scanned Image
The USB memory must be formatted in FAT file systems (FAT16, FAT32, or VFAT) before inserting the memory device into the front USB port of the printer. NOTE: If the USB memory is formatted in a file system other than above, the printer may not recognize that the USB memory is attached. -
Page 364: Sending An E-Mail With The Scanned Image
Setting the DNS Server Address To set the DNS server address to your printer, follow the steps below: 1 Launch the Dell Printer Configuration Web Tool. Open the web browser. Enter the IP address of your printer in the web browser. -
Page 365: Setting The Information Necessary To Access The Mail Server
Setting the Information Necessary to Access the Mail Server To make the printer to send an e-mail, follow the steps below: 1 Launch the Dell Printer Configuration Web Tool. Open the web browser. Enter the IP address of your printer in the web browser. - Page 366 In the SMTP Login Password text box, set the SMTP account password using up to 31 alphanumeric characters. For example: (your Gmail account password) In the Re-enter SMTP Login Password text box, enter the login password again to confirm it. For example: (your Gmail account password) In the POP3 Server Address text box, enter the POP3 server address in IP address format of "aaa.bbb.ccc.ddd"...
-
Page 367: Registering A New E-Mail Address To Address Book
Registering a New E-Mail Address to Address Book 1 From the Dell Printer Configuration Web Tool, click Address Book, and then click the E-Mail Address tab. 2 Click Create. The E-Mail Address page for registering a new e-mail address appears. - Page 368 NOTE: For more information on address book and server address book, see "Address Books." NOTE: For details about , see "Using the Server Address Book and Server Phone Book." Network Address Book NOTE: The e-mail addresses needs to be registered before you can select Address Book 4 Tap and specify scan settings such as Output Color, Resolution, File Format, 2-Sided...
-
Page 369: Faxing
You can specify the country, line type, tone/pulse, receive mode, DRPD pattern, fax header name, and fax number. 1 Insert the Software and Documentation disc provided with the printer in your computer. The Dell Printer Setup program launches automatically. 2 Click Configure Printer on the Dell Printer Setup window. -
Page 370: Setting Your Country
Setting Your Country 1 Press the (Information) button. 2 Tap the Tools tab, and then tap Admin Settings. 3 Tap Fax Settings. 4 Tap Fax Line Settings. 5 Tap Country. 6 Select the country where the printer is used, and then tap OK. The printer must be rebooted after you set the country settings. -
Page 371: Changing The Clock Mode
11 Tap – or + or enter the date using the number pad, and then tap OK. 12 Tap Time. 13 Enter the time using the number pad. 14 Tap OK. NOTE: The printer beeps and does not allow you to proceed to the next step if a wrong number is entered. Changing the Clock Mode You can set the current time using either the 12-hour or the 24-hour format. -
Page 372: Available Fax Settings Options
3 Tap Fax Settings. 4 Select the desired menu. 5 Select the desired setting or enter a value. To enter a value, tap – or +, or use the number pad or the keyboard. 6 Tap OK. If necessary , repeat steps 4 through 6. Available Fax Settings Options You can use the following settings options for configuring the fax system: Option... - Page 373 Option Description Incoming Receive Mode You can select the default fax receiving mode. Defaults • Telephone (manual receive mode): Automatic fax reception is turned off. You can receive a fax by picking up the handset of the external telephone and then pressing the remote receive code, or by tapping Manual Receive On Hook...
- Page 374 Option Description Sent Fax Forward You can set your printer to forward incoming faxes to another fax number, or forward them to an e-mail address. When a fax arrives at your printer, it is stored in the memory. Then, the printer dials the fax number you have specified in Forwarding Number or sends an e-mail to the address you have specified in...
- Page 375 Option Description Tone/Pulse You can select the dialing type. • Tone • Pulse(10PPS) • Pulse(20PPS) Prefix Dial You can specify whether or not to set a prefix dial number. When you set , the number set in Prefix Dial Prefix dials before any auto dial number is started.
-
Page 376: Advanced Fax Settings
10 Enter a prefix number using the number pad, and then tap OK. The characters you can use for a prefix number are 0–9, *, and #. The maximum number of characters for a prefix number is five. 11 Turn off the printer, and turn it on again to apply the settings. Advanced Fax Settings NOTE: The advanced fax settings are only meant for advanced users. -
Page 377: Sending A Fax
3 Tap button until FAX Test appears, and then tap OK. 4 When the message Check FAX Connection appears, tap OK. 5 When the message Ready to Start appears, tap OK to start diagnosing the FAX connection. One of the following diagnosing result is displayed. Diagnosing result Description The telephone line cord is not connected. -
Page 378: Adjusting The Document Resolution
To fax a document from the document glass: Open the document cover. 2 Place the document facing down on the document glass and align it with the registration guide on the top left corner of the glass. 3 Adjust the document resolution. (For details, see "Adjusting the Document Resolution.") 4 Close the document cover. -
Page 379: Adjusting The Document Contrast
3 Tap 4 Tap Resolution. 5 Tap the desired setting. Standard* Used for documents with normal sized characters. Fine Used for documents containing small characters or thin lines or documents printed using a dot-matrix printer. Super Fine Used for documents containing extremely fine detail. The super fine mode is enabled only if the remote machine also supports the Super Fine resolution. -
Page 380: Sending A Fax Manually
2 Press the (Home) button. 3 Tap Fax. 4 Adjust the document resolution to suit your fax needs. (For details, see "Adjusting the Document Resolution." For adjusting the contrast, see "Adjusting the Document Contrast.") 5 To select a fax number, do one of the followings : •... -
Page 381: Confirming Transmissions
NOTE: Tapping does not start sending a fax when the available time is set or the Fax function is locked. (For details, Send see "Set Available Time" for the Available time and "Function Enabled" for the Fax function.) Confirming Transmissions When the last page of your document has been sent successfully, the printer beeps and returns to the standby mode. -
Page 382: Sending A Fax From The Driver (Direct Fax)
Windows or "Installing the Drivers and Software" for Macintosh.) 1 Open the file you want to send by fax. 2 Open the print dialog box from the application, and then select Dell C2665dnf Color MFP Fax. 3 Click Preferences in Windows, or select FAX Setting in Macintosh. - Page 383 For Apple Macintosh: When the setting dialog box appears, specify the following settings. NOTE: The settings done here are only applied to a single fax job. For Microsoft Windows: For Apple Macintosh: Faxing...
- Page 384 a. Transmission image quality Purpose: To set the output quality. Values: Standard For documents with normal sized characters. High Quality* For documents containing small characters or thin lines or documents printed using a dot- matrix printer. Super-high image quality For documents containing extremely fine detail. The super fine mode is enabled only if the remote machine also supports Super Fine resolution.
- Page 385 Sender Name Purpose: To enter a sender’s name that will be printed on the fax cover page. The sender’s name can be up to 30 characters. If it exceeds 30 characters, only the first 30 characters will be printed. For Windows, click OK to close the Printing Preferences dialog box, and then click Print. For Macintosh, click Print.
-
Page 386: Receiving A Fax
• Look Up Phone Book: Displays a list of fax numbers that are saved in the file specified for My Phone Book file. • Look Up Device Data: Displays a list of fax numbers that are saved in the Phone Book on the Dell C2665dnf Color Laser Multifunction Printer. -
Page 387: Receiving A Fax Automatically In The Fax Mode
Receiving a Fax Automatically in the Fax Mode Your printer is preset to the Fax mode at the factory. If you receive a fax, the printer automatically goes into the fax mode after a specified period of time and receives the fax. -
Page 388: Receiving Faxes Using The Drpd
You can store up to 200 frequently dialed numbers in speed dial locations (001–200). When the speed dial job specified in the delayed fax or redial exists, you cannot change the speed dial number from the operator panel or Dell Printer Configuration Web Tool. Faxing... -
Page 389: Setting Speed Dial
Setting Speed Dial 1 Press the (Information) button. 2 Tap the Tools tab, and then tap Admin Settings. 3 Tap Phone Book. 4 Tap Individuals. 5 Tap until the desired speed dial number between 1 and 200 appears and then select that number. To jump to a specific speed dial number, enter the desired number and then # using the number pad. -
Page 390: Group Dialing
Group Dialing If you frequently send the same document to several destinations, you can create a group of these destinations and set them under a one-digit group dial location. This enables you to use a group dial number setting to send the same document to all the destinations in the group. -
Page 391: Sending A Fax Using Group Dial (Multi-Address Transmission)
11 Tap OK. To delete an existing group dial number, select the group dial number, and then tap Remove. If you want to edit another group dial number, repeat steps 5 to 11. Sending a Fax Using Group Dial (Multi-address Transmission) You can use group dialing for Broadcasting or Delayed transmissions. -
Page 392: Other Ways To Fax
Other Ways to Fax Using the Secure Receiving Mode You may need to prevent your received faxes from being accessed by unauthorized people. You can turn on the secure fax mode using the Secure Receive option to restrict printing out all of the received faxes when the printer is unattended. -
Page 393: Using An Answering Machine
Using an Answering Machine To the Printer Line Telephone Phone wall jack Answering Device You can connect a telephone answering device (TAD) directly to the back of your printer as shown above. • Set your printer to the Ans Machine/Fax and set Auto Receive Ans/Fax to specify the time for the TAD. -
Page 394: Changing Setting Options
Printing a Report The following reports may be useful when using fax: NOTE: For more information about other reports and how to print a report, see "Report / List." Speed Dial This list shows all the numbers currently stored in the memory of your printer as speed dial numbers. -
Page 395: Dell™ Document Hub
Registering the User and Signing In to the Dell Document Hub To use the Dell Document Hub, you need a user account registered to the printer, and sign in to the Dell Document Hub. -
Page 396: Signing In To The Dell Document Hub
NOTE: If all the tiles on the Dell Document Hub screen are pale and disabled when you sign in, you have not completed the necessary procedures to activate your account of the Dell Document Hub. Check the e-mail you received from the Dell Document Hub, and activate your account. -
Page 397: Searching For And Printing Files
This method is suitable when you want to search by the keywords, including the file name. NOTE: To search for files across multiple cloud services, you need to go to www.dell.com/dochub and connect the cloud services with the Dell Document Hub. 1 Tap the Search for Files tile in the Dell Document Hub screen. -
Page 398: Browsing And Printing Files
The status of the cloud services can be confirmed by an icon on the right side of the names of each cloud service. indicates that the cloud service is correctly associated with the Dell Document Hub. indicates that the cloud service is not associated, or not linked correctly. -
Page 399: Searching For The Files In The Selected Cloud Service
Once you save your settings as a favorite in the Favorites screen, you can recall those settings the next time you sign in to the Dell Document Hub from any printers of the same model. 8 Tap Print to start printing. -
Page 400: Searching For The Location Across The Cloud Services
Once you save your settings as a favorite in the Favorites screen, you can recall those settings the next time you sign in to the Dell Document Hub from any printers of the same model. 8 Tap Scan to start scanning. -
Page 401: Scanning The Document Using Optical Character Recognition (Ocr)
Scanning the Document Using Optical Character Recognition (OCR) You can scan the document using OCR, and save it in the cloud service. Tap the Smart OCR Scan tile in the Dell Document Hub screen. The Cloud Services screen is displayed. -
Page 402: Receiving The Scanned File As An E-Mail
Receiving the Scanned File as an E-Mail The document can be scanned and sent to you as an attached file of an e-mail. Tap the E-mail Me tile in the Dell Document Hub screen. The E-mail Me screen is displayed. -
Page 403: Receiving The Scanned Image Of The Business Card As An E-Mail
The business card can be scanned and converted to the vCard file, and sent to you as an attached file of an e-mail. Tap the Business Card Reader tile in the Dell Document Hub screen. The Business Card Reader screen is displayed. - Page 404 Dell™ Document Hub...
-
Page 405: Know Your Printer
Know Your Printer 24 Understanding Your Printer Software ........405 25 User Authentication..............423 26 Multiple Desktop - Tile Customization ........427 27 Using the Server Address Book and Server Phone Book ... 429 28 Using Digital Certificates ............433 29 Understanding Fonts .............. - Page 406 404...
-
Page 407: Understanding Your Printer Software
Dell™ Supplies Management System You can launch the Dell Supplies Management System dialog box from the All Programs menu or the desktop icon. You can order consumables by phone or from the web. 1 Click Start→ All Programs→ Dell Printers→ Additional Color Laser Software→ Dell Supplies Management System. -
Page 408: Printer Utility Software
Quick Launch Utility is only supported on Microsoft Windows To use the Quick Launch Utility, select to install the Quick Launch Utility when you install the Dell software. To install the Dell software, follow the instructions below. Software and Documentation 1 Insert the disc into your computer and click setup_assist.exe to start Dell Printer... -
Page 409: Address Books
To exit the Quick Launch Utility window: Click the Close (x) button at the top-right of the window. For details, click Help of each application. Status Window The Status Window button opens the Printer Status window. For more information about using Status Window, refer to "Printer Status Window."... -
Page 410: Adding And Editing Entries To The Address Books
Adding and Editing Entries to the Address Books There are following three ways to add or edit entries to the address books: • Operator panel of the printer • Address Book Editor • Dell Printer Configuration Web Tool Functions Features Types of Address Books... - Page 411 With Address Book Editor, you can: • Automatically retrieves data from the address books of your printer at startup • Synchronizes with the printer • Allows you to import the Address Book data from CSV file, WAB file, MAPI, and LDAP server •...
-
Page 412: App Manager
Do not turn off the printer or the computer while backing up or restoring data. NOTE: The App Manager - Dell C2665dnf can back up the data of 10 printers. For each printer, up to five backup history can be cached. -
Page 413: Preparing To Use The App Manager - Dell C2665Dnf
The time it takes to send and create backup files may take longer depending on the data size. NOTE: The features of the App Manager - Dell C2665dnf may not be used when the printer has an error. If the App Manager - Dell C2665dnf does not respond, check and clear the status of the printer. -
Page 414: Installing The Status Monitor Widget
Status Monitor Widget.) Installing the Status Monitor Widget 1 Double-click the Dell C2665 Installer icon in the Finder window. 2 Follow the on-screen instructions. When the Install Succeeded screen appears, the installation is complete. -
Page 415: Printer Status Window
Printer Status Window When the Status Monitor Widget is activated, the Printer Status window appears on Dashboard. Printer Status Message Area Displays a message of the current printer status. NOTE: The Status Monitor Widget automatically obtains the printer information at the updated interval that can be specified in Preferences. -
Page 416: Order Window
The Order window appears when low toner is detected. Order Online • Visit Dell printer supplies ordering web site hyperlink Click the Visit Dell printer supplies ordering web site hyperlink to access the web site for ordering Dell printer supplies. • URL list Displays a list of available URLs where you can order Dell printer supplies. -
Page 417: Preferences
Linux and the printer. Status Monitor Console Feature • Monitoring Dell Printers Allows you to check the status of Dell printers currently connected to your Linux. • Receiving Alerts Alerts you to problems, such as paper jams or low toner. -
Page 418: Before Installing The Status Monitor Console
2 Select your printer. The Printer Status window appears. For more information on Printer Status window, see "Printer Status Window." • You can order supplies from the Dell Supplies Management System window. See "Dell Supplies Management System Window." Understanding Your Printer Software... -
Page 419: Printer Selection Window
Click this button to open the Settings window. Details button Click this button to open the Printer Status window. If a non-supported printer is selected, it opens the Dell Printer Configuration Web Tool. For details on the Dell Printer Configuration Web Tool, see "Dell™ Printer Configuration Web Tool."... -
Page 420: Printer Status Window
Displays an alert message when any remaining toner is low, empty, or unknown. Order Online • Order Supplies Online button Click this button to access the web site for ordering Dell printer supplies. This button appears when the amount of toners becomes less than 30%. Refresh button Click this button to update the status of the printer. -
Page 421: Dell Supplies Management System Window
Click this button to open the procurement and support web site. • Select Reorder URL Displays a list of available URLs where you can order Dell printer supplies. Select a URL address to use when the Order Supplies Online button is clicked. -
Page 422: Service Tag Window
Dell and the Environment Click the hyperlink to access the web site about recycling. Close button Click this button to close the Dell Supplies Management System window. Service Tag Window 1 Enter the Dell printer service tag. NOTE: For information on the service tag, see "Express Service Code and Service Tag."... - Page 423 Enter the Community name of SNMP in the Community Name text box. Order URL • Select Reorder URL The selected URL address is set as default web site for the Select Reorder URL in the Dell Supplies Management System window. Understanding Your Printer Software...
- Page 424 Understanding Your Printer Software...
-
Page 425: User Authentication
User Authentication Using the user authentication function, it is possible to create and manage up to 18 user accounts secured with a password. Each user of the accounts can customize the home screen and save the changes. It is also possible to associate NFC (Near Field Communication) capable ID Cards to an user account. When the ID card is associated with a user account, you can login to that user account by waving the ID card over the NFC reader. -
Page 426: Editing The User Account
6 Enter the account password and NFC ID. NOTES: When there is a check mark in the check box, the printer always displays the Home screen of the • Initial Login account when you turn on the printer. If no account is specified as , the portal screen is displayed Initial Login when you turn on the printer. -
Page 427: Logging In Using The Nfc Authentication Card
Logging In Using the NFC Authentication Card To use the NFC authentication card, the following settings are needed: • Enable the NFC authentication function in Secure Settings of the operator panel. (See "NFC Authentication") • Register your user account to the printer so that you can log in with your NFC Authentication card. (See "Creating a New User Account") 1 Turn on the printer and wait until the portal screen is displayed. - Page 428 User Authentication...
-
Page 429: Multiple Desktop - Tile Customization
The Home screen is like a desktop of your computer and customizable to suit your preference or work style. For example, you can gather only the tiles you often use, or rearrange the tiles so that you can easily access the tiles you often use. Home Guest Dell Document Scan to E Copy mail... - Page 430 2 Tap the setting tiles to change the copy options as needed. For more information, see "Setting Copy Options." 3 After setting all the necessary copy options, tap The Save Settings screen is displayed. 4 Tap the text box to name your settings. 5 Tap the color tile to select the color of your custom tile.
-
Page 431: Using The Server Address Book And Server Phone Book
Starting the Dell Printer Configuration Web Tool To launch the Dell Printer Configuration Web Tool, enter the IP address of your printer in your web browser. If you do not know the IP address of your printer, print the system settings report or display the TCP/IP Settings page, which lists the IP address. -
Page 432: Setting Ldap Server
Click Restart Printer. Setting LDAP Server NOTE: When SSL/TLS communication is required to access the LDAP server, enter a check in the Enable check box for LDAP SSL/TLS Communication in SSL/TLS under the Security tab. For more information, see "SSL/TLS." Select Print Server Settings, click the Security tab, and then select LDAP Server. -
Page 433: Setting Ldap User Mapping
For details on configuring each item, consult your network administrator. In the Search Directory Root text box, enter the search directory root. In Login Credentials to Access LDAP Server, select credential used to access the LDAP server. In the Login Name text box, enter the login name. In the Password text box, enter the login password using 1 to 127 alphanumeric characters. -
Page 434: Sending A Fax Using The Fax Server Phone Book
Sending an E-mail With the Scanned File Using the E-mail Server Address Book 1 Press the (Home) button. 2 Tap Scan to E-mail. 3 Tap Address Book. 4 Tap Network Address Book. 5 Enter a keyword using the keyboard, and then tap Search. 6 Tap a recipient from the search result, and then tap Done. -
Page 435: Using Digital Certificates
"Setting HTTPS Communication" Setting HTTPS Communication Before managing certificates, set HTTPS communication with a self-signed certificate. When Using the Dell Printer Configuration Web Tool Launch Dell Printer Configuration Web Tool. Open the web browser. Enter the IP address of your printer in the web browser. -
Page 436: Importing A Digital Certificate
NOTE: After importing a PKCS#12 format certificate, the secret key is not exported even if you execute exporting. 1 Launch Dell Printer Configuration Web Tool. Open the web browser. Enter the IP address of your printer in the web browser. -
Page 437: Confirming The Settings Of A Digital Certificate
NOTE: To manage digital certificates, you must set up HTTPS communication. For details, see "Preparing to Manage Certificates." 1 Launch Dell Printer Configuration Web Tool. Open the web browser. Enter the IP address of your printer in the web browser. -
Page 438: Exporting A Digital Certificate
Since the secret key is not exported, an imported PKCS#12 format certificate can be exported only as a PKCS#7 certificate. 1 Launch Dell Printer Configuration Web Tool. Open the web browser. Enter the IP address of your printer in the web browser. -
Page 439: Setting The Features
Setting the Features You can set various security features using digital certificates. See the following for details: • "Setting the Certificate in the IPsec Digital Signature Mode" • "Setting the SSL-use Server Certificate (HTTP/IPP)" • "Setting LDAP-SSL/TLS Communication" • "Setting Server Certificate Verification for LDAP-SSL/TLS Communication" • "Setting Client Certificate for LDAP-SSL/TLS Communication"... -
Page 440: Setting Ldap-Ssl/Tls Communication
Setting LDAP-SSL/TLS Communication 1 Select Print Server Settings from the left side of the page. 2 Click the Security tab. 3 Select SSL/TLS. 4 Select the Enable check box for LDAP-SSL/TLS Communication. 5 Click Apply New Settings. 6 After restarting the printer, LDAP-SSL/TLS Communication is enabled. NOTE: When executing the certificate validity of the server and the presentation of the client certificate, see "Setting Server Certificate Verification for LDAP-SSL/TLS Communication"... -
Page 441: Setting For Wireless Lan Wpa-Enterprise (Eap-Tls)
1 Import the certificate to be used with Wireless LAN (server or root certificate). For details, see "Importing a Digital Certificate." 2 Set the digital certificate for wireless LAN (server or root certificate). Launch Dell Printer Configuration Web Tool. Select Print Server Settings. Click the Security tab. -
Page 442: Setting For Wireless Lan Wpa-Enterprise (Peapv0-Ms-Chapv2, Eap-Ttls Pap Eap-Ttls Chap)
7 Set WPA-Enterprise for EAP-TLS. Launch Dell Printer Configuration Web Tool. Click the Print Server Settings tab. Select Wireless LAN. NOTE: This setting is available only when the optional wireless adapter is installed. Select either of the following from the Encryption list of Secure Settings. -
Page 443: Setting Client Certificate For Ieee 802.1X (Eap-Tls)
The certificate displayed with an asterisk as "*Valid" in the Validity column is the certificate associated with the use purpose and actually used. 4 Set WPA-Enterprise for PEAPV0-MS-CHAPV2, EAP-TTLS PAP, or EAP-TTLS CHAP. Launch Dell Printer Configuration Web Tool. Click the Print Server Settings tab. Select Wireless LAN. - Page 444 Using Digital Certificates...
-
Page 445: Understanding Fonts
Understanding Fonts Typefaces and Fonts typeface A font is a set of characters and symbols created with a distinct design. The distinct design is called a . The typefaces you select add personality to a document. Well-chosen typefaces make a document easier to read. The printer has numerous resident fonts in PCL 5/PCL 6 and PostScript Level3 Compatible. -
Page 446: Bitmapped And Scalable Fonts
proportional typographic ) fonts, every character can have a different width. Since proportional fonts have Point size characters with different widths, the font size is specified in point size, not pitch. refers to the height of point the characters in the font. A is defined as 1/72 inch. -
Page 447: Resident Fonts
These temporary bitmapped fonts are deleted when you turn off or reset the printer. Scalable fonts provide the flexibility of printing in many different point sizes. Your printer uses different scalable font formats for downloading fonts to the printer. PCL 5/PCL 6 uses Intellifont and TrueType scalable fonts. - Page 448 Resident bitmapped and scalable fonts PCL 5/PCL 6 PostScript Level3 Compatible CG Omega CG Omega CG Omega It CG Omega Italic CG Omega Bd CG Omega Bold CG Omega BdIt CG Omega Bold Italic Garamond Antiqua Garamond Antiqua Garamond Krsv Garamond Kursiv Garamond Hlb Garamond Halbfett...
- Page 449 Resident bitmapped and scalable fonts PCL 5/PCL 6 PostScript Level3 Compatible Wingdings Wingdings Line Printer Times Roman Times-Roman Times It Times-Italic Times Bd Times-Bold Times BdIt Times-BoldItalic Helvetica Helvetica Helvetica Ob Helvetica-Oblique Helvetica Bd Helvetica-Bold Helvetica BdOb Helvetica-BoldOblique CourierPS Courier CourierPS Ob Courier Oblique CourierPS Bd...
-
Page 450: Symbol Sets
Resident bitmapped and scalable fonts PCL 5/PCL 6 PostScript Level3 Compatible ITC A G Go Bk AvantGarde-GothicBook ITC A G Go BkOb AvantGarde-GothicBookOblique ITC A G Go Dm AvantGarde-GothicDemi ITC A G Go DmOb AvantGarde-GothicDemiOblique ZapfC MdIt ZapfChancery-MediumItalic ZapfDingbats ZapfDingbats Symbol Sets A symbol set is the collection of alphabetic and numeric characters, punctuation, and special characters available in the font you select. -
Page 451: Error Codes
Understanding Printer Messages The touch panel displays error messages describing the current state of the printer and indicates possible printer problems you must resolve. This chapter provides a list of error codes or error messages, and informs you what you can do to clear error messages. - Page 452 IPsec certificate error. (Certificate error of the printer.) The certificate of the printer is invalid. Contact your system administrator. Reset the certificate from other connectable clients with Dell™ Printer Configuration Web Tool. If no device can be connected, disconnect Ethernet cable, turn off the IPsec, and then reset the certificate with Dell Printer Configuration Web Tool.
- Page 453 Error-Code What you can do 016-756 Printing in the prohibited time. Contact your system administrator. 016-757 The account is not registered. Contact your system administrator. 016-758 The function cannot be used. Contact your system administrator. 016-759 Printable page limit is exceeded. Contact your system administrator. 016-764 An error occurs when the printer connected to the SMTP server.
- Page 454 Error-Code What you can do 031-524 Exceeded the SMB server user account limit. Tap Close , or wait for 60 seconds for the printer to recover. Check the number of users who use the server at the same time is not exceeding the upper limit. 031-525 SMB destination client permission error.
- Page 455 Error-Code What you can do 031-541 Invalid user name specified for SMB server. Tap Close , or wait for 60 seconds for the printer to recover. Check if login name (user name) is correct. 031-542 TCP/IP not initialized. Tap Close , or wait for 60 seconds for the printer to recover.
- Page 456 Error-Code What you can do 031-584 Unable to create a scan folder on the FTP server. Tap Close , or wait for 60 seconds for the printer to recover. Check if the folder name you specified can be created in storage location. Check if the folder that has the same name as the one you specified already exists.
- Page 457 Error-Code What you can do 034-791 Close , or wait for 60 seconds for the printer to recover. Check if the telephone line cord is connected properly. If the line connection is correct, check the following: • If Tone/Pulse setting is correct. For more information about Tone/Pulse setting, see "Tone / Pulse."...
- Page 458 Error-Code What you can do 091-932 Remove the used yellow drum cartridge, and install a new cartridge. For more information about replacing the drum cartridge, see "Replacing the Drum Cartridges." 091-933 Remove the used magenta drum cartridge, and install a new cartridge. For more information about replacing the drum cartridge, see "Replacing the Drum Cartridges."...
-
Page 459: Error Messages
Check the WSD scan address and the destination computer, and then try scanning again. Contact your system administrator. 193-700 When genuine toner cartridges are installed, change the Non-Dell Toner setting to disable using the Dell Printer Configuration Web Tool or the Tool Box. Error Messages... - Page 460 Change the server settings and The printer cannot search for destinations confirm the server connection. within the specified time. Out on the Dell Printer Configuration Web Tool. (See "Authentication System" and "LDAP Server.") Check that the printer and the server are properly connected with an Ethernet cable.
-
Page 461: Specifications
Specifications Operating System Compatibility ® ® Your Dell™ C2665dnf Color Laser Multifunction Printer is compatible with Microsoft Windows XP , Windows XP ® 64-bit Edition, Windows Server 2003, Windows Server 2003 x64 Edition, Windows Server 2008, Windows Server ® 2008 64-bit Edition, Windows Server 2008 R2, Windows Vista... -
Page 462: Mib Compatibility
This information helps network administrators manage the network (analyze performance, traffic, errors, and so on). Dell C2665dnf Color Laser Multifunction Printer complies with standard industry MIB specifications, allowing the printer to be recognized and managed by various printer and network management software systems. -
Page 463: Print Specifications
Connection type Connection specifications and symbols Wall jack connector Print Specifications Item Description Print resolution 600 dpi x 600 dpi Print speed Simplex: Color 27 ppm, Black & White 27ppm (A4) Duplex: Color 18 ppm, Black & White 18ppm (A4) Paper size A4, B5, A5, Letter, Executive, Folio (8.5"... -
Page 464: Scanner Specifications
Item Description Copy mode (=Original type) Text, Text & Photo, Photo Scanning method Document glass: Document-fixed flatbed scanning DADF: Carriage-fixed, document-feeding scanning (2- side scanning) Scanner Specifications Item Description Compatibility TWAIN, TWAIN-Net, Windows Image Acquisition (WIA) Scan Service for Web Services on Devices (WSD) Scan resolution Optical: 600 dpi x 300 dpi (Color only), 600 dpi x 400 dpi, 600 dpi x 600 dpi, 1,200 dpi x 1,200 dpi... -
Page 465: Optional Wireless Adapter
Item Description User memory 4 MB (320 pages) Halftone 256 levels Optional Wireless Adapter Item Description Connectivity technology Wireless Compliant standards IEEE 802.11b, 802.11g, and 802.11n Bandwidth 2.4 GHz Data transfer rate IEEE 802.11n: 65 Mbps IEEE 802.11g: 54, 48, 36, 24, 18, 12, 9, and 6 Mbps IEEE 802.11b: 11, 5.5, 2, and 1 Mbps Security 64 (40-bit key)/128 (104-bit key) WEP ,... - Page 466 464 Specifications...
-
Page 467: Maintaining Your Printer
Maintaining Your Printer 32 Maintaining Your Printer ............467 33 Removing Options ..............507 34 Clearing Jams................513... - Page 468 466...
-
Page 469: Determining The Status Of Supplies
You can order consumables (toner cartridges, drum cartridges, and waste toner box) from Dell on the Internet when using a networked printer. Type the IP address of your printer in your web browser, launch the Dell Printer Configuration Web Tool, and click the Order Supplies at: to order consumables for your printer. -
Page 470: Storing Consumables
Storing Print Media To avoid potential paper feeding problems and uneven print quality, there are several things you can do: • To achieve the best possible print quality, store print media in an environment where the temperature is approximately 21 °C (70 °F) and the relative humidity is 40 %. • Store cartons of print media on a pallet or shelf, rather than directly on the floor. -
Page 471: Replacing The Toner Cartridges
To order by phone, see "Contacting Dell." It is recommended to use Dell toner cartridges for your printer. Dell does not provide warranty coverage for problems caused by using accessories, parts, or components not supplied by Dell. -
Page 472: Installing A Toner Cartridge
Installing a Toner Cartridge 1 Unpack a new toner cartridge of the desired color. 2 Shake the new toner cartridge five or six times to distribute the toner evenly. 3 Insert the toner cartridge into the associated cartridge slot, and then push until it stops. 4 Close the front cover. -
Page 473: Replacing The Drum Cartridges
Replacing the Drum Cartridges You need to replace all drum cartridges (yellow, magenta, cyan, and black) at a time. WARNING: Important Before performing any of the following procedures, read and follow the safety instructions in the Information CAUTION: Protect the drum cartridges against bright light. If the right side cover remains open for more than three minutes, print quality may deteriorate. - Page 474 Grasp the handle on the waste toner box and pull it out making sure to hold it upright so that the waste toner does not spill out. CAUTION: Take care not to drop the waste toner box while you are removing it. CAUTION: After removing the waste toner box, do not touch the parts shown in the illustration.
-
Page 475: Installing A Drum Cartridge
5 Slightly pressing down the tab on the drum cartridge that you want to replace, pull it out halfway with one hand. 6 Support the drum cartridge with the other hand from underneath, and then pull it out completely. 7 Repeat the steps 5 and 6 to remove the other three cartridges. Installing a Drum Cartridge 1 Unpack a new drum cartridge of the desired color. - Page 476 3 Insert the drum cartridge into the associated cartridge slot, and then push until it stops. 4 Repeat the steps 1 to 3 to insert the other three cartridges. 5 Remove the cleaning rod from inside the printer. 6 Remove the cleaning pad by pressing the white tabs between your thumb and index finger. 7 Unpack a new cleaning pad.
- Page 477 8 Attach the new cleaning pad to the cleaning rod. 9 Insert the cleaning rod fully into one of the four holes until it clicks into the interior of the printer as illustrated below, and then pull it out. 10 Repeat step 9 also on the other three holes. One time insertion is enough for each hole. 11 Return the cleaning rod to its original location.
- Page 478 12 Reinsert the removed waste toner box. CAUTION: If the waste toner box does not fit into place properly, make sure that the drum cartridge is fully inserted in the previous step. 13 Turn the waste toner box lock lever 90-degrees clockwise to lock the waste toner box. 14 Close the right side cover.
-
Page 479: Replacing The Fusing Unit
Replacing the Fusing Unit WARNING: Important Before performing any of the following procedures, read and follow the safety instructions in the Information Removing the Fusing Unit 1 Turn off the printer and wait for 30 minutes. 2 Push down the latch to open the rear cover. 3 Grasp the grips on both sides of the fusing unit squeezing the lever under the left side grip, and then pull out the unit. -
Page 480: Installing A Fusing Unit
Installing a Fusing Unit 1 Unpack a new fusing unit. 2 Make sure that the two tabs of the fusing unit align with the grooves on the printer, and then insert it into the printer until it clicks. Close the rear cover. NOTE: After replacing the fusing unit, be sure to initialize its life counter by following the instructions in the accompanying manual. -
Page 481: Replacing The Transfer Belt Unit, The 2Nd Belt Transfer Roller (2Nd Btr), And The Retard Roller
Replacing the Transfer Belt Unit, the 2nd Belt Transfer Roller (2nd BTR), and the Retard Roller You need to replace all three parts (transfer belt unit, 2nd BTR, and retard roller) at a time. Both the 2nd BTR and the retard roller for replacement come with a new transfer belt unit. WARNING: Important Before performing any of the following procedures, read and follow the safety instructions in the... - Page 482 Turn the waste toner box lock lever 90-degrees counterclockwise to unlock the waste toner box. Grasp the handle on the waste toner box and pull it out making sure to hold it upright so that the waste toner does not spill out. CAUTION: Take care not to drop the waste toner box while you are removing it.
- Page 483 5 Stand the removed waste toner box upright on a level surface. WARNING: Never lay the waste toner box on its side as this may cause its malfunction or toner spills. 6 Lift the operator panel. 7 Open the top cover. Maintaining Your Printer...
-
Page 484: Installing A Transfer Belt Unit
8 Put your fingers through the loops on both sides of the transfer belt unit, and then pull it out. CAUTION: If you cannot pull out the unit from the printer, make sure that all of the above procedures are performed properly. - Page 485 3 Make sure that the arrow marks on the transfer belt unit and the printer face each other, and then insert the unit into the printer until it clicks. 4 Close the top cover. 5 Lower the operator panel back in place. Maintaining Your Printer...
- Page 486 6 Reinsert the removed waste toner box. CAUTION: If the waste toner box does not fit into place properly, make sure that the transfer belt unit is fully inserted. 7 Turn the waste toner box lock lever 90-degrees clockwise to lock the waste toner box. 8 Close the right side cover.
-
Page 487: Removing The 2Nd Btr
Removing the 2nd BTR Pinching the tabs on both sides of the 2nd BTR, lift it out of the printer. Installing a 2nd BTR 1 Unpack a new 2nd BTR. 2 Hold the 2nd BTR by both its ends. 3 Make sure that the arrow marks on the 2nd BTR and the printer face each other, and then press down the 2nd BTR until it clicks. -
Page 488: Removing The Retard Roller In Tray1
4 Close the rear cover. Removing the Retard Roller in Tray1 1 Pull tray1 out of the printer about 200 mm. 2 Hold tray1 with both hands, and remove it from the printer. NOTE: Ensure that you remove all the paper from tray1 before removing the retard roller. Maintaining Your Printer... -
Page 489: Installing A Retard Roller In Tray1
Slightly pressing down the lock lever on tray1 to the right with one hand, raise the retard roller with the other hand. Slide the retard roller to the left to remove it from tray1. Installing a Retard Roller in Tray1 1 Slide the two axles of the retard roller into the holes on tray1. -
Page 490: Replacing The Waste Toner Box
3 Load paper in tray1, and then insert the tray into the printer and push until it stops. Replacing the Waste Toner Box WARNING: Important Before performing any of the following procedures, read and follow the safety instructions in the Information Removing the Waste Toner Box 1 Open the right side cover. -
Page 491: Installing A Waste Toner Box
3 Grasp the handle on the waste toner box and pull it out making sure to hold it upright so that the waste toner does not spill out. CAUTION: Take care not to drop the waste toner box while you are removing it. CAUTION: After removing the waste toner box, do not touch the parts shown in the illustration. - Page 492 Turn the waste toner box lock lever 90-degrees clockwise to lock the waste toner box. Close the right side cover. Maintaining Your Printer...
-
Page 493: Cleaning Inside The Printer
Cleaning Inside the Printer Cleaning the CTD Sensor Clean the Color Toner Density (CTD) sensor only when an alert for the CTD sensor is shown on the Status Monitor or touch panel screen. 1 Ensure that the printer is turned off. 2 Push down the latch to open the rear cover. - Page 494 Grasp the handle on the waste toner box and pull it out making sure to hold it upright so that the waste toner does not spill out. CAUTION: Take care not to drop the waste toner box while you are removing it. CAUTION: After removing the waste toner box, do not touch the parts shown in the illustration.
- Page 495 7 Lift the operator panel. 8 Open the top cover. 9 Put your fingers through the loops on both sides of the transfer belt unit, and then pull it out. Maintaining Your Printer...
- Page 496 10 Clean the CTD sensor (as shown) with a clean, dry cotton swab. 11 Make sure that the arrow marks on the transfer belt unit and the printer face each other, and then insert the unit into the printer until it clicks. 12 Close the top cover.
- Page 497 13 Lower the operator panel back in place. 14 Reinsert the removed waste toner box. CAUTION: If the waste toner box does not fit into place properly, make sure that the transfer belt unit is fully inserted. 15 Turn the waste toner box lock lever 90-degrees clockwise to lock the waste toner box. Maintaining Your Printer...
-
Page 498: Cleaning The Raster Optical Scanner (Ros) Window
16 Close the right side cover. 17 Close the rear cover. Cleaning the Raster Optical Scanner (ROS) Window To prevent deterioration of printing quality due to stains inside the printer, clean inside the printer regularly by using the cleaning rod whenever you replace drum cartridges. 1 Open the right side cover. - Page 499 Turn the waste toner box lock lever 90-degrees counterclockwise to unlock the waste toner box. Grasp the handle on the waste toner box and pull it out making sure to hold it upright so that the waste toner does not spill out. CAUTION: Take care not to drop the waste toner box while you are removing it.
- Page 500 4 Stand the removed waste toner box upright on a level surface. WARNING: Never lay the waste toner box on its side as this may cause its malfunction or toner spills. 5 Remove the cleaning rod from inside the printer. 6 Insert the cleaning rod fully into one of the four holes until it clicks into the interior of the printer as illustrated below, and then pull it out.
- Page 501 8 Return the cleaning rod to its original location. 9 Reinsert the removed waste toner box. 10 Turn the waste toner box lock lever 90-degrees clockwise to lock the waste toner box. Maintaining Your Printer...
-
Page 502: Cleaning The Scanner
11 Close the right side cover. Cleaning the Scanner Keeping the scanner clean helps ensure the best possible copies. It is recommended to clean the scanner at the start of each day and during the day, as needed. 1 Slightly dampen a soft lint-free cloth or paper towel with water. 2 Open the document cover. - Page 503 Wipe the surface of the document glass and DADF glass until it is clean and dry. White Sheet NOTE: Handle with care. White Document Cover Document Glass DADF Glass 4 Wipe the underside of the white document cover and white sheet until it is clean and dry. 5 Close the document cover.
-
Page 504: Cleaning The Dadf Feed Roller
Cleaning the DADF Feed Roller Keeping the DADF feed roller clean helps ensure the best possible copies. It is recommended to clean the DADF feed roller at regular intervals. Open the DADF cover. Wipe the DADF feed roller with a dry soft lint-free cloth or paper towel until it is clean. If the DADF feed roller gets soiled with ink stains, paper from the DADF may also be soiled. -
Page 505: Determining Values
5 Tap Color Regi Chart. 6 Tap Print. The color registration chart is printed. When Using the Tool Box 1 Click Start All Programs Dell Printers Dell C2665dnf Color Laser Multifunction Printer Tool Box. → → → → NOTE: For details about starting the Tool Box, see "Starting the Tool Box."... - Page 506 Fast Scan On the Chart 1 of the color registration chart, find the straightest lines where the two black lines and the colored line are most closely aligned for each color (LY, LM, LC, RY, RM, and RC). If you find the straightest line, make a note of the value (-8 +8) indicated by the straightest line for each color.
-
Page 507: Entering Values
1 Click Start → All Programs → Dell Printers → Dell C2665dnf Color Laser Multifunction Printer → Tool Box. NOTE: For details about starting the Tool Box, see "Starting the Tool Box." The Tool Box opens. 2 Click the Printer Maintenance tab. - Page 508 Maintaining Your Printer...
-
Page 509: Removing Options
Removing Options If the printer location needs to change or the printer and print media handling options need to be shipped to a new location, all print media handling options must be removed from the printer. For shipping, pack the printer and print media handling options securely to avoid damage. - Page 510 Remove the two screws joining the printer and the optional 550-sheet feeder by unscrewing them with a coin or similar object. Gently lift the printer off the optional 550-sheet feeder, and place it on a level surface. WARNING: Two people are required to lift the printer. Removing Options...
- Page 511 Insert the tray1 into the printer, and push until it stops. CAUTION: Do not use excessive force on the tray. Doing so could damage the tray or the inside of the printer. Re-connect all cables into the back of the printer and turn on the printer. Removing Options...
-
Page 512: Removing The Optional Wireless Adapter
Removing the Optional Wireless Adapter WARNING: When you remove the optional wireless adapter, be sure to turn off the printer, unplug the power cable, and disconnect all cables from the back of the printer before starting these tasks. 1 Ensure that the printer is turned off. 2 Turn the screw on the left side cover counterclockwise to remove it. - Page 513 5 Remove the wireless adapter from the printer by releasing the adapter's hook while pushing the wireless adapter towards the front of the printer. 6 Close the left side cover, and then slide it towards the front of the printer. 7 Turn the screw clockwise.
- Page 514 512 Removing Options...
-
Page 515: Clearing Jams
Clearing Jams Careful selection of appropriate print media and proper loading allow you to avoid paper jams. See "Print Media Guidelines" for more information. NOTE: Before buying large quantities of any print media, it is recommended to try a sample first. Avoiding Jams • Use only recommended print media. -
Page 516: Identifying The Location Of Paper Jams
Identifying the Location of Paper Jams WARNING: Do not attempt to clear any jams using tools or instruments. This may permanently damage the printer. The following illustration shows where paper jams may occur along the print media path. Duplex Automatic Document Feeder (DADF) Fusing Unit Tray1 Optional 550-Sheet Feeder... -
Page 517: Clearing Paper Jams From The Dadf
Clearing Paper Jams From the DADF When a document jams while it passes through the DADF, remove the jam according to the following procedure. NOTE: To prevent document jams, use the document glass for thick, thin, or mixed documents. 1 Remove the remaining documents from the DADF. If the document is jammed in the paper feed area: Open the DADF cover. - Page 518 Remove the DADF feed roller assembly and remove the document by gently pulling it straight up. Insert the DADF feed roller assembly and press down the release lever. If the document is jammed in the paper exit area: Remove the jammed document from the document output tray. Clearing Jams...
-
Page 519: Clearing Paper Jams From The Mpf
Close the DADF cover, and then load the documents back into the DADF. NOTE: Ensure that you adjust the document guides before printing a Legal-size document. 2 If you cannot see the jammed document or the jammed document do not move when you pulled, open the document cover. - Page 520 2 Grasp both sides of the MPF, and then pull it out of the printer. 3 Pull tray1 out of the printer about 200 mm. 4 Hold tray1 with both hands, and remove it from the printer. Clearing Jams...
-
Page 521: If Error Code: 050-129 Appears
5 Remove the jammed paper. 6 Insert tray1 into the printer, and push until it stops. 7 Insert the MPF into the printer. If error code: 050-129 appears: Follow the instructions in "If error code: 050-129 appears:" to clear paper jams. Clearing Jams... -
Page 522: Clearing Paper Jams From Tray1
Clearing Paper Jams From Tray1 NOTE: To resolve the error displayed on the touch panel, you must clear all print media from the print media path. Pull tray1 out of the printer about 200 mm. 2 Hold tray1 with both hands, and remove it from the printer. 3 Remove the jammed paper. -
Page 523: Clearing Paper Jams From The Fusing Unit
4 Insert tray1 into the printer, and push until it stops. 5 Tap Start. Clearing Paper Jams From the Fusing Unit NOTE: To resolve the error displayed on the touch panel, you must clear all print media from the print media path. If error code: 050-111 appears: 1 Push down the latch to open the rear cover. - Page 524 3 Hold and lower the tab to open the inner part. 4 Remove the jammed paper. 5 Replace the inner part. 6 Press down the levers on both sides of the fusing unit, and then close the rear cover. Clearing Jams...
-
Page 525: If Error Code: 050-129 Appears
If error code: 050-129 appears: Remove any paper loaded on the MPF 2 Grasp both sides of the MPF and then pull it out of the printer. 3 Pull tray1 out of the printer about 200 mm. Clearing Jams... - Page 526 4 Hold tray1 with both hands, and remove it from the printer. If you can see the jammed paper: Remove the jammed paper. Reinsert tray1 and the MPF into the printer. If you cannot see the jammed paper: Go to the next step. Clearing Jams...
- Page 527 5 Push down the latch to open the rear cover. 6 Lift the levers on both sides of the fusing unit. 7 Hold and lower the tab to open the inner part. Clearing Jams...
- Page 528 8 Remove the jammed paper. 9 Replace the inner part. 10 Press down the levers on both sides of the fusing unit, and then close the rear cover. Clearing Jams...
-
Page 529: Clearing Paper Jams From The Optional 550-Sheet Feeder
11 Insert tray1 into the printer, and push until it stops. 12 Insert the MPF into the printer. Clearing Paper Jams From the Optional 550-Sheet Feeder NOTE: To resolve the error displayed on the touch panel, you must clear all print media from the print media path. 1 Pull the optional 550-sheet feeder out of the printer about 200 mm. - Page 530 2 Hold the optional 550-sheet feeder with both hands, and remove it from the printer. 3 Remove the jammed paper. 4 Insert the optional 550-sheet feeder into the printer, and push until it stops. Clearing Jams...
-
Page 531: Troubleshooting
Troubleshooting 35 Troubleshooting Guide ............. 531... - Page 532 530...
-
Page 533: Troubleshooting Guide
Troubleshooting Guide Basic Printer Problems Some printer problems can be easily resolved. If a problem occurs with your printer, check each of the following: • The power cable is plugged into the printer and a properly grounded electrical outlet. • The printer is turned on. -
Page 534: Print Quality Problems
NOTE: Some of the following procedures that use the Tool Box can also be performed using the operator panel or Dell Printer Configuration Web Tool. For information on how to use the operator panel and Dell Printer Configuration Web Tool, see "Understanding the Printer Menus"... -
Page 535: The Output Is Too Light
Check the toner level in the Status tab in the Status Monitor. Replace the toner cartridges as necessary. Does this solve your problem? If you are using non-Dell brand toner cartridges, enable the Non-Dell The task is complete. Go to action 3. -
Page 536: Toner Smears Or Print Comes Off
The Pitch Configuration Chart is printed. Does this solve your problem? Replace the drum cartridges. The task is complete. Contact Dell. Replace the drum cartridges. See "Replacing the Drum Cartridges." After you replace the drum cartridges, click Chart Print on the Diagnosis tab. -
Page 537: Random Spots/Blurred Images
Does this solve your problem? Replace the transfer belt unit, the 2nd Belt Transfer Roller (2nd BTR), The task is complete. Contact Dell. and the retard roller. Replace the transfer belt unit, the 2nd BTR, and the retard roller. See "Replacing the Transfer Belt Unit, the 2nd Belt Transfer Roller (2nd... -
Page 538: The Entire Output Is Blank
Check the toner level in the Status tab in the Status Monitor. Replace the toner cartridges as necessary. Does this solve your problem? If you are using non-Dell brand toner cartridges, enable the Non-Dell The task is complete. Go to action 3. -
Page 539: Streaks Appear On The Output
Check the toner level in the Status tab in the Status Monitor. Replace the toner cartridges as necessary. Does this solve your problem? If you are using non-Dell brand toner cartridges, enable the Non-Dell The task is complete. Go to action 3. -
Page 540: Part Or The Entire Output Is Black
On the Graphics tab, ensure that Output Color is set to Color. Does this solve your problem? Replace the drum cartridges. The task is complete. Contact Dell. Replace the drum cartridges. See "Replacing the Drum Cartridges." After you replace the drum cartridges, click Chart Print on the Diagnosis tab. -
Page 541: Vertical Blanks
Action Replace the drum cartridges. The task is complete. Contact Dell. Replace the drum cartridges. See "Replacing the Drum Cartridges." After you replace the drum cartridges, click Chart Print on the Diagnosis tab. Click Pitch Configuration Chart. The Pitch Configuration Chart is printed. -
Page 542: Ghosting
The Pitch Configuration Chart is printed. Does this solve your problem? Replace the drum cartridges. The task is complete. Contact Dell. Replace the drum cartridges. See "Replacing the Drum Cartridges." After you replace the drum cartridges, click Chart Print on the Diagnosis tab. -
Page 543: Light-Induced Fatigue
Action Adjust the transfer bias. The task is complete. Contact Dell. On the operator panel, press the (Information) button and tap tab → tap → Maintenance→ Tools Admin Settings Adjust Transfer Belt Unit. K Offset YMC Offset , and then decrease the value. -
Page 544: Bead-Carry-Out (Bco)
Action Replace the drum cartridges. The task is complete. Contact Dell. Replace the drum cartridges. See "Replacing the Drum Cartridges." After you replace the drum cartridges, click Chart Print on the Diagnosis tab. Click 4 Colors Configuration Chart. The 4 Colors Configuration Chart is printed. -
Page 545: Jagged Characters
On the Others tab, set Print Page Mode under Items: to On. Does this solve your problem? If using a downloaded font, ensure that the font is recommended for the The task is complete. Contact Dell. printer, operating system, and the application being used. Does this solve your problem? Banding Action Locate the cause of the problem using the Pitch Configuration Chart. -
Page 546: Auger Mark
Action Replace the drum cartridges. The task is complete. Contact Dell. Replace the drum cartridges. See "Replacing the Drum Cartridges." After you replace the drum cartridges, click Chart Print on the Diagnosis tab. Click Pitch Configuration Chart. The Pitch Configuration Chart is printed. -
Page 547: Wrinkled/Stained Paper
Does this solve your problem? If printing on print media other than envelopes, contact Dell. Check the wrinkle. Is the wrinkle within 30 mm of the four edges of the This type of wrinkle is Go to action 3. -
Page 548: Jam/Alignment Problems
NOTE: Some of the following procedures that use the Tool Box can also be performed using the operator panel or Dell Printer Configuration Web Tool. For information on how to use the operator panel and Dell Printer Configuration Web Tool, see "Understanding the Printer Menus"... -
Page 549: Images Are Skewed
Go to action 4a. Go to action 4b. Replace the drum cartridges. The task is complete. Contact Dell. Replace the drum cartridges. See "Replacing the Drum Cartridges." Launch the Tool Box, and click Service Tools on the Printer Maintenance tab. -
Page 550: Tray1/Optional 550-Sheet Feeder Misfeed Jam
Action Install the transfer belt unit according to an appropriate procedure. See The task is complete. Contact Dell. "Installing a Transfer Belt Unit." Does this solve your problem? Tray1/Optional 550-Sheet Feeder Misfeed Jam Action Ensure that tray1 or the optional 550-sheet feeder is properly inserted. -
Page 551: Mpf Misfeed Jam
The task is complete. Go to action 3a. Does this solve your problem? Replace the drum cartridges. The task is complete. Contact Dell. Does this solve your problem? Regi Jam (Exit Sensor On JAM) Action Ensure that the drum cartridges are installed correctly. -
Page 552: Exit Jam (Exit Sensor Off Jam)
Replace the transfer belt unit, the 2nd BTR, and the retard roller. The task is complete. Contact Dell. Replace the transfer belt unit, the 2nd BTR, and the retard roller. See "Replacing the Transfer Belt Unit, the 2nd Belt Transfer Roller (2nd BTR), and the Retard Roller."... -
Page 553: Mpf Multi-Feed Jam
Go to action 5. Does this solve your problem? Wipe the retard roller in tray1 or the optional 550-sheet feeder where the The task is complete. Contact Dell. multi-feed occurred with a cloth moistened with water. Does this solve your problem? -
Page 554: Copy Problems
Replace it with a new one.) Replace the toner cartridge (C). See "Replacing the Toner Cartridges." The task is complete. Contact Dell. (The toner cartridge (C) you are using has been damaged. Replace it with a new one.) -
Page 555: Fax Problems
Problem Action Vertical blanks or streaks appear on the Clean the DADF glass. output when scanned using the DADF. Clean inside the printer by using the cleaning rod. See "Cleaning the Raster Optical Scanner (ROS) Window." Fax Problems Problem Action The printer is not working, there is no Unplug the power cord and plug it in again. -
Page 556: Scanning Problems
Problem Action The printer dials a number, but the The other fax machine may be turned off, out of paper, or cannot answer incoming connection with another fax machine fails. calls. Speak with the other machine operator and ask her/him to sort out the problem. - Page 557 Problem Action Ensure that the scanner sharing feature is disabled when you use Mac OS X before you scan documents via an ICA compatible application such as Image Capture. The printer does not support the scanner sharing feature of Mac OS X. Select a printer which is directly connected to the computer via USB or wired /wireless LAN and scan documents.
- Page 558 Problem Action The printer does not properly transfer scan Check if the following settings have been set correctly on the Dell Printer data to a specified destination via the Scan Configuration Web Tool. to E-mail or Scan to Network feature.
-
Page 559: Digital Certificate Problems
Digital Certificate Problems Symptom Cause Action The certificate import button is SSL communication is disabled. Create a self-signed certificate and enable SSL. disabled. The certificate details button is disabled. The certificate cannot be imported. The time setting is incorrect. Confirm validity period of the certificate as well as the time setting of the device. -
Page 560: Problems With Installed Optional Accessories
Problems With Installed Optional Accessories If an option does not operate correctly following installation or stops working: • Turn off the printer, wait for 10 seconds, and then turn on the printer. If this does not fix the problem, unplug the printer, and check the connection between the option and the printer. -
Page 561: Other Problems
85% or more. Adjust the humidity or relocate the printer to an appropriate environment. Visit www.dell.com/dochub for information about Dell Document Hub. A problem has occurred when using Dell Document Hub. - Page 562 560 Troubleshooting Guide...
-
Page 563: Appendix
Appendix Appendix..................563 Index.................... 565... - Page 564 562...
-
Page 565: Dell™ Technical Support Policy
Dell, as well as the verification of appropriate functionality of the printer and all Dell-installed hardware. In addition to this technician assisted technical support, online technical support is available at Dell Support. -
Page 566: Warranty And Return Policy
For specific information on Dell’s worldwide recycling programs, see www.dell.com/recyclingworldwide. Contacting Dell You can access Support for Home at dell.com/support. Select your region, enter the Service Tag of your printer and click Submit to access help tools and information. You can contact Dell electronically using the following addresses: •... - Page 567 Index Symbols A5, 297 About printer, 35 (Copy) button, 109 Access List, 175 (Delete) button, 110 Address Book, 121, 123, 138, 177, 407 (Home) button, 109 Address Book Editor, 407 (Information) button, 110 Ad-Hoc, 168 (Job Status) button, 110 Adjust 2nd BTR, 135, 149 (Login/Logout) button, 109 Adjust Altitude, 136, 151, 187, 198 (NFC) reader, 110...
- Page 568 Canceling a print job, 308 Conserving supplies, 467 Canceling print job Consumables, 127 From your computer, 308 Contact Dell Support at, 121, 123 Carbonless copy paper, 294 Contact Person, 122 CCP, 294 Contacting service, 559 Changing printer settings, 124, 323...
- Page 569 Custom Reduce / Enlarge, 144, 203 Display Brightness, 129 Display Manual Fax Recipients, 134, 147, 192, 210 Display of Dell Configuration Web Tool, 202 DADF cover, 37 Display of Network Information, 132 DADF feed roller, 37, 502 Display problems, 531...
- Page 570 E-mail, 362 Fax Activity, 134, 138, 147, 188, 192, 210, 239 E-Mail Address, 177-178 Fax Broadcast, 135, 147, 192, 210, 239 Email Address Book, 188 Fax Cover Page, 134, 147, 192, 209, 237, 281 E-Mail Alert, 159, 230 Fax Defaults, 133, 145, 191, 259 E-Mail Alert Settings, 157, 164 Fax Driver, 132 E-Mail Alert Setup, 117...
- Page 571 Forwarding E-mail Address, 134, 146 Image Compression, 135, 148, 191, 206 Forwarding Number, 134, 146 Image Enhance, 131, 140 Front cover, 35 Image Types, 135, 191, 208, 284 Front USB port, 35 Important Information, 30 FTP, 155, 159, 161 Impression Number, 129 FTP Client, 155, 166 Infrastructure, 168 Function Enabled, 142, 254...
- Page 572 Machine Ready Tone, 129, 139, 186, 193 Maintenance, 467 K Offset, 135 Manual Address, 188 Margin, 273, 278 Margin Left / Right, 133, 135, 145, 148, 190-191, Label, 135-136, 149-150, 187, 197, 296 204, 206 Landscape, 218 Margin Middle, 133, 135, 145, 148, 190-191, 204, 206 Language Settings, 265 Margin Top / Bottom, 133, 135, 145, 148, 190,...
- Page 573 No. of Sheets, 129 Page orientation, 300 Non Registered User, 137 Panel Language, 130, 139, 192, 201 Non-Dell Toner, 136, 151, 187, 197, 253 Panel Lock Control, 131, 141, 254 Notification Time-Out, 161 Panel Settings, 138, 188, 213 Number pad, 109, 114...
- Page 574 Print Color Regi Chart, 197 Processor Speed, 128 Print Drivers / Remote Client Account, 166 Proof Print, 266, 312 Print from Dell Document Hub, 159 Protocol Monitor, 138, 188, 214 Print ID, 130, 139, 187, 196, 245 Proxy Server, 156, 168...
- Page 575 Scan Defaults, 135, 190 Red Hat Enterprise Linux, 97, 459 Scan Settings Tool, 343 Redial Attempts, 134, 147, 192, 209 Scan to Dell Document Hub, 159 Reduce / Enlarge, 132, 144, 189, 202 Scan to E-mail, 131, 274 Reduce/Enlarge, 271...
- Page 576 Secure Settings, 131, 141 Software Download, 132 Security, 170 Software update, 406 Security Settings, 169 Speed Dial, 138, 188 Select Reorder URL, 136 SSID, 168 Select Tray, 132, 135, 144, 189, 191, 202, 207, SSL/TLS, 156, 173, 438 268, 282 Start Time, 132, 143 Selecting letterhead, 295 Status LED, 109...
- Page 577 Tray 1 Custom Paper Size - Y, 137, 184 User Setup Disk Creating Tool, 405 Tray 1 Custom Size - X, 189, 199 Using Dell Printer Configuration Web Tool, 120 Tray 1 Custom Size - Y, 189, 199 Tray 1 Display Tray Prompt, 137, 184, 189, 199...
- Page 578 Wireless Adapter, 50 Wireless adapter socket, 36 Wireless Settings, 153, 168 WPA-Enterprise, 169, 439-440 WPA-PSK, 169 WPS-PBC, 54 WPS-PIN, 54 WSD, 154, 161, 315 WSD Print, 159 XPS printer driver, 81, 84 Yellow terminator, 62 YMC Offset, 135 576 Appendix...