
Related Manuals for NETGEAR JWNR2000v2


Summary of Contents for NETGEAR JWNR2000v2
-
Page 1: User Manual
N300 Wireless Router Model JWNR2000v2 User Manual 350 East Plumeria Drive San Jose, CA 95134 May 2011 202-10785-01 v1.0... -
Page 2: Technical Support
NETGEAR, Inc. Technical Support Thank you for choosing NETGEAR. To register your product, get the latest product updates, get support online, or for more information about the topics covered in this manual, visit the Support website at http://support.netgear.com. -
Page 3: Table Of Contents
Contents Chapter 1 Hardware Setup Unpack Your Router ......... . . 7 Hardware Features. - Page 4 NETGEAR N300 Wireless Router JWNR2000v2 User Manual Wireless Settings Screen Fields....... 35 Set Up WPA-PSK and WPA2-PSK Wireless Security .
- Page 5 NETGEAR N300 Wireless Router JWNR2000v2 User Manual Quality of Service ..........76 WMM QoS for Wireless Multimedia Applications .
-
Page 6: Chapter 1 Hardware Setup
Hardware Setup Getting to know your router The NETGEAR N300 Wireless Router JWNR2000v2 User Manual provides you with an easy and secure way to set up a wireless home network. For more information on the topics covered in this manual, visit the Support website at http://support.netgear.com. -
Page 7: Unpack Your Router
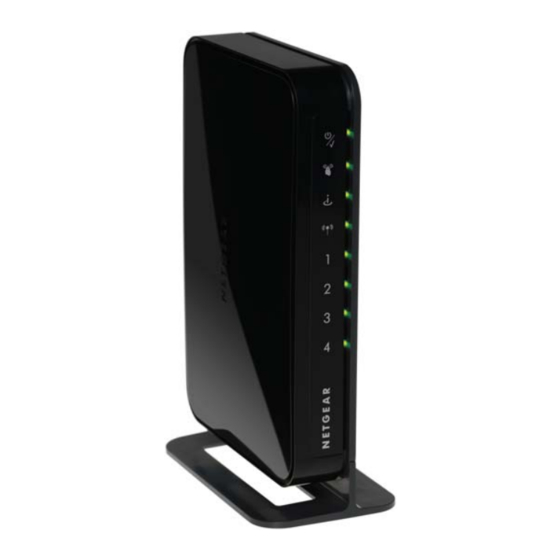
Installation guide with cabling and router setup instructions • If any parts are incorrect, missing, or damaged, contact your NETGEAR dealer. Keep the carton and original packing materials, in case you need to return the product for repair. Hardware Features Before you cable your router, take a moment to become familiar with the label and the front and back panels. - Page 8 NETGEAR N300 Wireless Router JWNR2000v2 User Manual The router front panel has status LEDs and icons shown in the figure. LAN ports Wireless Internet Power/Check Figure 2. Front panel LEDs and icons Table 1. Front Panel LEDs Icon LED Activity...
-
Page 9: Back Panel
Power On/Off Reset Figure 3. Back panel There are two models of the JWNR2000v2 router: one with a Power Note: On/Off button (shown here) and one without a Power button. Router Stand For optimal wireless performance, use the stand (included in the package) to position your router upright. - Page 10 NETGEAR N300 Wireless Router JWNR2000v2 User Manual Orient your router vertically. NETGEAR logo Insert the tabs of the stand into the slots on the bottom of your router as shown. Place your router in a suitable area for installation (near an AC power outlet and accessible to the Ethernet cables for your wired computers).
-
Page 11: Position Your Router
NETGEAR N300 Wireless Router JWNR2000v2 User Manual Position Your Router The router lets you access your network from virtually anywhere within the operating range of your wireless network. However, the operating distance or range of your wireless connection can vary significantly depending on the physical placement of your router. For example, the thickness and number of walls the wireless signal passes through can limit the range. -
Page 12: Cable Your Router
NETGEAR N300 Wireless Router JWNR2000v2 User Manual Cable Your Router The installation guide that came in the box has a cabling diagram on the first page. This section walks you through cabling with detailed illustrations. To connect the router, the computer, and the modem: Turn off and unplug your broadband modem. - Page 13 NETGEAR N300 Wireless Router JWNR2000v2 User Manual Locate the cable (A) that is still attached to your computer. Insert that cable into a yellow LAN port on the router, as shown in the following figure: Figure 6. Connect the Ethernet cable to a LAN port on the router Connect any additional wired PCs to your router by inserting an Ethernet cable from a PC into one of the three remaining LAN ports.
- Page 14 You might want to write it down in the area provided on the middle panel. (The default name is NETGEAR.) Click Next. b. Select the Yes option to add security, then select your security method. NETGEAR recommends WPA-PSK [TKIP] + WPA2-PSK [AES].
-
Page 15: Verify The Cabling
NETGEAR N300 Wireless Router JWNR2000v2 User Manual d. Review your network settings on the Success page. You may want to print this for your records. e. Click Next to apply all settings. Verify the Cabling Verify that your router is cabled correctly, is turned on, and is receiving power by checking the router LEDs. - Page 16 NETGEAR N300 Wireless Router JWNR2000v2 User Manual 16 | Chapter 1. Hardware Setup...
-
Page 17: Chapter 2 Router Internet Setup
This chapter explains how to set up your Internet connection using one of three methods: NETGEAR Genie (recommended), Setup Wizard, or manual setup. If you have already set up your router using one of these methods, the initial router setup is complete. Refer to this chapter if you want to become familiar with the router menus, view or adjust the initial settings, or change the router password and login time-out. -
Page 18: Router Setup Preparation
NETGEAR N300 Wireless Router JWNR2000v2 User Manual Router Setup Preparation You can set up your router with the Smart Wizard on the Resource CD as described in the installation guide with the Setup Wizard (see on page 23), or manually (see Setup Wizard on page 23). -
Page 19: Log In To The Router
URL, your computer might need a minute or two to recognize the LAN connection. Relaunch your browser and try again. If you are having trouble accessing the router wirelessly, NETGEAR recommends that • during setup you use an Ethernet cable to connect your computer so that you can log in to the router. -
Page 20: Upgrade Router Firmware
NETGEAR N300 Wireless Router JWNR2000v2 User Manual If you cannot connect to the wireless router, check the Internet Protocol (TCP/IP) properties in the Network Connections section of your PC Control Panel. They should be set to obtain both IP and DNS server addresses automatically. -
Page 21: Router Interface
Advanced Menu. Set the router up for unique situations such as when remote access by • IP or by domain name from the Internet is needed. Web Support. Go to the NETGEAR support site to get information, help, and product • documentation. These links work once you have an Internet connection. -
Page 22: Select A Language For Your Screen Display
If you are connected to the Internet and select a language that is not already stored in • flash memory, the language is downloaded from the NETGEAR server and stored in the current language partition of flash memory. If you are not connected to the Internet when you select a language, you can only select •... -
Page 23: Setup Wizard
Enter the settings for the IP address and DNS server. If no login is required, you can specify the MAC Address setting. Click Apply to save your settings. Click Test to test your Internet connection. If the NETGEAR website does not appear within 1 minute, see on page 87. -
Page 24: Basic Settings Screen
NETGEAR N300 Wireless Router JWNR2000v2 User Manual Basic Settings Screen ISP does not require login ISP does require login Figure 3. Basic Settings screen without (left) and with (right) login. The following descriptions explain all the possible fields in the Basic Settings screen. Note that which fields appear in this screen depends on whether or not an ISP login is required. - Page 25 NETGEAR N300 Wireless Router JWNR2000v2 User Manual Internet Service Provider. This drop-down list contains a few ISPs that need special protocols for connection. The list includes: PPTP (Point to Point Tunneling Protocol), used primarily in Austrian DSL services. PPPoE (Point to Point Protocol over Ethernet), the protocol used by most DSL services worldwide.
-
Page 26: Unsuccessful Internet Connection
NETGEAR N300 Wireless Router JWNR2000v2 User Manual Use Static IP Address. Enter the IP address, IP subnet mask, and the gateway IP address that your ISP assigned. The gateway is the ISP’s router to which your router will connect. •... -
Page 27: Change Password
NETGEAR N300 Wireless Router JWNR2000v2 User Manual Contact your ISP to verify that you have the correct configuration information. Read Troubleshooting. If problems persist, register your NETGEAR product and Chapter 7, contact NETGEAR Technical Support. If you cannot connect to the wireless router, check the Internet... -
Page 28: Log Out Manually
NETGEAR N300 Wireless Router JWNR2000v2 User Manual Log Out Manually The router interface provides a Logout command at the bottom of the router menus. Log out when you expect to be away from your computer for a relatively long period of time. -
Page 29: Chapter 3 Wireless Settings
Wireless Settings Protecting your network This chapter describes how to use the Wireless Settings screens to view and change (if needed) your wireless network settings. Security features to prevent objectionable content from reaching your PCs are covered in Chapter 4, Content Filtering. -
Page 30: Security Basics
NETGEAR N300 Wireless Router JWNR2000v2 User Manual Security Basics Unlike wired network data, wireless data transmissions extend beyond your walls and can be received by any device with a compatible wireless adapter (radio). For this reason, it is very important to maintain the preset security and understand the other security features available to you. -
Page 31: Wireless Security Options
WEP. WPA has several options including pre-shared key (PSK) encryption. This section presents an overview of the security options and provides guidance on when to use which option. Note that it is also possible to disable wireless security. NETGEAR does not recommend this. WPA Encryption WPA encryption is built into all hardware that has the Wi-Fi-certified seal. -
Page 32: Add Clients (Computers Or Devices) To Your Network
WPA or WPA2 wireless security. The router automatically sets security for each computer or device that uses WPS to join the wireless network. To use WPS, make sure that your wireless devices are Wi-Fi certified and support WPS. NETGEAR products that use WPS call it Push 'N' Connect. -
Page 33: Wireless Settings
NETGEAR recommends that you use these settings. If you decide to change them, note the new settings and save them in a secure location. -
Page 34: Consider Every Device On Your Network
NETGEAR recommends that you use wireless security to protect your network from unwanted access and that you change the default network name of NETGEAR to a name that you can easily recognize when connecting wirelessly to the router. You view or change these settings in the Wireless Settings screen. -
Page 35: Wireless Settings Screen Fields
Internet. Wireless Settings Screen Fields Region This field identifies the region where the JWNR2000v2 router can be used. It might not be • legal to operate the wireless features of the router in a region other than one of those identified in this field. -
Page 36: Set Up Wpa-Psk And Wpa2-Psk Wireless Security
Up To 300 Mbps. Performance mode, using channel expansion to achieve the 300 Mbps data rate. The JWNR2000v2 router uses the channel you selected as the primary channel and expands to the secondary channel (primary channel +4 or –4) to achieve a 40 MHz frame-by-frame bandwidth. -
Page 37: Set Up Wep Wireless Security
NETGEAR N300 Wireless Router JWNR2000v2 User Manual In the Passphrase field, enter a word or group of 8–63 printable characters. The passphrase is case-sensitive. Click Apply to save your settings. Set Up WEP Wireless Security WEP Shared Key authentication and WEP data encryption can be defeated by a determined eavesdropper using publicly available tools. -
Page 38: Add Guest Networks
• characters, and click Generate. The passphrase is case-sensitive. For example, NETGEAR is not the same as nETgear. The four key fields are automatically populated with key values. Manual. Enter 10 hexadecimal digits (any combination of 0–9, a–f, or A–F). These •... - Page 39 Give the wireless network a name. The name is case-sensitive and can be up to 32 characters. The same name must be assigned to all wireless devices in your network. NETGEAR recommends that you change the name to a different value.
-
Page 40: Chapter 4 Content Filtering
Content Filtering This chapter explains how to use the basic firewall features of the router to prevent objectionable content from reaching the PCs and other devices connected to your network. This chapter includes the following sections: • Live Parental Controls •... -
Page 41: Live Parental Controls
NETGEAR N300 Wireless Router JWNR2000v2 User Manual Live Parental Controls NETGEAR Live Parental Controls, powered by OpenDNS, is a router-based Web filtering solution available on NETGEAR N300 Wireless router and gateway products. Designed to protect you from identity theft and scams, Live Parental Controls blocks up to 50 categories of Internet content. -
Page 42: Delete A Keyword Or Domain
NETGEAR N300 Wireless Router JWNR2000v2 User Manual Select one of the keyword blocking options: Per Schedule. Turn on keyword blocking according to the Schedule screen settings. • Always. Turn on keyword blocking all the time, independent of the Schedule screen. - Page 43 NETGEAR N300 Wireless Router JWNR2000v2 User Manual To block access to Internet services: Select Content Filtering > Block Services. The Block Services screen displays. Enable service blocking by selecting either Per Schedule or Always, and then click Apply. To block by schedule, be sure to specify a time period in the Schedule screen. For information about scheduling, see on page 45.
-
Page 44: Block Services By Ip Address Range
NETGEAR N300 Wireless Router JWNR2000v2 User Manual information by contacting the publisher of the application, by asking user groups or newsgroups, or by searching. Enter the starting port and ending port numbers. If the application uses a single port number, enter that number in both fields. -
Page 45: Schedule Blocking
The router has a list of NETGEAR NTP servers. If you would prefer to use a particular NTP server as the primary server, select the Use this NTP Server check box, and enter its IP address. -
Page 46: Enable Security Event Email Notification
NETGEAR N300 Wireless Router JWNR2000v2 User Manual Click Apply to save your settings. Enable Security Event Email Notification To receive logs and alerts by email, provide your email information in the E-mail screen and specify which alerts you want to receive and how often. -
Page 47: View Logs Of Web Access Or Attempted Web Access
NETGEAR N300 Wireless Router JWNR2000v2 User Manual Send Alert Immediately. Select the corresponding check box if you would like immediate notification of a significant security event, such as a known attack, port scan, or attempted access to a blocked site. -
Page 48: Allow Inbound Connections To Your Network
To e-mail the log immediately, click the Send Log button. Allow Inbound Connections to Your Network By default, the JWNR2000v2 router blocks any inbound traffic from the Internet to your computers except for replies to your outbound traffic. However, you might need to create exceptions to this rule for the following purposes: To allow remote computers on the Internet to access a server on your local network. -
Page 49: Port Forwarding To A Local Server
IP address never changes. To ensure that your server computer always has the same IP address, Tip: use the reserved IP address feature of your JWNR2000v2 router. See on page 71 for instructions on how to use Reserved IP Addresses Setup reserved IP addresses. -
Page 50: Add A Custom Service
NETGEAR N300 Wireless Router JWNR2000v2 User Manual To set up port forwarding to a local server: Select Advanced > Port Forwarding/Port Triggering. The Port Forwarding/Port Triggering screen displays: From the Service Name list, select the service or game that you will host on your network. If... -
Page 51: Edit Or Delete A Port Forwarding Entry
NETGEAR N300 Wireless Router JWNR2000v2 User Manual In the Service Type field, select the protocol. If you are unsure, select TCP/UDP. In the Starting Port field, enter the beginning port number. If the application uses only a single port, enter the same port number in the Ending Port •... - Page 52 NETGEAR N300 Wireless Router JWNR2000v2 User Manual More than one local computer needs port forwarding for the same application (but not • simultaneously). An application needs to open incoming ports that are different from the outgoing port. • When port triggering is enabled, the router monitors outbound traffic looking for a specified outbound “trigger”...
- Page 53 NETGEAR N300 Wireless Router JWNR2000v2 User Manual If the Disable Port Triggering check box is selected after you Note: configure port triggering, port triggering is disabled. However, any port triggering configuration information you added to the router is retained even though it is not used.
- Page 54 NETGEAR N300 Wireless Router JWNR2000v2 User Manual Click Apply. The service appears in the Port Triggering Portmap table. 54 | Chapter 4. Content Filtering...
-
Page 55: Chapter 5 Network Maintenance
Network Maintenance Administering your network This chapter describes the router settings for administering and maintaining the router and home network. This chapter contains the following sections: • Upgrade the Router Firmware • Manage the Configuration File • View Router Status •... -
Page 56: Upgrade The Router Firmware
Upgrade the Router Firmware The router firmware (routing software) is stored in flash memory. By default, when you log in to your router, it checks the NETGEAR website for new firmware and alerts you if there is a newer version. -
Page 57: Automatic Firmware Checking On
Manually Check for Firmware Upgrades You can use the Router Upgrade screen to manually check the NETGEAR website for newer versions of firmware for your product. WARNING! -
Page 58: Manage The Configuration File
NETGEAR N300 Wireless Router JWNR2000v2 User Manual If the firmware version on the NETGEAR website is newer than the firmware on your router, download the file to your computer. To upload the newer firmware, select Maintenance > Router Upgrade to display the... -
Page 59: Restore
NETGEAR N300 Wireless Router JWNR2000v2 User Manual Restore Enter the full path to the file on your network, or click the Browse button to find the file. When you have located the .cfg file, click the Restore button to upload the file to the router. -
Page 60: View Router Status
NETGEAR N300 Wireless Router JWNR2000v2 User Manual View Router Status Select Maintenance > Router Status to display the following screen. The Router Status screen provides the status and usage information described in the following figure. Hardware Version. The firmware version. - Page 61 NETGEAR N300 Wireless Router JWNR2000v2 User Manual LAN Port (Local Ports). MAC Address. The router LAN port Ethernet MAC address. IP Address. The router LAN port IP address. The default is 192.168.0.1. DHCP. If Off, the router does not assign IP addresses to PCs on the LAN. If On, the router does assign IP addresses to PCs on the LAN.
- Page 62 NETGEAR N300 Wireless Router JWNR2000v2 User Manual Status. The link status of the port. TxPkts. The number of packets transmitted on this port since reset or manual clear. RxPkts. The number of packets received on this port since reset or manual clear.
-
Page 63: View Attached Devices
Remote Management Access Using the Remote Management feature, you can allow a user on the Internet to configure, upgrade, and check the status of your JWNR2000v2 router. To set up your router for remote management: Select Advanced > Remote Management. The Remote Management screen displays. - Page 64 NETGEAR N300 Wireless Router JWNR2000v2 User Manual Make sure that you have changed the router’s default password to a very secure password. The ideal password should contain no dictionary words from any language, and should be a mixture of letters (both uppercase and lowercase), numbers, and symbols. Your password can be up to 30 characters.
-
Page 65: Chapter 6 Advanced Settings
Advanced Settings Configuring for unique situations This chapter describes the advanced features of your router. The information is for users with a solid understanding of networking concepts who want to set the router up for unique situations such as when remote access from the Internet by IP or domain name is needed. It contains the following sections: •... -
Page 66: Wan Setup
NETGEAR N300 Wireless Router JWNR2000v2 User Manual WAN Setup The WAN Setup screen lets you disable port scan and DoS protection, configure a DMZ (demilitarized zone) server, enable the router to respond to a ping on the WAN (Internet) port, enable IGMP proxying, and change the Maximum Transmit Unit (MTU) size. -
Page 67: Set Up A Default Dmz Server
NETGEAR N300 Wireless Router JWNR2000v2 User Manual NAT Filtering. Network Address Translation (NAT) determines how the router processes inbound traffic. Secured NAT provides a secured firewall to protect the computers on the LAN from attacks from the Internet, but might prevent some Internet games, point-to-point applications, or multimedia applications from functioning. - Page 68 NETGEAR N300 Wireless Router JWNR2000v2 User Manual If your ISP assigns a private WAN IP address (such as 192.168.x.x Note: or 10.x.x.x), the Dynamic DNS service does not work because private addresses are not routed on the Internet. Your router contains a client that can connect to the Dynamic DNS service provided by DynDNS.org.
-
Page 69: Lan Setup
NETGEAR N300 Wireless Router JWNR2000v2 User Manual LAN Setup The LAN Setup screen allows configuration of LAN IP services such as DHCP and Routing Information Protocol (RIP). The router is shipped preconfigured to use private IP addresses on the LAN side and to act as a DHCP server. The router’s default LAN IP configuration is as follows: LAN IP address. -
Page 70: Lan Setup Screen Fields
Device Name. The device name is a user-friendly name for the router. This name is shown in the Network on Windows Vista and the Network Explorer on all Windows systems. The Device Name field cannot be blank. The default name is JWNR2000v2. LAN TCP/IP Setup IP Address. -
Page 71: Reserved Ip Addresses Setup
NETGEAR N300 Wireless Router JWNR2000v2 User Manual the attached computers from a pool of addresses specified in this screen. Each pool address is tested before it is assigned to avoid duplicate addresses on the LAN. For most applications, the default DHCP and TCP/IP settings of the Note: router are satisfactory. -
Page 72: Advanced Wireless Settings
Enable Wireless Router Radio. If you disable the wireless router radio, wireless devices • cannot connect to the JWNR2000v2 router. If you will not be using your wireless network for a period of time, you can clear this check box and disable all wireless connectivity. -
Page 73: Restrict Wireless Access By Mac Address
NETGEAR N300 Wireless Router JWNR2000v2 User Manual Wireless Card Access List. For information about this list, see • Restrict Wireless Access on page 73. by MAC Address WPS Settings These options are available if the settings in the Wireless Settings screen are compatible with WPS. - Page 74 NETGEAR N300 Wireless Router JWNR2000v2 User Manual To restrict access based on MAC addresses: Select Advanced > Wireless Settings. In the Advanced Wireless Settings screen, click Setup Access List to display the Wireless Card Access List. Click Add to add a wireless device to the wireless access control list. The Wireless Card Access Setup screen opens and displays a list of currently active wireless cards and their Ethernet MAC addresses.
-
Page 75: Set Up Static Routes
Click Apply to save your Wireless Card Access List settings. Now, only devices on this list can wirelessly connect to the JWNR2000v2 router. Set Up Static Routes Static routes provide additional routing information to your router. -
Page 76: Quality Of Service
Click Apply to have the static route entered into the table. Quality of Service Quality of Service (QoS) is an advanced feature that can be used to prioritize some types of traffic ahead of others. The JWNR2000v2 router can provide QoS prioritization over the wireless link. 76 |... -
Page 77: Wmm Qos For Wireless Multimedia Applications
NETGEAR N300 Wireless Router JWNR2000v2 User Manual WMM QoS for Wireless Multimedia Applications The JWNR2000v2 router supports Wi-Fi Multimedia Quality of Service (WMM QoS) to prioritize wireless voice and video traffic over the wireless link. WMM QoS provides prioritization of wireless data packets from different applications based on four access categories: voice, video, best effort, and background. - Page 78 NETGEAR N300 Wireless Router JWNR2000v2 User Manual On the QoS screen, click Setup QoS rule. The QoS - Priority Rules screen displays. For convenience, the QoS Policy table lists many common applications and online games that can benefit from QoS handling.
- Page 79 NETGEAR N300 Wireless Router JWNR2000v2 User Manual If you chose to add a new entry, the screen expands as shown: a. In the QoS Policy for field, enter a descriptive name for the new application or game. b. Select the packet type, either TCP, UDP, or both (TCP/UDP), and specify the port number or range of port numbers used by the application or game.
- Page 80 NETGEAR N300 Wireless Router JWNR2000v2 User Manual Click Apply. QoS for a MAC Address To create a QoS policy for traffic from a specific MAC address: Select Advanced > QoS Setup. The QoS Setup screen displays. On the QoS Setup screen, click Add Priority Rule.
-
Page 81: Traffic Meter
NETGEAR N300 Wireless Router JWNR2000v2 User Manual Traffic Meter Traffic Metering allows you to monitor the volume of Internet traffic passing through your router’s Internet port. With the Traffic Meter utility, you can set limits for traffic volume, set a monthly limit, and get a live update of traffic usage. -
Page 82: Universal Plug And Play
NETGEAR N300 Wireless Router JWNR2000v2 User Manual Universal Plug and Play Universal Plug and Play (UPnP) helps devices, such as Internet appliances and computers, to access the network and connect to other devices as needed. UPnP devices can automatically discover the services from other registered UPnP devices on the network. -
Page 83: Wireless Repeating (Also Called Wds)
NETGEAR N300 Wireless Router JWNR2000v2 User Manual networks. If you notice that some devices are not being updated or reached correctly, then it might be necessary to increase this value. UPnP Portmap Table. The UPnP Portmap Table displays the IP address of each •... -
Page 84: Wireless Repeating Function
NETGEAR N300 Wireless Router JWNR2000v2 User Manual Wireless Repeating Function You can view or change wireless repeater settings for the router. From the main menu of the browser interface, under Advanced, click Wireless Repeating Function to display the Wireless Repeating Function screen. -
Page 85: Set Up A Repeater Unit
Use a wired Ethernet connection to set up the repeater unit to avoid conflicts with the wireless connection to the base station. If you are using the JWNR2000v2 base station with a Note: non-NETGEAR router as the repeater, you might need to change additional configuration settings. - Page 86 NETGEAR N300 Wireless Router JWNR2000v2 User Manual Log in to the router that will be the repeater. Check the Wireless Settings screen, and verify that the wireless settings match the base station exactly. If the settings are different, be sure...
-
Page 87: Chapter 7 Troubleshooting
Troubleshooting This chapter provides information about troubleshooting your N300 Wireless Router Model JWNR2000v2. After each problem description, instructions are provided to help you diagnose and solve the problem. As a first step, please review the Quick Tips. NETGEAR provides helpful articles, documentation, and the latest Tip: software updates at http://www.netgear.com/support. -
Page 88: Quick Tips
NETGEAR N300 Wireless Router JWNR2000v2 User Manual Quick Tips This section describes tips for troubleshooting some common problems: Be sure to restart your network in this sequence. Turn off and unplug the modem. Turn off the router and computers. Plug in the modem and turn it on. Wait 2 minutes. - Page 89 Make sure that the power cord is properly connected to your router and that the power • adapter is properly connected to a functioning power outlet. Check that you are using the power adapter supplied by NETGEAR for this product. • If the error persists, you have a hardware problem and should contact Technical Support.
-
Page 90: Login Problems
Internet Explorer, click Refresh to be sure the Java applet is loaded. Try closing the browser and reopening it again. If you are attempting to set up your NETGEAR router as an additional router behind an • existing router in your network, consider replacing the existing router instead. NETGEAR does not support such a configuration. -
Page 91: Check The Internet Service Connection
You might need to force your cable or DSL modem to recognize your new router by • restarting your network, in the sequence described in the NETGEAR Wireless Router Setup Manual. Your service provider might require a login. Ask your service provider whether they •... -
Page 92: Troubleshooting Pppoe
NETGEAR N300 Wireless Router JWNR2000v2 User Manual Troubleshooting PPPoE If you are using PPPoE, try troubleshooting your Internet connection. To troubleshoot a PPPoE connection: Log in to the router. Select Maintenance > Router Status. Click Connection Status. If all of the steps indicate “OK,” then your PPPoE connection is up and working. -
Page 93: Troubleshoot Your Network Using The Ping Utility
NETGEAR N300 Wireless Router JWNR2000v2 User Manual Click Refresh or Reload in the Web browser. The changes might have occurred, but the • Web browser might be caching the old configuration. Troubleshoot Your Network Using the Ping Utility Most network devices and routers contain a ping utility that sends an echo request packet to the designated device. -
Page 94: Test The Path From Your Computer To A Remote Device
Select Content Filtering > Email to display a screen that shows the current date and time of day. The JWNR2000v2 router uses the Network Time Protocol (NTP) to obtain the current time from one of several network time servers on the Internet. Each entry in the log is stamped with the date and time of day. -
Page 95: Problems With Wireless Adapter Connections
Use the adapter’s setup program to scan for available wireless networks, looking for the network name (SSID) of NETGEAR, or your custom SSID if you have changed it. If your wireless network appears and has good signal strength, configure and test with the simplest wireless connection possible. -
Page 96: Restore The Default Configuration And Password
NETGEAR N300 Wireless Router JWNR2000v2 User Manual Restore the Default Configuration and Password This section explains how to restore the factory default configuration settings that reset the router’s user name to admin, the password to password, and the IP address to 192.168.1.1. -
Page 97: Appendix A Supplemental Information
Supplemental Information This appendix provides factory default settings and technical specifications for the router • Factory Default Settings • Specifications Appendix A. Supplemental Information | 97... -
Page 98: Factory Default Settings
NETGEAR N300 Wireless Router JWNR2000v2 User Manual Factory Default Settings Table 1. Router Default Settings Feature Default Setting Router Login URL http://www.routerlogin.net or http://www.routerlogin.com Login name (case-sensitive) admin (printed on product label) Login password (case-sensitive) password (printed on product label) -
Page 99: Specifications
NETGEAR N300 Wireless Router JWNR2000v2 User Manual Specifications Table 2. Router Technical Specifications Feature Specification Data and routing protocols TCP/IP, RIP-1, RIP-2, DHCP, PPPoE, PPTP, Bigpond, Dynamic DNS, and UPnP Power adapter • North America: 120V, 60 Hz, input • UK, Australia: 240V, 50 Hz, input •... -
Page 100: Appendix B Notification Of Compliance
EDOC in Languages of the European Community Language Statement Cesky [Czech] NETGEAR Inc. tímto prohlašuje, že tento Radiolan je ve shode se základními požadavky a dalšími príslušnými ustanoveními smernice 1999/5/ES. Dansk [Danish] Undertegnede NETGEAR Inc. erklærer herved, at følgende udstyr Radiolan overholder de væsentlige krav og øvrige relevante krav i direktiv 1999/5/EF. - Page 101 Hereby, NETGEAR Inc., declares that this Radiolan is in compliance with the essential requirements and other relevant provisions of Directive 1999/5/EC. Español [Spanish] Por medio de la presente NETGEAR Inc. declara que el Radiolan cumple con los requisitos esenciales y cualesquiera otras disposiciones aplicables o exigibles de la Directiva 1999/5/CE.
-
Page 102: Fcc Declaration Of Conformity
This transmitter must not be co-located or operating in conjunction with any other antenna or transmitter. FCC Declaration of Conformity We, NETGEAR, Inc., 350 East Plumeria Drive, San Jose, CA 95134, declare under our sole responsibility that the N300 Wireless Router Model JWNR2000v2 complies with Part 15 Subpart B of FCC CFR47 Rules. Operation is... -
Page 103: Industry Canada
NETGEAR N300 Wireless Router JWNR2000v2 User Manual FCC Caution Any changes or modifications not expressly approved by the party responsible for compliance could void the • user’s authority to operate this equipment. This device complies with Part 15 of the FCC Rules. Operation is subject to the following two conditions: (1) This •... - Page 104 For GNU General Public License (GPL) related information, please visit http://support.netgear.com/app/answers/detail/a_id/2649 . Interference Reduction Table The table below shows the Recommended Minimum Distance between NETGEAR equipment and household appliances to reduce interference (in feet and meters). Table 3. Household Appliance...
-
Page 105: Index
Index access cables, checking blocking cabling remote Ethernet restricting by MAC address channel, frequency viewing logs communication mode access control compliance turning on configuration file access points backing up adding erase custom service erasing priority rules managing reserved IP addresses restoring static routes configuring... - Page 106 NETGEAR N300 Wireless Router JWNR2000v2 User Manual disabling firewalls inbound traffic, allowing or blocking router PIN SIP ALG installing SSID broadcast Setup Wizard wireless client association Internet port Domain Name Server (DNS) addresses Internet port, no connection Domain Name Server (DNS), secondary...
- Page 107 NETGEAR N300 Wireless Router JWNR2000v2 User Manual ports filtering MAC addresses listed, back panel described positioning the router QoS for Power light, troubleshooting and restricting access by PPPoE spoofing PPTP maintenance settings PPTP (Point to Point Tunneling Protocol) managing router remotely...
- Page 108 NETGEAR N300 Wireless Router JWNR2000v2 User Manual security settings sending logs by email viewing service numbers advanced wireless settings services logs Session Initiation Protocol (SIP), disabling Virtual Channel Identifier (VCI) setting time zone Virtual Path Identifier (VPI) settings, default. See default factory settings...