Table of Contents
Advertisement
Quick Links
Advertisement
Table of Contents

Related Manuals for Casio CASSIOPEIA FIVA MPC-701 Series


Summary of Contents for Casio CASSIOPEIA FIVA MPC-701 Series
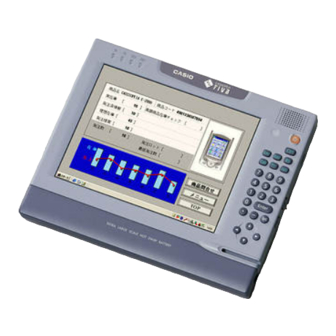
- Page 1 FIVA User’s Guide (Product No: MPC-701 series) Thank you for purchasing the CASIO MPC-701 series. This guide describes the basic operations of the MPC-701 series. Read this guide in its entirely before handling or operating the product, and keep it close at hand so it...
- Page 2 ® International E Program NERGY ® As a member of the International E NERGY Program, CASIO products have been judged to ® meet International E standards. NERGY ® is a U.S. registered mark. NERGY Power Plug and AC Adapter AC cord plug and wall outlet illustrated in this User’s Guide shows the two-pin plug type.
-
Page 3: Packing List
Packing List Thank you for purchasing the CASSIOPEIA FIVA MPC-701 series. A list of the items included with this product is given below. Confirm that nothing is missing or damaged. If anything is missing or damaged, contact the dealer from which you purchased this product. -
Page 4: Safety Precautions
Safety Precautions • To use this product safely and correctly, read this User’s Guide thoroughly and operate as instructed. After reading this guide, keep it close at hand for easy reference. Please keep all informations for future reference. • Always observe the warnings and cautions indicated on the product. •... - Page 5 Warning! Handling FIVA Should FIVA malfunction, start to emit smoke or a strange odor, or otherwise behave abnormally, immediately shut down the power, remove batteries, and unplug the AC adapter from the power outlet. Continued use creates the danger of fire and electric shock.
- Page 6 Warning! The liquid inside the LCD is harmful to humans. Never touch it or allow it to get in your mouth. • Should liquid from the LCD panel accidentally get into your mouth immediately wash out your mouth with clean water. If it gets onto your skin, immediately rinse for at least 15 minutes with clean tap water.
- Page 7 • Contact your authorized distributor whenever the power cord or plug requires repair or maintenance. Use only the AC adapter specified by CASIO for this product. Use of another type of AC adapter creates the danger of fire.
- Page 8 Use only the battery pack that comes with FIVA. When the battery pack reaches the end of its life, replace it with a new battery pack as specified by CASIO. Other types of batteries have different voltage rating and polarity, which creates the danger of fire and bursting...
- Page 9 Caution! Handling FIVA Do not place FIVA on an unstable or uneven surface. Doing so can cause FIVA to fall, creating the danger of malfunction, fire, and electric shock. Do not leave FIVA in the following areas. • Areas where FIVA will be subject to large amounts of humidity or dust, or directly exposed to hot or cold air.
- Page 10 Caution! Power Cord and Peripherals Do not overly bend the power cord, do not allow it to be caught between desks or other furniture, and never place heavy objects on the power cord. Doing so can cause shorting or breaking of the power cord, creating the danger of fire and electric shock.
-
Page 11: Before Using Fiva
AC adapter from the power outlet. Contact your original retailer or authorized distributor. • CASIO COMPUTER CO., LTD. shall not be held liable for any loss or claims due to using this product except as instructed to do so in this User’s Guide. - Page 12 System Recovery • This product comes with Windows 2000 operating system and a collection of utility software pre-installed on its hard disk. Should the system start to malfunction or produce errors, you can use the “Product Recovery CD-ROM” that comes with FIVA to restore the factory default system.
- Page 13 FIVA Precaution Label • The label shown above is affixed to the bottom of FIVA. Be sure to carefully observe these precautions at all times. Never remove this label. Should this label ever start to come off or should its contents become unreadable, contact your original dealer or authorized distributor.
- Page 14 Note that CASIO is not liable for any losses suffered by you or any third party due to the loss of data stored on FIVA’s hard disk.
- Page 15 • CASIO assumes no responsibility for any loss (including but not limited to personal injury, material loss, damage to FIVA) suffered by you or other arising out of the use of a non-CASIO option. Use Only as Directed • Be sure to connect or disconnect an option only as expressly directed in the documentation that comes with the option.
- Page 16 Check with your local solid waste officials for details in your area for recycling options or proper disposal. • Prior to your disposal or give away of the MPC-701 to a third party, you are recommended to take necessary action to erase completely all important data saved on the HDD on your own account not to crate a trouble caused by the leak of data.
-
Page 17: Maintenance And Care
FIVA. • Use only the stylus accompanied with the FIVA (or specified by CASIO) for inputting on the LCD screen. Before using the stylus, remove any dirt from the tip of it and on the screen. Dirt if any may make an input with the stylus more difficult or damage on the screen. - Page 18 Maintenance Never remove FIVA’S outer cover or otherwise try to take it apart or modify it in any way. High voltage inside the case creates the danger of electric shock. In the following instances, immediately shut down the power, remove the battery packs, unplug the power plug from the power outlet, and contact your original dealer or authorized distributor: •...
-
Page 19: Table Of Contents
Contents Packing List ....................1 Safety Precautions ..............2 Before Using FIVA ..................9 Maintenance and Care ................15 About This User’s Guide ................20 Chapter 1 Getting Ready ............21 Features ..................... 23 Part Names and Their Functions ............. 24 Keyboard .................... - Page 20 Using the Keyboard .................. 61 Keyboard Types ....................61 Changing the Mobile Keyboard Size ..............62 Moving the Mobile Keyboard on the Screen ............62 Inputting Text with the Mobile Keyboard ..........63 Using handwriting input (smARTwriter) ..........65 How does it work? ....................65 Training smARTwriter ..................
- Page 21 Connecting to the USB port ..............104 Using External Monitor ..................107 Changing the screen's resolution and colors ............ 108 Using a PC Card ..................109 Using a PC Card ....................109 Using a CF Card ..................112 Using a CF Card ....................112 Loading an Expansion Memory .............
-
Page 22: About This User's Guide
About This User’s Guide This User’s Guide is divided into the four sections shown below. Be sure you read the section titled “Before Using FIVA” starting from page 9 before you do anything else. Before Using FIVA This section provides important safety precautions and things you need to know to use FIVA correctly. -
Page 23: Chapter 1 Getting Ready
Chapter 1 Getting Ready This chapter provides you with general description of functions and part names. It also explains required procedures for turning power on and off for the first time. -
Page 25: Features
Features The MPC-701 Series is a lightweight and compact pen type computer. 8.4-inch SVGA (800 × 600) TFT LCD • High-density TFT color LCD has high resolution. MPC-701M30E: VE-transflective type MPC-701M50E: Transmissive type Backlight turns on automatically in response to the brightness sensor. -
Page 26: Part Names And Their Functions
Part Names and Their Functions The part names introduced in this chapter are used throughout the rest of this User’s Guide. Front Indicator lamps LCD screen Brightness sensor Speaker Power switch Microphone port Headphone port USB port Backlight switch B attery pack compartment K ey lock switch K eyboard... - Page 27 qLCD screen SVGA (800 × 600) 8.4" type color TFT with touch panel MPC-701M30E: VE-transflective type MPC-701M50E: Transmissive type wIndicator lamps LED lamps indicate the following states from the left as you face FIVA: Power (PW-LED) Indicates the power state. (page 92) HDD (HDD-LED) Indicates the disk accessing state.
- Page 28 Back Battery pack compartment Hook PC card slot USB port Modem port V entilation hole LAN port Infrared communications port Power adapter port R GB port CF card slot M emory replacement cover R eset switch B attery pack B attery release latch...
- Page 29 qBattery pack compartment Contains the battery pack. wHook Used for attaching the neck strap. ePC card slot (PCMCIA CARD) Used for inserting the PC card. rUSB port ( Connects USB peripheral devices. (USB Ver.2.0 compliant) tModem port ( Connects the built-in modem to the telephone line by modular cable. yLAN port (LAN) Connects to an Ethernet network.
-
Page 30: Keyboard
Keyboard This section describes the basic functions of the keyboard. Actual keyboard functions may differ in accordance with the application you are using. • Keyboard keys are grouped according to function: control keys, 10-key pad, and arrow keys. Function Key Name Description Control Escape... -
Page 31: Key Combinations
Key Combinations • Key combinations where you must hold down one key and press a second are indicated by a plus symbol. • The following shows the key combinations that are available with key. This is called the “hot keys” function. Description Decreases LCD brightness. -
Page 32: Before Using Fiva For The First Time
Before Using FIVA for the First Time Affixing the Screen Protector on to the LCD screen Follow the steps to affix the film. 1. Peel off a thin sheet on each side of the film first. 2. Note the four corners on the Screen Protective Film. The surface with the corners pointing upward must face to your side and the other side must face to the LCD screen. -
Page 33: Pulling Out The Stylus
Pulling out the Stylus Use your finger to slide the stylus from its storage slot on the front of the FIVA unit. To replace the stylus, slide it carefully back into the slot so the raised part of the stylus enters the slit. •... -
Page 34: Power Supply
Please connect AC adapter, when you exchange two battery packs simultaneously. Or please prepare a full charged battery pack, then change battery. And exchange other battery after waiting until the first battery pack is recognized by Windows of MPC-701. To set the battery pack 1. Turn over the FIVA. - Page 35 • Two battery packs can be attached at the same time, and they can be attached in any order. Of course operation with only one battery pack is also possible. To remove the battery pack Before removing the battery pack, be sure to turn off the power when the AC adapter is connected to FIVA and a power outlet you can remove the battery pack without turning off the power.
-
Page 36: Charging The Battery Pack
Charging the Battery Pack The AC adapter is used not only to supply power from the AC power outlet but also to charge the battery pack. The battery pack is also charged while FIVA is in use (power is on) if the AC adapter (provided) is connected with the battery pack inserted in the FIVA unit. - Page 37 When the two battery packs are used for MPC-701, one of them can be exchanged by the "hot swap" function at any time,even in the state of the use MPC-701. MPC-701 starts battery charge from a large remained capacity battery pack.
-
Page 38: Turning On Power
Turning on Power Either connect the FIVA unit to the power outlet by the AC adapter, or attach a charged battery pack. Turning on the power Press the power switch until the PW indicator lamp lights. Do not turn on and off in a short time. After turning power off, wait for at least 10 seconds before turning it back on again. -
Page 39: Windows 2000 Operating System Setup
Register the user name and password. Starting setup 1. Also, make sure that the AC adapter is connected before pressing the power switch. The CASIO logo screen is displayed, following by several other screens, and finally the Windows setup screen. - Page 40 2. Confirm the terms of the Windows 2000 operating system licensing agreement. Be sure to read these terms. If you agree with the terms of this agreement, select “I accept this agreement.”, and click Next. If you do not agree to these terms, you cannot use Windows 2000 operating system provided on FIVA.
- Page 41 4. Next, the user information screen for setting details relating to the individual using the software is displayed. Register your name and the name of your organization. When you have entered your name, press the tab. The cursor moves to the textbox for entering the name of your organization.
- Page 42 Input example: If your name is fiva Name fiva While holding down the CTRL key, press “8” repeatedly, when “f” appears, release the CTRL key and the “8” key. “f” is displayed on the screen. While holding down the CTRL key, press “8” repeatedly, when “i”...
- Page 43 5. Enter the Windows product key. (The key is indicated on the label affixed to the bottom of the FIVA.) If you make a mistake when entering the product key, an error will be displayed, and you can enter the product key again. This key will be needed when you ask for customer support, or when you set up Windows 2000 again.
- Page 44 • Product key The product key combines the ALT key, the “8” key and the “9” key for English letters and numbers only. Product key numbers are input from the 10 key. For English letters, while pressing the ALT key, repeatedly press the “8”...
- Page 45 6. The screen for entering the name of the computer and the administrator (system manager) password is displayed. 7. Setting the date and time Set the correct date and time to FIVA.
- Page 46 8. Set the network settings. In this screen, you must enter information that is common not only to FIVA but that is also shared with other computers over a network. If you do not know this information, ask the system administrator of the network you are using or the system supervisor at the store of purchase.
- Page 47 9. In the exit Windows 2000 operating system setup screen, select Exit. This reboots FIVA, and the Windows 2000 initial screen is displayed. 10. Enter the user name and password in this field to log on. After doing the input, setup closes and the Windows desktop screen returns.
-
Page 48: Shutting Down The Power
Shutting Down the Power There are 3 ways to shut down the power. However, power consumption with the power off, and the time until Windows can be used again vary according to how FIVA is stopped and power is shut down. -
Page 49: To Shut Down Windows 2000 Operating System From The Start Menu
To shut down Windows 2000 operating system from the Start menu Selecting [Shut Down...] from the Start menu ( [Shutdown], [Restart], [Stand by] and [Hibernate] can be selected in the Windows Shutdown dialog box. The following describes how to shut down from the Start menu... - Page 50 Selecting [Shutdown] in the Windows Shutdown dialog box This shuts down Windows and turns the power off. Select this method when FIVA is not to be used for a long time (for example, when power is not to be turned on until the following day) or when adding on memory.
- Page 51 Selecting [Restart] in the Windows Shutdown dialog box This exits the currently active session, completely shuts down the system, and then restart the system as in a normal bootup. Select this method when you are experiencing a problem in the application or when you want to change system settings.
- Page 52 Selecting [Stand by] in the Windows Shutdown dialog box Use this method when you have to leave your desk for only a short time or you want to resume operation immediately after the previous operation. In the Standby mode, screen displays, Windows states and the states of previously active applications are saved to memory so that they can be immediately used.
- Page 53 Selecting [Hibernate] in the Windows Shutdown dialog box In the Hibernation mode, the state of Windows 2000 operating system and previously active applications are saved to hard disk. (In the Standby mode, they are saved to memory and a slight amount of power is constantly consumed.) Also, almost no power is supplied.
- Page 54 • Avoid entering the Hibernation Mode while a communication operation is in progress, or while a peripheral (disk, printer, etc.) is in use. Entering the Hibernation Mode while a communication operation is in progress will cause an error on the other computer.
-
Page 55: How To Use Suspend
How to Use Suspend The FIVA unit is provided with the suspend of the power saving function as standard. Suspend refers to both the Hibernate and Stand by modes described on the previous pages. Use of the battery packs can be prolonged by suspending FIVA when FIVA is not to be used temporarily. -
Page 57: Chapter 2 Using Fiva
Chapter 2 Using FIVA This chapter explains how to turn on power and per- form a number of basic computer operations. -
Page 59: Adjusting The Screen Brightness
Adjusting the Screen Brightness When you use FIVA, the brightness of the screen must sometimes be adjusted. There are two ways of doing this, from the keyboard and from the Mobile Cockpit. q From the keyboard (page 29) +"1" ( ) turns down (darkens) the brightness. -
Page 60: Using The Stylus
Using the Stylus Before actually using the stylus to perform screen operations, be sure to first clean the tip of the stylus and the screen. Performing stylus operations when the stylus or screen is dirty can damage the screen and interfere with stylus input. Use only the stylus that comes with FIVA to perform screen operations. -
Page 61: Stylus Operations
Stylus Operations With FIVA, you can perform all the operations you need by lightly touching the screen. The following provides descriptions and examples of a number of basic functions. • Do not trace along the frame line on the LCD screen with the stylus, or apply an excessive pressure when inputting on the screen as it is easily damaged. -
Page 62: Key Lock
r Right Click Touch the icon on the lower right of the screen. The next time you touch the screen with the stylus performs a right-click operation. Some applications do not allow right clicking while a range of text is selected (highlighted). -
Page 63: Using The Keyboard
Using the Keyboard Keyboard Types FIVA Hard Keyboard The keys to the right of the FIVA display are grouped according to function: control keys, 10-key pad, and arrow keys. Pressing the function key and then another key performs a hot key function. See page 29 for a complete list of hot key combinations. -
Page 64: Changing The Mobile Keyboard Size
Changing the Mobile Keyboard Size Touch and hold the lower right corner of the keyboard with the stylus so the pointer changes from . Drag the stylus on the screen to change the size of the keyboard. Note that the size of the smARTwriter handwriting input panel cannot be changed. -
Page 65: Inputting Text With The Mobile Keyboard
Inputting Text with the Mobile Keyboard There are five different Mobile Keyboard configurations. You can select the one that suits you best. To change the configuration of the Mobile Keyboard, tap the icon in the upper left corner of the current keyboard, and then select the keyboard you want from the menu that appears. - Page 66 t Ten key...
-
Page 67: Using Handwriting Input (Smartwriter)
Using handwriting input (smARTwriter) FIVA comes with smARTwriter handwriting recognition software. You can find detailed information about all of the features and functions in the online help that is available while smARTwriter is running. The following explains of smARTwriter Plus Ver.3.5. smARTwriter is a pre-installed handwriting recognition application that lets you input text into an active application, launch applications, open documents and more by writing with the stylus directly on the... -
Page 68: Achieving Good Recognition
Achieving Good Recognition Following the tips listed below helps to improve the handwriting recognition rate. • Write without stopping. There is no need to wait for smARTwriter to recognize text. • Write using printed (not connected or cursive) characters. • Do not use delayed strokes. Dot your “i” and cross “t” characters immediately. -
Page 69: Using The Euro Trainer
3. The Quick Trainer window appears, showing a passage of text. 4. Copy each character into the slot or box directly under it, one character in each slot. If you make a mistake, re-write the letter or character. You can re-write a letter or character as many times as you need. -
Page 70: Using Smartwriter
Using smARTwriter This section explains what you need to know in order to actually set up and use smARTwriter on your FIVA. Starting Up smARTwriter smARTwriter always starts up automatically every time you turn on FIVA. You can, however, quit smARTwriter manually (selecting Exit from the smARTwriter menu option), and then start it back up manually the next time you want to use it. - Page 71 First Steps in Writing with smARTwriter 1. Switch to Pointing Mode( ) and then start up an application, such as Word. 2. Switch to Writing Mode ( ) and tap in the input area of the application so the insertion cursor appears. You are ready to start writing on the screen.
-
Page 72: Using Gestures
Using Gestures A “gesture” is a symbol you draw to activate a special function or enter a special character, like a backspace, new line, etc. The following are the gestures available with smARTwriter. Training Correction Backspace Backspace Space New Line Edit Selected Edit Selected •... - Page 73 To activate the Correction Box with the menu 1. Write until a recognition error occurs. 2. Select (highlight) the misrecognized word. 3. Tap the smARTwriter icon and then select Correct... from the smARTwriter menu. • This activates the Correction Box with the misrecognized word inside it.
-
Page 74: The Smartwriter Menu
The smARTwriter Menu Tapping the smARTwriter icon opens the smARTwriter menu, which provides access to the main functions of smARTwriter. Tap here. Correct Activates the Correction Box. See “Using the Correction Box” on page 71. Train Opens the Trainer dialog box so you can “teach” smARTwriter your handwriting style. -
Page 75: Train
Train You can train smARTwriter to recognize your own handwriting style for characters, strings, macros, gestures, or application shortcuts. • Training improves the handwriting recognition rate because it teaches smARTwriter how to recognize your particular writing style. See “Using Quick Trainer” on page 66 for information about how to use another training tool named Quick Trainer. - Page 76 2. In the upper part of the Trainer dialog box, select the segments or parts of the ink pattern that you want to use as a character. • Tap the ink pattern to select it, tap it again to deselect. If there is more than one stroke, make sure you select all the strokes that are part of the character.
-
Page 77: Macros & Gestures
• If you open the Trainer dialog box while text is selected in a document, the selected text is automatically replaced by the newly trained character when you close the Trainer dialog box. Macros & Gestures This option opens the Train Macro Wizard dialog box with the last ink pattern you wrote or selected. -
Page 78: Application Shortcuts
3. Tap Finish to save the macro and close the Train Macro Wizard. Existing Macro 1. On the dialog box that appears, select the macro or gesture you want from the list. • The lower part of the dialog box shows the sequence currently assigned to the selected macro or gesture. - Page 79 3. In response to the prompt that appears, tap New Shortcut if you are creating a new shortcut, or Existing Shortcuts to associate the ink pattern with an existing shortcut. Next, tap Next to continue. • The prompt described in step 3 appears only when one or more application shortcut already exists.
-
Page 80: Library
Library The collection of characters and shapes recognized by smARTwriter is called the Library of Models. smARTwriter contains a pre-defined Library of Models with over 371 distinct characters. smARTwriter recognizes handwriting primarily by comparing the shape and direction of flow of individual characters you write to a set of character shapes (models) stored in the Library of Models. - Page 81 Type of Models Use this box to specify the category of models you want to view. Tap the down arrow and select one of the categories listed below. To view: Select: All characters in the Library of Models Lower case characters only Lower Upper case characters only Upper...
-
Page 82: Using The Libraries Window
Using the Libraries Window Use the Libraries Window to create new libraries, open an existing library (change the active library), and to copy and delete libraries. The icons on the top of the Libraries Window represent New (create), Open (change), Copy, and Delete. Creating a New Library If more than one person uses the FIVA, it is a good idea if each user creates a personal Library of Models. -
Page 83: Properties
To delete a library • Make sure that the library you are deleting is not the active library. If it is, change the active library. 1. On the Libraries Window, select the library you want to delete from the list of libraries. 2. - Page 84 The settings on this tab control the way the electronic ink is displayed on the FIVA screen. Ink Width Use this setting to change the width of the ink. Tap the up or down arrow to change the width within the range of 1 to 5 points. Ink Color This area shows a sample of the color currently selected for the ink, and provides a button for changing the color.
- Page 85 Orientation • This option affects smARTwriter only. The screen orientation of your other applications does not change. These settings let you adjust the position of the screen for use as a writing board. They define the writing orientation so smARTwriter can recognize the electronic ink pattern.
-
Page 86: Quitting Smartwriter
Constraints This tab lets you turn recognition filters on and off. Turning on filters helps to improve recognition. As explained previously, smARTwriter searches through a large number of symbols in the Library of Models to find a match for each character you write. -
Page 87: Using Smartscribble
Using smARTscribble Basic Concepts About smARTscribble smARTscribble is a sketching application you can use to draw on the screen and capture the ink pattern. The resulting image is a set of stylus strokes you can edit later. smARTscribble also lets you add text to the image. -
Page 88: Working With Text
3. Lift the stylus from the screen. All the strokes contained within the selection boundary become highlighted. Strokes that are partially within the selection boundary are also highlighted. • Selecting as area or image automatically cancels any previous selection on the screen. To select all the images on the screen On the Edit menu, tap Select All. - Page 89 To modify existing text 1. Tap the Text button ( ) to switch to the text mode. 2. Tap the text item you want to edit. 3. Make any changes you want. 4. After you are finished, tap anywhere outside the text box or tap the Text button again to finish entering text.
-
Page 90: Ink
Changing the Ink color To change the color of the ink 1. On the Edit menu, tap Pen Color to display the Color dialog box, which is a standard Windows color palette. 2. Select the color you want to use for the ink. •... -
Page 91: Smartscribble Documents
smARTscribble Documents Creating, Saving and Opening Documents smARTscribble documents can be saved as files. • smARTscribble document files have names that end with the extension INK. Any file with this extension is automatically associated with smARTscribble. • To create a new smARTscribble document, tap New on the File menu. -
Page 92: Page Size
Page Size Each new smARTscribble document page is sized to fit the FIVA screen. Use the Expand ( ) to expand the size of the document page. • To lengthen the size of a page, tap the Expand ( ) button. This causes the page to expand downwards. -
Page 93: Using The Battery Pack
Using the Battery Pack A charged battery pack lets you run FIVA without connecting the AC adapter. The following describes various power management functions that help to make battery pack operation more efficient. • See page 32 for information about attaching and removing the battery pack. - Page 94 Checking the Power Indicator Lamp ColorBAT-LED PW-LED When there is little remaining battery power left when FIVA is running on the battery pack only, the Power Indicator lamp ( ) starts to flash red, and the system notifies the user by the low battery power warning. If you ignore this warning and continue using FIVA without the AC adapter connected, FIVA will automatically enter the Hibernation mode.
-
Page 95: Using The Battery Pack Effectively
Checking with Mobile Cockpit Mobile Cockpit’s battery monitor function lets you graphically view the charge level of the battery at any time. See page 134. For more information on the battery pack, press the battery control button to display some on-screen information. Battery control button Click. - Page 96 When to Replace the Battery Pack The battery pack is a consumable item, and after long use the amount of operating time provided by a fully charged battery can become quite short. This indicates it is time to replace the battery pack with a new one.
- Page 97 When Two Battery Packs Are Mounted When two battery packs are mounted, the hot-swapping function allows either of the two battery packs to be replaced while the other is in use even if FIVA is turned on. About charging Charging is started from the battery pack having more remaining power.
-
Page 99: Chapter 3 Supplementary Information
Chapter 3 Supplementary Information This chapter contains information about how to connect peripherals and what to do when you experience problems. -
Page 101: Connecting A Peripheral To Fiva
Note the following important points before connecting a peripheral. • Some peripherals require changes in FIVA settings. Some peripherals require certain settings to be made before they can be used. • Use only special cables for connections. Use only the specified cables to connect peripherals. Even if the shape of a connector on a cable appears the same as that for the specified cable, it may not work properly. -
Page 102: Connecting A Headphone Or A Microphone
Connecting a Headphone or a Microphone By connecting commercially available headphone or microphone to this unit, the sound function built in this unit can be used. To connect the headphone Connect the headphone plug to the headphone port ( ) on the right of this unit. -
Page 103: Connecting To The Lan Port
To connect microphone Connect the microphone plug to the microphone port ( ) on the right of this unit. Use a microphone which has the monaural mini jack (ø3.5 mm). Connect the microphone plug to the microphone port ( ). To disconnect the plug, pull it out from the port by holding the plug. -
Page 104: Connecting To The Modem Port
Connecting to the modem port The built-in 56kbps modem provides a high-speed data communication and facsimile transmission/reception capabilities. (The actual communication speed depends on the local line conditions, etc.) You can use this function by connecting the modular cable to the modem port. -
Page 105: Performing Infrared Communications
Performing Infrared Communications A communications function compliant with the IrDA infrared communications system is provided on the rear of FIVA. Infrared communications allows you to send and receive data to and from another computer. Infrared communications port Locate FIVA and the other device supporting the IrDA interface so that they directly face each other. -
Page 106: Connecting To The Usb Port
Connecting to the USB port The USB (Universal Serial Bus) is a standard interface specification for the connections of the USB compatible peripherals such as a keyboard, mouse, printer, scanner, etc. to the computer. Connecting to or disconnecting from the USB port can be performed even when the power of this unit is turned on. - Page 107 Using the floppy disk drive The optional USB compatible floppy disk drive (MPC-240FDD) is available for this unit. The two types of floppy disk can be used with this unit. One is 2DD floppy disk with the capacity of 720 KB and the other is 2HD floppy disk with the capacity of 1.44 MB.
- Page 108 Connecting a Printer A USB compatible printer can be connected to the USB port of this unit. Installing the printer driver is required for using the printer. The printer driver that comes with this unit or one (stored in a CD, floppy disk, etc.) that comes with the printer can be used.
-
Page 109: Using External Monitor
Using External Monitor Connect an external monitor to FIVA so that the operation can be performed while viewing the big-screen. To connect a Monitor 1. Turn off the power of FIVA after closing an application, etc. Making sure that the RGB cable from the external monitor is oriented correctly, connect the RGB cable to the RGB port of the FIVA. -
Page 110: Changing The Screen's Resolution And Colors
Changing the screen's resolution and colors You can specify the resolution and number of colors only when using an external monitor. Right click on the Windows Me desktop and select Properties on the menu. The Display Properties appears. Click the Setting tab and then make the Colors and Screen area settings you want. -
Page 111: Using A Pc Card
Using a PC Card Using a PC Card FIVA has one PC Card Standard PCMCIA TYPE II PC card slot (including card compatible with the Card BUS). You can use a PC card to connect various peripherals such as the CD- ROM drive or DVD-ROM, etc. - Page 112 Inserting a PC card Make sure that the PC card is oriented correctly when you insert it into the PC card slot. Inserting the PC card into the slot upside down forcibly may damage the cable or the slot. 1. Connect the cable to the PC card. And, push the eject button into the slot.
- Page 113 Removing a PC card Before removing a PC card from the slot, first click the Mobile Cockpit PC Card button ( ) and disable PC card operation and then remove the PC card. Also, make sure that an application or system is not running. The PC card can be inserted or removed even when the power of this unit is turned on or off, but not when the unit is in the Suspend Mode.
-
Page 114: Using A Cf Card
Using a CF Card Using a CF Card FIVA has one CF TYPE I/II CF (Compact Flash) card slot. You can use a CF card to load the expansion memory or hard disk. Almost all CF cards can be inserted or removed while the power of the unit is turned on. For the detail of using a CF card, see the manual that comes with the CF card. - Page 115 Inserting a CF card Make sure that CF card is oriented correctly when you insert it into the CF card slot. Inserting the CF card into the slot upside down forcibly may damage the connector or the slot. 1. Push the eject button into the slot. 2.
- Page 116 Removing a CF card Before removing a CF card from the slot, first click the Mobile Cockpit PC Card button ( ) and disable CF card operation and then remove the CF card. And, be sure that an application or system is not running. The CF card can be inserted or removed even when the power of this unit is turned on or off, but not when the unit is in the Suspend Mode.
-
Page 117: Loading An Expansion Memory
Expanded memory can help applications and large-volume data to be operated at a high speed. Use the optional expansion memory board (MPC-252RAM/253RAM/754RAM) or one specified by CASIO. Before installing or removing expansion memory board Do not disassemble the unit except the part described below. - Page 118 3. Remove the screw from the memory replacement cover near the center of the top section of the turned over FIVA. 4. Lift up the cover to remove. 5. When the cover is removed, the expansion memory slot appears. Align the notched sections (q) of the expansion memory board with the protrusions (w) of the expansion memory slot, and insert the expansion memory board diagonally while paying attention to its orientation and insertion angle until its terminals come into contact...
- Page 119 • The memory board is not installed correctly, or • The memory board is not a specified one by CASIO. To check the capacity of the RAM (The amount subtracted 16 from the system memory.), click Start → Settings → Control Panel → System →...
-
Page 120: Using The "Mobile Cockpit
Using the “Mobile Cockpit #” The CASIO original application software “Mobile Cockpit3” is installed in this unit. The “Mobile Cockpit3” is always displayed as a tool bar on the desk top of the Windows and it allows you to perform the convenient settings easily. -
Page 121: Registering Applications In The "Launcher Bar
q Switching the tool bar The Mobile Cockpit has the Control bar and Launcher bar. You can switch the display between them depending on your usage. When you click , the display is switched between the Control bar and the Launcher bar. •... - Page 122 2. Confirm that the button of the application you registered is displayed in the Launcher bar. To register applications from the “My Computer”. 1. Drag and drop application you want to register from the My Computer in the Windows to the Launcher bar. 2.
- Page 123 To delete the application you registered 1. Clicking the Switching the tool bar button in the Mobile Cockpit to switch to the Launcher bar from the Control bar. 2. Right-click the button of the application you want to delete. Right-click the icon of the application. 3.
-
Page 124: Changing The Display Position Of The Tool Bar
w Panel Changing the display position of the tool bar By dragging the panel, the “Mobile Cockpit” can be displayed in the following 5 positions of the desk top screen. The upper part of the screen The lower part of the screen The right side of the screen The left side of the screen Floating... -
Page 125: Pop-Up Menu
• When you use Windows or Mobile Cockpit III task bar at left or right side of the screen, do not set Auto hide active. • If you place the task bar at left or right side on the screen and set Auto hide active, the icons on the task bar may be hidden which makes you find the icons difficult. - Page 126 Help When you need the information about the Mobile Cockpit, this lets you know how to operate. Version info This displays the version information of the Mobile Cockpit. Exit This closes the application of the “Mobile Cockpit3”. When you want to use the tool bar of the “Mobile Cockpit3”...
-
Page 127: One Touch Operation Button Setting
e Settings You can specify 4 settings of the “One Touch Operation Buttons”, the Wake On Timer, Power Management and Settings. One Touch Operation Button Setting Three one touch operation buttons ( , P0, P1) are located on the keyboard. Pressing each of these buttons starts up the application pre- registered to that button. -
Page 128: Power Management Setting
Power Management Setting This allows you to prolong the using time of the battery pack when you change the settings of the Suspend Mode, CPU, hard disk and the LCD monitor and the power supply according to the conditions. (This function is called “Power Management”.) To make the change of the using condition easier, the three modes of “FULL POWER”, “NORMAL”... - Page 129 FULL POWER NORMAL ECONOMY...
- Page 130 USER AC This setting is when the power is supplied to this unit by the AC adapter. USER DC This setting is when the power is supplied to this unit by the battery packs.
-
Page 131: Settings (Preferences)
Settings (Preferences) The initial setting can be set to use this unit. The two settings of “Built-in LAN on/off”, “Power Switch Action” can be specified. When the restart is necessary after the setting is changed, the display to restart this unit appears after you press the OK button. Built-in LAN When you do not use the built-in LAN, remove the check mark from... -
Page 132: Power Management
r Power management When the button is depressed. Full power Normal Economy User When you press one of the “Full power”, the “Normal”, the “Economy” and the “User” button to select the setting of the “Power Management Setting” described before, the setting of the power management for this unit can be specified. -
Page 133: Adjusting The Volume
y LAN connection switch Up to 16 LAN settings can be set to FIVA, each with individual names for each of the different locations. With these individual LAN settings, you set the name of your own computer, IP address, proxy setting, and the normally used printer. If LAN settings are already set when the LAN connection switch button is pressed, the following dialog box is displayed. - Page 134 i PC card properties The( ) button open Windows PC card (PCMCIA) properties. ) button To remove the PC card by operating from this screen. All currently connected storage devices including PC cards can be removed by the [Eject Hardware] button ( ) in the indicator area.
- Page 135 !0 Battery Control This window displays the condition of the battery packs. You can check the connecting condition of the battery packs, the remaining power of the battery packs or the time to replace with a new battery pack, etc. The reading of the Rated capacity does not guarantee the actual capacity of the battery packs which are being used.
-
Page 136: Battery Indicator
!1 Battery indicator The battery indicator indicates the battery pack remaining power and installed state at all times. When running FIVA by the battery pack only • The display differs when only battery pack is installed and when two battery packs are used. -
Page 137: Standby Mode
!2 Standby Mode When you click the standby button ( ), this unit enters the Standby Mode. • You can also set to the Standby Mode by pressing “ + “3” ( )”, selecting “Standby” after selecting the “Shut down”, or performing the operation of “e Settings”... -
Page 138: Using The Terminal Equipment 1456Vql19V (Int) (Built-In Modem)
The following explanation on pages 136 to 143 is about the Terminal Equipment embedded in CASSIOPEIA FIVA series and described by following the rules. The Terminal Equipment is operable and compliant with the regulations in the United States and Canada only. For users of CASSIOPEIA FIVA series resident in other countries, the description and the instruction of the equipment are not applicable. - Page 139 If trouble is experienced with this equipment 1456VQL19V (INT), for repair or warranty information, please contact CASIO INC. (973.361.5400). If the equipment is causing harm to the telephone network, the telephone company may request that you disconnect the equipment until the problem is resolved.
- Page 140 This equipment is registered with the FCC under Part 68 as a component device for use with CASIO COMPUTER CO., LTD. models CASSIOPEIA FIVA Series. In order for the FCC registration of this product to be retained, all other products used in conjunction with this product must also be FCC Part 68 registered for use with this host.
-
Page 141: Notice Concerning Fcc Radial Regulations
Notice Concerning FCC Radial Regulations Note that federal law prohibits you from using software that is not in compliance with FCC rules that regulate redialing on the computer or other device where this modem is installed. For users in Canada NOTICE: The Industry Canada label identifies certified equipment. -
Page 142: For Users In Europe
PSTN network termination point. In the event of problem, you are advised to contact your local dealer or CASIO distributor in the first instance. Network compatibility The modem has been designed for the use with the following networks and tested in compliance with EG 201 121 standard. -
Page 143: Main Functions Of The Modem
Main functions of the modem Network control functions Automatic Send and Receive by built-in NCU Conforms to the following protocols and possible to communicate in full duplex V.21/V.22bis/V.32/V.32bis/V.34/ Modem protocols V34bis/V.90/K56flex/V.27ter/V.29/V.17 Data compression Conforms to MNP 5, ITU-T V.42bis protocols Error control protocols Conforms to MNP 4, ITU-V.42 Function... -
Page 144: Connecting To Telephone Line
FIVA with embedded 1456VQL19V (INT) Modem port Connecting to telephone line The modular cable that comes with the modem shall be used to connect the modem to the telephone line. In this case, if the telephone line is available through the modular jack, it is possible to connect the modem to the telephone line directly. -
Page 145: Connecting To The Fiva
Connecting to the FIVA Turn off the power of the FIVA first and then connect as depicted below. Modular cable Connector for communication (for connection to the dedicated Modular cable) Caution on operation of the product To use this product, operate as instructed below since this is designed to be embedded in the FIVA. -
Page 146: Troubleshooting
Troubleshooting This section describes what you should do whenever you start to experience problems with operation of FIVA, its peripherals, or applications you are running. Basic Troubleshooting Note the following important points whenever you are experiencing problems. 1. Take your time. If the system seems to hang up, resist the urge to turn off power, click things on the display, or press keyboard keys. - Page 147 Hard Disk Free Space (MB) Battery Pack (Used/No Used) External Monitor Printer PC (CF) Card Peripherals Other Peripherals Software Windows Version All applications running Remarks when problem occurred Other information about FIVA can be found by visiting the CASSIOPEIA Website at: http://www.casio.co.jp/English/system/...
-
Page 148: Fiva Malfunction
FIVA Malfunction Symptom Recommended Action FIVA is emitting smoke and heat. Immediately turn off power, remove the Battery Packs, and unplug the AC adapter from the wall outlet. FIVA malfunction Contact your original dealer or authorized distributor. Have the following information on hand. -
Page 149: Power Supply
Power Supply Symptom Recommended Action Power does not turn on. Use the AC adapter to power FIVA. • Power indicator lamp is flashing red. • Use a fully charged battery pack. If the • Power turns on but immediately turns battery pack has small charge when off. -
Page 150: Display Problems
Display Problems Symptom Recommended Action Nothing on the display, Power indicator Press the power switch to turn on power. lamp is not lit. Display has gone blank. Touch anywhere on the display. FIVA’s power saving function causes the display to go blank if no operation is performed for some time. -
Page 151: Software Problems
Software Problems Symptom Recommended Action Cannot perform infrared data communi- Make sure that the wireless link on the cation. control panel is enabled. • Make sure there are no obstructions in the infrared path between the two devices. Cannot send data correctly using Make sure the data transfer speed set for infrared data communication. -
Page 152: General Operation Problems
General Operation Problems Symptom Recommended Action Power indicator lamp flashes red Purchase a new battery pack and replace immediately after charging. the current one. Battery packs tend to lose their ability to charge after long use. • If you suspect that the problem is due to FIVA suddenly hangs up. - Page 153 General Operation Problems (continued) Symptom Recommended Action Hot keys do not work. Tap the Taskbar’s Start button and start up Mobile Cockpit from the Programs menu. • If Mobile Cockpit is not running, tap the Mobile Cockpit is not displayed. Taskbar’s Start button and start up Mobile Cockpit from the Programs menu.
-
Page 154: Declaration Of Confirmity
The CE marking indicates compliance to applicable European Directives and Norms declared by; CASIO Europe GmbH Bornbarch 10, D-22848 Norderstedt, Germany DECLARATION OF CONFIRMITY CASIO Europe GmbH Bornbarch 10, D-22848 Norderstedt, Germany declare under our sole responsibility that the product... - Page 155 Declaration of Conformity Model Number: MPC-701M50E, MPC-701M30E Trade Name: CASIO Responsible party: CASIO INC. Address: 570 Mt. Pleasant Avenue, Dover, New Jersey 07801. Telephone number: 973.361.5400 This device complies with part 15 of the FCC Rules. Operation is subject to the...
-
Page 156: Specifications
JIS drip-proof Class II compliant Specifications Lithium ion battery (nominal: 11.1 V, 2000 mAh) M30E: 5 hrs approx. (CASIO standard), 3.5 hrs approx. (JEITA measurement method) Battery pack* Operating time (For one battery pack) M50E: 4 hrs approx. (CASIO standard), 3 hrs approx. (JEITA measurement method) Charging time (For one battery pack) With power ON: 2.5 hrs approx., With power OFF: 2.5 hrs approx. -
Page 157: Options List
Options List The useful options shown below are available for use with the FIVA MPC-701 Series. Expansion memory board Floppy disk drive (part No.: MPC-252RAM) 64 MB (part No.: MPC-240FDD) (part No.: MPC-253RAM) 128 MB (part No.: MPC-754RAM) 256 MB... - Page 159 • The content of this guide is subject to change without notice. • CASIO has, to the best of its ability, endeavored to make this guide as accurate as possi- ble. However, if any unclear portions or omissions are found, please contact your dealer.
- Page 160 ™ CASIO COMPUTER CO., LTD. 6-2, Hon-machi 1-chome Shibuya-ku, Tokyo 151-8543, Japan...