Casio DT-X200 Series User Manual
Handheld terminal
Hide thumbs
Also See for DT-X200 Series:
- User manual (19 pages) ,
- Software manual (207 pages) ,
- Service manual (85 pages)

Related Manuals for Casio DT-X200 Series


Summary of Contents for Casio DT-X200 Series
- Page 1 Handheld Terminal DT-X200 Series User’s Guide Be sure to read “Safety Precautions” inside this guide before trying to use your Handheld Terminal.
- Page 2 “FeliCa” is a contactless IC card technology developed by SONY Corporation and a registered trademark of SONY Corporation. Information in this document is subject to change without advance notice. CASIO Computer Co., Ltd. makes no representations or warranties with respect to the contents or use of this manual and specifi...
-
Page 3: Table Of Contents
Contents Contents ......................E-1 Safety Precautions ..................E-3 Operating Precautions ...................E-7 About the Waterproofi ng/Dustproofi ng ............E-9 Warning Label ....................E-10 Important ......................E-11 Regulatory Information ................E-11 Accessories and Options ................E-12 General Guide ....................E-13 Loading and Removing the Battery Pack ...........E-16 Loading ......................E-17 Removing ...................... - Page 4 ® Performing Bluetooth Communication .............E-33 Resetting the Handheld Terminal ..............E-34 Performing a Full Reset (Initialization) ............E-34 DT-X200 Specifi cations ................E-36 Dimensional Drawings ..................E-39 Handling the Hand Belt (HA-K95HB)............E-40 Attaching the hand belt ..................E-40 Removing the hand belt ..................E-40 Using the USB Cradle (HA-K60IO) ..............E-41 General Guide ....................
-
Page 5: Safety Precautions
Safety Precautions Congratulations upon your selection of this CASIO product. Be sure to read the following Safety Precautions before trying to use it for the fi rst time. Your neglect or avoidance of the warning and caution statements in the subsequent pages causes the danger of fi... -
Page 6: Lcd Screen
Warning Interference with the Operation of Other Equipment (Using Wireless Data Communication) • Keep your Handheld Terminal well away from anyone wearing a pacemaker. Radio waves emitted by the Handheld Terminal can affect the operation of a pacemaker. • Before the use in aircraft, be sure to consult with cabin crew for interference the Handheld Terminal emits. - Page 7 Immediately rinse it off with clean tap water and then consult a physician. Caution • Replace only with the same type of battery pack recommended by CASIO. Dispose of used battery packs according to the local regulation. • Keep the battery pack out of the reach of small children.
- Page 8 Caution • Note that CASIO Computer Co., Ltd. shall not be held liable to you or any third party for any damages or loss caused by deletion or corruption of data due to use of the Handheld Terminal, malfunction or repair of the Handheld Terminal or its peripherals, or due to the batteries going dead.
-
Page 9: Operating Precautions
Operating Precautions Your Handheld Terminal and its options are precision. Improper operation or rough handling can cause problems with data storage and other problems. Note and observe the following precautions to ensure proper operation. • Do not leave dead battery pack in the Handheld Terminal for a long period. Dead battery pack can leak, leading to malfunction and damage to the Handheld Terminal. - Page 10 • Lithium-ion Battery Pack Each lithium-ion battery pack has its life. The life span heavily depends on how the battery pack is charged or stored which may cause deterioration of the battery pack to shorten the life span if it is handled improperly. Note the tips below to make the battery pack last long.
-
Page 11: About The Waterproofi Ng/Dustproofi Ng
IEC National Committees. Important! The water- and dust-proofi ng performance of this product is based on CASIO testing procedures. Note also that this performance applies to the product at the time of shipment (delivery to the customer) and is not guaranteed inclusive of the environment in which the product is used. -
Page 12: Warning Label
Warning Label Warning! ■ Never look directly into the laser light. • These products scan using laser light. Never look directly into the laser light or shine the laser light into the eyes. DT-X200-41E DT-X200-10E/ 11E/20E/21E • This label is a warning and caution label for Class 2 laser products that comply with IEC60825-1:2007. -
Page 13: Important
• Please keep all information for future reference. • The declaration of conformity may be consulted at http://doc.casio.com/ • Products are for distribution within all member states of the EU. • Options of DT-X200 are HA-K60IO, HA-K62IO, HA-K36DCHGE, HA-K65US, HA-F32DCHG and HA-K23XLBAT. -
Page 14: Accessories And Options
Accessories and Options Accessories Handheld Terminal DT-X200 Series Please check the items in the box before using the Handheld Terminal for the fi rst time. • Battery Pack HA-K23XLBAT • USB and Charging Unit HA-K65US • AC Adaptor AD-S15050B-N5 • Power Cord •... -
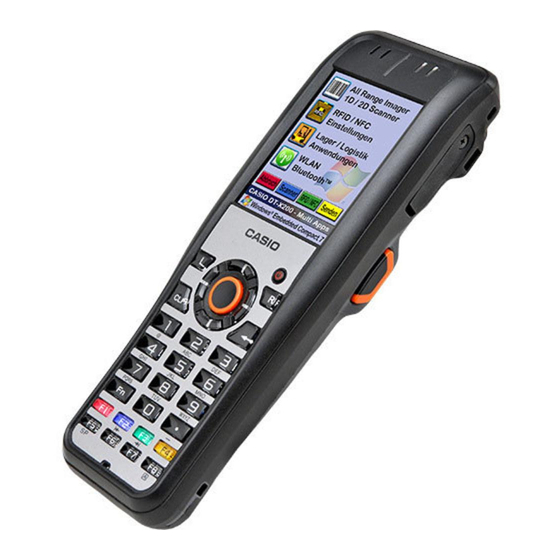
Page 15: General Guide
General Guide Left Front Right Back Bottom The illustration shows DT-X200-10E/ -11E/-20E/-21E. E-13... - Page 16 Speaker Generates audio and buzzer tones. Indicator 1 Orange: Charging Green: Charging complete Red: Battery pack error or the surrounding temperature is out of the charging temperature range. Indicator 2 Flashes blue when operating via Bluetooth or orange when operating via W-LAN. Lights red when there is a bar code scanning error and lights green when a bar code scans successfully.
- Page 17 15 CLR Key Used to clear one letter to the left of the cursor. 16 Strap Holes Used to attach neck strap and hand belt. 17 microSD Card Slot microSD card slot. 18 R Trigger Key Used to perform bar code reading. 19 L Trigger Key Used to perform bar code reading.
-
Page 18: Loading And Removing The Battery Pack
Loading and Removing the Battery Pack Your Handheld Terminal uses two types of battery: a battery pack and a memory backup battery. The battery pack is used to power normal operations and to store data, while the memory backup battery provides the power required to maintain memory contents when the battery pack power is unable to supply power for some reason. -
Page 19: Loading
Loading 1. Turn the terminal over, turn the left and right lock switches for the battery pack cover to the “FREE” position ( ), and then remove the battery pack cover ( 2. Load a battery pack (HA-K23XLBAT). Take care that the battery pack is oriented correctly when you load it. -
Page 20: Removing
Removing 1. Make sure that the Handheld Terminal is turned off. If the power is on, press the power key to turn it off. 2. Turn the terminal over, turn the left and right lock switches for the battery pack cover to the “FREE”... -
Page 21: Attaching The Pen Cord
Attaching the Pen Cord The pen cord can be used to prevent the pen (stylus) from being lost. Since there are two strap holes where the pen cord can be attached on the back of the terminal near the top, use the hole that affords the greatest ease of use. Attach the pen cord according to the procedure described below. -
Page 22: Attaching The Hand Strap
Attaching the Hand Strap The hand strap can be used to prevent the Handheld Terminal from fall. Since there are four strap holes where the hand strap can be attached, use the hole that affords the greatest ease of use. Attach the hand strap according to the procedure described below. To attach the hand strap 1. -
Page 23: Calibrating Touch Panel Alignment
Calibrating Touch Panel Alignment Whenever the response of the touch panel is poor, or operation being executed does not match with the location you are tapping on the touch panel, please recalibrate the alignment of the touch panel using the following method. •... -
Page 24: Setting The Display Brightness
Setting the Display Brightness Adjusting Display Brightness You can use the following procedures to adjust display brightness to make it easier to read under different lighting conditions. • Press the “Fn” key and then press the “5” key or “6” key after confi rming that “F” is displayed on the screen. -
Page 25: Using The Laser Scanner (Laser Models
Using the Laser Scanner (Laser Models) 1. After turning on the power, position the laser scanner close to a bar code and then press the trigger key. 2. The laser emits light and scans the bar code. If scanning is completed normally, Indicator 2 displays a green light. -
Page 26: Bar Code Scanning Position
Bar Code Scanning Position Position the laser scanner close to the bar code when scanning small bar codes. Position the laser scanner at a distance from the bar code so that the bars enter the light when scanning large bar codes. Margin Margin Good... -
Page 27: Adjusting The Laser Light Emission Width
Adjusting the Laser Light Emission Width The emission width of the laser light emitted by the Handheld Terminal (model dependant) can be adjusted. Adjust the emission width when it is improper. 1. Navigate to the menus in the following sequence: Start Settings Control Panel... - Page 28 4. Tap the [Calibration] button. The display appears as shown at right. 5. Press the trigger key to emit laser light, and align the light with the barcode for adjusting emission width. • Align the laser light with the narrow bars on both sides. •...
-
Page 29: Using The Cmos Imager (Imager Models
Using the CMOS Imager (Imager Models) 1. Turn on the Handheld Terminal, position its CMOS Imager reader port near the bar code or 2D code, and then press the trigger key. 2. The Handheld Terminal reads the code by emitting laser and red lights. Indicator 2 (read operation indicator lamp) lights in green when the reading is successful. -
Page 30: Using The Full Range Imager (Full Range Imager Models
Using the Full Range Imager (Full Range Imager Models) 1. Turn on the Handheld Terminal, aim its CMOS Imager reader port toward the bar code or 2D code, and then press the trigger key. The aimer in a round shape is emitted onto barcode. -
Page 31: Handling The Nfc Reader/Writer (Dt-X200-11E/11C/21E/21C
Handling the NFC Reader/Writer (DT-X200-11E/21E/41E) NFC is a type of RFID (Radio Frequency Identifi cation) technology that allows the data in a device to be read simply by holding the device up to an NFC reader. It can be used to read RFID tags used for controlling goods as well as contactless IC cards used in applications such as employee identifi... -
Page 32: Contactless Ic Cards
Important! Both contactless IC cards and RFID tags • The NFC employs a low power radio wave which does not require regulatory station license. • Frequency band used by the NFC is 13.56 MHz. Secure a suffi cient space between DT-X200 and other reader/writer located in the vicinity. Make sure also that a radio station employs the same frequency band does not locate near by prior to using DT-X200. -
Page 33: Handling Microsd Cards
Handling microSD Cards The Handheld Terminal supports microSD card. Install (or remove) a microSD card according to the procedure described below. Installing 1. Open the cover of the microSD card slot ( ) and insert a microSD card all the way in until the top of the microSD card aligns with the entrance of the slot of the Handheld Terminal ( •... -
Page 34: Removing
Removing 1. Open the cover of the microSD card slot and press on the microSD card ( The microSD card is pushed out ( 2. Pull out the microSD card and close the cover of the microSD card slot. Important! •... -
Page 35: Performing Bluetooth Communication
® Performing Bluetooth Communication ® Bluetooth interface can also be used to transfer data between two Handheld Terminals. ® With Bluetooth the two Handheld Terminals should be located within about three meters ⁄ ) from each other, as long as there is nothing blocking the path between them. "... -
Page 36: Resetting The Handheld Terminal
Resetting the Handheld Terminal Resetting the terminal is the same as resetting a PC. Performing a reset causes all unsaved RAM data to be lost that are in mid-course of inputting and editing, but data and settings that are already stored in the FlashROM should be unaffected. Perform a reset to restore normal operation whenever the Handheld Terminal operates abnormally due to misoperation or some other reason. - Page 37 1. While holding down the Fn key and CLR key, push down the reset switch for about 3 seconds with the pen (stylus) until the message shown below appears on the display. • To cancel the full reset operation, press the L Trigger key. R Trigger Key 2.
-
Page 38: Dt-X200 Specifi Cations
DT-X200 Specifi cations Model: DT-X200-10E/20E/11E/21E/41E ® CPU: Marvell PXA320 624MHz Memory: 256MB RAM, 512MB Flash ROM (user defi ned: 300MB) ® ® Microsoft Windows Embedded Compact7 ® 6.9 cm (2.7 inches), 240 × 320-dot Blanview Display: TFT Color LCD Laser Scanner (DT-X200-10E/11E): Readable symbologies: UPC-A/UPC-E/EAN8 (JAN8)/EAN13 (JAN13)/Codabar (NW-7)/ Code39/Interleaved 2 of 5 (ITF)/MSI/Industrial 2 of 5/Code93/... - Page 39 ® Bluetooth ® Protocol: Bluetooth Specifi cation Ver.2.1 + EDR Communication Range: Approximately 3 m (depends on radio wave conditions and environment) Output: 4dBm max. (PowerClass2) WLAN: Standards: IEEE 802.11b/g Diffusion Modulation: DS: 802.11b DS/OFDM: 802.11g Frequency: 802.11b/g: 2.400-2.4835 GHz Transmission Rate: 802.11b: Max.
- Page 40 Weight: DT-X200-10E/11E: Approximately 290g (when battery pack is installed) DT-X200-20E/21E/41E: Approximately 295g (when battery pack is installed) E-38...
-
Page 41: Dimensional Drawings
Dimensional Drawings Approx. 41mm (1 ") Approx. Approx. 66mm (2 ") 32mm (1 ") (Display) (Display) Approx. 35mm (1 ") (Grip) Approx. 57mm (2 ") (Grip) DT-X200-10E/11E/20E/21E Approx. 44mm (1 ") Approx. 32mm (1 ") (Display) Approx. 35mm (1 ") (Grip) DT-X200-41E E-39... -
Page 42: Handling The Hand Belt (Ha-K95Hb
Handling the Hand Belt (HA-K95HB) An optional hand belt (HA-K95HB) can be attached to the terminal. Attaching the hand belt 1. As shown in the fi gure, align the metal part of the hand belt hook in line with the installation position on the terminal and then snap it into the ditch. -
Page 43: Using The Usb Cradle (Ha-K60Io
Using the USB Cradle (HA-K60IO) The optional USB Cradle (HA-K60IO) makes it possible to transmit system data and fi le data between the Handheld Terminal and a PC via a USB connection (download or upload). You can also use the USB Cradle to charge the battery pack installed in the Handheld Terminal. - Page 44 USB Client Port This port is used to transmit system data and fi le data (download, upload) by connecting the Cradle to a PC using a USB cable (DT-380USB-A). A dedicated driver must be installed in the PC before connecting the Cradle to the PC. AC Adaptor Jack Connect the AC adaptor (sold separately) here.
-
Page 45: Connecting The Usb Cradle Power Supply
Connecting the USB Cradle Power Supply Use the optional AC adaptor (AD-S15050B) for the power supply of the USB Cradle. Always make sure to connect the AC adaptor to the USB Cradle before performing communication with the Handheld Terminal. Power to the Handheld Terminal is supplied from the USB Cradle. - Page 46 4. Turn on the power switch on the right side of the USB Cradle. The power LED on the front of the USB Cradle lights red. 5. Align the terminals on the bottom of the DT-X200 with the power supply terminals in the USB Cradle before inserting the DT-X200 ( ).
- Page 47 Important! • Allowing the power supply terminals become wet can cause an electric shock or fi re. In addition, if the terminals become soiled, contact may be impaired resulting in poor charging. For reasons of safety and maintaining charging battery pack(s) in optimum condition, clean the power supply terminals by wiping with a dry cloth or cotton swab after disconnecting the AC adaptor.
-
Page 48: Specifi Cations
Specifi cations 1. USB Protocol: USB Ver1.1 Standard Transfer Rate: 12Mbps (max.) 2. Charging Charging Method: Constant current/voltage Charge Period: Approximately 4 hours 3. Power Supply Power Source: AC adaptor (AD-S15050B) Consumption Current: 5V DC approximately 3.0A Output to Handheld Terminal: 5V DC 3.0A (max.) 4. -
Page 49: Using The Ethernet Cradle (Ha-K62Io
Using the Ethernet Cradle (HA-K62IO) The optional Ethernet Cradle (HA-K62IO) makes it possible to transmit system data and fi le data between the Handheld Terminal and a PC via a USB or LAN connection (download or upload). You can also use the Ethernet Cradle to charge the battery pack installed in the Handheld Terminal. - Page 50 USB Client Port This port is used to transmit system data and fi le data (download, upload) by connecting the Ethernet Cradle to a PC using a USB cable (DT-380USB-A). The dedicated driver must be installed in the PC before connecting the Ethernet Cradle to the PC. USB Host Port This port is used to connect a corresponding USB peripheral device.
-
Page 51: Connecting The Ethernet Cradle Power Supply
Connecting the Ethernet Cradle Power Supply Use the optional AC adaptor (AD-S42120C) for the power supply of the Ethernet Cradle. Always make sure to connect the AC adaptor to the Ethernet Cradle before performing communication with the Handheld Terminal. Power to the Handheld Terminal is supplied from the Ethernet Cradle. - Page 52 4. Before using the cradle ports, remove the caps from the ports. When using a LAN, connect one end of the LAN cable to the LAN port and the other end to the PC or hub. When using a USB connection, connect one end of the USB cable (DT-380USB-A) to the USB port and the other end to the PC.
- Page 53 Status of Indicator 1 on DT-X200: Orange: Charging the battery pack. Red Flashing: Standby due to battery pack error or the surrounding temperature is out of the charging temperature range. (charging begins when the temperature is within the charging temperature range) Green: Charging the battery pack is complete.
-
Page 54: Specifi Cations
Specifi cations 1. LAN Specifi cations Communications protocol: IEEE 802.3 Media type: 10base-T/100base-TX auto-switched 2. USB Protocol: USB Ver1.1 Standard Transmission Rate: 12Mbps (max.) 3. Charging Charging Method: Constant current/voltage (the charging circuit is built in DT-X200) Charge Period: Approximately 4 hours 4. -
Page 55: Using The Cradle-Type Dual Battery Charger (Ha-K36Dchg
Using the Cradle-type Dual Battery Charger (HA-K36DCHGE) The optional Cradle-type Dual Battery Charger (HA-K36DCHGE) can concurrently charge two battery packs installed in the respective DT-X200s. General Guide Side Upper Bottom Bundled Items Use these bundled items to join multiple chargers together. Bottom bracket Side bracket Screws (for brackets) - Page 56 1 AC Adaptor Jack Connect the AC adaptor (sold separately) here. 2 Power Switch Turns the power on and off. 3 Connectors Use these connectors to connect multiple Cradle-type Dual Battery Chargers to each other. 4 Screw Holes for The connection bracket attaches here when you connect multiple Brackets Cradle-type Dual Battery Chargers to each other.
-
Page 57: Charging Battery Pack
Charging Battery Pack Use the optional AC adaptor (AD-S90190C) to supply power to the charger. 1. Plug the connector from the AC adaptor into the AC adaptor jack on the dual battery charger with the engraved side of the connector facing upwards. Push the connector fi... - Page 58 4. Place DT-X200 in the charger as illustrated so that the terminals on the bottom of the DT-X200 make contact with the power contacts of the charger. Take care not to trap objects such as the hand strap in the charger. The power LEDs on the top of the charger light green and indicator 1 lights orange.
- Page 59 Important! • Water or moisture on the power contacts can cause a short-circuit and/or fi re. Soil on the power contacts will deteriorate the conduction causing poor charge performance. When cleaning the power contacts, unplug the AC adaptor from the charger as safety precaution and wipe off soil on the power contacts with a dry and soft cloth or with cotton swab.
-
Page 60: Connecting Multiple Cradle-Type Dual Battery Charger
Connecting Multiple Cradle-type Dual Battery Chargers You can connect up to three Cradle-type Dual Battery Chargers. Doing so makes it possible to supply power to all the Cradle-type Dual Battery Chargers using one dedicated AC adaptor. 1. As shown in the illustrations below, remove the connector covers of the Cradle-type Dual Battery Chargers you want to connect to each other. -
Page 61: Specifi Cations
Important! • Each unit of the charger comes with one piece each of the side and bottom brackets. After you join two chargers together using these two brackets, one side bracket and one bottom bracket will be left over. Keep these as spare for use in future. -
Page 62: Using The Usb And Charging Unit (Ha-K65Us
Using the USB and Charging Unit (HA-K65US) The optional USB and Charging Unit (HA-K65US) makes it possible to transmit system data and fi le data between the Handheld Terminal and a PC via a USB connection (download or upload). You can also use the USB and Charging Unit to charge the battery pack installed in the Handheld Terminal. -
Page 63: Mounting The Usb And Charging Unit
Mount and use the USB and Charging Unit as described in the procedure below. Mounting the USB and Charging Unit 1. Fit the USB and Charging Unit onto the bottom of the terminal as shown in the illustration. 2. After mounting the unit onto the terminal, check that it is fi rmly locked in place using the stoppers. -
Page 64: Removing The Usb And Charging Unit
Removing the USB and Charging Unit 1. Unlock the stoppers on the left and right sides of the USB and Charging Unit by pressing them inwards, as shown in the illustration. 2. Keeping the stoppers pressed in, pull the USB and Charging Unit off the terminal. Connecting to a Computer Connect to a computer using the USB and Charging Unit with the USB cable (DT- 380USB-A). -
Page 65: Charging The Battery Pack
Charging the Battery Pack The battery pack installed in the DT-X200 can be charged using the USB and Charging Unit with the optional AC adaptor (AD-S15050B). An indicator on the DT-X200 shows the level of charge. AC Adaptor (AD-S15050B) Status of Indicator 1 on DT-X200: Orange: Charging Red Flashing: Standby due to battery pack error or the surrounding temperature is out... -
Page 66: Specifi Cations
Specifi cations Charging: Charging Method: Constant current/voltage Charge Period: Approximately 4 hours (AD-S15050B) Approximately 8 hours (USB-computer connection) Power Supply: Power Source: AC Adaptor (AD-S15050B) Consumption Current: 5V DC approximately 3.0A Output to Handheld Terminal: 5V DC 3.0A (max.) AC Adaptor Model: AD-S15050B Input:... -
Page 67: Using The Dual Battery Charger (Ha-F32Dchg
Using the Dual Battery Charger (HA-F32DCHG) The optionally available Dual Battery Charger (HA-F32DCHG) can be used to simultaneously charge two battery packs. General Guide Left Right Bottom Front 1 Charge Indicator LED 2 AC Adaptor Jack 3 Dual Battery Charger Connection Port 4 Connection Bracket Attachment Holes 5 Power Supply Terminals E-65... -
Page 68: Charging Battery Pack
Charging Battery Pack Use the separately sold AC adaptor (AD-S42120C) for the power supply of the Dual Battery Charger. 1. Plug the cord from the AC adaptor into the AC adaptor jack of the Dual Battery Charger. 2. Plug the AC cord into a wall outlet. 3.Taking care that the battery pack is oriented correctly, insert it into the Dual Battery Charger. -
Page 69: Connecting Multiple Dual Battery Chargers
Connecting Multiple Dual Battery Chargers You can connect up to three Dual Battery Chargers. Doing so makes it possible to supply power to all the Dual Battery Chargers using one dedicated AC adaptor. 1. As shown in the illustrations below, remove the connector covers of the Dual Battery Chargers you want to connect to each other. -
Page 70: Specifi Cations
Specifi cations 1. Charging Specifi cation Charging Method: Constant current/voltage Charge Period: Approx. 4.5 hours (1 battery pack, normal temperature) When charging two battery packs: Approx. 5 hours (2 battery packs, normal temperature) 2. Power Supply Power Source: AC adaptor (AD-S42120C) Consumption Current: 12V DC 3.5A Output:... -
Page 71: Using Rechargeable Battery Pack
Using Rechargeable Battery Pack HA-K23XLBAT Important! • Store a battery pack in its special soft case whenever you are not using it. • If the battery pack has been left over unused for a long period of time, the capacity remained decreases due to spontaneous discharge or chemical decomposition by the battery pack itself. - Page 72 CASIO COMPUTER CO., LTD. 6-2, Hon-machi 1-chome Shibuya-ku, Tokyo 151-8543, Japan...