
Related Manuals for Makita XHU09


Summary of Contents for Makita XHU09
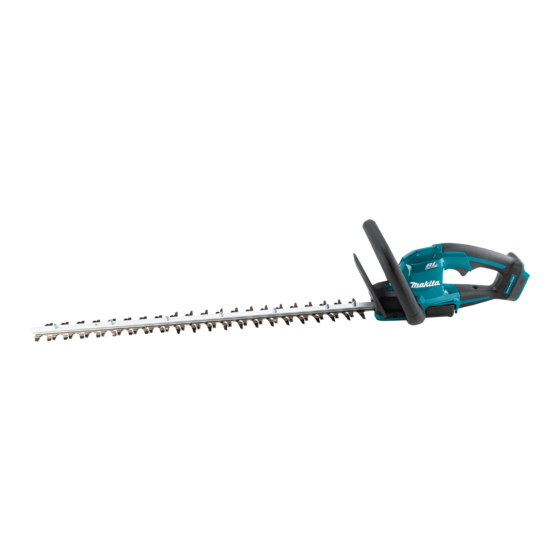
- Page 1 INSTRUCTION MANUAL MANUAL DE INSTRUCCIONES Cordless Hedge Trimmer Cortasetos Inalámbrico XHU09 IMPORTANT: Read Before Using. IMPORTANTE: Lea antes de usar.
-
Page 2: Specifications
ENGLISH (Original instructions) SPECIFICATIONS Model: XHU09 Blade length 600 mm (23-5/8") Strokes per minute 4,000 /min Overall length 965 mm (38") (Without battery) Rated voltage D.C. 18 V Net weight 2.7 - 3.0 kg (6.0 - 6.6 lbs) • Due to our continuing program of research and development, the specifications herein are subject to change without notice. - Page 3 If operating a power tool in a damp location is Disconnect the plug from the power source unavoidable, use a ground fault circuit inter- and/or remove the battery pack, if detachable, rupter (GFCI) protected supply. Use of a GFCI from the power tool before making any adjust- ments, changing accessories, or storing power reduces the risk of electric shock.
-
Page 4: Additional Safety Instructions
Additional Safety Instructions Follow all charging instructions and do not charge the battery pack or tool outside the Preparation temperature range specified in the instruc- tions. Charging improperly or at temperatures Check the hedges and bushes for foreign outside the specified range may damage the objects, such as wire fences or hidden wiring battery and increase the risk of fire. - Page 5 Electrical and battery safety Symbols Avoid dangerous environment. Don't use the tool in dump or wet locations or expose it to The followings show the symbols used for tool. rain. Water entering the tool will increase the risk of electric shock. volts Do not dispose of the battery(ies) in a fire.
-
Page 6: Functional Description
Use of non-genuine Makita batteries, or batteries that have been altered, may result in the battery bursting causing fires, personal injury and damage. It will also void the Makita warranty for the Makita tool and Fig.1 charger. ► 1 . Red indicator 2. Button 3. Battery cartridge... -
Page 7: Overload Protection
50% to 75% Let the machine and battery(ies) cool down. If no improvement can be found by restoring protection 25% to 50% system, then contact your local Makita Service Center. NOTICE: 0% to 25% If the tool stops due to a cause not described above, refer to the section for troubleshooting. -
Page 8: Electronic Function
This tool is equipped with an electric brake. If the tool consistently fails to quickly stop the shear blades after releasing the switch trigger, have the tool serviced at Makita Authorized Service Center. • Accidental re-start preventive function Even if you install the battery cartridge while pull- ing the switch trigger, the tool does not start. - Page 9 Place the tool upside down, then remove 6 bolts, Remove 2 bolts, the felt pad and the sleeves, and and then remove the cover and the plate. then remove the shear blades. Fig.8 ► 1 . Felt pad 2. Bolt 3. Sleeve 4. Shear blades Remove the blade cover, and then attach it to the new shear blades.
- Page 10 Slide the shear blades slightly as shown in the Slide the shear blades and sleeves so that the figure, and then attach the sleeves to the shear blades. holes on the sleeves are aligned with the holes on the tool. Fig.11 ► 1 . Sleeve Fig.13 Slide the blade cover slightly toward the tip of the shear blades, and then attach the shear blades to the ► 1 .
- Page 11 ► 1 . Claw 2. Groove the crank properly. Install the shear blades again. NOTICE: If the parts other than the shear blades such as the crank is worn out, ask Makita Authorized Service Centers for parts replacement or repairs. 11 ENGLISH...
-
Page 12: Operation
Press the levers on the chip receiver, and then OPERATION hook the claws on the other side to the groove on the shear blades. WARNING: Keep hands away from shear blades. CAUTION: Avoid operating the tool in very hot weather as much as practicable. When operat- ing the tool, be careful of your physical condition. - Page 13 Hold the tool with both hands, hold the front handle If the chip receiver is attached to the shear blades, it while pressing the switch lever and pull the switch trig- gathers discarded leaves and makes clean-up after- ger, and then move the tool forward. ward much easier.
-
Page 14: Maintenance
Store the tool in a place not exposed to To maintain product SAFETY and RELIABILITY, moisture or rain. repairs, any other maintenance or adjustment should be performed by Makita Authorized or Factory Service Centers, always using Makita replacement parts. Cleaning the tool Clean the tool by wiping off dust with a dry cloth or one dipped in soapy water and wrung out. -
Page 15: Grease Lubrication
Set the angle of a file to 35°, and grind the upper Grease lubrication blade from 2 directions with the file. Interval of lubrication: Every 50 operating hours Remove the bolt from the hole for lubrication. Fig.33 ► ( 1) File (2) 35° Fig.35 CAUTION: Before grinding the shear blades, ► 1 . Bolt make sure that the tool is switched off and the battery cartridge is removed from the tool. -
Page 16: Troubleshooting
TROUBLESHOOTING Before asking for repairs, conduct your own inspection first. If you find a problem that is not explained in the manual, do not attempt to dismantle the tool. Instead, ask Makita Authorized Service Centers, always using Makita replace- ment parts for repairs. State of abnormality Probable cause (malfunction) Remedy Motor does not run. Battery cartridge is not installed. Install the battery cartridge. -
Page 17: Especificaciones
ESPAÑOL (Instrucciones originales) ESPECIFICACIONES Modelo: XHU09 Longitud de la cuchilla 600 mm (23-5/8″) Carreras por minuto 4 000 cpm Longitud total 965 mm (38″) (sin batería) Tensión nominal 18 V c.c. Peso neto 2,7 kg - 3,0 kg (6,0 lbs - 6,6 lbs) •... - Page 18 Evite tocar con el cuerpo superficies conec- No utilice la herramienta donde no alcance. tadas a tierra o puestas a tierra tales como Mantenga los pies sobre suelo firme y el equi- tubos, radiadores, cocinas y refrigeradores. Si librio en todo momento. Esto permite un mejor su cuerpo es puesto a tierra o conectado a tierra control de la herramienta eléctrica en situaciones existirá un mayor riesgo de que sufra una des-...
- Page 19 Mantenga las herramientas de corte limpias Servicio y filosas. Si recibe un mantenimiento adecuado Haga que una persona calificada repare la y tiene los bordes afilados, es probable que la herramienta eléctrica utilizando sólo piezas de herramienta se atasque menos y sea más fácil repuesto idénticas. Esto asegura que se man- controlarla. tenga la seguridad de la herramienta eléctrica. Utilice la herramienta eléctrica, los accesorios Nunca dé...
- Page 20 Cuando entregue el cortasetos a otra persona, Si las cuchillas de cizalla entran en contacto coloque primero el cortasetos en el suelo y con alguna cerca u otro objeto duro, apague levante el cortasetos después de quitar la inmediatamente la herramienta y retire el car- mano por completo.
- Page 21 12. Utilice las baterías únicamente con los pro- seguridad para el cartucho de ductos especificados por Makita. Instalar las batería baterías en productos que no cumplan con los requisitos podría ocasionar un incendio, un calen- Antes de utilizar el cartucho de batería, lea...
-
Page 22: Descripción Del Funcionamiento
INSTRUCCIONES. PRECAUCIÓN: Utilice únicamente baterías originales de Makita. El uso de baterías no origina- les de Makita, o de baterías alteradas, puede ocasio- nar que las baterías exploten causando un incendio, lesiones personales y daños. Asimismo, esto inva- lidará la garantía de Makita para la herramienta y el... -
Page 23: Protección Contra Sobrecarga
Cargue la(s) batería(s) o reemplácela(s) con batería(s) recargada(s). Deje que la máquina y la(s) batería(s) se enfríen. Si no hay ninguna mejora al restaurar el sistema de protección, comuníquese con su centro local de servi- cio Makita. AVISO: Si la herramienta se detiene debido a una causa no descrita anteriormente, consulte la sección de detección y solución de problemas. 23 ESPAÑOL... -
Page 24: Luz Indicadora
Esta herramienta está equipada con un freno eléctrico. Si la herramienta falla constantemente en detener rápidamente las cuchillas de cizalla tras soltar el gatillo interruptor, lleve la herra- mienta a servicio a un centro de servicio autori- zado de Makita. • Función para evitar el encendido accidental Aunque instale el cartucho de batería mientras se jala el gatillo interruptor, la herramienta no arranca. Para arrancar la herramienta, primero suelte el gatillo interruptor y luego jale el mismo. -
Page 25: Montaje
MONTAJE NOTA: La placa puede permanecer en la cubierta. Gire la manivela con el destornillador plano, de manera que los 2 orificios queden perpendiculares a las PRECAUCIÓN: Asegúrese siempre de que la herra- cuchillas de cizalla. mienta esté apagada y el cartucho de batería haya sido extraído antes de realizar cualquier trabajo en la misma. PRECAUCIÓN: Siempre utilice guantes al reemplazar las cuchillas de cizalla de manera que sus... - Page 26 Retire la cubierta de las cuchillas y luego coló- Deslice la cubierta de las cuchillas ligeramente quela en las nuevas cuchillas de cizalla. hacia la punta de las cuchillas de cizalla, y luego colo- que las cuchillas de cizalla en la herramienta. Fig.9 ► 1 .
- Page 27 AVISO: Si aparte de las cuchillas de cizalla otras piezas, tales como la manivela, muestran signos de desgaste, solicite su reparación o reemplazo a los centros de servicio autorizados Makita. Instalación o extracción del colector de residuos Accesorio opcional PRECAUCIÓN:...
- Page 28 El colector de residuos recolecta los restos de hojas y Presione las palancas del colector de residuos, y facilita la limpieza más adelante. Éste puede instalarse luego enganche las partes salientes del otro lado a la en ambos lados de la herramienta. ranura de las cuchillas de cizalla. Alinee los orificios del colector de residuos con los tornillos de las cuchillas de cizalla. Fig.18 Fig.20 ► 1 .
-
Page 29: Operación
Sostenga la herramienta con ambas manos, sostenga OPERACIÓN el mango delantero mientras presiona la palanca del interruptor y jale del gatillo interruptor, y luego desplace la herramienta hacia adelante. ADVERTENCIA: Mantenga las manos aleja- das de las cuchillas de cizalla. PRECAUCIÓN: Si es posible, evite utilizar la herramienta cuando haga demasiado calor. Durante la operación de la herramienta, vigile su condición física. -
Page 30: Limpieza De La Herramienta
PRECAUCIÓN: Asegúrese siempre de que la herra- mienta esté apagada y el cartucho de batería extraído antes de intentar realizar una inspección o mantenimiento. Para mantener la SEGURIDAD y FIABILIDAD del producto, las reparaciones, y cualquier otra tarea de mantenimiento o ajuste deberán ser realizadas en centros de servicio autorizados o de fábrica Makita, empleando siempre repuestos Makita. 30 ESPAÑOL... - Page 31 Ajuste el ángulo de la lima a 35°, y afile la cuchilla Almacenamiento superior desde 2 direcciones con la lima. El orificio para el gancho en la parte inferior de la herramienta resulta útil para colgar la herramienta en la pared usando un clavo o tornillo. Coloque la cubierta de las cuchillas de cizalla de manera que las cuchillas no queden expuestas. Almacene la herramienta fuera del alcance de los niños. Almacene la herramienta en un lugar que no esté...
-
Page 32: Resolución De Problemas
RESOLUCIÓN DE PROBLEMAS Antes de solicitar alguna reparación, primero realice una inspección por su cuenta. Si detecta algún problema que no esté explicado en el manual, no intente desensamblar la herramienta. En vez de esto, solicite la reparación a un centro de servicio autorizado de Makita, usando siempre piezas de repuesto Makita. Estado de la anomalía Causa probable (avería) Remedio El motor no funciona. -
Page 33: Accesorios Opcionales
PRECAUCIÓN: Estos accesorios o aditamen- tos están recomendados para utilizarse con su herramienta Makita especificada en este manual. El empleo de cualquier otro accesorio o aditamento puede conllevar el riesgo de lesiones personales. Utilice los accesorios o aditamentos solamente para su fin establecido. - Page 36 Makita Corporation 3-11-8, Sumiyoshi-cho, 885987-942 Anjo, Aichi 446-8502 Japan XHU09-1 EN, ESMX 20220705 www.makita.com...