
Related Manuals for Makita XRU24


Summary of Contents for Makita XRU24
- Page 1 INSTRUCTION MANUAL MANUAL DE INSTRUCCIONES Cordless Grass Trimmer Cortador Inalámbrico de Pasto XRU24 IMPORTANT: Read Before Using. IMPORTANTE: Lea antes de usar.
-
Page 2: Specifications
ENGLISH (Original instructions) SPECIFICATIONS Model: XRU24 No load speed 7,800 /min (without cutting tool) Overall length 1,228 - 1,436 mm (48-1/4″ - 56-1/2″) Nylon cord diameter 1.65 mm (1/16″) Applicable cutting tool and Nylon cutting head 260 mm cutting diameter (P/N: 191Y39-5) (10-1/4″) - Page 3 The string trimmer should be switched off immediately if it shows any signs of abnormal operation. Don't force the tool. It will do the job better and with less likelihood of a risk of injury at the rate for which it was designed. Don't overreach.
- Page 4 Do not expose a battery pack or machine to Before starting make sure that the nylon cut- fire or excessive temperature. Exposure to fire ting head has no contact with hard objects or temperature above 130°C (265°F) may cause such as branches, stones etc. as the nylon explosion.
- Page 5 19. Take a rest to prevent loss of control caused Symbols by fatigue. We recommend to take a 10 to 20-minute rest every hour. The followings show the symbols used for tool. 20. Hold the power tool by insulated gripping surfaces only, because the cutting attachment volts may contact hidden wiring.
-
Page 6: Parts Description
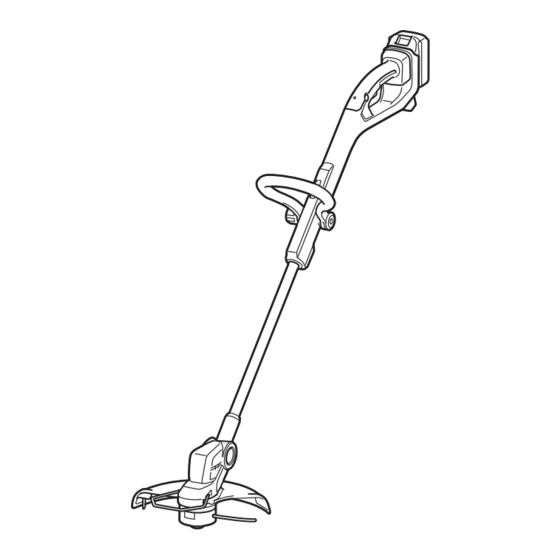
Wire guard Nylon cutting head causing fires, personal injury and damage. It will Nylon cord Protector also void the Makita warranty for the Makita tool and Angle adjustment Lock lever charger. button Tips for maintaining maximum... -
Page 7: Installing The Loop Handle
Installing the loop handle Installing the wire guard Attach the loop handle to the tool by securing it with a NOTICE: Do not expand the wire guard outward hex bolt and the thumb nut as shown in the figure. too much. Otherwise it may break. Fig.5 Fig.7 ►... -
Page 8: Functional Description
Makita. Installing or removing battery If you put on the shoulder harness included in the tool package and the shoulder harness of the back-... -
Page 9: Battery Protection System
If you turn the tool on, the motor runs without pressing the lock-off button. Ask your local again but stops soon. In this situation, remove and Makita Service Center for repairs. recharge the battery. WARNING: Never disable the lock function or Indicating the remaining battery tape down the lock-off button. -
Page 10: Nylon Cutting Head
The indication lamp blinks or lights up when the battery The cutting angle can be adjusted in 5 steps. To change becomes low or the tool is overloaded. Refer to the the cutting angle, change the angle of the motor hous- following table for the status and action to be taken. - Page 11 To adjust the shaft length, open the lock lever, then NOTICE: Use the grass trimmer without get- adjust the length of the shaft, and then close the lock ting the nylon cutting head into a contact with lever. the ground surface. Using the nylon cutting head contacting the ground surface may cause the motor under overload resulting in damage to the grass trimmer.
-
Page 12: Using The Grass Trimmer As An Edger
Using the grass trimmer as an edger NOTICE: Do not use the trimmer as if you dig out the ground. Using the grass trimmer as an edger is suitable for cutting the grass growing along the bricks or blocks. Open the lock lever, then extend the shaft to the max- imum length, then rotate the motor housing 180°, and then close the lock lever. -
Page 13: Maintenance
Discoloration, deformation or cracks may result. To maintain product SAFETY and RELIABILITY, repairs, any other maintenance or adjustment should be performed by Makita Authorized or Factory Service Fig.29 Centers, always using Makita replacement parts. ► 1. Loop handle 2. Shaft... - Page 14 Replacing the nylon cord WARNING: Use nylon cord with diameter specified in “SPECIFICATIONS” only. Never use heavier line, metal wire, rope or the like. Use recommended nylon cord only, otherwise it may cause damage to the tool and result in serious personal injury. WARNING: Make sure that the cover of the nylon cutting head is secured to the housing properly as described below.
- Page 15 8 12 Fig.30 ► (1) Up to 8 m (26.25 ft) (2) 70 - 80 mm (2-3/4" - 3-1/8") 15 ENGLISH...
-
Page 16: Troubleshooting
Before asking for repairs, conduct your own inspection first. If you find a problem that is not explained in the manual, do not attempt to dismantle the tool. Instead, ask Makita Authorized Service Centers, always using Makita replace- ment parts for repairs. -
Page 17: Especificaciones
ESPAÑOL (Instrucciones originales) ESPECIFICACIONES Modelo: XRU24 Velocidad sin carga 7 800 r/min (sin la herramienta de corte) Longitud total 1 228 mm - 1 436 mm (48-1/4″ - 56-1/2″) Diámetro del cordón de nailon 1,65 mm (1/16″) Herramienta de corte aplicable... - Page 18 Evite la puesta en marcha accidental: Use siempre casco donde haya riesgo de caída de objetos. El casco protector debe ser revi- — Asegúrese de que el interruptor se sado durante intervalos periódicos para ver encuentre en la posición de apagado si tiene daños y debe reemplazarse al menos antes de instalar el paquete de batería.
- Page 19 Recargue sólo con el cargador especificado Puesta en marcha de la herramienta por el fabricante. Un cargador que sea adecuado para un tipo específico de paquete de batería puede generar un riesgo de incendio al usarse con un paquete de batería distinto. Use las herramientas únicamente con los paquetes de baterías designados específi- camente para ellas.
- Page 20 Tenga cuidado con el cabezal de corte de 20. Sujete la herramienta eléctrica solamente por nailon para evitar lesiones en pies y manos. las superficies de asimiento aisladas, ya que el accesorio de corte podría entrar en contacto Nunca haga cortes por encima de la altura de con cableado oculto.
- Page 21 PRECAUCIÓN: Utilice únicamente baterías ori- de batería en lugares donde la temperatura ginales de Makita. El uso de baterías no originales de pueda alcanzar o exceder los 50 °C (122 °F). Makita, o de baterías alteradas, puede ocasionar que las Nunca incinere el cartucho de batería incluso...
-
Page 22: Montaje
Consejos para alargar al máximo MONTAJE la vida útil de la batería Cargue el cartucho de batería antes de que PRECAUCIÓN: Asegúrese siempre de que la se descargue completamente. Pare siem- herramienta esté apagada y el cartucho de batería haya sido pre la operación y cargue el cartucho de extraído antes de realizar cualquier trabajo en la misma. - Page 23 Makita. Si coloca el arnés para hombros incluido en el paquete de la herramienta y el arnés para hombros de la fuente de alimentación tipo mochila al mismo...
-
Page 24: Descripción Del Funcionamiento
Sistema de protección de batería DESCRIPCIÓN DEL FUNCIONAMIENTO La herramienta está equipada con un sistema de protección de batería. Este sistema corta en forma automática el suministro de energía al motor para prolongar la vida útil de la batería. ADVERTENCIA: La herramienta se detendrá... -
Page 25: Luz Indicadora
Solicite la reparación en el centro de servicio Makita de su localidad. NOTA: El momento en el que la luz indicadora parpadea o se enciende puede variar dependiendo de la temperatura en... -
Page 26: Ajuste Del Ángulo De Corte
El cabezal de corte de nailon cuenta con un mecanismo Ajuste la longitud del eje y el ángulo de corte, de modo de golpe y alimentación. Para alimentar el cordón de que el cabezal de corte de nailon quede plano al suelo nailon, golpee el cabezal de corte contra el suelo mien- cuando sostenga el mango con la mano derecha. - Page 27 Corte de pasto AVISO: No utilice el cortador como si fuera a desenterrar algo del suelo. Sostenga el cortador de pasto con ambas manos, y mueva el cortador de pasto de derecha a izquierda lentamente. Corte el pasto unas cuantas veces, empezando por la parte de arriba del pasto mediante la punta del cordón de nailon.
-
Page 28: Mantenimiento
Para mantener la SEGURIDAD y FIABILIDAD del pro- ducto, las reparaciones, y cualquier otra tarea de man- tenimiento o ajuste deberán ser realizadas en centros de servicio autorizados o de fábrica Makita, empleando siempre repuestos Makita. Limpieza de la herramienta Limpie la herramienta quitando el polvo, la tierra o los residuos de pasto con un paño seco o un paño hume-... - Page 29 Almacenamiento Cuando almacene la herramienta, levante el protector de alambre, acorte el eje, y luego pliegue el mango redondo. Fig.28 ► 1. Protector de alambre Fig.29 ► 1. Mango redondo 2. Eje Reemplazo del cordón de nailon ADVERTENCIA: Utilice el cordón de nailon únicamente con el diámetro especificado en la sección “ESPECIFICACIONES”.
- Page 30 8 12 Fig.30 ► (1) Hasta 8 m (26,25 ft) (2) 70 mm - 80 mm (2-3/4″ - 3-1/8″) 30 ESPAÑOL...
-
Page 31: Resolución De Problemas
Estos accesorios o aditamentos están recomendados para utilizarse con su herra- mienta Makita especificada en este manual. El empleo de cualquier otro accesorio o aditamento puede conlle- var el riesgo de lesiones personales. Utilice los accesorios o aditamentos solamente para su fin establecido. - Page 32 Makita Corporation 3-11-8, Sumiyoshi-cho, 885961-940 Anjo, Aichi 446-8502 Japan XRU24-1 EN, ESMX 20211123 www.makita.com...