
Related Manuals for Makita XRU18


Summary of Contents for Makita XRU18
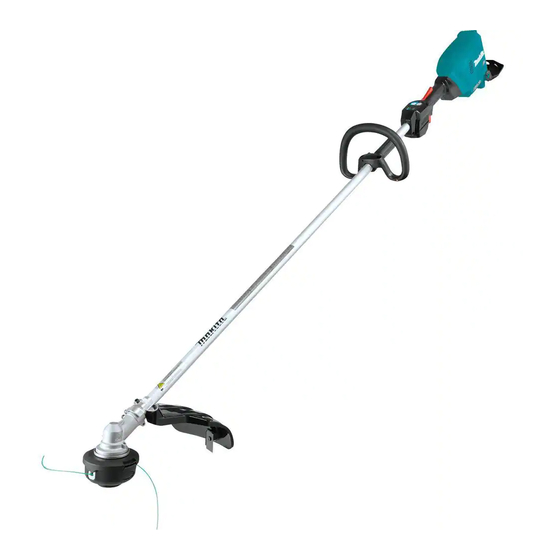
- Page 1 INSTRUCTION MANUAL MANUAL DE INSTRUCCIONES Cordless Grass Trimmer Cortador Inalámbrico de Pasto XRU18 IMPORTANT: Read Before Using. IMPORTANTE: Lea antes de usar.
-
Page 2: Specifications
ENGLISH (Original instructions) SPECIFICATIONS Model: XRU18 Handle type Loop handle No load speed 3: 0 - 6,000 /min (at each rotation speed level) 2: 0 - 4,600 /min 1: 0 - 4,000 /min Overall length 1,834 mm (72-1/2″) (without cutting tool) Nylon cord diameter 2.0 mm (0.08″) - Page 3 Don't force the tool. It will do the job better and with less likelihood of a risk of injury at the rate for which it was designed. Don't overreach. Keep proper footing and balance at all times. 10. Stay Alert - Watch what you are doing. Use common sense.
- Page 4 Do not use a cutting tool which is not recom- 12. Do not modify or attempt to repair the machine mended by Makita. or the battery pack except as indicated in the Do not operate the tool in bad weather or if instructions for use and care.
- Page 5 16. Always ensure that the ventilation openings WARNING: DO NOT let comfort or familiarity are kept clear of debris. with product (gained from repeated use) replace 17. Cutting elements continue to rotate after the strict adherence to safety rules for the subject motor is switched off.
- Page 6 Use of non-genuine Makita batteries, or batteries that have been altered, may result in the battery bursting causing fires, personal injury and damage. It will also void the Makita warranty for the Makita tool and charger. Tips for maintaining maximum...
-
Page 7: Parts Description
PARTS DESCRIPTION Speed indicator ADT indicator Caution lamp Main power button (ADT = Automatic Torque Drive Technology) Reverse button Battery cartridge Lock-off lever Switch trigger Handle Protector 7 ENGLISH... -
Page 8: Functional Description
FUNCTIONAL Caution lamp Status Color Blinking DESCRIPTION Green Overload Overheat (tool) / (battery) WARNING: Always be sure that the tool is switched off and the battery cartridge is removed Over discharge before adjusting or checking function on the tool. Failure to switch off and remove the battery cartridge Overload protection may result in serious personal injury from accidental start-up. -
Page 9: Main Power Switch
Press the check button on the battery cartridge to indi- CAUTION: Before installing the battery car- cate the remaining battery capacity. The indicator lamps tridge into the tool, always check to see that the light up for a few seconds. switch trigger actuates properly and returns to the "OFF"... -
Page 10: Electronic Function
To return to regular rotation, release the trigger and wait Speed indicator Mode Rotation speed until the cutting tool stops. High 0 - 6,000 /min Medium 0 - 4,600 /min 0 - 4,000 /min Automatic Torque Drive Technology ► 1. Speed indicator 2. ADT indicator 3. Reverse button When you turn on the Automatic Torque Drive NOTE: During the reverse rotation, the tool operates Technology (ADT), the tool runs at optimum rotation... - Page 11 Installing the handle Correct combination of the cutting tool and the protector Attach the upper and lower clamps on the damper. Put the handle on the upper clamp and fix it with CAUTION: Always use the correct combi- hex socket head bolts as illustrated. nation of cutting tool and the protector.
-
Page 12: Nylon Cutting Head
To maintain product SAFETY and RELIABILITY, Use of a damaged cutting tool may result in serious repairs, any other maintenance or adjustment should personal injury. be performed by Makita Authorized or Factory Service Centers, always using Makita replacement parts. 12 ENGLISH... -
Page 13: Cleaning The Tool
Cleaning the tool Clean the tool by wiping off dust, dirt, or cut off grass with a dry cloth or one dipped in soapy water and wrung out. To avoid overheating of the tool, be sure to remove the cut off grass or debris adhered to the vent of the tool. - Page 14 95-M10L 3 m (9 ft) 100 mm (3-15/16″) 80 mm (3-1/8″) 14 ENGLISH...
- Page 15 B&F ECO 4L 3 m (9 ft) 100 mm (3-15/16″) 80 mm (3-1/8″) 15 ENGLISH...
-
Page 16: Troubleshooting
Before asking for repairs, conduct your own inspection first. If you find a problem that is not explained in the manual, do not attempt to dismantle the tool. Instead, ask Makita Authorized Service Centers, always using Makita replace- ment parts for repairs. -
Page 17: Especificaciones
ESPAÑOL (Instrucciones originales) ESPECIFICACIONES Modelo: XRU18 Tipo de mango Mango redondo Velocidad sin carga 3: 0 - 6 000 r/min (en cada nivel de la velocidad de rotación) 2: 0 - 4 600 r/min 1: 0 - 4 000 r/min Longitud total 1 834 mm (72-1/2″) - Page 18 Evite la puesta en marcha accidental: Use siempre casco donde haya riesgo de caída de objetos. El casco protector debe ser revi- — Asegúrese de que el interruptor se sado durante intervalos periódicos para ver encuentre en la posición de apagado si tiene daños y debe reemplazarse al menos antes de instalar el paquete de batería.
- Page 19 No utilice una herramienta de corte que no sea recomendada por Makita. No utilice la herramienta cuando haya mal tiempo o si existe el riesgo de ser alcanzado por un rayo.
- Page 20 Método de operación 20. Sujete la herramienta eléctrica solamente por las superficies de asimiento aisladas, ya que la Use la herramienta sólo en condiciones de herramienta de corte podría entrar en contacto buena iluminación y visibilidad. Durante la con cableado oculto. La herramienta de corte época de invierno, tenga cuidado con las áreas que entre en contacto con un cable con corriente resbalosas o mojadas, así...
- Page 21 Asimismo, esto inva- en el (1) el cargador de batería, (2) la batería, y (3) lidará la garantía de Makita para la herramienta y el el producto con el que se utiliza la batería. cargador Makita.
-
Page 22: Descripción De Las Piezas
DESCRIPCIÓN DE LAS PIEZAS Indicador de velocidad Indicador de ADT Luz indicadora de Botón de encendido (ADT = Automatic precaución principal Torque Drive Technology (Tecnología de acciona- miento automático de torsión)) Botón de inversión Cartucho de batería Palanca de desbloqueo Gatillo interruptor Mango Protector... -
Page 23: Descripción Del Funcionamiento
Sistema de protección para la DESCRIPCIÓN DEL herramienta/batería FUNCIONAMIENTO La herramienta está equipada con un sistema de protección para la herramienta/batería. Este sistema ADVERTENCIA: Asegúrese siempre de que corta automáticamente la alimentación al motor para la herramienta esté apagada y que el cartucho prolongar la vida de la herramienta y la batería. - Page 24 Indicación de la capacidad restante de la batería Únicamente para cartuchos de batería con el indicador ► 1. Indicador de velocidad 2. Botón de encendido principal NOTA: La herramienta se apagará automáticamente si no es operada durante cierto periodo de tiempo. Accionamiento del interruptor ►...
-
Page 25: Ajuste De Velocidad
Tecnología de accionamiento automático de torsión Cuando enciende la tecnología de accionamiento auto- mático de torsión (ADT), la herramienta funciona a una velocidad de rotación y a una torsión óptimas para el tipo de césped que se está cortando. Para encender la ADT, mantenga oprimido el botón de inversión hasta que el indicador de ADT se encienda. -
Page 26: Montaje
MONTAJE ADVERTENCIA: Asegúrese siempre de que la herramienta esté apagada y que el cartucho de batería haya sido extraído antes de realizar cualquier trabajo en la herramienta. El no seguir esta indicación de apagar y quitar el cartucho de batería puede ocasionar lesiones personales graves debido al encendido accidental. -
Page 27: Instalación Del Protector
AVISO: Asegúrese de utilizar un cabezal de corte ción correcta de herramienta de corte y el protec- de nailon original de Makita. tor. Una combinación incorrecta podría no protegerlo de la herramienta de corte, los residuos que salgan proyectados y las piedras. Asimismo, podría afectar el equilibrio de la herramienta y ocasionar alguna lesión. -
Page 28: Operación
Para mantener la SEGURIDAD y FIABILIDAD del pro- ducto, las reparaciones, y cualquier otra tarea de man- tenimiento o ajuste deberán ser realizadas en centros de servicio autorizados o de fábrica Makita, empleando siempre repuestos Makita. Limpieza de la herramienta Limpie la herramienta quitando el polvo, la tierra o los residuos de pasto con un paño seco o un paño... - Page 29 Reemplazo del cordón de nailon ADVERTENCIA: Utilice el cordón de nailon únicamente con el diámetro especificado en este manual de instrucciones. Nunca use una línea más pesada, alambre de metal, cuerda o simila- res. El no hacerlo podría causar daños a la herra- mienta y resultar en lesiones personales graves.
- Page 30 95-M10L 3 m (9 ft) 100 mm (3-15/16″) 80 mm (3-1/8″) 30 ESPAÑOL...
- Page 31 B&F ECO 4L 3 m (9 ft) 100 mm (3-15/16″) 80 mm (3-1/8″) 31 ESPAÑOL...
-
Page 32: Resolución De Problemas
Antes de solicitar alguna reparación, primero realice una inspección por su cuenta. Si detecta algún problema que no esté explicado en el manual, no intente desensamblar la herramienta. En vez de esto, solicite la reparación a un centro de servicio autorizado de Makita, usando siempre piezas de repuesto Makita. Estado de la anomalía Causa probable (avería) - Page 36 Makita Corporation 3-11-8, Sumiyoshi-cho, 885741B944 Anjo, Aichi 446-8502 Japan XRU18-1 EN, ESMX www.makita.com 20191008...