
Related Manuals for Makita XRU12


Summary of Contents for Makita XRU12
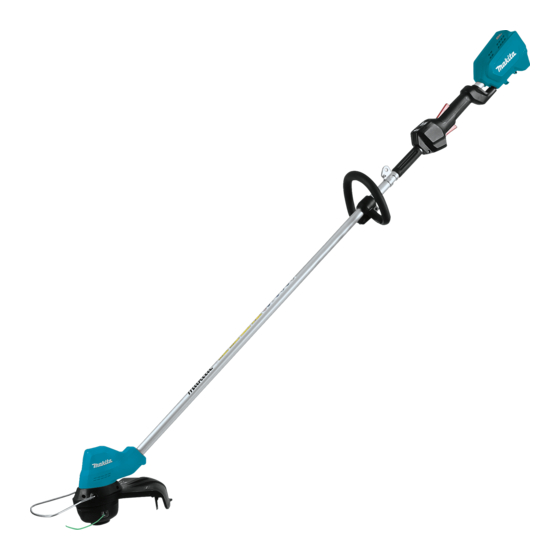
- Page 1 INSTRUCTION MANUAL MANUAL DE INSTRUCCIONES Cordless Grass Trimmer Cortador Inalámbrico de Pasto XRU11 XRU12 IMPORTANT: Read Before Using. IMPORTANTE: Lea antes de usar.
- Page 2 ENGLISH (Original instructions) SPECIFICATIONS Model: XRU11 XRU12 Type of handle Loop handle No load speed 4,000/5,000/6,000 /min Overall length 1,791 mm (without cutting tool) (70-1/2″) Nylon cord diameter 2.0 - 2.3 mm (0.08 - 0.09″) Applicable cutting tool and Nylon cutting head (P/N...
- Page 3 Personal protective equipment Electrical and battery safety Dress Properly. The clothing worn should be Avoid dangerous environment. Don't use the functional and appropriate, i.e. it should be tool in damp or wet locations or expose it to tight-fitting but not cause hindrance. Do not rain.
- Page 4 17. Cutting elements continue to rotate after the breakage of parts, mounting, and any other condition that may affect its operation. A guard motor is switched off. or other part that is damaged should be prop- 18. Do not operate power tools in explosive atmo- erly repaired or replaced by our authorized spheres, such as in the presence of flammable service center unless indicated elsewhere in...
- Page 5 The followings show the symbols used for tool. have been altered, may result in the battery bursting causing fires, personal injury and damage. It will volts also void the Makita warranty for the Makita tool and charger. direct current Tips for maintaining maximum...
- Page 6 9 10 Battery cartridge Lock-off lever Switch trigger Hanger Handle Protector (cutting tool Wire guard Lock lever guard) (XRU12 only) Joint cover Speed indicator Auto speed control (XRU12 only) (XRU12 only) indicator Power lamp Main power button Reverse button Shoulder harness...
- Page 7 FUNCTIONAL Status Indicator Blinking DESCRIPTION Overload WARNING: Always be sure that the tool is switched off and the battery cartridge is removed before adjusting or checking function on the tool. Overheat Failure to switch off and remove the battery cartridge may result in serious personal injury from accidental start-up.
- Page 8 Press the check button on the battery cartridge to indi- To start the tool, grasp the handle (the lock-off lever is cate the remaining battery capacity. The indicator lamps released by the grasp) and then pull the switch trigger. light up for few seconds. To stop the tool, release the switch trigger.
- Page 9 Mounting the attachment pipe For XRU12 only Mount the attachment pipe to the power unit. Turn the lever to the direction of the arrow shown in the figure.
- Page 10 Make sure that the surface of the lock lever is parallel to the pipe. Align the projections on the protector holder with its counter parts of the motor housing. Turn the lever to the direction of the arrow shown in the figure. ►...
- Page 11 CAUTION: Make sure to remove the hex wrench after installation. NOTICE: Be sure to use genuine Makita nylon cutting head. ► 1. Hex socket head bolt 2. Handle Loosen the hex socket head bolt on the hanger. Move the hanger to a comfortable working position and then tighten the bolt.
- Page 12 OPERATION Correct handling of tool WARNING: Always position the tool on your right-hand side. Correct positioning of the tool allows for maximum control and will reduce the risk of seri- ous personal injury caused by kickback. WARNING: Be extremely careful to maintain control of the tool at all times.
- Page 13 Detachment The shoulder harness features a means of quick release. ► 1. Latch 2. Cover Prepare approximately 3 m (9 ft) of new nylon cord. Fold the new nylon cord with one end become approximately 80 mm (3-1/8″) longer than the other ►...
- Page 14 Before asking for repairs, conduct your own inspection first. If you find a problem that is not explained in the manual, do not attempt to dismantle the tool. Instead, ask Makita Authorized Service Centers, always using Makita replace- ment parts for repairs.
- Page 15 COMPLETE tool, freight prepaid, to one of Makita’s Factory or Authorized Service Centers. If inspection shows the trouble is caused by defective workmanship or material, Makita will repair (or at our option, replace) without charge. This Warranty does not apply where: •...
- Page 16 ESPAÑOL (Instrucciones originales) ESPECIFICACIONES Modelo: XRU11 XRU12 Tipo de mango Mango redondo Velocidad sin carga 4 000/5 000/6 000 r/min Longitud total 1 791 mm (sin la herramienta de corte) (70-1/2″) Diámetro del cordón de nailon 2,0 - 2,3 mm (0,08 - 0,09″)
- Page 17 Manténgase alerta - Preste atención a lo que está haciendo. Utilice el sentido común. No utilice el aparato cuando esté cansado. 12. Almacene los aparatos que no use en interiores. Uso previsto de la herramienta Utilice la herramienta adecuada. La desbroza- dora inalámbrica está...
- Page 18 No abra ni dañe la(s) batería(s). Los electrolitos Método de operación liberados son corrosivos y pueden ocasionar Use la herramienta sólo en condiciones de daños en los ojos o la piel. Éstos pueden ser buena iluminación y visibilidad. Durante la tóxicos si se llegan a tragar.
- Page 19 19. Tome un descanso para evitar la pérdida de ADVERTENCIA: El uso de este producto control a causa de la fatiga. Recomendamos puede producir polvo que contenga sustancias tomar de 10 minutos a 20 minutos de descanso químicas que podrían causar enfermedades cada hora.
- Page 20 Makita, o de baterías alteradas, puede ocasio- nar que las baterías exploten causando un incendio, lesiones personales y daños. Asimismo, esto inva- lidará la garantía de Makita para la herramienta y el cargador Makita. Consejos para alargar al máximo la vida útil de la batería...
-
Page 21: Table Of Contents
Palanca de desbloqueo Gatillo interruptor Colgador Mango Protector (protección de Protector de alambre Palanca de bloqueo la herramienta de corte) (XRU12 únicamente) Cubierta de la junta Tapa Indicador de velocidad Indicador de control de (XRU12 únicamente) (XRU12 únicamente) velocidad automático Luz de alimentación... -
Page 22: Cartucho De Batería
Sistema de protección para la DESCRIPCIÓN DEL herramienta/batería FUNCIONAMIENTO La herramienta está equipada con un sistema de pro- tección de la herramienta/batería. Este sistema corta ADVERTENCIA: Asegúrese siempre de que en forma automática el suministro de energía al motor la herramienta esté apagada y que el cartucho para prolongar la vida útil de la herramienta y la batería. -
Page 23: Palanca De Desbloqueo
Indicación de la capacidad restante PRECAUCIÓN: Nunca coloque su dedo en el de la batería interruptor cuando transporte la herramienta. La herramienta podría ponerse en marcha accidental- mente y ocasionar una lesión. Únicamente para cartuchos de batería con el indicador Para encender la herramienta, mantenga oprimido el botón de encendido principal durante algunos segundos. -
Page 24: Indicador De Velocidad
► 1. Botón de encendido principal ► 1. Botón de inversión NOTA: Durante la rotación inversa, la herramienta Indicador Modo Velocidad de sólo funcionará durante un breve lapso de tiempo y rotación luego se detendrá automáticamente. Automático 4 000 - 6 000 r/min NOTA: Una vez que se haya detenido la herramienta, la rotación regresará... - Page 25 Para extraer el tubo, gire la palanca en la dirección de la flecha tal como se muestra en la ilustración y saque Para el modelo XRU12 únicamente el tubo presionando la palanca de bloqueo. Ensamble el aditamento del tubo en la unidad motorizada.
- Page 26 AVISO: Asegúrese de utilizar un cabezal de corte de nailon original de Makita. Para reducir el riesgo de daños a objetos en frente del cabezal de corte, inserte el protector de alambre de tal forma que se controle el rango de corte de la línea de podado.
-
Page 27: Colgador
► 1. Perno de cabeza hueca hexagonal 2. Colgador Almacenamiento de la llave Allen (hexagonal) PRECAUCIÓN: Tenga cuidado de no dejar ► 1. Cabezal de corte de nailon 2. Protector metálico la llave hexagonal insertada en el cabezal de la 3. -
Page 28: Arnés Para Hombro
OPERACIÓN Manipulación correcta de la herramienta ADVERTENCIA: Siempre coloque la herra- mienta de su lado derecho. El correcto posiciona- miento de la herramienta permite un máximo control y reducirá el riesgo de lesiones personales graves a causa de un retroceso brusco. ADVERTENCIA: Sea extremadamente cui- dadoso en mantener el control de la herramienta... - Page 29 Para mantener la SEGURIDAD y FIABILIDAD del pro- ducto, las reparaciones, y cualquier otra tarea de man- tenimiento o ajuste deberán ser realizadas en centros de servicio autorizados o de fábrica Makita, empleando ► 1. Carrete siempre repuestos Makita. Enrolle todo excepto unos 100 mm (3-15/16″) de los cordones, dejando los extremos temporalmente ensartados a través de la muesca en el costado del...
- Page 30 Antes de solicitar alguna reparación, primero realice una inspección por su cuenta. Si detecta algún problema que no esté explicado en el manual, no intente desensamblar la herramienta. En vez de esto, solicite la reparación a un centro de servicio autorizado de Makita, usando siempre piezas de repuesto Makita. Estado de la anomalía Causa probable (avería)
- Page 31 • se hayan hecho modificaciones a la herramienta. EN NINGÚN CASO MAKITA SE HARÁ RESPONSABLE DE NINGÚN DAÑO INDIRECTO, INCIDENTAL, O DERIVADO DE LA VENTA O USO DEL PRODUCTO. ESTE DESCARGO DE RESPONSABILIDAD APLICA DURANTE Y DESPUÉS...
- Page 32 Para reducir la exposición a estos productos químicos: trabaje en un área bien ventilada y póngase el equipo de seguridad indicado, tal como las máscaras contra polvo que están especialmente diseñadas para filtrar partículas microscópicas. Makita Corporation 3-11-8, Sumiyoshi-cho, Anjo, Aichi 446-8502 Japan 885546B942...