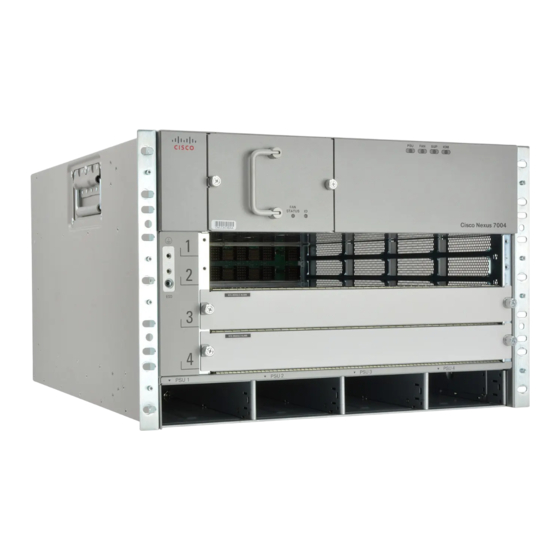
Cisco Nexus 7004 Installation Manual
Hide thumbs
Also See for Nexus 7004:
- Hardware installation and reference manual (508 pages) ,
- Hardware installation and reference manual (76 pages) ,
- Hardware installation and reference manual (274 pages)
Advertisement
Quick Links
Installing a Cisco Nexus 7004 Chassis
This chapter describes how to install a new or relocated Cisco Nexus 7004 chassis in a rack or cabinet. For
information about installing other Cisco Nexus 7000 Series chassis or power supplies, see the following
chapters:
•
•
•
•
•
•
Preparing to Install the Switch
This section includes the following topics:
Note
Required Tools
Before you install the Cisco Nexus 7004 chassis into a rack, make sure that you have the Cisco Nexus 7004
Accessory Kit (see the
and the following equipment, which are not provided by Cisco:
• Mechanical lift capable of lifting 150 pounds (68 kg)
Note
• Number 1 Phillips-head screwdriver with torque capability
Preparing to Install the Switch, on page 1
Installing the Chassis, on page 4
Grounding the Cisco Nexus 7004 Chassis, on page 8
Installing the Cable Management Frames, on page 10
Installing the Air Filter, on page 12
You must set up one two- or four-post, 19-inch EIA rack or cabinet before you can install the Cisco Nexus
7004 chassis. Make sure that you order the rack or cabinet and have it delivered before installing the chassis.
"Cisco Nexus 7004 Switch Accessory Kit" section on page C-1
This lift is required only if moving or lifting a fully loaded chassis that weighs at least 120 pounds (54.4 kg).
If you remove the power supplies, the chassis weighs 93 pounds (42.2 kg) or less and you can manually lift
it with two persons.
for the contents list)
Installing a Cisco Nexus 7004 Chassis
1
Advertisement

Related Manuals for Cisco Nexus 7004


Summary of Contents for Cisco Nexus 7004
-
Page 1: Table Of Contents
Installing a Cisco Nexus 7004 Chassis This chapter describes how to install a new or relocated Cisco Nexus 7004 chassis in a rack or cabinet. For information about installing other Cisco Nexus 7000 Series chassis or power supplies, see the following chapters: •... - Page 2 Before you install the Cisco Nexus 7004 chassis, you must install a standard two- or four-post, 19-inch EIA data center rack (or a cabinet that contains such a rack) that meets the requirements listed in the Cisco Nexus 7000 Series Site Preparation Guide. To maximize safety, you should do the following for the rack: •...
- Page 3 Unpacking and Inspecting a New Switch Before you install a new Cisco Nexus 7004 chassis, you need to unpack and inspect it to be sure that you have all the items that you ordered and verify that the switch was not damaged during shipment. If anything is damaged or missing, contact your customer representative immediately.
-
Page 4: Installing The Chassis
Installing the Chassis Installing the Chassis This section describes how to install the Cisco Nexus 7004 chassis in a rack or cabinet. These installation steps include checking for installation prerequisites, setting up the center-mount brackets if needed, removing the power supplies from the chassis if lifting the chassis manually, and installing the chassis in a rack. When you finish this task, you can connect the chassis to the earth ground, install the cable management frames, install the front door (optional), and reinstall any removed power supplies. - Page 5 You can either lift the chassis with a mechanical lift and slide it on top of another installed Cisco Nexus 7004 chassis, or you can lighten the chassis and lift it manually into position with a couple of...
- Page 6 Lift the chassis to its position on a rack in one of the following ways: • If you use a mechanical lift, position the chassis next to the front of another Cisco Nexus 7004 chassis already installed in the rack, elevate the new chassis to the level of the installed chassis (or no more than 0.25 inches [0.64...
- Page 7 Use five M6 x 19 mm screws (or 12-24 x 3/4 inch screws) to fasten each side of the chassis to the rack. Tighten each of the 10 screws to 40 in. lbs (4.5 N.m) (see Figure 2: Mounting the Cisco Nexus 7004 Chassis on a Rack, on page Figure 2: Mounting the Cisco Nexus 7004 Chassis on a Rack...
-
Page 8: Grounding The Cisco Nexus 7004 Chassis
Operations” section. Grounding the Cisco Nexus 7004 Chassis The Cisco Nexus 7004 switch is fully grounded as soon as you connect the chassis and the power supplies to the earth ground in the following ways: • You connect the chassis to either a grounded and fully bonded rack or to the data center ground. This ground connection is active even when the power supplies are not installed. - Page 9 M4 screws, and tighten the screws to 11.5 to 15 in-lb (1.3 to 1.7 N·m). Callout 1 in Figure 4: Grounding Pad and ESD Port Locations on the Cisco Nexus 7004 Chassis, on page 10 shows the location of the grounding pad on the front side of the chassis.
-
Page 10: Installing The Cable Management Frames
Installing a Cisco Nexus 7004 Chassis Connecting Your ESD Wrist Strap to the Chassis Figure 4: Grounding Pad and ESD Port Locations on the Cisco Nexus 7004 Chassis Grounding port Step 5 Prepare the other end of the grounding wire and connect it to an appropriate grounding point in your site to ensure an adequate earth ground for the switch. - Page 11 The top of the frame should be at the same level as the top of the chassis (see Figure 5: Installing the Cable Management Frames on a Cisco Nexus 7004 Chassis, on page 11).
-
Page 12: Installing Usb Storage Media In A Supervisor 2 Or 2E Module
Make sure that the USB drive is fully inserted inside the reader. If it is fully inserted, either format the card (see the Cisco Nexus 7000 Series NX-OS Fundamentals Configuration Guide ) or replace the USB drive with another that is properly formatted for the reader.