Cisco NCS 4000 Series Manual
Network convergence system unpacking, moving and securing guide
Hide thumbs
Also See for NCS 4000 Series:
- Hardware installation (296 pages) ,
- Hardware installation manual (82 pages) ,
- Troubleshooting manual (44 pages)
Table of Contents
Advertisement
Quick Links
Cisco Network Convergence System 4000 Series Unpacking, Moving
and Securing Guide
First Published: 2016-09-30
Last Modified: 2016-11-07
Americas Headquarters
Cisco Systems, Inc.
170 West Tasman Drive
San Jose, CA 95134-1706
USA
http://www.cisco.com
Tel: 408 526-4000
800 553-NETS (6387)
Fax: 408 527-0883
Advertisement
Table of Contents

Related Manuals for Cisco NCS 4000 Series


Summary of Contents for Cisco NCS 4000 Series
- Page 1 Cisco Network Convergence System 4000 Series Unpacking, Moving and Securing Guide First Published: 2016-09-30 Last Modified: 2016-11-07 Americas Headquarters Cisco Systems, Inc. 170 West Tasman Drive San Jose, CA 95134-1706 http://www.cisco.com Tel: 408 526-4000 800 553-NETS (6387) Fax: 408 527-0883...
- Page 2 Cisco and the Cisco logo are trademarks or registered trademarks of Cisco and/or its affiliates in the U.S. and other countries. To view a list of Cisco trademarks, go to this URL: www.cisco.com/go/trademarks . Third-party trademarks mentioned are the property of their respective owners. The use of the word partner does not imply a partnership relationship between Cisco and any other company.
-
Page 3: Table Of Contents
Moving the Chassis to the Final Location Securing the Chassis C H A P T E R 4 Preparing the Rack for Chassis Installation Preparing to Mount the Chassis in a Rack Cisco Network Convergence System 4000 Series Unpacking, Moving and Securing Guide... - Page 4 Contents Installing the Mounting Brackets Installing the Aid Brackets Removing the Chassis Door Mounting the Chassis into a Rack Attaching the Chassis Door Unpacking Chassis Component Shipping Pallets Cisco Network Convergence System 4000 Series Unpacking, Moving and Securing Guide...
-
Page 5: P R E F A C E Preface
Obtaining Documentation and Submitting a Service Request, page vii Audience This document is intended for those who unpack the Cisco NCS 4016 chassis and Cisco installation partners who are responsible for moving and securing the Cisco NCS 4016 chassis. No additional knowledge of routing or the Cisco IOS XR software is assumed. - Page 6 Use the statement number provided at the end of each warning to locate its translation in the translated safety warnings that accompanied this device.SAVE THESE INSTRUCTIONS Cisco Network Convergence System 4000 Series Unpacking, Moving and Securing Guide...
-
Page 7: Related Documentation
Subscribe to What’s New in Cisco Product Documentation , which lists all new and revised Cisco technical documentation, as an RSS feed and deliver content directly to your desktop using a reader application. The RSS feeds are a free service. - Page 8 Preface Obtaining Documentation and Submitting a Service Request Cisco Network Convergence System 4000 Series Unpacking, Moving and Securing Guide viii...
-
Page 9: Overview
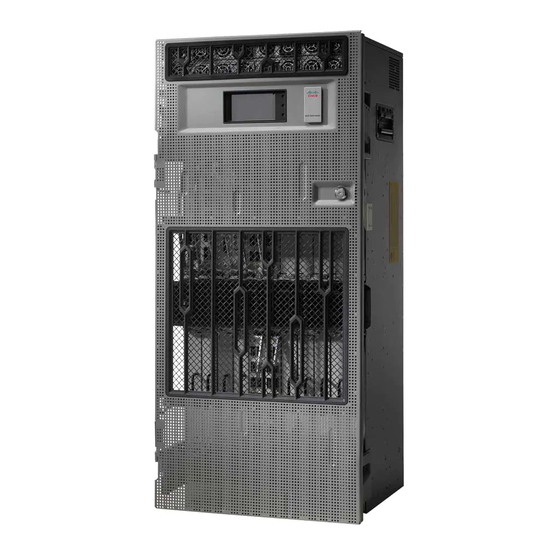
The Cisco NCS 4016 chassis contains two slots for route processor (RP) cards, sixteen slots for line cards (LC), and four slots for fabric cards (FC). The Cisco NCS 4016 chassis is rack mountable. It is compatible with the following standard rail spacing: •... -
Page 10: Verifying The Securing Location
The floor plan for the Cisco NCS 4016 chassis must include enough space to install the chassis in the equipment rack and allow sufficient airflow for the system. The floor plan must also provide enough room to access chassis components for maintenance (for example, to remove fan trays, power modules, cables, and air filters). -
Page 11: Safety Guidelines
The following guidelines are for your safety and to protect equipment. Guidelines do not include all hazards. Be alert. Review the safety warnings listed in Regulatory Compliance and Safety Information for the Cisco NCS Note Network Convergence System 4000 Series before installing, configuring, or troubleshooting any installed card. -
Page 12: Preventing Electrostatic Discharge
• Do not wear loose clothing, jewelry, and other items that could get caught in the chassis while working with the chassis and its associated components. • Use Cisco equipment in accordance with its specifications and product-usage instructions. • Do not work alone if potentially hazardous conditions exist. -
Page 13: Unpacking The Chassis
To unpack the Cisco NCS 4016 chassis, follow these steps: SUMMARY STEPS 1. Carefully move the pallet containing the Cisco NCS 4016 chassis to the staging area where you plan on unpacking it. 2. Cut the plastic bands holding the chassis shipping box in place. - Page 14 DETAILED STEPS Step 1 Carefully move the pallet containing the Cisco NCS 4016 chassis to the staging area where you plan on unpacking it. Caution The Cisco NCS 4016 chassis with pallet should be handled carefully to eliminate the risk of tipping over the package.
- Page 15 Unpacking the Chassis Unpacking the Chassis Step 3 Remove the six plastic clips on the outer sleeve using a flat head screw driver. Figure 3: Chassis in Original Packaging Cisco Network Convergence System 4000 Series Unpacking, Moving and Securing Guide...
- Page 16 Unpacking the Chassis Unpacking the Chassis Cisco Network Convergence System 4000 Series Unpacking, Moving and Securing Guide...
-
Page 17: Removing The Chassis From The Pallet
Removing the Chassis from the Pallet This procedure describes how to remove the support brackets that secure the chassis to the pallet. Figure 4: Hardware Locations for Support Brackets Cisco Network Convergence System 4000 Series Unpacking, Moving and Securing Guide... - Page 18 2. Using the 3/8-in. socket wrench, remove the 4 hex cap bolts that connect the right support bracket to the pallet. 3. Set the support bracket aside carefully. 4. Repeat Step 1 through Step 3 for the left support bracket. Cisco Network Convergence System 4000 Series Unpacking, Moving and Securing Guide...
- Page 19 DETAILED STEPS Step 1 Using the Phillips #2 screwdriver, remove the fourteen M4 screws that connect the right support bracket to the chassis. Figure 5: Removing the Chassis Support Brackets Cisco Network Convergence System 4000 Series Unpacking, Moving and Securing Guide...
- Page 20 Unpacking the Chassis Removing the Chassis from the Pallet Cisco Network Convergence System 4000 Series Unpacking, Moving and Securing Guide...
- Page 21 What to Do Next After you have removed the support brackets that secure the chassis to the pallet, go to the Transferring the Chassis to a Mechanical Lifting Device, on page Cisco Network Convergence System 4000 Series Unpacking, Moving and Securing Guide...
- Page 22 Unpacking the Chassis Removing the Chassis from the Pallet Cisco Network Convergence System 4000 Series Unpacking, Moving and Securing Guide...
-
Page 23: Moving The Cisco Ncs 4016 Chassis
C H A P T E R Moving the Cisco NCS 4016 Chassis This section describes the procedures required to move the Cisco NCS 4016 chassis to its final location. This section contains the following topics: Note The installation of a Cisco NCS 4016 chassis may require space, floor loading, power, and cooling modifications to your facility. - Page 24 3. With at least two people, move the chassis carefully from the pallet onto the lifting device as shown in th figure, below. The chassis has lifting handles at either side. Cisco Network Convergence System 4000 Series Unpacking, Moving and Securing Guide...
- Page 25 Step 1 Place the mechanical lifting device on the side of the chassis on the pallet. Figure 6: Aligning the Lifting Device in Front of the Chassis on the Pallet Cisco Network Convergence System 4000 Series Unpacking, Moving and Securing Guide...
- Page 26 Always follow safety precautions when moving a chassis. Caution When moving or mounting the chassis, be careful not to apply pressure to the horizontal fiber management areas on the chassis, or they may bend or break. Cisco Network Convergence System 4000 Series Unpacking, Moving and Securing Guide...
- Page 27 The figure below, shows the location of the fiber management areas on the chassis. Figure 8: Location of Fiber Management Areas Fiber management top area Fiber management bottom area Cisco Network Convergence System 4000 Series Unpacking, Moving and Securing Guide...
-
Page 28: Moving The Cisco Ncs 4016 Chassis
After performing this task, move the chassis to its final location. Moving the Cisco NCS 4016 Chassis This section describes the procedures required to move the Cisco NCS 4016 chassis to its final location. This section contains the following topics:... -
Page 29: Moving The Chassis To The Final Location
To move the Cisco NCS 4016 chassis to its installation location, follow these steps: SUMMARY STEPS 1. Make sure you have a suitable lifting device to move the Cisco NCS 4016 chassis. 2. Move the chassis to its installation location. - Page 30 Moving the Cisco NCS 4016 Chassis Moving the Chassis to the Final Location Cisco Network Convergence System 4000 Series Unpacking, Moving and Securing Guide...
-
Page 31: Securing The Chassis
Securing the Chassis This chapter describes how to secure the Cisco NCS 4016 chassis in the rack. To install two Cisco NCS 4016 chassis in a single rack, you will need to have a minimum vertical opening Note of 48 RU. If you are using the DC Power Front Connection Adapter, only one chassis will fit into the rack. - Page 32 Hilti.com for details). Make sure that floor mounting bolts are accessible, especially if annual re-torquing of bolts is required. Figure 9: Single Cisco NCS 4016 Chassis Mounted in Rack Cisco Network Convergence System 4000 Series Unpacking, Moving and Securing Guide...
- Page 33 Securing the Chassis Preparing the Rack for Chassis Installation Before you move the chassis or mount the chassis into the rack, we recommend that you do the following: Cisco Network Convergence System 4000 Series Unpacking, Moving and Securing Guide...
-
Page 34: Preparing To Mount The Chassis In A Rack
Preparing to Mount the Chassis in a Rack Before you mount the Cisco NCS 4016 chassis into a rack, it is critical that the installation site be prepared properly to handle the chassis weight, power requirements, cooling needs, and other requirements. - Page 35 • For 4-post ANSI racks and ETSI cabinets, the brackets are installed in the front position. Figure 10: Positioning for Mounting Bracket Installation Top bracket area, middle Top bracket area, front position position Bottom bracket area, Bottom bracket area, front middle position position Cisco Network Convergence System 4000 Series Unpacking, Moving and Securing Guide...
- Page 36 Installing the Mounting Brackets To attach the mounting brackets, simply fix each bracket onto the chassis using six screws as shown in the figure, below. Figure 11: Attaching Chassis Mounting Brackets Cisco Network Convergence System 4000 Series Unpacking, Moving and Securing Guide...
- Page 37 Various types of bracket installation are shown in these illustrations: Figure 12: Attaching ANSI 19-Inch Brackets to Front (4-Post Rack) or Middle (2-Post Rack) Figure 13: Attaching ANSI 23-Inch Brackets to Front (4-Post Rack) or Middle (2-Post Rack) Cisco Network Convergence System 4000 Series Unpacking, Moving and Securing Guide...
- Page 38 Securing the Chassis Installing the Mounting Brackets Figure 14: Attaching ETSI Brackets to Front Cisco Network Convergence System 4000 Series Unpacking, Moving and Securing Guide...
-
Page 39: Installing The Aid Brackets
2. Once the chassis has been installed, remove the aid brackets. Loosen the two screws from the aid brackets and take off the rack. Cisco Network Convergence System 4000 Series Unpacking, Moving and Securing Guide... - Page 40 Attach the aid brackets to the rack below where the chassis will sit. Tighten the two screws to firmly attach the brackets to the rack. Figure 15: Attaching Aid Brackets to the Rack Cisco Network Convergence System 4000 Series Unpacking, Moving and Securing Guide...
- Page 41 Once the chassis has been installed, remove the aid brackets. Loosen the two screws from the aid brackets and take off the rack. Keep the aid brackets in case of future chassis relocation. Cisco Network Convergence System 4000 Series Unpacking, Moving and Securing Guide...
-
Page 42: Removing The Chassis Door
3. Loosen the screw to disconnect the ground cable. 4. Move down the pin to release the door from the chassis hinge. 5. Move up the door to release the bottom hinge pin. Cisco Network Convergence System 4000 Series Unpacking, Moving and Securing Guide... - Page 43 Securing the Chassis Removing the Chassis Door DETAILED STEPS Step 1 Turn the knob to unlock the door. Figure 16: Knob to Unlock Door Cisco Network Convergence System 4000 Series Unpacking, Moving and Securing Guide...
- Page 44 Securing the Chassis Removing the Chassis Door Step 2 Open the door. Step 3 Loosen the screw to disconnect the ground cable. Figure 17: Disconnecting the Ground Cable Cisco Network Convergence System 4000 Series Unpacking, Moving and Securing Guide...
- Page 45 Securing the Chassis Removing the Chassis Door Step 4 Move down the pin to release the door from the chassis hinge. Figure 18: Pin to Release Door from Hinge Cisco Network Convergence System 4000 Series Unpacking, Moving and Securing Guide...
-
Page 46: Mounting The Chassis Into A Rack
Move up the door to release the bottom hinge pin. Figure 19: Releasing the Bottom Hinge Pin Mounting the Chassis into a Rack This section describes how to mount the Cisco NCS 4016 chassis into a rack . Cisco Network Convergence System 4000 Series Unpacking, Moving and Securing Guide... - Page 47 Securing the Chassis Mounting the Chassis into a Rack The figure below, shows the chassis mounting hardware ready for rack mounting. Figure 20: Chassis Mounting Hardware Ready for Rack Mounting Cisco Network Convergence System 4000 Series Unpacking, Moving and Securing Guide...
- Page 48 Required Tools and Equipment • Number 1 Phillips screwdriver • Mechanical lifting device, such as a scissor lift or other suitable lifting device • Installation kit, shipped with the chassis, contains installation aid brackets and screws (Cisco product number NCS4K-INST-KIT=) Steps...
- Page 49 Take extra care when aligning the bottom of the chassis with the installation aid brackets. Figure 21: Example — Using a Scissor Lift to Position the Chassis in the Rack Cisco Network Convergence System 4000 Series Unpacking, Moving and Securing Guide...
- Page 50 Step 6 Insert and partially tighten the 16 screws (8 on each side) to attach the chassis mounting brackets to the rack mounting brackets. Figure 22: Chassis Mounting Holes Cisco Network Convergence System 4000 Series Unpacking, Moving and Securing Guide...
-
Page 51: Attaching The Chassis Door
If the front door was removed earlier, install it after the chassis is installed on the rack. For door installation details, see the “Replacing the Front Door” section in the Cisco Network Convergence System 4000 Series Hardware Installation Guide . - Page 52 What to Do Next You can now install any additional chassis components, line cards, route processor cards, and fabric cards. See the Cisco Network Convergence System 4000 Series Hardware Installation Guide . Cisco Network Convergence System 4000 Series Unpacking, Moving and Securing Guide...