Table of Contents
Advertisement
Quick Links
Advertisement
Table of Contents

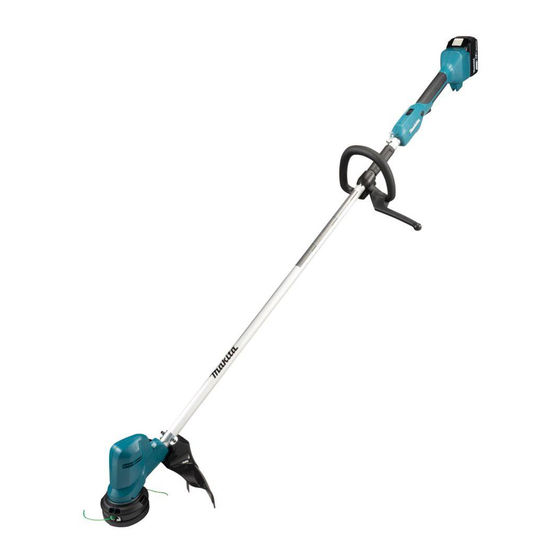
Related Manuals for Makita DUR194ZX3


Summary of Contents for Makita DUR194ZX3
- Page 1 INSTRUCTION MANUAL Cordless Grass Trimmer DUR194 Read before use.
-
Page 2: Specifications
SPECIFICATIONS Model: DUR194 Type of handle Loop handle No load speed 2: 6,000 min 1: 4,500 min Overall length 1,580 mm (without cutting tool) Nylon cord diameter 2.0 mm Applicable cutting tool and 8-tooth blade 200 mm cutting diameter (P/N 191Y44-2) Nylon cutting head 280 mm (P/N 198893-8, 191D89-4) - Page 3 WARNING: Wear ear protection. WARNING: The noise emission during actual use of the power tool can differ from the declared val- ue(s) depending on the ways in which the tool is used especially what kind of workpiece is processed. WARNING: Be sure to identify safety measures to protect the operator that are based on an estimation of exposure in the actual conditions of use (taking account of all parts of the operating cycle such as the times when the tool is switched off and when it is running idle in addition to the trigger time).
-
Page 4: Safety Warnings
Personal safety SAFETY WARNINGS Stay alert, watch what you are doing and use common sense when operating a power tool. Do not use a power tool while you are tired or General power tool safety warnings under the influence of drugs, alcohol or med- ication. -
Page 5: Intended Use
Power tool use and care Do not use a battery pack or tool that is dam- aged or modified. Damaged or modified batteries Do not force the power tool. Use the correct may exhibit unpredictable behaviour resulting in power tool for your application. The correct fire, explosion or risk of injury. -
Page 6: Personal Protective Equipment
Personal protective equipment Electrical and battery safety Do not expose the tool to rain or wet condi- tions. Water entering the tool will increase the risk of electric shock. Do not use the tool if the switch does not turn it on and off. Any tool that cannot be con- trolled with the switch is dangerous and must be repaired. -
Page 7: Cutting Tools
Operation 19. Hold the tool by insulated gripping surfaces only, because the cutter blade may contact In the event of an emergency, switch off the hidden wiring. Cutter blades contacting a "live" tool immediately. wire may make exposed metal parts of the tool If you feel any unusual condition (e.g. -
Page 8: First Aid
Transport Before transporting the tool, turn it off and remove the battery cartridge. Attach the cover to the cutting blade. When transporting the tool, carry it in a hori- zontal position by holding the shaft. When transporting the tool in a vehicle, prop- erly secure it to avoid turnover. - Page 9 Avoid storing battery cartridge in a con- causing fires, personal injury and damage. It will tainer with other metal objects such as also void the Makita warranty for the Makita tool and nails, coins, etc. charger. Do not expose battery cartridge to water Tips for maintaining maximum or rain.
-
Page 10: Parts Description
PARTS DESCRIPTION Fig.4 Battery cartridge Speed switching lever Switch trigger Lock-off button Barrier Protector Loop handle Hanger Shoulder harness 10 ENGLISH... - Page 11 After installing the protector, remove the cutter cover ASSEMBLY from the cutter. WARNING: Always be sure that the tool is switched off and battery cartridge is removed before carrying out any work on the tool. Failure to switch off and remove the battery cartridge may result in serious personal injury from accidental start-up. WARNING: Never start the tool unless it is completely assembled.
-
Page 12: Cutter Blade
To remove the cutting blade, loosen the nut while hold- ing down the spindle lock button. Nylon cutting head NOTICE: Be sure to use genuine Makita nylon cutting head. While holding down the spindle lock button, place the nylon cutting head onto the spindle and tighten it securely by hand. -
Page 13: Functional Description
Plastic blade Hex wrench storage NOTICE: Be sure to use genuine Makita plastic CAUTION: blade. Be careful not to leave the hex wrench inserted in the tool head. It may cause While holding down the spindle lock button, place the injury and/or damage to the tool. -
Page 14: Overheat Protection
Let the tool and battery(ies) cool down. If no improvement can be found by restoring protection system, then contact your local Makita Service Center. NOTICE: If the tool stops due to a cause not described above, refer to the section for troubleshooting. -
Page 15: Operation
An unguarded cutting tool may result unintended starting. Never use the tool if it starts when in serious personal injury. you pull the switch trigger without pressing the lock- off button. Ask your local Makita Service Center for repairs. WARNING: Never disable the lock function or OPERATION tape down the lock-off button. - Page 16 Connect the hook of the shoulder harness to the hanger CAUTION: If the cutting tool accidentally and put the shoulder harness on. Make sure that the impacts a rock or hard object during operation, tool is held securely by the shoulder harness. stop the tool and inspect for any damage.
-
Page 17: Maintenance
Discoloration, deformation or cracks may result. To maintain product SAFETY and RELIABILITY, repairs, any other maintenance or adjustment should be performed by Makita Authorized or Factory Service Centers, always using Makita replacement parts. Replacing the nylon cord WARNING: Use only the nylon cord with diameter specified in this instruction manual. - Page 18 95-M10L Fig.25 ► ( 1) Up to 4 m (2) 80 mm (3) 100 mm 18 ENGLISH...
- Page 19 96-M10L Fig.26 ► ( 1) Up to 4 m (2) 100 mm 19 ENGLISH...
- Page 20 Replacing the plastic blade Grinding the metal blade Replace the plastic blade if it is worn out or broken. CAUTION: Before grinding the metal blade, When installing the plastic blade, align the direction of make sure that the tool is switched off and the the arrow on the blade with that of the protector.
-
Page 21: Troubleshooting
TROUBLESHOOTING Before asking for repairs, conduct your own inspection first. If you find a problem that is not explained in the manual, do not attempt to dismantle the tool. Instead, ask Makita Authorized Service Centers, always using Makita replace- ment parts for repairs. State of abnormality Probable cause (malfunction) Remedy Motor does not run. Battery cartridge is not installed. Install the battery cartridge. - Page 22 Makita Europe N.V. Jan-Baptist Vinkstraat 2, 3070 Kortenberg, Belgium Makita Corporation 3-11-8, Sumiyoshi-cho, Anjo, Aichi 446-8502 Japan 885962-227 www.makita.com 20211206...