
Related Manuals for Makita DT04R1


Summary of Contents for Makita DT04R1
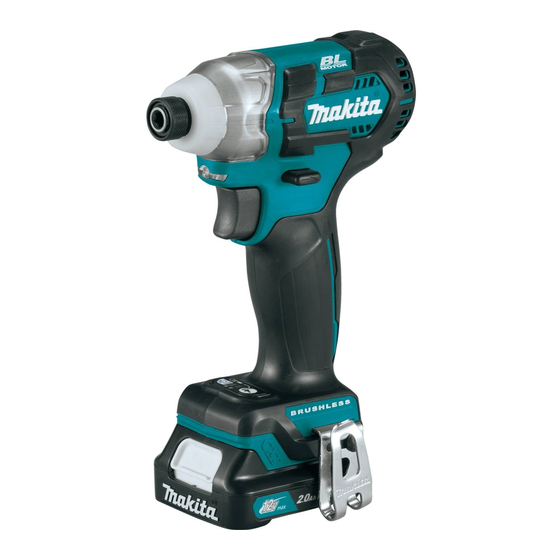
- Page 1 INSTRUCTION MANUAL MANUAL DE INSTRUCCIONES Cordless Impact Driver Atornillador de Impacto Inalámbrico DT04 IMPORTANT: Read Before Using. IMPORTANTE: Lea antes de usar.
-
Page 2: Specifications
ENGLISH (Original instructions) SPECIFICATIONS Model: DT04 Fastening capacities Machine screw 4 mm - 8 mm (5/32" - 5/16") Standard bolt 5 mm - 14 mm (3/16" - 9/16") High tensile bolt 5 mm - 12 mm (3/16" - 1/2") No load speed (RPM) Hard impact mode 0 - 3,000 /min Soft impact mode... - Page 3 Remove any adjusting key or wrench before Under abusive conditions, liquid may be turning the power tool on. A wrench or a key left ejected from the battery; avoid contact. If con- attached to a rotating part of the power tool may tact accidentally occurs, flush with water.
-
Page 4: Functional Description
Do not install the battery cartridge causing fires, personal injury and damage. It will also forcibly. If the cartridge does not slide in easily, it is void the Makita warranty for the Makita tool and charger. not being inserted correctly. Tips for maintaining maximum... -
Page 5: Electric Brake
Electric brake This tool is equipped with an electric brake. If the tool consistently fails to quickly stop after the switch trigger is released, have the tool serviced at a Makita service ► 1. Indicator lamps 2. Check button center. - Page 6 Reversing switch action ► 1. Button Pull the switch trigger to turn on the lamp. To turn off, ► 1. Reversing switch lever release it. The lamp goes out approximately 10 seconds after releasing the switch trigger. CAUTION: Always check the direction of To keep the lamp off, turn off the lamp status.
- Page 7 Impact force grade displayed Maximum blows Purpose Example of application on panel Hard 3,900 min (/min) Tightening when force and Tightening wood screws, speed are desired. tightening bolts. Soft 1,600 min (/min) Tightening with less force to Tightening sash screws, tight- avoid screw thread breakage.
-
Page 8: Installing Hook
Standard bolt Installing hook N•m (ft•lbs) (87) M14 (9/16") (72) M12 (1/2") (58) M14 (9/16") (43) M10 (3/8") M12 (1/2") (29) ► 1. Groove 2. Hook 3. Screw M8 (5/16") M10 (3/8") The hook is convenient for temporarily hanging the tool. (14) M8 (5/16") This can be installed on either side of the tool. -
Page 9: Using Holster
Never use gasoline, benzine, thinner, alcohol or the like. Discoloration, deformation or cracks may result. To maintain product SAFETY and RELIABILITY, repairs, any other maintenance or adjustment should be performed by Makita Authorized or Factory Service Centers, always using Makita replacement parts. 9 ENGLISH... -
Page 10: Optional Accessories
COMPLETE tool, freight prepaid, to one of Makita’s Factory or Authorized Service Centers. If inspection shows the trouble is caused by defective workmanship or material, Makita will repair (or at our option, replace) without charge. This Warranty does not apply where: •... -
Page 11: Especificaciones
ESPAÑOL (Instrucciones originales) ESPECIFICACIONES Modelo: DT04 Capacidades de apriete Tornillo de máquina 4 mm - 8 mm (5/32" - 5/16") Tornillo estándar 5 mm - 14 mm (3/16" - 9/16") Tornillo de alta resistencia 5 mm - 12 mm (3/16" - 1/2") Velocidad sin carga (RPM) Modo de impacto duro 0 r/min - 3 000 r/min... - Page 12 Si no es posible evitar usar una herramienta Desconecte la clavija de la fuente de energía eléctrica en condiciones húmedas, utilice un y/o la batería de la herramienta eléctrica antes alimentador protegido con interruptor de cir- de realizar ajustes, cambiar accesorios o guar- cuito de falla a tierra (ICFT).
- Page 13 Asimismo, esto invalidará la garan- tía de Makita para la herramienta y el cargador Makita. Consejos para alargar al máximo Instrucciones importantes de la vida útil de la batería seguridad para el cartucho de batería...
-
Page 14: Descripción Del Funcionamiento
Sistema de protección de batería DESCRIPCIÓN DEL FUNCIONAMIENTO La herramienta está equipada con un sistema de pro- tección de batería. Este sistema corta en forma auto- mática el suministro de energía al motor para prolongar PRECAUCIÓN: la vida útil de la batería. Asegúrese siempre de que la La herramienta se detendrá... - Page 15 Accionamiento del conmutador de nimiento a un centro de servicio Makita. inversión de giro Iluminación de la luz delantera PRECAUCIÓN: No mire a la luz ni vea a la fuente de luz directamente.
- Page 16 Esta herramienta tiene un conmutador de inversión PRECAUCIÓN: Confirme siempre la direc- para cambiar la dirección de rotación. Presione la ción de rotación antes de la operación. palanca del conmutador de inversión desde el lado A para una rotación en sentido de las manecillas del reloj PRECAUCIÓN: Utilice el conmutador de o desde el lado B, para una rotación en sentido inverso...
-
Page 17: Montaje
Instalación del gancho MONTAJE PRECAUCIÓN: Asegúrese siempre de que la herramienta esté apagada y el cartucho de batería haya sido extraído antes de realizar cualquier trabajo en la misma. Instalación o extracción de la punta de destornillador/punta de atornillar Accesorio opcional ►... - Page 18 Perno estándar NOTA: Utilice la broca apropiada para la cabeza del tornillo/perno que desee utilizar. N•m NOTA: Cuando fije un tornillo de 8 mm o más pequeño, elija (ft•lbs) una fuerza de impacto apropiada y ajuste cuidadosamente la pre- 120 N•m sión sobre el gatillo interruptor para evitar que el tornillo se dañe.
-
Page 19: Mantenimiento
Makita. Si la inspección muestra que el problema ha sido a causa de un defecto de mano de obra o material, Makita hará la reparación Puede guardar dos puntas para atornillar en la parte (o a su discreción, el reemplazo) sin ningún cargo. - Page 20 Para reducir la exposición a estos productos químicos: trabaje en un área bien ventilada y póngase el equipo de seguridad indicado, tal como las máscaras contra polvo que están especialmente diseñadas para filtrar partículas microscópicas. Makita Corporation 3-11-8, Sumiyoshi-cho, Anjo, Aichi 446-8502 Japan 885522-946...
- Page 21 DC10SB DC10WD Battery Charger .... 3 Chargeur ....... 5 Cargador de Batería ..8 IMPORTANT: Read Before Using. IMPORTANT : Lire ce qui suit avant d’utiliser cet outil. IMPORTANTE: Leer antes de usar.
- Page 22 (DC10SB) 30mm 69mm 90mm ≧ ≧ (1-3/16”) (2-23/32”) (3-9/16”) 30mm ≧ (1-3/16”) 32mm 50mm ≧ ≧ (1-9/32”) (1-31/32”) 180mm ≧ 110mm (7-3/32”) 75mm ≧ (4-11/32”) (2-31/32”) ≈8mm (5/16”) 115mm ≧ (4-17/32”) (DC10WD) 55mm 115mm ≧ ≧ (2-3/16”) (4-17/32”) 35mm ≧ (1-3/8”) 30mm 40mm...
-
Page 23: Important Safety Instructions
11. Do not operate charger with damaged cord or plug. If the cord or plug is damaged, ask Makita authorized – This manual contains important safety and service center to replace it in order to avoid a hazard. - Page 24 BL1021B cartridge BL1041B NOTE: • The battery charger is for charging Makita-battery When the battery cartridge is too hot, charging does not begin until the battery cartridge temperature reaches cartridge. Never use it for other purposes or for other manufacturer’s batteries.
- Page 25 Wall mounting Things you need to prepare: Warning: – Two screws - for hanging the charger. • Make sure to use two screws for hanging the charger Screw size : 4mm x more than 20mm on the wall, and anchor the charger on the wall with (5/32”...
- Page 26 – Ce manuel referme d’importantes consignes de endommagé, faites-le remplacer dans un centre de sécurité et instructions d’utilisation du chargeur. service agréé Makita pour éviter tout danger. Avant d’utiliser le chargeur, lisez toutes les 12. Évitez d’utiliser ou démonter le chargeur après qu’il instructions et étiquettes d’avertissement apposées...
- Page 27 NOTE : Lorsque la batterie est trop chaude, la charge ne • Le chargeur est conçu pour les batteries Makita. Ne jamais l’utiliser à d’autres fins ou avec les batteries commence qu’une fois la température de la batterie d’autres fabricants.
-
Page 28: Instrucciones De Seguridad Importantes
11. No utilice el cargador si su cable o clavija están dañados. Si el cable o la clavija están dañados, pida – Este manual contiene importantes instrucciones a un centro de servicio autorizado de Makita que los de seguridad y operación para el cargador de reemplace para evitar riesgos. - Page 29 Cuando el cartucho de batería está muy caliente, la carga no comienza hasta que el cartucho de batería de batería Makita. No lo utilice nunca con otros fines ni para baterías de otros fabricantes. alcanza la temperatura a la que la carga es posible.
- Page 30 Montaje de pared Advertencia: Cosas que necesita tener: – Dos tornillos - para colgar el cargador. • Asegúrese de usar dos tornillos para colgar el cargador Tamaño de los tornillos: 4 mm × más de 20 mm en la pared y utilice otro tornillo para fijarlo. (5/32"...
- Page 32 Makita Corporation 3-11-8, Sumiyoshi-cho, Anjo, Aichi 446-8502 Japan www.makita.com 885431A949...