Makita CE001G Instruction Manual
Cordless power cutter
Hide thumbs
Also See for CE001G:
- User manual ,
- Instruction manual (109 pages) ,
- Instruction manual (105 pages)
Table of Contents
Advertisement
Quick Links
Advertisement
Table of Contents

Related Manuals for Makita CE001G


Summary of Contents for Makita CE001G
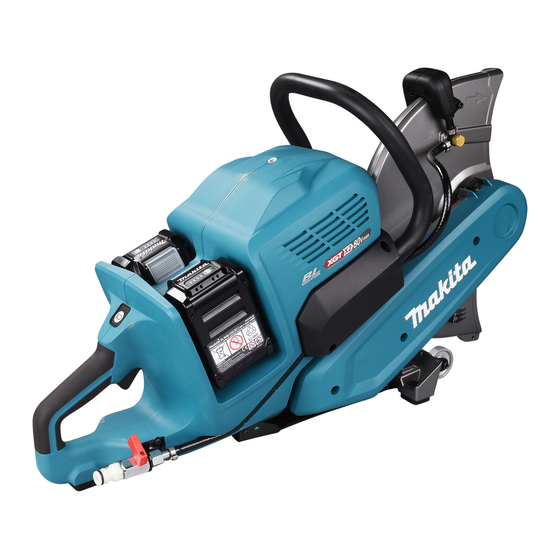
- Page 1 INSTRUCTION MANUAL Cordless Power Cutter CE001G Read before use.
-
Page 2: Specifications
SPECIFICATIONS Model: CE001G Wheel diameter 355 mm Max. wheel thickness 5.0 mm Max. cutting depth 127 mm Rated speed 5,300 min Rated voltage D.C. 72 V - 80 V max Max. permitted pressure of feed-water 5.0 bars Overall length 786 mm Net weight 12.3 - 12.9 kg... - Page 3 Keep children and bystanders away while If devices are provided for the connection of operating a power tool. Distractions can cause dust extraction and collection facilities, ensure these are connected and properly used. Use of you to lose control. dust collection can reduce dust-related hazards. Electrical safety Do not let familiarity gained from frequent use Power tool plugs must match the outlet.
- Page 4 Use the power tool, accessories and tool bits Cordless cutter safety warnings etc. in accordance with these instructions, tak- ing into account the working conditions and The guard provided with the tool must be the work to be performed. Use of the power tool securely attached to the power tool and for operations different from those intended could positioned for maximum safety, so the least...
- Page 5 12. Hold the power tool by insulated gripping sur- When wheel is binding or when interrupting faces only, when performing an operation where a cut for any reason, switch off the power the cutting accessory may contact hidden wir- tool and hold the power tool motionless until ing. Cutting accessory contacting a “live” wire may the wheel comes to a complete stop.
- Page 6 Do not short the battery cartridge: CAUTION: Only use genuine Makita batteries. (1) Do not touch the terminals with any con- Use of non-genuine Makita batteries, or batteries that ductive material. have been altered, may result in the battery bursting (2) Avoid storing battery cartridge in a con- causing fires, personal injury and damage. It will...
-
Page 7: Parts Description
PARTS DESCRIPTION Fig.1 Abrasive cut-off wheel / Wheel guard Wheel cover grip Front grip diamond wheel Lamp Battery cartridge Lock-off button Caster Shaft lock button Cover Cock Water inlet Handle Switch trigger Lamp button Overload indicator Coupling sleeve Box wrench 7 ENGLISH... -
Page 8: Functional Description
Indicating the remaining battery FUNCTIONAL DESCRIPTION capacity CAUTION: Always be sure that the tool is Press the check button on the battery cartridge to indi- switched off and the battery cartridge is removed cate the remaining battery capacity. The indicator lamps before adjusting or checking function on the tool. light up for a few seconds. Installing or removing battery cartridge CAUTION: Always switch off the tool before installing or removing of the battery cartridge. -
Page 9: Overload Protection
Then turn the tool on to restart. service center for proper repairs BEFORE further usage. Overheat protection... -
Page 10: Electric Brake
► 1 . Hex bolt 2. Flange 3. Ring 4. Abrasive cut-off wheel / diamond wheel 5. Arrow (rotation direction of the wheel) CAUTION: Use only the Makita wrench to install or remove the wheel. To install the wheel, follow the removal procedure in CAUTION: When installing the wheel, be sure reverse. -
Page 11: Connecting To Water Supply
NOTE: When installing the wheel, be sure to attach NOTE: The fitting depends on the shape of the faucet the flanges so that the flat side of flange faces the to which you connect. Prepare a suitable commercial- wheel, and attach the ring that matches the inner ly-bought fitting. diameter of the wheel. NOTE: If you use a water tap joint, prepare another coupling sleeve and attach it to the other end of the hose. NOTE: When using a water pump, follow the instruc- tions of your water pump to connect the water hose. - Page 12 Cutting NOTE: When the battery cartridge temperature is low, the tool may not work to its full capacity. At this CAUTION: During operation, do not bring the time, for example, use the tool for a light-duty cut for tool higher than your shoulder height. a while until the battery cartridge warms up as high as room temperature. Then, the tool can work to its full capacity. NOTE: If the cutting action of the diamond wheel begins to diminish, dress the cutting edge of the wheel using an old discarded coarse grit bench grinder wheel or concrete block. Dress by pressing lightly on the outer edge of the diamond wheel.
-
Page 13: Cleaning The Tool
NOTICE: Never use gasoline, benzine, thinner, alcohol or the like. Discoloration, deformation or cracks may result. To maintain product SAFETY and RELIABILITY, repairs, any other maintenance or adjustment should be performed by Makita Authorized or Factory Service Centers, always using Makita replacement parts. Fig.20 ► 1 . Air vent 13 ENGLISH... - Page 14 Push in the shaft lock button and hold it to lock the Replacing the synchro-belt large pulley, and then turn the small disc counterclock- wise using the thick end of the box wrench to loosen the Remove the battery cartridges and the wheel. synchro-belt. Loosen the hex socket bolts using the tip of the box wrench, and then remove the cover.
- Page 15 Push in the shaft lock button and hold it to lock Push in the shaft lock button and hold it to lock the the large pulley, and then turn the small disc clockwise large pulley, and then turn the nut clockwise using the using the thick end of the box wrench to tighten the belt. thin end of the box wrench. Fig.27 ► 1 .
-
Page 16: Troubleshooting
Ask your local authorized service center for repair. NOTE: Some items in the list may be included in the OPTIONAL tool package as standard accessories. They may differ from country to country. ACCESSORIES CAUTION: These accessories or attachments are recommended for use with your Makita tool specified in this manual. The use of any other accessories or attachments might present a risk of injury to persons. Only use accessory or attachment for its stated purpose. If you need any assistance for more details regard- ing these accessories, ask your local Makita Service Center. •... - Page 20 Makita Corporation 3-11-8, Sumiyoshi-cho, Anjo, Aichi 446-8502 Japan 885944-926 www.makita.com 20211112...