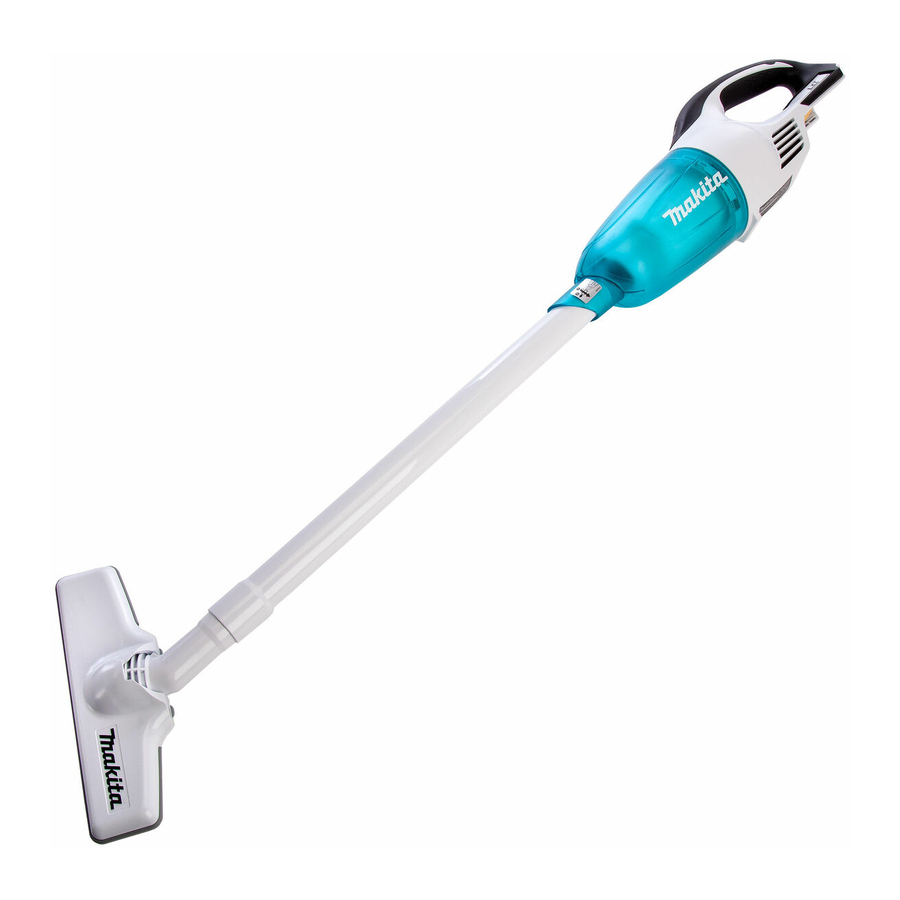
Makita DCL181F Instruction Manual
Cordless cleaner
Hide thumbs
Also See for DCL181F:
- Instruction manual (89 pages) ,
- Instruction manual (53 pages) ,
- Instruction manual (76 pages)
Table of Contents
Advertisement
Quick Links
Advertisement
Table of Contents

Related Manuals for Makita DCL181F


Summary of Contents for Makita DCL181F
- Page 1 INSTRUCTION MANUAL Cordless Cleaner DCL181F Read before use.
-
Page 2: Specifications
If the tool is not used for a long period of time, the battery must be removed from the tool. • Do not short the battery cartridge. • See the chapter “MAINTENANCE” for the appropriate details of precautions during user maintenance. SPECIFICATIONS Model: DCL181F Capacity 650 mL Continuous use HIGH Approx. 20 min (with battery BL1830B) Approx. -
Page 3: Safety Warnings
ADDITIONAL SAFETY RULES SAFETY WARNINGS This appliance is intended for household use. Cordless cleaner safety warnings Read this instruction manual and the charger instruction manual carefully before use. Do not pick up the following materials: WARNING: IMPORTANT! READ CAREFULLY — Hot materials such as lit cigarettes or spark/ all safety warnings and all instructions BEFORE metal dust generated by grinding/cutting metal... -
Page 4: Functional Description
Use of non-genuine Makita batteries, or batteries that have been altered, may result in the battery bursting causing fires, personal injury and damage. It will also void the Makita warranty for the Makita tool and charger. Tips for maintaining maximum... -
Page 5: Battery Protection System
Indicator lamps Remaining CAUTION: Always install the battery cartridge capacity fully until the red indicator cannot be seen. If not, it may accidentally fall out of the tool, causing injury to Lighted Blinking you or someone around you. 75% to 100% CAUTION: Do not install the battery cartridge forcibly. - Page 6 High performance filter Lighting the lamp CAUTION: Never look into the light directly. Direct light causes damage to your eyes. ► 1. Capsule 2. High performance filter Disposing of dust ► 1. OFF button 2. HIGH/LOW button 3. Lamp CAUTION: Empty the cleaner before it To turn on the lamp, simply press the "HIGH/LOW"...
- Page 7 Disposing of dust for high Remove accumulated dust from inside of capsule and off of prefilter. performance filter In order to drop dust sticking on the filter in the capsule, tap the capsule 4 or 5 times with your hand. Now point suction inlet downwards, turn capsule in direction of arrow in diagram, and disconnect capsule slowly and straight.
- Page 8 Reassembly Reassembly for normal filter Put on filter until it is fully in position on the cleaner unit. Connect capsule. Align O mark on capsule with O mark on handle and then firmly twist capsule in direction of arrow until it is secured. ►...
- Page 9 Problem Examples Example 4: Prefilter's securing lip is not firmly locked into groove of cleaner housing Example 1: Only prefilter has been loaded (no filter) ► 1. Groove of cleaner housing 2. Prefilter 3. Securing ► 1. Prefilter Example 2: Only filter has been loaded (no prefilter) Reassembly for high performance filter Connect high performance filter.
-
Page 10: Operation
Connect capsule. Align O mark on capsule with O OPERATION mark on handle and then firmly twist capsule in direction of arrow until it is secured. CAUTION: To connect attachments, such as nozzle, twist and insert the attachment in direction of the arrow to secure the connection during use. -
Page 11: Maintenance
Nozzle + Extension wand (Straight pipe) Cleaning without nozzle The extension wand fits in between the nozzle and the You can pick up powder and dust without nozzle. cleaner itself. This arrangement is convenient for clean- ing a floor in a standing position. ►... -
Page 12: Cleaner Body
Cleaner body Insert the sponge filter from between the pillars and set it in the original position. Make sure that each bottom From time to time wipe off the outside (cleaner body) of edge of the pillar holds down the sponge filter, and there is the cleaner using a cloth dampened in soapy water. -
Page 13: Troubleshooting
CAUTION: Do not attempt to repair the cleaner by yourself. To maintain product SAFETY and RELIABILITY, repairs, any other maintenance or adjustment should be performed by Makita Authorized or Factory Service Centers, always using Makita replacement parts. Cyclone attachment OPTIONAL... - Page 14 NOTICE: NOTE: Check that the cyclone attachment, cleaner, When the cyclone attachment is and straight pipe are all firmly connected before attached, do not use the cleaner in the horizontal restarting operation. or upward facing condition. Doing so may cause the mesh filter to become clogged.
- Page 15 Insert the mesh filter into the base while the hooks are aligned with the port. Turn the mesh filter clockwise until the hooks are locked with a click. Make sure that the mesh filter is installed securely. ► 1. Mesh filter 2. Hook 3. Port 15 ENGLISH...
- Page 16 Makita Europe N.V. Jan-Baptist Vinkstraat 2, 3070 Kortenberg, Belgium Makita Corporation 3-11-8, Sumiyoshi-cho, Anjo, Aichi 446-8502 Japan 885580D221 www.makita.com 20201105...