
Related Manuals for Makita GPH02


Summary of Contents for Makita GPH02
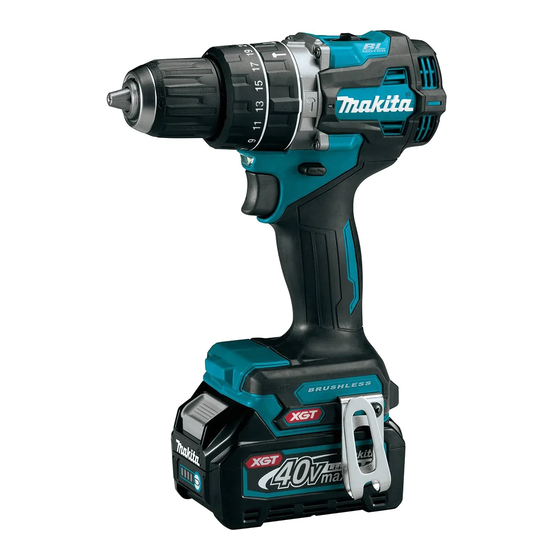
- Page 1 INSTRUCTION MANUAL MANUAL DE INSTRUCCIONES Cordless Hammer Driver Drill Rotomartillo Atornillador Inalámbrico GPH02 IMPORTANT: Read Before Using. IMPORTANTE: Lea antes de usar.
-
Page 2: Specifications
ENGLISH (Original instructions) SPECIFICATIONS Model: GPH02 Drilling capacities Masonry 13 mm (1/2") Steel 13 mm (1/2") Wood Auger bit: 38 mm (1-1/2") Self-feed bit: 38 mm (1-1/2”) Hole saw: 51 mm (2”) Fastening capacities Wood screw 10 mm x 90 mm (3/8" x 3-1/2") Machine screw M6 (1/4") - Page 3 Do not abuse the cord. Never use the cord for Power tool use and care carrying, pulling or unplugging the power tool. Do not force the power tool. Use the correct Keep cord away from heat, oil, sharp edges power tool for your application. The correct or moving parts.
- Page 4 Do not use a battery pack or tool that is dam- Always start drilling at low speed and with the aged or modified. Damaged or modified batteries bit tip in contact with the workpiece. At higher may exhibit unpredictable behaviour resulting in speeds, the bit is likely to bend if allowed to rotate fire, explosion or risk of injury.
-
Page 5: Tips For Maintaining Maximum Battery Life
To install the battery cartridge, align the tongue on the causing fires, personal injury and damage. It will battery cartridge with the groove in the housing and slip also void the Makita warranty for the Makita tool and it into place. Insert it all the way until it locks in place charger. -
Page 6: Overload Protection
This tool is equipped with an electric brake. If the tool consistently fails to quickly stop after the switch trigger NOTE: Depending on the conditions of use and the is released, have the tool serviced at a Makita service ambient temperature, the indication may differ slightly center. -
Page 7: Speed Change
Speed change CAUTION: Always set the speed change lever fully to the correct position. If you operate the tool with the speed change lever positioned halfway between the "1" side and "2" side, the tool may be damaged. CAUTION: Do not use the speed change lever while the tool is running. -
Page 8: Adjusting The Fastening Torque
► 1 . Action mode changing ring 2. Adjusting ring 3. Mark 4. Arrow Adjusting the fastening torque The fastening torque can be adjusted in 21 levels by turning the adjusting ring. Align the graduations with the arrow on the tool body. You can get the minimum fas- tening torque at 1 and maximum torque at 21. Before actual operation, drive a trial screw into your material or a piece of duplicate material to determine which torque level is required for a particular applica- tion. -
Page 9: Installing Hook
ASSEMBLY NOTICE: When hanging the tool on your belt using the hook, remove the driver bit/drill bit and the side grip. CAUTION: Always be sure that the tool is Installing driver bit holder switched off and the battery cartridge is removed before carrying out any work on the tool. -
Page 10: Screwdriving Operation
Be sure to use a tungsten-carbide tipped drill bit. OPERATION Position the drill bit at the desired location for the hole, then pull the switch trigger. Do not force the tool. Light pressure gives best results. Keep the tool in position CAUTION: Always insert the battery cartridge and prevent it from slipping away from the hole. -
Page 11: Maintenance
Never use gasoline, benzine, thinner, alcohol or the like. Discoloration, deformation or cracks may result. To maintain product SAFETY and RELIABILITY, repairs, any other maintenance or adjustment should be performed by Makita Authorized or Factory Service Centers, always using Makita replacement parts. OPTIONAL ACCESSORIES CAUTION: These accessories or attachments are recommended for use with your Makita tool specified in this manual. -
Page 12: Especificaciones
ESPAÑOL (Instrucciones originales) ESPECIFICACIONES Modelo: GPH02 Capacidades de taladrado Mampostería 13 mm (1/2") Acero 13 mm (1/2") Madera Broca de barrena: 38 mm (1-1/2″) Broca de autoalimentación: 38 mm (1-1/2″) Sierra perforadora: 51 mm (2″) Capacidades de fijación Tornillo para madera 10 mm x 90 mm (3/8" x 3-1/2") Tornillo de máquina 6 mm (1/4") Velocidad sin carga (RPM) - Page 13 Seguridad eléctrica Cargar las herramientas eléctricas con su dedo en el interruptor o enchufarlas con el interrup- Las clavijas de conexión de las herramientas tor encendido hace que los accidentes sean eléctricas deberán encajar perfectamente en la comunes. toma de corriente. No modifique nunca la cla- vija de conexión de ninguna forma.
- Page 14 Dé mantenimiento a las herramientas eléctri- Siga todas las instrucciones para la carga y evite cas y los accesorios. Compruebe que no haya cargar la herramienta o la batería fuera del rango de piezas móviles desalineadas o estancadas, temperatura especificado en las instrucciones. Una piezas rotas y cualquier otra condición que carga inadecuada o a una temperatura fuera del rango pueda afectar al funcionamiento de la herra-...
- Page 15 Siga las regulaciones locales relacionadas al desecho de las baterías. Instrucciones importantes de 12. Utilice las baterías únicamente con los productos especificados por Makita. Instalar las baterías en seguridad para el cartucho de productos que no cumplan con los requisitos podría batería ocasionar un incendio, un calentamiento excesivo, una explosión o una fuga de electrolito.
-
Page 16: Descripción Del Funcionamiento
Asimismo, esto inva- lidará la garantía de Makita para la herramienta y el cargador Makita. Consejos para alargar al máximo la vida útil de la batería Cargue el cartucho de batería antes de que... -
Page 17: Protección Contra Sobrecarga
Makita. condiciones: 17 ESPAÑOL... -
Page 18: Cambio De Velocidad
Iluminación de la luz delantera PRECAUCIÓN: No mire a la luz ni vea a la fuente de luz directamente. Jale el gatillo interruptor para encender la luz. La luz continúa iluminándose mientras se está jalando el gatillo interruptor. La luz se apaga aproximadamente 10 segundos tras haber liberado el gatillo interruptor. ► 1 . - Page 19 Selección del modo de • Modo de atornillado (rotación con embrague) Seleccione el modo apropiado para el trabajo en accionamiento cuestión. Gire el anillo de cambio de modo de acciona- miento y alinee la marca que haya seleccionado con la PRECAUCIÓN: flecha en el cuerpo de la herramienta. Ponga siempre el anillo correctamente en la marca del modo que desee. Si utiliza la herramienta con el anillo puesto a medias entre las marcas de modo, la herramienta podrá...
-
Page 20: Montaje
El gancho resulta útil para colgar temporalmente la MONTAJE herramienta. Se puede instalar en cualquiera de los lados de la herramienta. Para instalar el gancho, insér- telo en una ranura de la carcasa de la herramienta de PRECAUCIÓN: Asegúrese siempre de que la cualquiera de los lados y después sujételo con un torni- herramienta esté... -
Page 21: Operación
Operación de taladrado con OPERACIÓN percusión PRECAUCIÓN: Siempre inserte completa- PRECAUCIÓN: En el momento de comenzar mente el cartucho de batería hasta que quede a penetrar, cuando se atasca el agujero con viru- asegurado en su lugar. Si puede ver el indicador tas y partículas, o cuando se topa contra varillas rojo del lado superior del botón, esto indica que no de refuerzo de hormigón armado, se ejerce una... -
Page 22: Mantenimiento
(tíner), alcohol o sustancias similares. Puede que esto ocasione grietas o descoloramiento. Para mantener la SEGURIDAD y FIABILIDAD del pro- ducto, las reparaciones, y cualquier otra tarea de man- tenimiento o ajuste deberán ser realizadas en centros de servicio autorizados o de fábrica Makita, empleando siempre repuestos Makita. 22 ESPAÑOL... - Page 24 Para reducir la exposición a estos productos químicos: trabaje en un área bien ventilada y póngase el equipo de seguridad indicado, tal como las máscaras contra polvo que están especialmente diseñadas para filtrar partículas microscópicas. Makita Corporation 3-11-8, Sumiyoshi-cho, Anjo, Aichi 446-8502 Japan 885843-946...