
Related Manuals for Makita GFD02


Summary of Contents for Makita GFD02
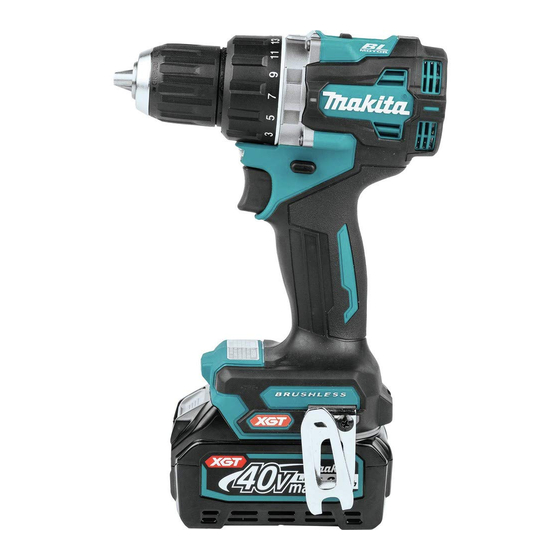
- Page 1 INSTRUCTION MANUAL MANUAL DE INSTRUCCIONES Cordless Driver Drill Atornillador Taladro Inalámbrico GFD02 IMPORTANT: Read Before Using. IMPORTANTE: Lea antes de usar.
-
Page 2: Specifications
ENGLISH (Original instructions) SPECIFICATIONS Model: GFD02 Drilling capacities Steel 13 mm (1/2") Wood Auger bit: 38 mm (1-1/2") Self-feed bit: 38 mm (1-1/2”) Hole saw: 51 mm (2”) Fastening capacities Wood screw 10 mm x 90 mm (3/8" x 3-1/2") Machine screw M6 (1/4") - Page 3 If operating a power tool in a damp location is Disconnect the plug from the power source unavoidable, use a ground fault circuit inter- and/or remove the battery pack, if detachable, rupter (GFCI) protected supply. Use of a GFCI from the power tool before making any adjust- ments, changing accessories, or storing power reduces the risk of electric shock.
-
Page 4: Cordless Driver Drill Safety Warnings
Service WARNING: DO NOT let comfort or familiarity Have your power tool serviced by a qualified with product (gained from repeated use) replace repair person using only identical replacement strict adherence to safety rules for the subject parts. This will ensure that the safety of the power product. MISUSE or failure to follow the safety tool is maintained. -
Page 5: Tips For Maintaining Maximum Battery Life
18. Keep the battery away from children. To remove the battery cartridge, slide it from the tool SAVE THESE INSTRUCTIONS. while sliding the button on the front of the cartridge. To install the battery cartridge, align the tongue on the CAUTION: Only use genuine Makita batteries. battery cartridge with the groove in the housing and slip Use of non-genuine Makita batteries, or batteries that it into place. Insert it all the way until it locks in place have been altered, may result in the battery bursting with a little click. If you can see the red indicator on the causing fires, personal injury and damage. It will upper side of the button, it is not locked completely. also void the Makita warranty for the Makita tool and CAUTION: Always install the battery cartridge charger. -
Page 6: Overheat Protection
Electric brake malfunctioned. This tool is equipped with an electric brake. If the tool consistently fails to quickly stop after the switch trigger NOTE: Depending on the conditions of use and the is released, have the tool serviced at a Makita service ambient temperature, the indication may differ slightly center. from the actual capacity. NOTE: The first (far left) indicator lamp will blink when the battery protection system works. -
Page 7: Speed Change
Lighting up the front lamp Speed change CAUTION: CAUTION: Do not look in the light or see the Always set the speed change lever source of light directly. fully to the correct position. If you operate the tool with the speed change lever positioned halfway Pull the switch trigger to light up the lamp. The lamp between the "1" side and "2" side, the tool may be keeps on lighting while the switch trigger is being pulled. -
Page 8: Adjusting The Fastening Torque
Adjusting the fastening torque The fastening torque can be adjusted in 22 levels by turning the adjusting ring. Align the graduations with the arrow on the tool body. You can get the minimum fas- tening torque at 1 and maximum torque at marking. The clutch will slip at various torque levels when set at the number 1 to 21. The clutch does not work at marking. Before actual operation, drive a trial screw into your material or a piece of duplicate material to determine which torque level is required for a particular applica- tion. -
Page 9: Screwdriving Operation
Installing driver bit holder OPERATION Optional accessory CAUTION: Always insert the battery cartridge all the way until it locks in place. If you can see the red indicator on the upper side of the button, it is not locked completely. Insert it fully until the red indicator cannot be seen. If not, it may accidentally fall out of the tool, causing injury to you or someone around you. CAUTION: When the speed comes down extremely, reduce the load or stop the tool to avoid the tool damage. -
Page 10: Drilling In Metal
CAUTION: These accessories or attachments Use a cutting lubricant when drilling metals. The excep- are recommended for use with your Makita tool tions are iron and brass which should be drilled dry. specified in this manual. The use of any other CAUTION: accessories or attachments might present a risk of Pressing excessively on the tool injury to persons. Only use accessory or attachment... -
Page 11: Especificaciones
ESPAÑOL (Instrucciones originales) ESPECIFICACIONES Modelo: GFD02 Capacidades de taladrado Acero 13 mm (1/2") Madera Broca de barrena: 38 mm (1-1/2″) Broca de autoalimentación: 38 mm (1-1/2″) Sierra perforadora: 51 mm (2″) Capacidades de apriete Tornillo para madera 10 mm x 90 mm (3/8" x 3-1/2") Tornillo de máquina 6 mm (1/4") Velocidad sin carga (rpm) - Page 12 Evite tocar con el cuerpo superficies conectadas a Si dispone de dispositivos para la conexión tierra o puestas a tierra tales como tubos, radiado- de equipos de extracción y recolección de res, cocinas y refrigeradores. Si su cuerpo es puesto polvo, asegúrese de conectarlos y utilizarlos debidamente.
- Page 13 Mantenga los mangos y superficies de asi- Advertencias de seguridad para el miento secos, limpios y libres de aceite o taladro atornillador inalámbrico grasa. Los mangos y superficies de asimiento resbalosos no permiten una manipulación segura Instrucciones de seguridad para todas las ni el control de la herramienta en situaciones operaciones inesperadas.
- Page 14 Siga las regulaciones locales relacionadas al desecho de las baterías. diámetro 12. Utilice las baterías únicamente con los productos especificados por Makita. Instalar las baterías en productos que no cumplan con los requisitos podría Instrucciones importantes de ocasionar un incendio, un calentamiento excesivo, una seguridad para el cartucho de explosión o una fuga de electrolito.
-
Page 15: Descripción Del Funcionamiento
Cargue el cartucho de batería a una tempera- PRECAUCIÓN: Introduzca siempre com- tura ambiente de 10 °C - 40 °C (50 °F - 104 °F). pletamente el cartucho de batería hasta que Si un cartucho de batería está caliente, déjelo el indicador rojo no pueda verse. Si no, podría enfriar antes de cargarlo. -
Page 16: Protección Contra Sobrecarga
La herramienta está equipada con un sistema de protección soltar el gatillo interruptor, lleve la herramienta a mante- para la herramienta/batería. Este sistema corta automáti- nimiento a un centro de servicio Makita. camente la alimentación para prolongar la vida de la herra- mienta y la batería. La herramienta se detendrá automática- Iluminación de la luz delantera mente durante la operación si la herramienta o la batería se... -
Page 17: Cambio De Velocidad
Número Velocidad Torsión Operación desplegado aplicable Baja Alta Operación de carga pesada Alta Baja Operación de carga ligera Para cambiar la velocidad, apague primero la herra- mienta. Presione la palanca de cambio de velocidad para desplegar “2” para velocidad alta o “1” para veloci- dad baja pero alta torsión. Asegúrese de que la palanca de cambio de velocidad esté... -
Page 18: Montaje
El gancho resulta útil para colgar temporalmente la MONTAJE herramienta. Se puede instalar en cualquiera de los lados de la herramienta. Para instalar el gancho, insér- telo en una ranura de la carcasa de la herramienta de PRECAUCIÓN: Asegúrese siempre de que la cualquiera de los lados y después sujételo con un torni- herramienta esté... -
Page 19: Operación
AVISO: Nunca use gasolina, bencina, diluyente (tíner), alcohol o sustancias similares. Puede que esto ocasione grietas o descoloramiento. Para mantener la SEGURIDAD y FIABILIDAD del pro- ducto, las reparaciones, y cualquier otra tarea de man- tenimiento o ajuste deberán ser realizadas en centros de servicio autorizados o de fábrica Makita, empleando siempre repuestos Makita. 19 ESPAÑOL... -
Page 20: Accesorios Opcionales
PRECAUCIÓN: Estos accesorios o aditamen- tos están recomendados para utilizarse con su herramienta Makita especificada en este manual. El empleo de cualquier otro accesorio o aditamento puede conllevar el riesgo de lesiones personales. Utilice los accesorios o aditamentos solamente para su fin establecido. - Page 24 Para reducir la exposición a estos productos químicos: trabaje en un área bien ventilada y póngase el equipo de seguridad indicado, tal como las máscaras contra polvo que están especialmente diseñadas para filtrar partículas microscópicas. Makita Corporation 3-11-8, Sumiyoshi-cho, Anjo, Aichi 446-8502 Japan 885844-944...