Honeywell evohome Applications Manual
Hide thumbs
Also See for evohome:
- Installation manual (53 pages) ,
- User manual (21 pages) ,
- Quick start manual (17 pages)
Table of Contents
Advertisement
Advertisement
Table of Contents

Related Manuals for Honeywell evohome


Summary of Contents for Honeywell evohome
- Page 1 Application Manual...
-
Page 2: Table Of Contents
Content Introduction ..........................3 Wireless communication............................3 Product overview ..............................4 Application examples ......................6 Single zone thermostat with boiler control ......................6 Two zone system with zone valves ........................8 Multizone system with radiators ........................... 10 Multizone system with radiators and remote sensor .................... 12 Multizone system with underfloor heating individual room thermostat .............. -
Page 3: Introduction
Introduction As part of the wide range of Honeywell´s product portfolio for wireless communication products we provide heating solutions for individual zoning control. This application manual explains examples for heating solutions, particularly for radiator, underfloor and electrical heating control. Wireless communication The peripherals communicate with the evotouch controller based on our proven RF wireless technology 868 MHZ. -
Page 4: Product Overview
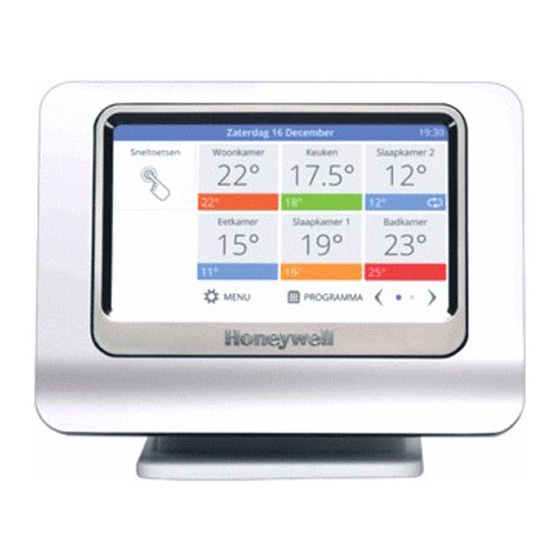
Product overview Picture Product OS number Description evotouch controller Modern designed multizoning controller with touch screen display for up to 8 zones. With individual time program for each zone, guided programming, text-based user guide. Underfloor heating HCE80(R) Underfloor heating controller for up to 5 zones. Pump controller control, analogue output for boiler feedback MCR200, MCR40, EXCEL controllers. - Page 5 Radiator controller with energy-saving features, e.g. window function, manual setpoint override, display operating status and battery exchange. Fits valves of brands Honeywell Braukmann, MNG, Heimeier, Junkers, Oventrop beginning from 03/1998. Adaptors for Danfoss, Herz, Vaillant, Oventrop available. Battery- powered (2x1,5 V AA LR6), transceiver 868 MHz.
-
Page 6: Application Examples
Application examples Single zone thermostat with boiler control Zone 1 B D R t o u e v o B o i l e r r o o m Z o n e Notes • The internal room sensor of the evotouch controller must be activated •... - Page 7 Application description This application shows 1 zone boiler control where the evotouch controller controls the boiler directly depending on heat demand via the BDR91 relay module (switching ON/OFF). The internal room sensor of the evotouch controller is used in order to measure the room temperature. Option •...
-
Page 8: Two Zone System With Zone Valves
Two zone system with zone valves Z o n e 2 Z o n Z o n B D R t o u e v o B o i l e r r o o m Z o n e Notes •... - Page 9 Application description For zone 1, the internal room sensor of the evotouch controller is used. Zone 2 requires the DT92 room unit for the room temperature measurement and local remote setpoint adjustment. The setpoints can be altered directly on the evotouch controller by manual override, time program, lifestyle actions and DT92 as well.
-
Page 10: Multizone System With Radiators
Multizone system with radiators Example: 6 zones, up to 8 zones are possible Z o n e 4 Z o n e 5 Z o n e 6 .. . 8 Z o n e 2 Z o n e 3 t o u c e v o B D R... - Page 11 Application description The integrated room sensor of the HR80 is used to measure the room temperature and compare it with the received room setpoint from the evotouch controller. Depending on the temperature deviation, the radiator valve is controlled to achieve the target room temperature setpoint.
-
Page 12: Multizone System With Radiators And Remote Sensor
Multizone system with radiators and remote sensor Example: 6 zones, up to 8 zones are possible Z o n e 4 Z o n e 5 Z o n e 6 .. . 8 Z o n e 2 Z o n e 3 t o u c e v o B D R... - Page 13 Application description This application shows when the HR80 integrated room sensor should be used or, alternatively, the DT92 remote sensor. The precise room temperature measurement requires air flow through the HR80 room sensor which is not always possible, particularly if the radiators are faced with e.g. wood, which causes an imprecise temperature measurement (see examples in zone 1 and zone 2).
-
Page 14: Multizone System With Underfloor Heating Individual Room Thermostat
Multizone system with underfloor heating individual room thermostat Example: 6 zones, up to 8 zones are possible Z o n e 4 Z o n e 5 Z o n e 6 .. . 8 Z o n e 2 Z o n e 3 8 0 ( R H C E... - Page 15 Application description The underfloor heating controller controls 6 zones individually. For zone 1, the evotouch internal room sensor is used. All other zones (2 – 6) require their own room unit DT92 in order to measure the room temperature and adjust the room temperature setpoint remotely.
-
Page 16: Multizone System With Underfloor Heating Individual Room Sensor
Multizone system with underfloor heating individual room sensor Example: 6 zones, up to 8 zones are possible Z o n e 4 Z o n e 5 Z o n e 6 .. . 8 Z o n e 2 Z o n e 3 8 0 ( R H C E... - Page 17 Application description The HCE80(R) / HCC80(R) underfloor heating controllers individually control up to 8 zones. For zone 1, the internal room sensor from the evotouch controller is used. All other zones (2 – 6) require their own HCF82 room sensor to measure the room temperature.
-
Page 18: Multizone System With Radiators And Underfloor Heating
Multizone system with radiators and underfloor heating Example: 6 zones, up to 8 zones are possible Z o n e 4 Z o n e 5 Z o n e 6 .. . 8 Z o n e 2 Z o n e 3 8 0 ( R H C E 8 0 ( R... - Page 19 Application description This is a typical application which shows the combination of underfloor heating and radiator control. Zones 1 and 2 are controlled by the underfloor heating controller HCE80 and zones 3 – 6 by radiator controllers HR80. Zone 1 uses the internal room sensor from the evotouch controller, while zones 2 and 3 use the DT92 room unit to measure the room temperature and remote setpoint adjustment.
-
Page 20: Multizone System With Mixing Valve And Radiators
Multizone system with mixing valve and radiators Example: 6 zones, up to 8 zones are possible Z o n e 4 / M K 1 Z o n e 5 / M K 1 Z o n e 6 / M K 1 .. - Page 21 Application description This application shows two heating circuits: one for radiator MK1 and one for underfloor heating MK2. The HR80 radiator controllers belong to the heating circuit MK1 (zones 2 – 6) which use their own integrated room sensor. Zone 1 (underfloor heating MK2) is controlled by the mixing valve controller HM80 and the evotouch controller’s internal room sensor is used to measure the room temperature.
-
Page 22: Multizone Boiler Control With Up To 4 Controllers
Multizone boiler control with up to 4 controllers B o i l e r r o o m Note • Instead of the BDR91 relay module the OPENTHERM-Bridge can be used Application description The boiler relay or OPENTHERM-Bridge can receive the heat demand signal from up to 4 evotouch controllers in order to control the boiler based on the required heat demand. -
Page 23: Application Settings
Application settings Parameters can be set for optimum operation and control performance of the system in the specific application. Underfloor heating Parameter Settings / range Min/max temperature setpoint 5 ... 35 °C Radiator heating Parameter Settings / range Optimisation Enabled / disabled Window function Enabled / disabled Min/max temperature setpoint... -
Page 24: Generic Binding
Generic Binding New components of the zoning system, which have capabilities to communicate wireless based on 868 MHz technology, have to be integrated into the system before they can be taken into operation. This process is called BINDING The binding procedure in the evotouch controller is guided by help screens which lead the installer through the procedure. - Page 25 Press the button GUIDED CONFIG Press the YES button. Depending on your needs, select a button to press. Follow the next guided screens Application Manual...
- Page 26 4.1.2 EXPERT configuration Press the button MENU. The next screen appears. Press the button ZONING MENU. Press the button ZONING CONFIG Press for 5 seconds to enter” and Press the button “ hold the button for 5 seconds until the next screen appears..
-
Page 27: Sensor Binding
Depending on your needs, select a button to press. Follow the next screens Notes If you have mixed applications example 5 zones radiator control and 3 zones underfloor heating control you can setup the configuration as following: Select menu GUIDED CONFIG and configure the 5 zones for radiator control Select menu ZONING CONFIG and add the 3 zones for underfloor heating control ADD ZONE Alternative go to the expert menu: Select menu ZONING CONFIG and add the 5 zones for Radiator control ADD ZONE... -
Page 28: Binding The Evotouch Controller To The Hr80 Radiator Controller
Binding the evotouch controller to the HR80 radiator controller 4.3.1 Binding the HR80 integrated room sensor Follow the guided or expert configuration until the following screen appears. Position the evotouch controller close to the HR80 which is connected to the valve. Press the bind button (1) on the HR80. - Page 29 4.3.2 Binding the HR80 actuator(s) Follow the guided or expert configuration until the following screen appears. evotouch controller as close as possible Position the to the HR80 actuator(s). Consecutively press the bind buttons (1) on all the HR80 radiator controllers of the zone. Press the BIND button on the evotouch controller to send the signal.
- Page 30 4.3.3 Checking RF communication with the HR80 radiator controller The evotouch controller will send and receive test signals to and from the assigned HR80 to test the signal strength. evotouch controller receiving test messages from the HR80 Separate HR80 operating unit from coupling module (see instructions HR80).
-
Page 31: Binding The Evotouch Controller To The Bdr91 / Hc60Ng / R6660D Relay Module
Binding the evotouch controller to the BDR91 / HC60NG / R6660D relay module 4.4.1 Binding procedure Follow the guided or expert configuration until the following screen appears. Press and hold the bind button of the BDR91 / HC60NG BDR91 HC60NG / R6660D / R6660D relay module for 5 sec to activate the bind mode. - Page 32 4.4.2 Checking RF communication BDR91 The evotouch controller sends test signals to and from the assigned relay module BDR91 in order to test the signal strength. The signal strength can be EXCELLENT, GOOD, POOR or not received HC60NG / R6660D The evotouch controller sends test signals to the assigned relay module HC60NG / R6660D in order to test the signal strength.
-
Page 33: Binding The Evotouch Controller To The Opentherm-Bridge Boiler Feedback
Binding the evotouch controller to the OPENTHERM-Bridge boiler feedback The following modules can be used for boiler feedback as well: BDR91, HC60NG, R6660D. For the BIND buttons and checking RF communication of these modules see section 4.4. 4.5.1 Binding procedure Follow the guided or expert configuration until the following screen appears. - Page 34 4.5.2 Checking RF communication The evotouch controller sends test signals to the assigned OPENTHERM-Bridge in order to test the signal strength. When OPENTHERM-Bridge receives the test signal, the field strength is indicated by flashing of the red LED. 1 pulse = sufficient 5 pulses = strong Deactivating the RF communication check Press the NEXT button.
-
Page 35: Binding The Evotouch Controller To The Hm80 Mixing Valve Controller
Binding the evotouch controller to the HM80 mixing valve controller 4.6.1 Binding procedure Follow the guided or expert configuration until the following screen appears. Press both buttons (1) and (2) at the HM80 for approx. 4 seconds until the LED (3) flashes regularly. Position the evotouch controller as close as possible to the HM80 mixing valve controller. - Page 36 4.6.2 Checking RF communication The evotouch controller sends test signals to the assigned HM80 in order to test the signal strength. When HM80 receives the test signal, the field strength is indicated by flashing of the red LED (4). 1 pulse = sufficient 5 pulses = strong Note Sensor information relates to the sensor in the zone...
-
Page 37: Binding The Evotouch Controller To The Hce80(R) / Hcc80(R) Underfloor Heating Controller
Binding the evotouch controller to the HCE80(R) / HCC80(R) underfloor heating controller For zones 2 – 6 an external room sensor (DT92 / HCW82 / HCF82) must be bound to the evotouch controller. 4.7.1 Binding room sensor Follow the guided or expert configuration until the following screen appears. - Page 38 4.7.2 Binding room setpoint Follow the guided or expert configuration until the following screen appears. Press and hold the installation button (1) at the underfloor heating controller again for approx. 2 seconds. The LED of zone 1 (2) flashes green. evotouch controller as close as possible Position the to the underfloor heating controller.
- Page 39 4.7.3 Checking RF communication The evotouch controller sends test signals to the assigned underfloor heating controller in order to test the signal strength. When the underfloor heating controller receives the test signal, the field strength is indicated by flashing of the green zone LED (2).
-
Page 40: Binding The Evotouch Controller To The Dt92 Room Adjuster/Sensor
Binding the evotouch controller to the DT92 room adjuster/sensor 4.8.1 Binding procedure Follow the guided or expert configuration until the following screen appears. evotouch controller as close as possible Position the to the DT92. Press and hold both arrows up and down until the display changes. - Page 41 4.8.2 Checking RF communication Select Menu BINDING AND RF TEST. The DT92 controller sends test signals to the evotouch controller in order to test the signal strength. The device is now in the test mode and sends test signals to the evotouch controller. The signal strength can be EXCELLENT, GOOD, POOR or not received.
-
Page 42: Binding The Evotouch Controller To The Hcw82 Room Adjuster/Sensor Or To The Hcf82 Room Sensor
Binding the evotouch controller to the HCW82 room adjuster/sensor or to the HCF82 room sensor 4.9.1 Binding procedure Follow the guided or expert configuration until the following screen appears. Position the evotouch controller as close as possible to the HCW82 / HCF82. Press and hold the bind button (1) on the HCF82 / HCW82 for approx. - Page 43 4.9.2 Checking RF communication Select Menu BINDING AND RF TEST. HCW82 / HCF82 send test signals to the evotouch controller in order to test the signal strength. Press and hold the bind button of the HCW82 / HCF82 for at least 30 seconds until the red LED extinguishes. The device is now in test mode and sends a test signal every 5 seconds.
-
Page 44: Binding The Evotouch Controller To The Hb85 Temperature Sensor
Deactivating the RF communication check Remove and re-insert the batteries of the DT92. Disconnect the power supply. Press the bind button. Completing configuration Press the DONE button. Configuration of the HCW82 / HCF82 is completed. 4.10 Binding the evotouch controller to the HB85 temperature sensor 4.10.1 Binding procedure To check whether the radio connection is ready for later operation, during binding the temperature sensor module... - Page 45 4.10.2 Checking RF communication HB85 sends test signals to the evotouch controller in order to test the signal strength. Press the bind button of the HB85 briefly. For approx. 10 minutes, HB85 transmits a test message to the evotouch controller every 5 seconds. The field strength is indicated on the evotouch controller.
- Page 46 evotouch...
- Page 47 Application Manual...
- Page 48 RG12 1EB Technical Help Desk: 08457 678999 Doku-Nr. 50042748-001 www.honeywelluk.com © 2009 Honeywell International Inc. Manufactured for and on behalf of the Environmental and Combustion Controls Division of Honeywell Technologies Sàrl, Rolle, Z.A. La Pièce 16, Switzerland by its Authorized Representative:...