
Related Manuals for Makita XLC05


Summary of Contents for Makita XLC05
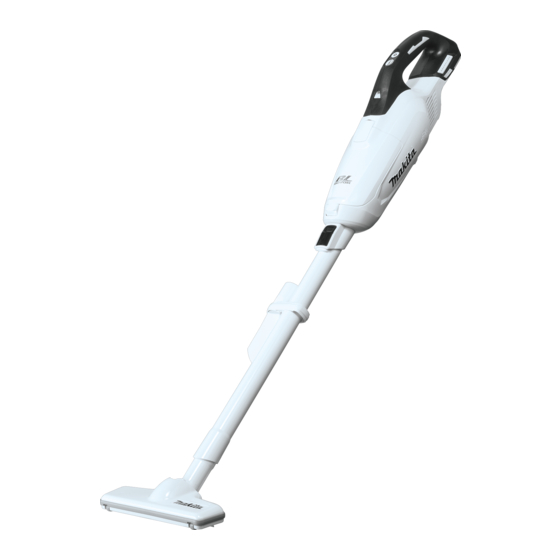
- Page 1 INSTRUCTION MANUAL MANUAL DE INSTRUCCIONES Cordless Cleaner Aspiradora Inalámbrica XLC05 IMPORTANT: Read Before Using. IMPORTANTE: Lea antes de usar.
-
Page 2: Specifications
ENGLISH (Original instructions) SPECIFICATIONS Model: XLC05 Capacity with a dust bag 500 mL with a paper filter 330 mL Continuous use 1 (Normal speed mode) Approx. 50 min (with battery BL1830B) 2 (High speed mode) Approx. 20 min 3 (Max speed mode) Approx. -
Page 3: Additional Safety Rules
Do not put any object into openings. Under abusive conditions, liquid Do not use with any opening blocked; may be ejected from the battery; keep free of dust, lint, hair, and any- avoid contact. If contact acciden- thing that may reduce air flow. tally occurs, flush with water. - Page 4 Hot substances that are burning Symbols • or smoking (cigarettes, matches, incense sticks, candles, hot ashes), The followings show the symbols used for sparks and metal dust generated by tool. cutting or grinding metal, etc. volts Flammable material (toner, • paint, spray, etc.) direct current Foam like carpet cleaning agent, etc.
-
Page 5: Functional Description
Use of non-genuine Makita batteries, or batteries that have been altered, may result in the battery bursting causing fires, personal injury and damage. It will also void the Makita warranty for the Makita tool and charger. Tips for maintaining maximum... -
Page 6: Battery Protection System
Indicator lamps Remaining CAUTION: Always install the battery cartridge capacity fully until the red indicator cannot be seen. If not, it may accidentally fall out of the tool, causing injury to Lighted Blinking you or someone around you. The battery CAUTION: Do not install the battery cartridge may have... -
Page 7: Installing Dust Bag
Installing dust bag NOTE: The timing, at which the lamp starts blinking, depends on the temperature at work place and the battery cartridge conditions. Use the dust stopper when installing dust bag. Be careful not to take the upper side for the lower side by mistake because they are different each other. - Page 8 Overlap the frame of dust stopper with that of the Close the front cover completely. dust bag. ► 1. Front cover Place the dust stopper and the dust bag together Installing the paper filter into the cleaner cavity in the same direction of arrow on the dust stopper.
-
Page 9: Operation
Insert the protrusion of the paper filter into the Place the dust stopper and the paper filter lower groove on the dust stopper as shown in the figure. together into the cleaner cavity in the same direction of arrow on the dust stopper. Insert them all the way into the slots in the cleaner cavity. - Page 10 To remove, pull the extension wand while pushing the Installing or removing the cleaner release button. attachment CAUTION: After installing attachment, check if it is securely installed. If install attachment imper- fectly, it may come off and cause personal injury. CAUTION: Be careful not to hit your hand on the wall etc.
- Page 11 Nozzle + Extension wand (Straight pipe) Cleaning without nozzle The extension wand fits in between the nozzle and the You can pick up powder and dust without nozzle. cleaner itself. This arrangement is convenient for clean- ing a floor in a standing position. For picking up dust on a floor in a standing position, it is convenient to attach the extension wand to the cleaner.
-
Page 12: Maintenance
To maintain product SAFETY and RELIABILITY, repairs, any other maintenance or adjustment should be performed by Makita Authorized or Factory Service Centers, always using Makita replacement parts. ► 1. Dust stopper 2. Dust bag NOTICE: Never use gasoline, benzine, thinner, alcohol or the like. - Page 13 When the sponge filter is clogged with dust, remove it After use from the cleaner and then wipe it off or wash in water. NOTICE: Putting the cleaner against the wall without any Dust stopper other support cause the cleaner to fall down and be damaged. Wipe dust off from the dust stopper.
-
Page 14: Troubleshooting
Press in the whole edge of the sponge filter against the Wall mount for cordless cleaner recessed wall inside the dust bag/paper filter mounting area. Optional accessory NOTE: The screw to mount the holder is not included. Prepare a screw which fits with the material to screw into. -
Page 15: Optional Accessories
OPTIONAL ACCESSORIES CAUTION: These accessories or attachments are recommended for use with your Makita tool specified in this manual. The use of any other accessories or attachments might present a risk of injury to persons. Only use accessory or attachment for its stated purpose. -
Page 16: Especificaciones
ESPAÑOL (Instrucciones originales) ESPECIFICACIONES Modelo: XLC05 Capacidad con una bolsa recolectora de polvo 500 ml con un filtro de papel 330 ml Uso continuo 1 (Modo velocidad normal) Aprox. 50 min. (con batería BL1830B) 2 (Modo velocidad alta) Aprox. 20 min. - Page 17 No manipule el aparato con las Cuando no se esté usando el paquete manos mojadas. de baterías, guárdelo lejos de otros objetos metálicos tales como sujeta- No introduzca ningún objeto en las aber- papeles (clips), monedas, llaves, cla- turas. No lo utilice con ninguna abertura vos, tornillos u otros objetos metá- bloqueada;...
-
Page 18: Reglas De Seguridad Adicionales
REGLAS DE Basura líquida o húmeda, inclu- • yendo vómitos y heces SEGURIDAD Asbesto • Pesticidas • ADICIONALES Tal acción podría ocasionar un incen- dio, lesiones y/o daños materiales. Para reducir la exposición a estas Este aparato está diseñado para un uso sustancias químicas, utilice un doméstico solamente. - Page 19 Un cortocircuito en la batería lesiones personales y daños. Asimismo, esto inva- puede causar un flujo grande de lidará la garantía de Makita para la herramienta y el cargador Makita. corriente, sobrecalentamiento, posibles quemaduras e incluso una Consejos para alargar al máximo...
-
Page 20: Descripción Del Funcionamiento
Para colocar el cartucho de batería, alinee la lengüeta DESCRIPCIÓN DEL sobre el cartucho de batería con la ranura en la carcasa y deslice en su lugar. Inserte por completo hasta que FUNCIONAMIENTO se fije en su lugar con un pequeño clic. Si puede ver el indicador rojo del lado superior del botón, esto indica que no ha quedado fijo por completo. -
Page 21: Montaje
Encendido de la lámpara Luces indicadoras Capacidad restante PRECAUCIÓN: No mire a la luz ni vea a la Iluminadas Apagadas Parpadeando fuente de luz directamente. 75% a 100% Para encender la lámpara, oprima el botón de encen- dido/cambio de velocidad. Para apagar la lámpara, 50% a 75% oprima el botón de apagado. - Page 22 Inserte la parte saliente de la bolsa recolectora de AVISO: Para evitar que el polvo se introduzca en polvo dentro de la ranura inferior del tope para el polvo, el motor: tal como se muestra en la figura. • Asegúrese de instalar la bolsa recolectora de polvo o el filtro de papel antes de utilizar la aspiradora.
- Page 23 Coloque el tope para el polvo y la bolsa recolec- Instalación del filtro de papel tora de polvo de manera conjunta en la cavidad de la aspiradora, en la misma dirección de la flecha en el Utilice también el tope para el polvo cuando instale el tope para el polvo.
-
Page 24: Operación
No hay ninguna distinción entre los lados superior Extienda la parte del contenedor del filtro de papel e inferior del filtro de papel. Puede insertar su parte en el interior de la aspiradora. saliente de cualquier lado en la ranura inferior del tope para el polvo. - Page 25 Cuando se utiliza el tubo de Cuando se utilice la boquilla extensión con la función de bloqueo Para instalar la boquilla, enrósquela e insértela firme- mente en la entrada de succión de la aspiradora o en Para instalar el tubo de extensión, insértelo en la el extremo del tubo de extensión.
- Page 26 Boquilla para esquinas Para recoger polvo en un piso en posición de pie, es conveniente colocar el tubo de extensión en la Coloque la boquilla para esquinas para aspirar esqui- aspiradora. nas y huecos en autos y muebles. ► 1. Boquilla para esquinas 2. Cuerpo de la aspiradora ►...
-
Page 27: Mantenimiento
Centros de ► 1. Tope para el polvo 2. Bolsa recolectora de polvo Servicio Autorizados por Makita o de Fábrica, utilizando siempre repuestos Makita. Cuando utilice el filtro de papel... -
Page 28: Bolsa Recolectora De Polvo
Tope para el polvo Limpieza Limpie el polvo del tope para el polvo. Retire el polvo y la suciedad en la pieza de la esponja Cuerpo de la aspiradora golpeándola suavemente. De vez en cuando, limpie el exterior (cuerpo) de la aspi- radora usando un paño húmedo y agua enjabonada. -
Page 29: Detección Y Solución De Problemas
Presione todo el borde del filtro de esponja contra la Montaje de pared para la aspiradora pared hueca en el interior del área donde va colocada inalámbrica la bolsa recolectora de polvo/filtro de papel. Accesorio opcional NOTA: El tornillo para instalar el soporte no está incluido. -
Page 30: Accesorios Opcionales
PRECAUCIÓN: Estos accesorios o aditamen- tos están recomendados para utilizarse con su herramienta Makita especificada en este manual. El empleo de cualquier otro accesorio o aditamento puede conllevar el riesgo de lesiones personales. Utilice los accesorios o aditamentos solamente para su fin establecido. - Page 32 Para reducir la exposición a estos productos químicos: trabaje en un área bien ventilada y póngase el equipo de seguridad indicado, tal como las máscaras contra polvo que están especialmente diseñadas para filtrar partículas microscópicas. Makita Corporation 3-11-8, Sumiyoshi-cho, Anjo, Aichi 446-8502 Japan 885707-944...