
Related Manuals for Makita XLC08


Summary of Contents for Makita XLC08
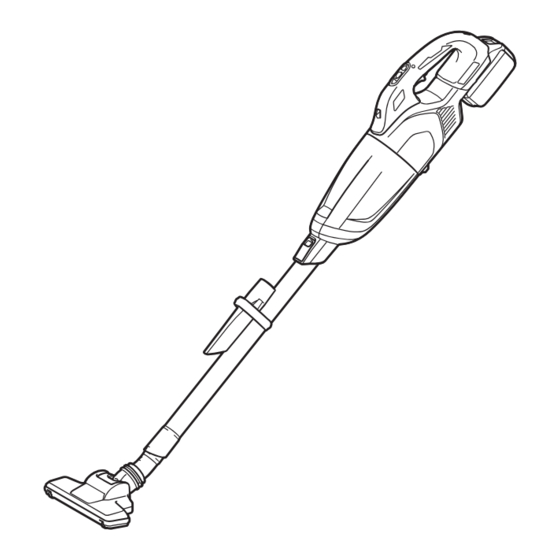
- Page 1 INSTRUCTION MANUAL MANUAL DE INSTRUCCIONES Cordless Cleaner Aspiradora Inalámbrica XLC08 IMPORTANT: Read Before Using. IMPORTANTE: Lea antes de usar.
-
Page 2: Specifications
ENGLISH (Original instructions) SPECIFICATIONS Model: XLC08 Capacity 730 mL Continuous use (with battery BL1830B) Approx. 10 min Overall length (with pipe, nozzle, and battery BL1830B) 1,066 mm (42") Rated voltage D.C. 18 V Net weight 1.3 - 1.7 kg (2.9 - 3.7 lbs) •... -
Page 3: Additional Safety Rules
Do not put any object into openings. Under abusive conditions, liquid Do not use with any opening blocked; may be ejected from the battery; keep free of dust, lint, hair, and any- avoid contact. If contact acciden- thing that may reduce air flow. tally occurs, flush with water. - Page 4 Do not pick up the following materials: If you drop or strike the cleaner, check it carefully for cracks or dam- Hot substances that are burn- — age before operation. ing or smoking (cigarettes, matches, incense sticks, can- Do not bring close to stoves or other dles, hot ashes), sparks and heat sources.
- Page 5 Makita warranty for the Makita tool and Please also observe possibly more charger. detailed national regulations. Tips for maintaining maximum...
-
Page 6: Functional Description
If no improvement can be found by restoring protection system, then contact your local Makita Service Center. To remove the battery cartridge, slide it from the tool Indicating the remaining battery while sliding the button on the front of the cartridge. - Page 7 When the slide switch is set to "I" side: Indicator lamps Remaining While the slide switch is set to "I" side, the switch trig- capacity ger is pulled automatically and the cleaner continues actuating. To stop the cleaner, set the slide switch to "O" Lighted Blinking side and release the switch trigger.
-
Page 8: Parts Description
ASSEMBLY NOTE: Do not install an optional filter (non-woven cloth) between the HEPA filter and prefilter. The suc- tion power may be reduced. CAUTION: Always be sure that the tool is NOTE: Always use the high performance filter that is switched off and the battery cartridge is removed framed with an originally-designed stay when overlay- before carrying out any work on the tool. ing it on the HEPA filter. - Page 9 Point suction inlet downwards, turn capsule in direction Reassembly of arrow in diagram, and disconnect capsule slowly and straight. Connect high performance filter. At this time, make sure to twist high performance filter so that securing lip is firmly locked into the cleaner unit. Fig.11 ► 1 . Capsule 2. Suction inlet Fig.14 NOTE: Dust may spill out when capsule is opened, so ► 1 . High performance filter be sure to set a garbage bag beneath capsule.
- Page 10 For the HEPA filter NOTE: Always remove dust ahead of time, as suction power will be reduced if there is too much dust in When installing the HEPA filter, fit the groove of the cleaner. HEPA filter with the protrusion on the cleaner. Then, put the prefilter or the high performance filter on the HEPA Problem Example filter and twist it to secure. To remove, follow the instal- lation procedure in reverse. The securing lip of high performance filter is not firmly locked into groove of cleaner housing. Fig.17 ► 1 .
-
Page 11: Operation
When using attachment without lock OPERATION function CAUTION: Do not move your face close to CAUTION: To connect attachment without the air vent when operating the cleaner. If foreign lock function, twist and insert it in direction of objects are blown into eyes, it may result in personal the arrow to secure the connection during use. injury. - Page 12 Nozzle + Extension wand (Straight pipe) Sash nozzle + Extension wand (Straight pipe) The extension wand fits in between the nozzle and the cleaner itself. This arrangement is convenient for clean- In tight quarters where the cleaner itself cannot ing a floor in a standing position. squeeze in, or in high places hard to reach, use this arrangement.
-
Page 13: Maintenance
To maintain product SAFETY and RELIABILITY, repairs, any other maintenance or adjustment should be performed by Makita Authorized or Factory Service Centers, always using Makita replacement parts. After use CAUTION: Putting the cleaner against the... -
Page 14: Sponge Filter
Sponge filter Wall mount for cordless cleaner When the sponge filter becomes dirty, clean it as Optional accessory follows. NOTE: The screw to mount the holder is not included. Remove filters that cover the stay. Prepare a screw which fits with the material to screw Pull out the sponge filter from between the pillars. into. Clean the sponge filter by tapping or washing. If Attach the wall mount for cordless cleaner to a hard you wash it, dry it out thoroughly before use. wooden wall, beam or column, where the wall mount Insert the sponge filter between the pillars and set for cordless cleaner can be firmly secured. Always be... -
Page 15: Optional Accessories
OPTIONAL ACCESSORIES Optional accessory CAUTION: These accessories or attachments are recommended for use with your Makita tool specified in this manual. The use of any other accessories or attachments might present a risk of injury to persons. Only use accessory or attachment for its stated purpose. If you need any assistance for more details regard- ing these accessories, ask your local Makita Service Center. - Page 16 NOTE: Check that the cyclone attachment, cleaner, NOTE: Check that the cyclone attachment, cleaner, and extension wand (straight pipe) are locked prop- and extension wand (straight pipe) are locked prop- erly before use. erly before restarting operation. NOTE: Empty the dust case of the cyclone attach- NOTE: If the suction force does not recover even ment and the capsule of the cleaner when dust has after disposing of the dust and cleaning the mesh...
- Page 17 When the mesh filter gets dirty badly, clean it in the MAKITA LIMITED WARRANTY following procedures. Turn the mesh filter in the direction of the arrow Please refer to the annexed warranty sheet for the and remove it while the hooks are unlocked. most current warranty terms applicable to this product. If annexed warranty sheet is not available, refer to the warranty details set forth at below website for your respective country.
-
Page 18: Especificaciones
ESPAÑOL (Instrucciones originales) ESPECIFICACIONES Modelo: XLC08 Capacidad 730 ml Uso continuo (con batería BL1830B) Aprox. 10 min. Longitud total (con tubo, boquilla y batería BL1830B) 1 066 mm (42") Tensión nominal 18 V c.c. Peso neto 1,3 kg - 1,7 kg (2,9 lbs - 3,7 lbs) •... - Page 19 No manipule el aparato con las Use los aparatos únicamente con manos mojadas. los paquetes de baterías designados específicamente para ellos. El uso No introduzca ningún objeto en las de otros paquetes de baterías puede aberturas. No lo utilice con ninguna generar riesgo de lesiones e incendio.
-
Page 20: Reglas De Seguridad Adicionales
No modifique ni intente reparar el Grandes cantidades de polvo — aparato ni el paquete de baterías (harina, polvo de extintor de salvo como se indique en las ins- incendios, etc.) trucciones para el uso y cuidado. Sustancias que causan sínto- —... - Page 21 Utilice las baterías únicamente con gún material conductor. los productos especificados por Evite guardar el cartucho de Makita. Instalar las baterías en pro- batería en un cajón junto con ductos que no cumplen con los requi- otros objetos metálicos, tales sitos podría ocasionar un incendio, un...
-
Page 22: Descripción Del Funcionamiento
Instalación o extracción del cartucho de batería PRECAUCIÓN: Utilice únicamente baterías originales de Makita. El uso de baterías no origina- PRECAUCIÓN: Apague siempre la herra- les de Makita, o de baterías alteradas, puede ocasio- mienta antes de colocar o quitar el cartucho de nar que las baterías exploten causando un incendio,... - Page 23 Deje que la herramienta y la(s) batería(s) se enfríen. Si no hay ninguna mejora al restaurar el sistema de protección, comuníquese con su centro local de servi- cio Makita. Fig.2 Indicación de la capacidad restante ► 1 . Indicador rojo 2. Botón 3. Cartucho de batería de la batería Para instalar el cartucho de batería, alinee la lengüeta sobre el cartucho de batería con la ranura en la carcasa...
-
Page 24: Montaje
Encendido de la lámpara NOTA: Dependiendo de las condiciones de uso y la temperatura ambiente, la indicación podrá diferir ligeramente de la capacidad real. PRECAUCIÓN: No mire a la luz ni vea a la NOTA: La primera luz indicadora (extrema izquierda) fuente de luz directamente. parpadeará cuando el sistema de protección de batería esté... - Page 25 Prefiltro o filtro de alto rendimiento y Para eliminar el polvo que quede pegado sobre el filtro en la cápsula, dé un golpe ligero a la cápsula unas 4 o filtro HEPA 5 veces con su mano. Fig.8 Fig.10 ► 1 . Cápsula 2. Prefiltro 3. Filtro de alto rendimiento ► 1 . Cápsula 4. Filtro HEPA Dirija la entrada de succión hacia abajo, gire la cápsula en la dirección de la flecha en el diagrama y desconecte AVISO: No cubra el filtro de alto rendimiento la cápsula lentamente y en línea recta.
- Page 26 Enrosque el filtro de alto rendimiento en la dirección de AVISO: Asegúrese siempre de verificar que el la flecha para desabrochar el reborde de fijación de la filtro de alto rendimiento esté cargado correc- unidad de la aspiradora y luego saque el filtro. tamente antes de usar la aspiradora. Si no está correctamente puesto, el polvo se introducirá a la carcasa del motor causando daños en el mismo. Si se presenta el problema como se describe más adelante, el filtro de alto rendimiento no se pondrá correctamente. Vuélvalo a colocar correctamente para corregir el problema. Conecte la cápsula. Alinee la marca en la cápsula con la marca en el mango y luego gire firmemente la cápsula en la dirección de la flecha hasta que quede asegurada. Fig.13 ► 1 . Reborde de fijación NOTA: Cuando utilice el prefiltro, siga también el...
-
Page 27: Operación
Instalación o extracción del retenedor/filtro HEPA Accesorio opcional Para el retenedor y filtro de esponja Para extraer el retenedor, empuje hacia arriba la parte inferior de los pilares del retenedor con sus dedos y libere su ranura de la parte saliente de la aspiradora. Después de esto, extraiga el filtro de esponja. Fig.20 ► 1 . Filtro HEPA 2. Filtro de alto rendimiento Fig.18 OPERACIÓN ► 1 . - Page 28 Cuando se utiliza el aditamento con Cuando se utiliza el aditamento sin la la función de bloqueo función de bloqueo Para instalar el aditamento, insértelo en la entrada PRECAUCIÓN: Para conectar el aditamento de succión de la aspiradora hasta que haga clic. sin la función de bloqueo, enrosque e insértelo Asegúrese de que el aditamento quede asegurado.
- Page 29 Boquilla + Tubo de extensión (tubo recto) Boquilla para bastidores + tubo de extensión (tubo recto) El tubo de extensión se coloca entre la boquilla y la aspiradora misma. Esta modalidad resulta conveniente Utilice esta modalidad para espacios estrechos donde para aspirar un piso estando de pie.
-
Page 30: Mantenimiento
Para mantener la SEGURIDAD y CONFIABILIDAD del producto, las reparaciones y cualquier otro manteni- miento o ajuste deben ser realizados por los centros de servicio autorizados por Makita o de fábrica, utilizando siempre repuestos Makita. Después del uso PRECAUCIÓN: El colocar la aspiradora contra la pared sin que haya ningún otro soporte podría ocasionar que la aspiradora se cayera, Fig.32... -
Page 31: Detección Y Solución De Problemas
Filtro de esponja Montaje de pared para la aspiradora inalámbrica Cuando el filtro de esponja se ensucie, límpielo como se indica a continuación. Accesorio opcional Retire los filtros que cubren el retenedor. NOTA: El tornillo para instalar el soporte no está Jale hacia afuera el filtro de esponja de entre los incluido. Prepare un tornillo que sea apto para el pilares. material donde va a atornillarse. Limpie el filtro de esponja mediante golpecitos o lavándolo. Si lo lava, déjelo secar por completo antes Fije el montaje de pared para la aspiradora inalámbrica de usarlo. en una pared, travesaño o columna de madera resis- tente donde el montaje de pared para la aspiradora Inserte el filtro de esponja entre los pilares y coló-... -
Page 32: Accesorios Opcionales
PRECAUCIÓN: Estos accesorios o aditamen- tos están recomendados para utilizarse con su herramienta Makita especificada en este manual. El empleo de cualquier otro accesorio o aditamento puede conllevar el riesgo de lesiones personales. Utilice los accesorios o aditamentos solamente para su fin establecido. - Page 33 NOTA: Verifique que el colector ciclónico, la aspira- NOTA: Verifique que el colector ciclónico, la aspira- dora y el tubo de extensión (tubo recto) estén asegu- dora y el tubo de extensión (tubo recto) estén asegu- rados correctamente antes de su uso. rados correctamente antes de reiniciar la operación. NOTA: Vacíe la caja para polvo del colector ciclónico NOTA: Si la fuerza de succión no se recupera incluso y la cápsula de la aspiradora cuando se haya acumu- después de desechar el polvo y de limpiar el filtro de lado el polvo.
- Page 34 Cuando el filtro de malla se ensucie en exceso, límpielo GARANTÍA LIMITADA DE MAKITA con los siguientes procedimientos. Gire el filtro de malla en la dirección de la flecha, y Ésta Garantía no aplica para México retírelo mientras los ganchos no están asegurados. Consulte la hoja de la garantía anexa para ver los términos más vigentes de la garantía aplicable a este producto. En caso de no disponer de esta hoja de garantía anexa, consulte los detalles sobre la garantía descritos en el sitio web de su país respectivo indicado a continuación.
- Page 36 Para reducir la exposición a estos productos químicos: trabaje en un área bien ventilada y póngase el equipo de seguridad indicado, tal como las máscaras contra polvo que están especialmente diseñadas para filtrar partículas microscópicas. Makita Corporation 3-11-8, Sumiyoshi-cho, Anjo, Aichi 446-8502 Japan 885A24-948...