Makita DDG460 Instruction Manual
Cordless earth auger
Hide thumbs
Also See for DDG460:
- Instruction manual (81 pages) ,
- Instruction manual (69 pages) ,
- Instruction manual (81 pages)
Table of Contents
Advertisement
Quick Links
Advertisement
Table of Contents

Related Manuals for Makita DDG460


Summary of Contents for Makita DDG460
- Page 1 INSTRUCTION MANUAL Cordless Earth Auger DDG460 Read before use.
-
Page 2: Specifications
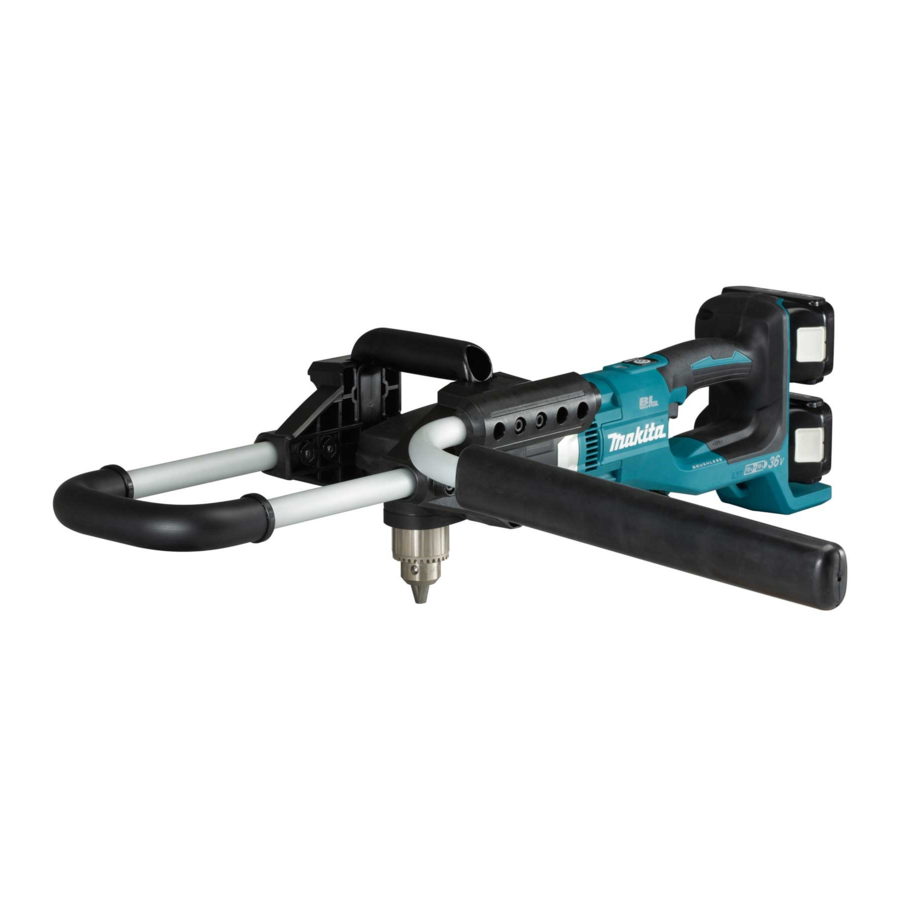
SPECIFICATIONS Model: DDG460 No load speed High 0 - 1,400 min 0 - 350 min Drilling capacities For sandy soil: 200 mm For clay soil: 150 mm Overall length 840 mm Rated voltage D.C. 36 V Net weight 7.3 - 8.2 kg •... -
Page 3: Ec Declaration Of Conformity
Electrical safety Vibration Power tool plugs must match the outlet. Never modify the plug in any way. Do not use any The vibration total value (tri-axial vector sum) deter- adapter plugs with earthed (grounded) power mined according to EN62841-2-1: tools. Unmodified plugs and matching outlets will Vibration emission (a ) : 2.5 m/s or less... - Page 4 Do not let familiarity gained from frequent use Keep handles and grasping surfaces dry, of tools allow you to become complacent and clean and free from oil and grease. Slippery ignore tool safety principles. A careless action can handles and grasping surfaces do not allow for cause severe injury within a fraction of a second.
- Page 5 For commercial transports e.g. by third parties, abnormal sounds, stop operating immediately forwarding agents, special requirement on pack- and ask your local Makita Service Center for aging and labeling must be observed. repair. For preparation of the item being shipped, consult- 16.
-
Page 6: Initial Setting
Use of non-genuine Makita batteries, or batteries that have been altered, may result in the battery bursting causing fires, personal injury and damage. It will also void the Makita warranty for the Makita tool and charger. Tips for maintaining maximum... -
Page 7: Functional Description
Installing the side handle Installing the reaction receiver Remove the bolts shown in the figure from the tool. Place the reaction receiver so that the bar of the reac- The removed bolt is not needed for this tool if you want tion receiver comes to the left side of the operator. -
Page 8: Main Power Switch
Main power switch Indicator lamps Remaining capacity WARNING: Always turn off the main power Lighted Blinking switch when not in use. 75% to 100% To stand by the tool, press the main power button until the main power lamp lights up. To turn off, press the 50% to 75% main power button again. -
Page 9: Speed Change
Lighting up the front lamp Automatic speed change function This tool has "high speed mode" and "high torque CAUTION: Do not look in the light or see the mode". source of light directly. The tool automatically changes the operation mode depending on the work load. -
Page 10: Installing Or Removing Battery Cartridge
Two speed ranges can be preselected with the speed ASSEMBLY change knob. To change the speed, depress the lock button and turn the speed change knob so that the pointer points to the Installing or removing battery position 1 for low speed or the position 2 for high speed. cartridge CAUTION: Always switch off the tool before... -
Page 11: Operation
Mounting the auger bit on the bit Mounting the auger bit adapter CAUTION: Always be sure that the tool is NOTE: The shape and mechanism of the auger bit switched off and the battery cartridge is removed and the auger pin may vary depending on your auger before carrying out any work on the tool. -
Page 12: Digging Operation
Work posture Digging operation Maintaining proper operating position is one of the CAUTION: Hold the tool firmly when operat- most important and effective procedures for controlling ing the tool. kickback. CAUTION: Keep proper positioning by practicing the following When leaving the tool, such as points. -
Page 13: Maintenance
Discoloration, deformation or cracks may result. To maintain product SAFETY and RELIABILITY, repairs, any other maintenance or adjustment should be performed by Makita Authorized or Factory Service Centers, always using Makita replacement parts. OPTIONAL ACCESSORIES CAUTION:... - Page 16 Makita Europe N.V. Jan-Baptist Vinkstraat 2, 3070 Kortenberg, Belgium Makita Corporation 3-11-8, Sumiyoshi-cho, Anjo, Aichi 446-8502 Japan 885819-222 www.makita.com 20200722...