Table of Contents
Advertisement
Quick Links
MODEL T25920/T25926
VARIABLE-SPEED WOOD
LATHE
OWNER'S MANUAL
(For models manufactured since 03/16)
T25920
T25926
COPYRIGHT © DECEMBER, 2014 BY GRIZZLY INDUSTRIAL, INC. REVISED APRIL, 2016 (WK)
WARNING: NO PORTION OF THIS MANUAL MAY BE REPRODUCED IN ANY SHAPE
OR FORM WITHOUT THE WRITTEN APPROVAL OF GRIZZLY INDUSTRIAL, INC.
#AWWK17009 PRINTED IN CHINA
V2.04.16
Advertisement
Table of Contents

Related Manuals for Grizzly T25920


Summary of Contents for Grizzly T25920
- Page 1 (For models manufactured since 03/16) T25920 T25926 COPYRIGHT © DECEMBER, 2014 BY GRIZZLY INDUSTRIAL, INC. REVISED APRIL, 2016 (WK) WARNING: NO PORTION OF THIS MANUAL MAY BE REPRODUCED IN ANY SHAPE OR FORM WITHOUT THE WRITTEN APPROVAL OF GRIZZLY INDUSTRIAL, INC.
- Page 2 This manual provides critical safety instructions on the proper setup, operation, maintenance, and service of this machine/tool. Save this document, refer to it often, and use it to instruct other operators. Failure to read, understand and follow the instructions in this manual may result in fire or serious personal injury—including amputation, electrocution, or death.
-
Page 3: Table Of Contents
SECTION 5: ACCESSORIES ......28 Contact Info............ 2 SECTION 6: MAINTENANCE ......30 Manual Accuracy ........... 2 Schedule ............30 T25920 & T25926 Data Sheet ...... 3 Cleaning & Protecting ........30 Identification ........... 5 Lubrication ........... 30 Controls & Components ......... 6 SECTION 7: SERVICE ........ -
Page 4: Introduction
ID label (see below). This information is required for us to provide proper tech support, and it helps us determine if updated documenta- tion is available for your machine. Manufacture Date Serial Number Model T25920/T25926 (Mfd. Since 08/14) -
Page 5: T25920 & T25926 Data Sheet
T25920 & T25926 Data Sheet MODELS T25920 & T25926 MODEL T24463, T24464 BENCHTOP LATHES 6" Bench Grinders Model Number T24463 T24464 Model Number T25920 T25926 Product Dimensions Product Dimensions Weight 19 lbs. 17 lbs. Weight 84 lbs. 75 lbs. Width (side-to-side)/Depth (front- ⁄... - Page 6 Cast Iron Cast Iron Frame Cast Iron Base Cast Iron Tailstock Cast Iron Paint Urethane Other Country of Origin China Warranty 1 Year Serial Number Location ID Label ISO 9001 Factory Assembly Time 10 Minutes Model T25920/T25926 (Mfd. Since 08/14)
-
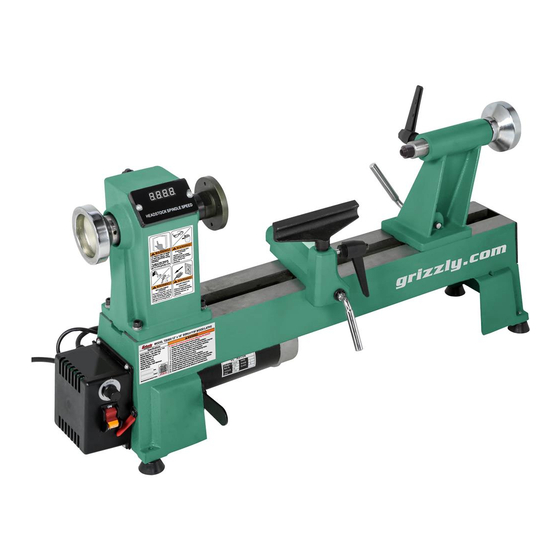
Page 7: Identification
Identification Become familiar with names and locations of controls and features shown below to better understand instructions in this manual. Figure 1. T25920/T25926 control and component identification. Tool Rest Lock Lever A. Headstock Base Lock Lever B. Faceplate K. Belt Tension Lever C. -
Page 8: Controls & Components
Figure 2. Tension lever and ON/OFF switch. RPM Display: Displays spindle speed in revolu- tions per minute (RPM). Quill Lock Lever Tailstock Lock Lever RPM Display Figure 5. Typical tailstock controls. Figure 3. RPM display on headstock. Model T25920/T25926 (Mfd. Since 08/14) -
Page 9: Section 1: Safety
Everyday ery. Never operate under the influence of drugs or eyeglasses are NOT approved safety glasses. alcohol, when tired, or when distracted. Model T25920/T25926 (Mfd. Since 08/14) - Page 10 EXPERIENCING DIFFICULTIES. If at any time debris. Make sure they are properly installed, you experience difficulties performing the intend- undamaged, and working correctly BEFORE ed operation, stop using the machine! Contact our operating machine. Technical Support at (570) 546-9663. Model T25920/T25926 (Mfd. Since 08/14)
-
Page 11: Additional Safety For Wood Lathes
SANDING/POLISHING. To reduce entanglement CHECK CLEARANCES. Before starting spindle, risk, remove tool rest before sanding. Never verify workpiece has adequate clearance by completely wrap sandpaper around workpiece. hand-rotating it through its entire range of motion. Model T25920/T25926 (Mfd. Since 08/14) -
Page 12: Section 2: Power Supply
For your own safety and protection of T25920 Full-Load Current Rating .....5.3A property, consult an electrician if you are T25926 Full-Load Current Rating .....6.0A unsure about wiring practices or electrical codes in your area. -
Page 13: Extension Cords
Two-prong outlets do not meet the grounding requirements for this machine. Do not modify or use an adapter on the plug provided—if it will not fit the outlet, have a qualified electrician install the proper outlet with a verified ground. -11- Model T25920/T25926 (Mfd. Since 08/14) -
Page 14: Section 3: Setup
The following is a list of items shipped with your you are completely satisfied with the machine and machine. Before beginning setup, lay these items have resolved any issues between Grizzly or the out and inventory them. shipping agent. You MUST have the original pack- aging to file a freight claim. -
Page 15: Cleanup
• Safety glasses & disposable gloves • Plastic paint scraper (optional) Basic steps for removing rust preventative: Figure 8. T25920 minimum working clearances. Put on safety glasses. Coat the rust preventative with a liberal ⁄ " amount of cleaner/degreaser, then let it soak for 5–10 minutes. -
Page 16: Bench Mounting
(see Figure 13). the workbench with lag screws and washers. Tailstock Handwheel Lag Screw Flat Washer Machine Base Handwheel Workbench Handle Figure 11. "Direct Mount" setup. Figure 13. Tailstock handwheel handle installed. -14- Model T25920/T25926 (Mfd. Since 08/14) -
Page 17: Test Run
Try to start machine. ed results that can lead to serious injury, death, or machine/property damage. — Machine should NOT start. If it does start, switch disabling feature is not functioning properly and switch must be replaced. -15- Model T25920/T25926 (Mfd. Since 08/14) -
Page 18: Section 4: Operations
Read books/magazines or get formal training before beginning any proj- ects. Regardless of the content in this sec- tion, Grizzly Industrial will not be held liable for accidents caused by lack of training. -16- Model T25920/T25926 (Mfd. Since 08/14) -
Page 19: Stock Inspection & Requirements
Always visually inspect your workpiece for these items. If they can't be removed, DO NOT turn the workpiece. -17- Model T25920/T25926 (Mfd. Since 08/14) -
Page 20: Adjusting Spindle Speeds
Under 2" 1520 3000 3000 2–4" 1600 2480 Side Access 4–6" 1080 1650 Cover Opened Rear Access Cover 6–8" 1240 Removed 8–10" 1000 10–12" Figure 18. Side and rear access covers. Figure 16. Speed recommendations. -18- Model T25920/T25926 (Mfd. Since 08/14) -
Page 21: Adjusting Tailstock
" pressure (see Figure 22). Deflection Pulley Figure 20. Checking belt deflection. After verifying belt tension is correct, re-install rear cover and close side access cover. Tailstock Mounting Nut Figure 22. Mounting nut location. -19- Model T25920/T25926 (Mfd. Since 08/14) -
Page 22: Adjusting Tool Rest
Turn this hex nut in small increments to fine tune the clamping pressure as needed. -20- Model T25920/T25926 (Mfd. Since 08/14) -
Page 23: Installing/Removing Headstock Center
Spur Center Figure 25. Typical installation of spur center into headstock. Check that center is securely installed by giv- ing it a quick tug. (A properly installed center will not pull out by hand.) -21- Model T25920/T25926 (Mfd. Since 08/14) -
Page 24: Removing/Installing Faceplate
2'' or quill will not be supported enough. Failure to follow DISCONNECT MACHINE FROM POWER! warnings may result in personal injury. Thread faceplate onto spindle shaft until secure against shoulder on spindle shaft. -22- Model T25920/T25926 (Mfd. Since 08/14) -
Page 25: Selecting Turning Tools
The Swan Neck Hollowing Tool shown on Page 29 is a good example of a specialty tool. Figure 30. Example of a skew chisel. -23- Model T25920/T25926 (Mfd. Since 08/14) -
Page 26: Spindle Turning
Figure 34. Workpiece ¼" Pencil Lines Marked Diagonally Across Corners Workpiece Figure 36. Spur center properly embedded. Center Figure 34. Workpiece marked diagonally from corner to corner to determine the center. -24- Model T25920/T25926 (Mfd. Since 08/14) -
Page 27: Spindle Turning Tips
Otherwise, spin- ning workpiece could force lathe tool out of your hands or entangle your hands with workpiece. Failure to heed this warning could result in serious personal injury. -25- Model T25920/T25926 (Mfd. Since 08/14) -
Page 28: Faceplate Turning
Backing Block on Page 27). in Spindle Turning on Page 24. Center faceplate on workpiece and attach with wood screws that do not have tapered heads (see Figure 38). Figure 38. Typical attachment of faceplate to workpiece. -26- Model T25920/T25926 (Mfd. Since 08/14) -
Page 29: Sanding/Finishing
Sandpaper Wrapping sandpa- per completely around workpiece could pull your hands into mov- ing workpiece and may cause serious injury. Never wrap sandpa- per or finishing materi- Workpiece als completely around workpiece. -27- Model T25920/T25926 (Mfd. Since 08/14) -
Page 30: Section 5: Accessories
" serious personal injury or machine damage. Round Scraper. Overall lengths are 16" to 19". To reduce this risk, only install accessories recommended for this machine by Grizzly. NOTICE Refer to our website or latest catalog for additional recommended accessories. - Page 31 ⁄ " hood adjusts from 23" to 43" high. Every shop needs one of these! Figure 48. Swan neck hollowing tools. Figure 46. Dust collector with hood. www.grizzly.com 1-800-523-4777 order online at or call -29- Model T25920/T25926 (Mfd. Since 08/14)
-
Page 32: Section 6: Maintenance
To reduce risk of shock or accidental startup, always disconnect machine from power before adjustments, Cleaning the Model T25920/T25926 is relatively maintenance, or service. easy. Vacuum excess wood chips and sawdust, and wipe off the remaining dust with a dry cloth. -
Page 33: Section 7: Service
6. Motor bearings are at fault. 6. Test by rotating shaft; rotational grinding/loose shaft requires bearing replacement. 7. Workpiece or chuck at fault. 7. Center workpiece in chuck/faceplate; reduce RPM; replace defective chuck. -31- Model T25920/T25926 (Mfd. Since 08/14) -
Page 34: Wood Lathe Operation
1. Turn the barrel handwheel until it forces taper out of from tailstock barrel. way back into the tailstock. barrel. 2. Debris was not removed from taper Always make sure that taper surfaces are clean. before inserting into barrel. -32- Model T25920/T25926 (Mfd. Since 08/14) -
Page 35: Tensioning & Replacing Belt
Figure 51. Loosen spindle pulley set screw. — If there is more than ⁄ " deflection repeat the tensioning procedure until it is correct. If tension cannot be achieved replace belt. -33- Model T25920/T25926 (Mfd. Since 08/14) -
Page 36: Replacing Fuse
13. Re-install rear access cover and close side access cover. Figure 55. 10A fuse location on circuit board. Re-install electrical box onto side access cover with screws removed in Step 2, then test run. -34- Model T25920/T25926 (Mfd. Since 08/14) -
Page 37: Replacing Brushes
Flat Head Screwdriver #2 ........1 Repeat Steps 3–5 to replace brush on top- side of motor. T25920/T25926: Both models use same motor replacement brushes (Part# PT25920084). Tension belt (refer to Tensioning & Replacing Belt on Page 33 for details). -
Page 38: Section 8: Wiring
Technical Support at (570) 546-9663. The photos and diagrams included in this section are best viewed in color. You can view these pages in color at www.grizzly.com. -36- Model T25920/T25926 (Mfd. Since 08/14) -
Page 39: T25920/T25926 Wiring Diagram
250VAC A1218 Figure 59. Connections in headstock. Toggle Switch (viewed from behind) RU CB-8 E19 4417 Circuit Ground Breaker RU L2 50VDC Figure 60. Electrical box. MOTOR 110V READ ELECTRICAL SAFETY -37- Model T25920/T25926 (Mfd. Since 08/14) ON PAGE 36! -
Page 40: Section 9: Parts
Please Note: We do our best to stock replacement parts whenever possible, but we cannot guarantee that all parts shown here are available for purchase. Call (800) 523-4777 or visit our online parts store at www.grizzly.com to check for availability. -
Page 41: T25920 Parts List
Safety labels help reduce the risk of serious injury caused by machine hazards. If any label comes off or becomes unreadable, the owner of this machine MUST replace it in the original location before resuming operations. For replacements, contact (800) 523-4777 or www.grizzly.com. -39-... -
Page 42: T25926 Breakdown
Please Note: We do our best to stock replacement parts whenever possible, but we cannot guarantee that all parts shown here are available for purchase. Call (800) 523-4777 or visit our online parts store at www.grizzly.com to check for availability. -
Page 43: T25926 Parts List
PT25926038 BED PT25926081 DIGITAL DISPLAY PLATE PT25926039 RETAINING PLATE PT25926082 PHLP HD SCR M4-.7 X 16 PT25926040 CAP SCREW M10-1.5 X 12 PT25926083 TRANSFORMER 110V/9V PT25926041 LOCK PLATE PT25926084 KNOCKOUT BAR PT25926042 LOCK NUT M10-1.5 -41- Model T25920/T25926 (Mfd. Since 08/14) -
Page 44: T25920/T25926 Labels & Cosmetics
FOR GRIZZLY MACHINES ONLY! DO NOT REPRODUCE OR CHANGE THIS ARTWORK 120 x 72mm COPYRIGHT © GRIZZLY INDUSTRIAL, INC. WITHOUT WRITTEN APPROVAL! Grizzly will not accept labels changed without approval. MODEL T25920 FOR GRIZZLY MACHINES ONLY! DO NOT REPRODUCE OR CHANGE THIS ARTWORK artwork changes are required, contact us immediately at manuals@grizzly.com. -
Page 45: Warranty Card
Would you recommend Grizzly Industrial to a friend? _____ Yes _____No Would you allow us to use your name as a reference for Grizzly customers in your area? Note: We never use names more than 3 times. _____ Yes _____No 10. - Page 46 FOLD ALONG DOTTED LINE Place Stamp Here GRIZZLY INDUSTRIAL, INC. P.O. BOX 2069 BELLINGHAM, WA 98227-2069 FOLD ALONG DOTTED LINE Send a Grizzly Catalog to a friend: Name_______________________________ Street_______________________________ City______________State______Zip______ TAPE ALONG EDGES--PLEASE DO NOT STAPLE...
-
Page 47: Warranty & Returns
WARRANTY & RETURNS Grizzly Industrial, Inc. warrants every product it sells for a period of 1 year to the original purchaser from the date of purchase. This warranty does not apply to defects due directly or indirectly to misuse, abuse, negligence, accidents, repairs or alterations or lack of maintenance.