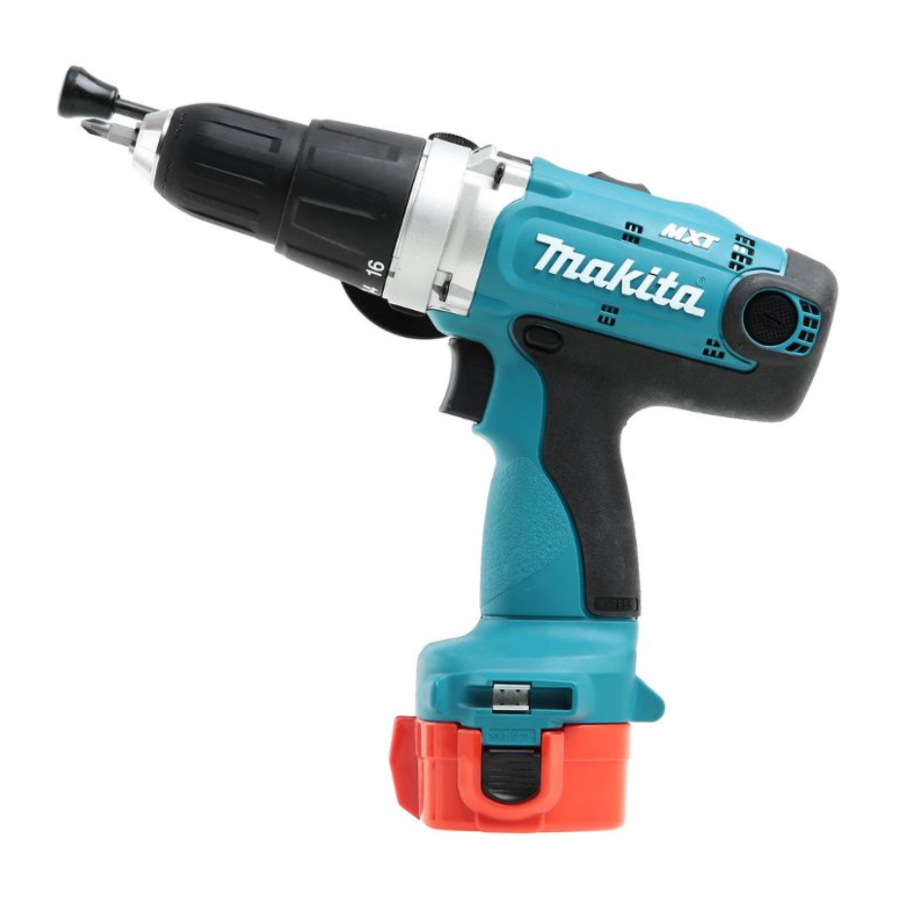
Makita 8414D Technical Information
Cordless percussion-driver drills 12v/ 14.4v/ 18v
Hide thumbs
Also See for 8414D:
- Instruction manual (61 pages) ,
- Instruction manual (57 pages) ,
- Instruction manual (52 pages)
Advertisement
Quick Links
Download this manual
See also:
Instruction Manual
T
ECHNICAL INFORMATION
Models No.
Description
C
ONCEPT AND MAIN APPLICATIONS
The above products have been developed as successor models
of the current 8443D series models and as the highest grade
series models among Makita Cordless Percussion-Driver Drills.
Their brief advantages are;
*Powerful motor provides high operation efficiency.
*Mechanical 3-speed;
3rd speed: higher than the predecessors for finishing
light duty jobs with extremely high efficiency
1st speed: lower than the predecessors for extra-heavy
duty applications
*Easy operation mode change
*All the great advantages as Model 8443D series models
These new products are available in the following variations:
8414D
Model No.
8414DWAE
1222 (Ni-Cd 2.0Ah)
8414DWAE3 1222 (Ni-Cd 2.0Ah)
8414DWALE
1222 (Ni-Cd 2.0Ah)
8414DWDE
1234 (Ni-MH 2.6Ah)
8414DWDE3 1234 (Ni-MH 2.6Ah)
8414DWDLE
1234 (Ni-MH 2.6Ah)
8414DWFE
1235 (Ni-MH 3.0Ah)
8414DWFE3
1235 (Ni-MH 3.0Ah)
8434D
Model No.
8434DWAE
1422 (Ni-Cd 2.0Ah)
8434DWAE3 1422 (Ni-Cd 2.0Ah)
8434DWALE
1422 (Ni-Cd 2.0Ah)
8434DWDE
1434 (Ni-MH 2.6Ah)
8434DWDE3 1434 (Ni-MH 2.6Ah)
8434DWDLE
1434 (Ni-MH 2.6Ah)
8434DWFE
1435 (Ni-MH 3.0Ah)
8434DWFE3
1435 (Ni-MH 3.0Ah)
8444D
Model No.
8444DWAE
1822 (Ni-Cd 2.0Ah)
8444DWAE3 1822 (Ni-Cd 2.0Ah)
8444DWALE
1822 (Ni-Cd 2.0Ah)
8444DWDE
1834 (Ni-MH 2.6Ah
8444DWDE3 1834 (Ni-MH 2.6Ah)
8444DWDLE
1834 (Ni-MH 2.6Ah)
8444DWFE
1835 (Ni-MH 3.0Ah)
8444DWFE3
1835 (Ni-MH 3.0Ah)
8414D/ 8434D/ 8444D
Cordless Percussion-Driver Drills 12V/ 14.4V/ 18V
Battery
type
Quantity
2
3
2
2
3
2
2
3
Battery
type
Quantity
2
3
2
2
3
2
2
3
Battery
type
Quantity
2
3
2
2
3
2
2
3
Model No.
Length (L)
Width (W)
94 (3-11/16)
Height (H)
243 (9-9/16)
Battery cover
Charger
(quantity)
2
3
2
2
DC1414
3
2
2
3
Battery cover
Charger
(quantity)
2
3
2
2
DC1414
3
2
2
3
Battery cover
Charger
(quantity)
2
3
2
2
DC1804
3
2
2
3
L
Dimensions: mm (")
8414D
8434D
259 (10-1/4)
94 (3-11/16)
247 (9-3/4)
Flash light
w/o light
ML120
w/o light
ML120
w/o light
Flash light
w/o light
ML140
w/o light
ML140
w/o light
Flash light
w/o light
ML180
w/o light
ML180
w/o light
PRODUCT
P 1 / 5
H
W
8444D
95 (3-3/4)
252 (9-7/8)
Advertisement

Related Manuals for Makita 8414D


Summary of Contents for Makita 8414D
- Page 1 ONCEPT AND MAIN APPLICATIONS The above products have been developed as successor models of the current 8443D series models and as the highest grade series models among Makita Cordless Percussion-Driver Drills. Their brief advantages are; *Powerful motor provides high operation efficiency.
-
Page 2: Specification
Battery cover ........For quantity, see the variation list in page 1. Note: The standard equipment for the tool shown above may differ from country to country. ptional accessories For all models For 8414D For 8434D For 8444D *Assorted drill bits for... -
Page 3: Drill Chuck
P 3 / 5 epair [1] DISASSEMBLY/ ASSEMBLY [1] -1. Drill Chuck REMOVAL When replacing Gear assembly, remove Drill chuck first as described below. (When replacing only Housing, you need not remove Drill chuck.) 1) After opening the chuck jaws to the full, remove the chuck screw (M6x22 (-) Flat head screw) by turning it clockwise. Use impact driver drill if it is difficult to remove the screw. - Page 4 P 4 / 5 epair [1] -1. Drill Chuck (cont.) INSTALLATION 1) Make sure that Flat washer 13 is mounted to Spindle before installing Drill chuck. (Fig. 5) 2) Slide Speed change lever to the position of "1" (1st speed), and slide Action mode change lever to the drill mode as illustrated in Fig.
- Page 5 P 5 / 5 ircuit diagram Color index of lead wires' sheath Black Endbell complete Receptacle Switch Holder Spring terminal iring diagram Route lead wires between rib B and the inside wall of Housing. Rib B Rib A Route the connect lead wires Boss A (red and black) of endbell complete between rib A and boss A.