
Related Manuals for Honeywell HISD-1181W


Summary of Contents for Honeywell HISD-1181W
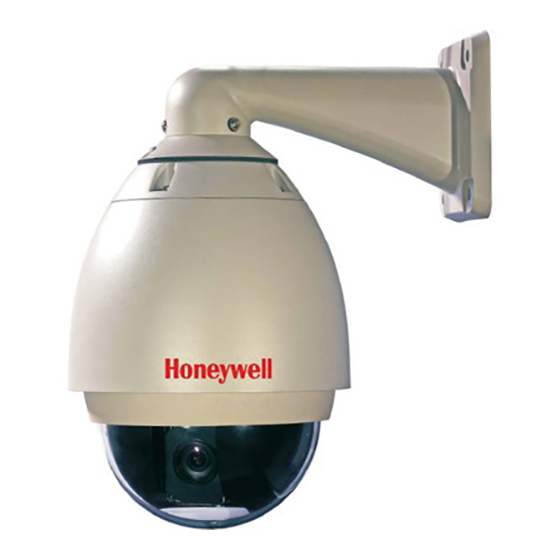
- Page 1 Honeywell HD HS Dome Camera Operation Manual HISD-1181W/2201W © 2012 Honeywell International Inc. All rights reserved.
-
Page 3: Table Of Contents
Honeywell Contents Introduction ........................1 Performance Characteristics Features ..............1 Features of IP Module ....................1 Hardware Installation ..................... 2 System Requirement ....................2 Installation Environment ................... 2 Installation environment requirements ............... 2 Recommended operating environment .............. 2 Hardware installation steps ................2 Network connection ................... - Page 4 Honeywell Visit IP camera under different network environments ..........48 LAN ........................48 Static IP ........................48 Dynamic IP .......................49 Internet ......................50 FAQs ........................55...
- Page 5 Honeywell CAUTION • Non-technician should not try to operate this dome device before reading this manual carefully. • Cut the power supply off before operating the dome device to avoid damage caused by mal-operation. • Interior of the dome device are precision optical and electrical instruments. Heavy pressure, shock and other incorrect operations should be prevented.
-
Page 6: Packing List
Honeywell Packing List Check if the packing contents match the packing list on receiving the products. The packing list is as below: Part Quantity IP HD Dome Camera Wall bracket Camera Shroud Rubber Blanket Foam-rubber cushion Bag of screws Certificate... -
Page 7: Introduction
Honeywell 1 Introduction Performance Characteristics Features • Pan 360°continuous rotation.\ • Tilt 0°~90° rotation • Pan manual operation speed can be 0.1° /S to 300° /S • Tilt manual operation speed can be 0.1° /S to 120° /S • 256 preshot positions.(A fixed position that aimed by the dome camera, which can be set and revised by user arbitrarily)... -
Page 8: Hardware Installation
Hardware Installation 2 Hardware Installation System Requirement • LAN or Internet serve • Internet Explorer: 5.0 or higher version • CPU: PⅢ or higher • Internal Memory:512M or bigger • Display:17 inch • Monitor Resolution: 1024×768 • Operating system:Windows NT、Windows2000、Windows XP Installation Environment Installation environment requirements Far away from high-temperature resource and environment;... -
Page 9: Network Connection
Honeywell Figure 2-1 Micro SD card installation site Figure 2-2 Insert Micro SD card following the direction shown in Figure 2-2 • Connect related cables according to actual need ( Power line, reticle, audio frequency line etc.). • Connect the power supply. -
Page 10: Connection Instruction
Hardware Installation • Connect the power supply. The IP camera will automatic start once power is connected. Connection Instruction RESET+/GND ALARM OUT NO+ / ALARM Audio_ out (white) Audio_ in (yellow) NC+ / ALARM OUT_NC- Power Line ALARM_IN+ / GND- Network terminal... -
Page 11: Operating Guide For Ip Camera
Honeywell 3 Operating Guide for IP Camera Search IP Camera Use search engine to find camera IP address. After install NVS software, user can find search tool. Its icon like . Once click that icon, user can get IP address and other relevant parameters of all cameras. - Page 12 Operating Guide for IP Camera Input the IP address of IP camera in Internet Explorer to enter into login page (see Figure 3- 2), type in user name and password (default user name and password are : admin): Figure 3-2 After enter into the live view interface, click the “File”.
-
Page 13: Liveview
Honeywell Liveview See Figure 3-5 for the interface of “Liveview” Figure 3-5 In the Liveview interface, users can do operations like Snap, Record, Replay, Call, Listen, Alarm, Log, Local Zoom of Image, Full-screen Viewing, PTZ and Lens Control. • Snap: click “Snap”, snap the current image and save it in .JPG format automatically to the storage directory of snapped images. - Page 14 Operating Guide for IP Camera • Full Screen: Display images in full-screen, right click to exit full screen mode. • PTZ Control: Allows four-directional rotation, automatic adjustment of PTZ rotation speed(see Figure 3-6). • Lens Control: Allows PTZ operations like Zoom, Focus, Aperture, Light, Clip, Preset set, and Preset Call(see Figure 7).
-
Page 15: Record Playback
Honeywell Figure 3-8 Record Playback Click enter into video playback page (see Figure 3-9). Figure 3-9 Users can search for recorded image files or snapped pictures in local PC or storage device according to date. - Page 16 Operating Guide for IP Camera • Date: Users can select certain date to perform recorded image file or snapped picture searching, click “date” button , data selection page will pop up(see Figure 3-10): Figure 3-10 Click “《 ” icon to turn to previous year Click “...
- Page 17 Honeywell Figure 3-11 Select to search for record files or snapped pictures in PC or device SD card The record file list searched is displayed on the left The picture list searched is displayed on the right The left side stands for hour, each grid means one hour...
-
Page 18: Set System Parameters(Configure)
Operating Guide for IP Camera Figure 3-13 Click Pause to pause download manually,click Start to continue to download the unfinished files,click Delete to delete the downloaded files,click Close to close the download information interface. If you close the Download Information window and click , you can continue to view the information about download. -
Page 19: Remote Config
• Input type: You can choose MIC or Line In input. • Type: Support three types of audio compressed format:G.726,G.711A,G.711U. • Sampling: HISD-1181W supports audio sample rates of 8k and 32; HISD-2201W supports 8k, 16k and 32k. -
Page 20: Video Settings
Operating Guide for IP Camera • Input Volume: Adjust the device’s input volume to control the volume of Listen. • Output Volume: Adjust the device’s output volume to control the volume of Call. After you set these parameters, please click Save to make them valid. Video Settings Text Overlay See Figure 3-16 for the interface of “Text Overlay”:... - Page 21 Honeywell Figure 3-17 HISD-1181W Figure 3-18 HISD-2201W • Coding: H.264 and MJPEG. • Image: Set definition of images. HD camera support: • Preferred Stream: 1920*1080/1280*960/1280*720 • Alternate Stream: 640*480/320*240 • Quality: You can choose the right quality according to your need: Fine, Normal,...
-
Page 22: Video Mask
Operating Guide for IP Camera • I frame interval: Adjustable between 1~200(Preferred Stream), 1~120(Alternate Stream).Smaller I frame interval means higher image bitrate and better image quality. It is recommended to set the I frame interval as above 25. • Frame rate: Set encoding frame rate per second. Under poor network condition, frame rate can be reduced to control encoding bitrate to make motion images flow more smoothly. - Page 23 • All: Mask the whole image. • Cls: Clear masked areas. After you set these parameters, please click Save to make them valid. Picture Parameter See Figure 3-20, 3-21 for the interface of “Snap picture parameter setting”: Figure 3-20 HISD-1181W)
-
Page 24: Network Settings
Operating Guide for IP Camera Figure 3-21 HISD-1181W Snap picture parameter setting: Supports only images of JPG format currently, megapixel camera definition is the same as set in video definition, other cameras can choose different pixel by yourself. After you set these parameters, please click Save to make them valid. - Page 25 Honeywell Figure 3-23 • DHCP: If DHCP function of the router is enabled, IP camera will automatically fetch IP address from the router. • IP address: Set the camera’s IP address. • Subnet mask: Default value is 255.255.255.0 (users are recommended not to change it).
- Page 26 Operating Guide for IP Camera Figure 3-24 • Enable PPPOE: Enable or disable PPPOE dial-up function. • IP: After successful setting of device dial-up, it will display the public IP Address. • Username: ADSL dial-up account, obtain from the IP service provider. •...
- Page 27 Honeywell Auto-mapping of port, when IP camera is connected to a router with UPNP function enabled, the router will automatically map the port in UPNP settings to public network, manual port mapping by users is not necessary. • Network card: select the type of NIC connecting UPNP router. For WiFi models, when IP camera is connected to router via WiFi network, select “wireless”...
- Page 28 Operating Guide for IP Camera • MAIL From: Mailbox that sends mails. • MAIL To: Mailbox that receives mails. • SMTP username: The login user name of the mailbox that sends mails. • SMTP password: The login password of the mailbox that sends mails. •...
- Page 29 Honeywell Figure 3-27 FTP server sends the record files and snapped images generated after alarm is triggered in FTP mode to specified FTP server, supports 2 FTP servers, when the preferred one goes wrong, system will switch to the alternate one.
- Page 30 Operating Guide for IP Camera Figure 3-28 Bind the device with a fixed domain name by DNNS setting so that visiting to the device can be realized no matter how the public IP changes.(Refer to Appendix 3 for detailed steps) •...
- Page 31 Honeywell Figure 3-29 • Enable VPN: Enable or disable VPN function. • Server URL: IP address or domain of VPN server. • Name: User registered in VPN server. • Password: User password registered in VPN server. • IP: Display IP after VPN dial-up success.
-
Page 32: Storage Settings
Operating Guide for IP Camera IP EMail See Figure 3-31 for the interface of “Public IP noticed by email”: Figure 3-31 • Enable Email: Check this switch to enable public IP mail notification function. • Update Interval: Select the interval of public IP mail notifications. After enable this function, when the device starts or detects public IP change, it will send notification mail to the mail address set in mail setting. - Page 33 Honeywell Figure 3-33 • Storage Device Info: View information of SD card here, including No., TotalSize, FreeSize and Status. Users can also click Format button to format SD card, during the formatting process, please click Refresh button to the display formatting completion percentage.
-
Page 34: Record Setting
Operating Guide for IP Camera • Hot-plugging is not recommended for SD card, compulsory hot-plugging may damage the SD card, causing data loss or abnormal operation. • Do not cut off the power of the device during formatting process. • Ext2 file is used to format system by default. -
Page 35: Alarm Settings
Honeywell Figure 3-35 • Snap parameter: Set the interval of IP camera picture snapping, minimum interval is 1 second. • Snap schedule: Set the period of scheduled snapping, two periods allowed. • File save mode: IP camera snapped pictures can be saved via E-mail sending or FTP uploading. - Page 36 Operating Guide for IP Camera Figure 3-36 In this page, users can set features like motion detection on/off, sensitivity, detection time, linkage alarm output, alarm output duration, E-mail sending when alarm been triggered, linkage snapping/recording, etc. • Enable detect: Enable or disable motion detection. •...
-
Page 37: Sensor Setting
Honeywell • Linkage recording: When alarm is triggered, the device SD card will be driven to record images. The record files can be saved via E-mail sending or FTP uploading. • Motion Detection Area: Left click and drive the mouse to set the surveillance areas (4 areas at most). - Page 38 Operating Guide for IP Camera • Alarm output: Enable or disable linkage alarm output. • Alarm output duration: Set the duration of the linkage alarm output after being triggered (in seconds), the range of the duration is 0~86400s.0 means that there is no limit for alarm output.
-
Page 39: Dome Camera
Honeywell • Alarm output duration: Set the duration of the linkage alarm output after being triggered (in seconds), the range of the duration is 0~86400s.0 means that there is no limit for alarm output. • Snap: When alarm is triggered, the device SD card will be driven to snap pictures. - Page 40 Operating Guide for IP Camera Figure 3-39 HISD-1181W • Images Color: Adjust the Brightness, Chroma, Saturation, Acutance of video. • Zoom Control: High Speed and Normal Speed mode. • AWB Control: You can choose Manual or Auto mode to adjust white balance White balance: Depending on the lighting conditions, a pure white in a photograph may appear slightly yellow or blue.
- Page 41 Honeywell view of the camera. WDR enables the capture and display of both bright and dark areas in the same frame, in a way that there are details in both areas, i.e. bright areas are not saturated, and dark areas are not too dark.
- Page 42 Operating Guide for IP Camera Figure 3-40 HISD-2201W Figure 3-41 HISD-2201W • Zoom Control: High Speed and Normal Speed mode. • AWB Control: You can choose Manual or Auto mode to adjust white balance. White balance: Depending on the lighting conditions, a pure white in a photograph may appear slightly yellow or blue.
-
Page 43: Ptz Setting
Honeywell • WDR Control: If you turn on WDR, you can’t set BLC Control. Wide dynamic range: WDR is intended to provide clear images even under back light circumstances where intensity of illumination can vary excessively, namely when there are both very bright and very dark areas simultaneously in the field of view of the camera. - Page 44 Operating Guide for IP Camera Figure 3-42 • Auto Flip: Enable or disable auto flip .when the video rotated vertically, if you disable this function, dome camera won’t continue when it moved to the maximum angle; If you enable this function, when the dome camera rotated vertically to the maximum angle, it will be rotated horizontally 1800, after that, it will continue to rotated vertically.
-
Page 45: System
Honeywell The priority of task that set in Time set is higher than that of Park. For example, the demo is doing the task that set in Park when enable task in Time set, it will stop and turn to the latter. -
Page 46: User Manage
Operating Guide for IP Camera See Figure 3-44 for the interface of “System Time”: Figure 3-44 • System time Setting: You can choose the proper time zone. • Update via NTP Server: After starting the function, switch on NTP switch and select time zone, save it to turn to Liveview, the system time that has been automatically corrected by NTP server can be displayed. - Page 47 Honeywell General user authority: • Can perform operations like snapping, recording, playback, talkback, monitoring, alarm clearing, log searching, zooming and full-screen reviewing. • Can perform operations like Local setting, PTZ setting, Record and Replay etc. Default user name of administrator: admin...
- Page 48 Operating Guide for IP Camera Figure 3-47 All device parameters (including network parameters, excluding physical address) will be recovered as factory setting values. Reboot See Figure 3-48 for the interface of “Reboot”: Click Reboot, it will pop up a box, enter the password, the IP camera will restart.
-
Page 49: Appendix
Honeywell 4 Appendix Main Technical Parameters Model HISD-1181W HISD-2201W Video Image Sensor 1/3'' Progressive Scan CCD 1/2.8'' Progressive Scan CMOS Effective Pixels 1280(H) x 720(V) 1920(H) x 1080(V) Minimum Illumination Color: 0.1lx, B/W: 0.005lx Day/Night S/N Ratio >=50db Shutter Speed 1 - 1/30000sec f=4.7 –... - Page 50 1 Audio In / 1 Audio Out Environmental Protection Class IP66 Operating -10°C ~ 60°C Temperature Operating Humidity 0 ~ 90% (non-condensing) Viewing System Browser IE 6.0 or above Video Player VLC, Quick Time, Real Player Software Operating Platform Honeywell HUS Platform...
-
Page 51: Network Interface Of Ip Camera
Honeywell Regulatory Certification CE, FCC Network Interface of IP Camera The default network ports of IP camera are: Web port 5000 Communication port, audio/video data transmission port, talkback data transmission port 5000 Audio/video data transmission port Multi-cast Multicast original port + channel number... -
Page 52: Apply For Ddns Domain Name Service
Appendix Apply for DDNS domain name service IP camera DDNS introduction DDNS function of IP camera DDNS (Dynamic Domain Name Service) refers to the real-time analysis of a fixed domain name and the dynamic public IP address of the IP camera. With this function, all Internet users can visit the IP camera via a fixed domain name. - Page 53 Honeywell Step 2: User login Enter registered user name and password, click “login” to enter into domain name management interface as follow: Step3: Domain name registration...
-
Page 54: Visit Ip Camera Under Different Network Environments
Appendix A domain name must be registered first, then put into use. Click “Domain name management”, a page appears as follow: Register and submit the domain name to be used. For example: “test.mvddns.net”. Visit IP camera under different network environments You can visit IP camera with your PC via LAN or WAN, the following contents will tell you how to use IP camera under different network environments. -
Page 55: Dynamic Ip
Honeywell Setup steps: Log in IP camera via the IE browser (the default IP is 192.168.55.160). Switch to the page network settings, fill in the device IP address assigned by network administrator in to Basic Parameters, e.g. 192.168.55.160. Fill in subnet mask, default value is 255.255.255.0. -
Page 56: Internet
Appendix Log in IP camera via IE, turn to Network Settings and check Enable DHCP. After setting all the parameters, click save and restart to make the parameters valid. Internet You have three ways to connect IP camera to Internet: •... - Page 57 Honeywell Setup steps: Log in IP camera via crossover cable direct connection.(For details, please refer to “Hardware Installation”) Switch to the page network settings, fill in the device IP address requested from network service provider in to Basic Parameters, e.g. 218.84.31.168;...
- Page 58 Appendix Please refer to below picture for the network settings: DDNS setup steps: Log in DNNS server (e.g.http://www.mvddns.net), register user account and password.(For details, please refer to Appendix 3) Click to open DDNS; Select DDNS service provider, e.g. mvddns.net; Fill in the registration name to log into DDNS server; Fill in the registration password to log into DDNS server;...
- Page 59 Honeywell Take the TL-WR340G router of TP-LINK as an example for illustration: Ask network administrator for the IP address of the router (i.e. LAN gateway address), login user name and password, then log in the router. The main interface is as follow: Open “Forwarding”, select “Virtual Servers”...
- Page 60 Appendix After save successfully, below screen appears: If DDNS is successfully set in “Network Settings” of IP camera, direct visit to the IP camera can be realized via entering http://test.mvddns.net:85 into IE browser. PPPoE dial-up access For IP camera dial-up access, see below picture for the network topology:...
-
Page 61: Faqs
Honeywell Setup steps: Log in IP camera via crossover cable direct connection.(For details, please refer to Hardware Installation) Set PPPoE parameters.(for details, please refer to PPPOE settings) Connect IP camera to Internet. If DDNS service is successfully set for the device, the device can be visited via entering domain name into IE browser. - Page 62 Appendix Solution: Delete the caching of Browser: Open IEclick Toolselect “Internet Options”click delete files button in “Internet temporary files” select “delete all offline contents”click OK and re-log in IP camera. The images do not flow. Possible reason 1: The frame rate of IP camera is too low. Solution: Increase the video frame rate Possible reason 2: Too many users are viewing the images.
- Page 63 Honeywell Possible Reason 1: No audio input connection Solution: Check audio connection of the host Possible Reason 2: The audio option of IP camera is off Solution: Check audio parameter settings to see if you have opened the audio. Search NVS software cannot find device.
- Page 64 TEL +86 21 22196888 FAX +86 21 62370740 Honeywell Security Block 28, Section 2 Huai De Cui Gang Industrial Estate Fu Yong, Bao An, Shenzhen, P.R.China TEL +86 755 27326500 FAX +86 755 27391736 © 2012 Honeywell International Inc. http://www.cn.security.honeywell.com http://www.security.honeywell.com...