Table of Contents
Advertisement
Advertisement
Table of Contents

Related Manuals for Honeywell HISD-2201WE-IR


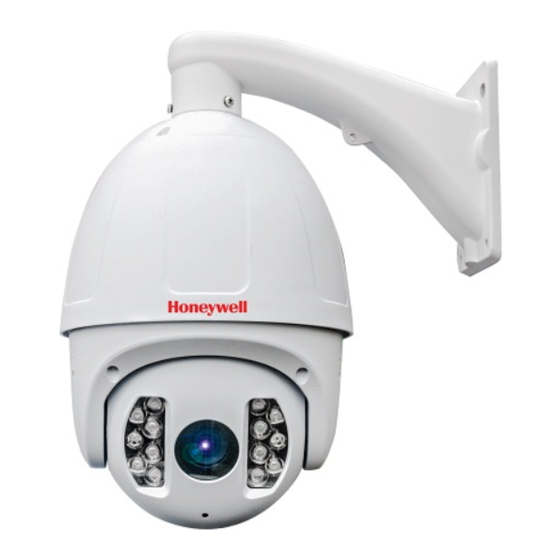
Summary of Contents for Honeywell HISD-2201WE-IR
- Page 1 Honeywell Honeywell Network High Speed Dome Operation manual HISD-2201WE(-IR)
-
Page 2: Table Of Contents
Honeywell Contents 1 Introduction............................1 Performance Characteristics Features....................1 2 Hardware Installation..........................2 System requirement..........................2 Installation environment......................... 2 Installation environment requirements....................2 Recommend operating environment....................2 Hardware installation steps........................2 Network connection..........................4 Connection instruction...........................4 3 Operating Guide for Network High Speed Dome................5 Set the IE Browser..........................5 Download and Install ActiveX.......................5... - Page 3 Static IP..............................29 Dynamic IP............................30 Internet..............................30 Frequently asked questions........................ 3 4 Rev. A...
- Page 4 Honeywell CAUTION • Non-technician should not try to operate this high speed dome before reading this manual carefully. (This manual are subject to change without prior notice.) • Cut the power supply off before operating the device to avoid damage caused by mal-operation.
-
Page 6: Packing List
Check if the packing contents match the packing list on receiving the products. The packing list is as below. Part Quantity HISD-2201WE(-IR) Wall mounting bracket Rubber blanket Screws bag Operation manual Certificate of approval Contact your local retailer if anything is missing in your package. HISD-2201WE HISD-2201WE-IR... -
Page 7: Introduction
H.264 High Profile /MJPEG encoding, VBR/CBR, dual stream motion detection, network problem detect and process Alarm linkage output, TF card video recording, snapshot, FTP upload, Email inform, Link preset, CMS inform ONVIF Profile S protocol, compatible with Honeywell HUS and NVR 360° horizonal continuous rotation; vertical 0°-90°,256... -
Page 8: Hardware Installation
Recommend operating environment HISD-2201WE Indoor:-10 ~ 50℃ Outdoor: -30°C~60°C HISD-2201WE-IR Indoor:-30 ~ 60℃ Hardware installation steps Please make sure LAN and WAN are working order before installation of the IP camera . After checked all the network system in good condition, keep your hands clean and dry, following the steps bellow. - Page 9 Honeywell Press the buckles beside the camera, and put out the main part about zoom Figure 2 2 HISD-2201WE Remove the screws Figure 2 3 HISD-2201WE Figure 2 4 HICC-2201TVI Insert Micro SD card following the direction shown in Figure 2-5...
- Page 10 Honeywell Remove the screws with “7” wrench Figure 2 6 HISD-2201WE-IR Remove the screws here Figure 2 7 HISD-2201WE-IR TF card slot Figure 2 8 HISD-2201WE-IR Insert Micro SD card following the direction shown in Figure 2-9 Figure 2 9 HISD-2201WE-IR •...
-
Page 11: Network Connection
Honeywell • Make sure to turn off all the power when install the camera • Please confirm the power transformer, avoid the device damage with unmatched power source Network connection • LAN connection Use one network line to connect IP camera with concentrator or switchboard of the LAN. -
Page 12: Set The Ie Browser
Honeywell 3 Operating Guide for IP Camera Set the IE Browser If you visit IP camera for first time, Please set the IE browser. Setting method: Open the IE browser, click Internet Option into the "Security" page, click the "Custom Level", and then follow steps to set the... - Page 13 Honeywell Figure 3 1 A file download dialog will pop out, click “Next” to installation. As figure 3-2. Figure 3 2 Select the ActiveX installation and storage file, the default installation and storage file is c:\Program Files\webactivex, and click “Next” to enter next dialog.
-
Page 14: Login
Honeywell Figure 3-4 Click “Finish” to complete the ActiveX installation. As figure 3-5. Figure 3-5 Login http://192.168.1.188,) Reopen Internet Explorer after ActiveX installation completes, input IP address ( of the IP camera to turn to login page, enter username (default setting is admin) and password (default setting is blank), click login to enter into main interface(see Figure 3-6):... -
Page 15: Live View
Honeywell Live view Live preview interface as figure 3-7. Figure 3 7 In the Live view interface, users can do operations such as voice intercom, listen, full-screen preview, video record, alarm information check, PTZ and lens control, brightness, contrast, preset setting, cruise, track setting and etc. - Page 16 Honeywell Cruise: 255 presets addable, cruise time 1-255s adjustable, cruise speed 1-10 levels selectable. All cruise tracking can be call and delete independently. Tracking path setting: Select a tracking number on the tracking drop down list, then click , after a series PTZ operation, click to complete and storage the tracking.
-
Page 17: System Specification Setting
Honeywell System specification setting Device Info IP Camera “Device Info” interface as figure 3-11. Figure 3 11 Device Name: Edit the camera name Device Sn: Display the device Sn Device Type: Display the device type Serial No. : Display the product serial No. -
Page 18: Display Settings
Honeywell Figure 3-12 Protocol: Support Pelcod,Pellcop,PellcoF protocol Address: 0-255 adjustable Baud Rate: Serious baud rate selectable Operation method: Connect analog high speed dome at the IP camera AB port, set the protocol and baud rate, and control the high speed dome through IPC preview interface After all parameters setting completed, click “Save”... -
Page 19: Encoding
Honeywell Time Format: Select different time display mode for the appointed channel Date Format: Select different date display mode for the appointed channel Bright: Adjust the brightness for the appointed channel Contrast: Adjust the contrast for the appointed channel Saturation: Adjust the saturation for the appointed channel... -
Page 20: Motion Detection
Honeywell Figure 3-15 Day&Night Mode: Outside Trigger/ Auto/ Color/ Black White four kinds of mode selectable. Non infrared IP cameras default mode is Auto, and infrared IP cameras default mode is Outside Trigger. According to the IP camera type and actual scene to select the Day&Night mode. -
Page 21: Video Tampering
Honeywell Figure 3-16 Enable: Select whether open the motion detection function. Alarm Schedule: Set the alarm schedule from Monday to Sunday. Drawing: Click Drawing, then set the detective area. Clear: Click Clear to clear the current detective areas. Sensitivity: The higher of the sensitivity, the obvious of the motion detective. -
Page 22: Video Mask
Honeywell Figure 3-17 Enable: Set whether open the video tempering Alarm Schedule: Set the alarm schedule from Monday to Sunday. Drawing: Click Drawing, then set the video tampering area. Clear: Click Clear to clear the current video tampering areas. Sensitivity: The higher of the sensitivity, the obvious of the video tampering effect. -
Page 23: Network Settings
Honeywell Figure 3-18 Enable: Click to determine whether to operate the video mask function Drawing: Click Drawing to select the mask area. Clear: Click Clear to delete the current channel video mask setting After all parameters setting completed, click “Save” and the it comes into effect immediately. -
Page 24: Ddns Setting
Honeywell Subnet Mask: Input the corresponding IP subnet mask Default Gateway: Input the corresponding gateway address DNS 1: DNS server IP address DNS2: DNS server standby IP address SNMP: To detect whether it will cause any management attention as device connected on the network... -
Page 25: Ntp Settings
Honeywell NTP Settings IP Camera “NTP Settings” interface as figure 3-21. Figure 3-21 Enable NTP: Click to determine whether to use NTP Server Address: Input NTP server IP address NTP Port: Only TCP transmission supported, default is 123 Adjust time interval: Input the interval time... -
Page 26: Ftp Settings
Honeywell Figure 3-22 (sent)Email Address: Input the address of the outbox the password of the outbox Password: Input the Confirm pwd: Input the password again to confirm it (sent)SMTP Server: Input the smtp server address of the outbox SMTP Port: Input the smtp server port of the outbox... -
Page 27: Alarm Output
Honeywell Figure 3-24 Alarm Input: Select the alarm input number Alarm In Name: Input alarm input name Trigger: Select the alarm statue: Normal Open/ Normal Close Alarm Schedule: Alarm schedule can be set from Monday to Sunday Email: Click Email, then it will send Email to appointed mailbox when alarm triggered... -
Page 28: Exception Settings
Honeywell Figure 3-25 Output Relay Status: Normally Open/ Normally Close selectable Output Delay: Select the alarm output time( Alarm delay output when alarm triggered) After all parameters setting completed, click “Save” and the it comes into effect immediately. Exception Settings IP Camera “Exception Settings”... -
Page 29: User Info
Honeywell After all parameters setting completed, click “Save” and the it comes into effect immediately. User Info IP Camera “User Info” setting interface as below, admin is the administrator (default), default indicates general users, booth and login with permissions authorized to default users(default). -
Page 30: System Update
Honeywell System Update IP Camera “System Update” setting interface as figure 3-28. Figure 3-28 File: Click Browse to find and select the upgrade kit, then click Update. Non-technician should not try to operate system upgrade, do not turn off the power during upgrade process. -
Page 31: Restore
Honeywell Figure 3-29 Restore IP Camera “Restore” setting interface as figure 3-30. Figure 3-30 Restore: Restore to factory setting Reboot: Reboot the devices Local Setting IP Camera “Local Setting” interface as figure 3-31. -
Page 32: File Management
Honeywell Figure 3-31 Window Mode: Set the preview window mode(Full/ 4:3/ 16:9 ) Preview Capture: Select the preview capture file storage path Preview Capture: Select the preview video record file storage path Record File Type: AVI/ I8 format selectable Color: Realtime/ Smooth way two types selectable After all parameters setting completed, click “Save”... -
Page 33: Log Search
Honeywell Search: Select the search start time, click button, the video record and snap image file will display( Double click the file to check details) Start: Click button to play the backup video image file Stop: Click button to stop the the play... -
Page 34: Appendix
Motion Detection 1 zones (Sensitivity value selectable) Access Protocol ONVIF Profile S , compatible with Honeywell HUS and NVR IPv4, TCP, UDP, HTTP, HTTPS, SMTP, FTP, NTP, DNS, DDNS, DHCP, ARP, Network Protocols UPnP, RTSP, RTP, RTCP, PPPoE, ICMP, SNMP... -
Page 35: Default Network Parameters
50W (IR LED and heater ON) Outdoor: 40W (Heater ON) Regulatory CE,FCC,type- examination report *Note: Honeywell reserves the right, without notification to make changes in product design and/or specifications. Network Interface of IP Camera The default network ports of IP camera are: Web port... -
Page 36: Lan
Honeywell IP Camera DDNS DDNS description DDNS( Dynamic Domain Name System) means that DDNS is implemented through a dynamic domain resolution server. It requires a PC with fixed IP address on the Internet, on which the dynamic domain resolution server runs. All internet users can view the IP camera via a fixed IP address. -
Page 37: Dynamic Ip
Honeywell Setting procedure: 1. Log in IP camera via the IE browser (the default IP is 192.168.1.188) 2. Switch to the page “ Network Setting” interface, input the IP address. Default is 192.168.1.50 3. Fill in subnet mask, the default is 255.255.255.0 4. - Page 38 Honeywell 1. Fixed IP mode 2. ADSL broadband and router share online mode( Dynamic get the IP address mode) 3. PPPOE dial-up access After IP camera is connected to Internet, remote Internet users can visit it directly via domain name or IP address.
- Page 39 Honeywell Users can set up DDNS domain name service at the same time. Fill the username and password which were applied in the DDNS server into the DDNS setting item, implement port mapping from the router. The router determines and points to the IP camera that need to be visited according to different ports, long-distance Internet user can visit the IP camera on the network via domain name directly.
- Page 40 Honeywell Select “Add New Items”, enter the IP address of the IP camera (e.g.192.168.1.100 ), port (e.g. 85), status (valid) and other information, click save, see below picture: After save successfully, below screen appears: If DDNS is successfully set in “Network Settings” of IP camera, direct visit to the IP camera can be realized via entering http://test.mvddns.net:85...
-
Page 41: Frequently Asked Questions
Honeywell PPPOE dial-up access For IP camera dial-up access, see below picture for the network topology: Setup steps: Log in IP camera via crossover cable direct connection.(For details, please refer to Hardware Installation) Set PPPOE parameters.(for details, please refer to PPPOE settings) Connect IP camera to Internet. - Page 42 Honeywell 5.Fail to visit IP camera via IE browser. Possible Reason 1: Network is disconnected. Solution: Connect your PC to network, checking whether it works properly or not. Check whether there is cable failure or network failure caused by PC virus, until PCs can be connected with the command of Ping.
- Page 43 1800 244 301 Saigon Trade Centre, Unit 2011 37 Ton Duc International Technical Support Number: +6 Thang St., Dist. 1 HoChiMinh City 1894 794 217 Tel: +848 39106012/13 Email: honeywellsecurity.as@honeywell.com Email: security.ea@honeywell.com https://www.asia.security.honeywell.com Honeywell http://www.security.honeywell.com ©2013 Honeywell International Inc. All rights reserved.