Blomberg KQD 1360X Instruction Manual
Hide thumbs
Also See for KQD 1360X:
- Operating instructions manual (600 pages) ,
- Operating instructions manual (294 pages) ,
- Operating instructions manual (486 pages)
Table of Contents
Advertisement
Available languages
Available languages
Advertisement
Table of Contents

Related Manuals for Blomberg KQD 1360X


Summary of Contents for Blomberg KQD 1360X
- Page 1 Refrigerator מקרר KQD 1360X Instruction manual...
- Page 2 Please read this manual first! Dear Customer, We hope that your product, which has been produced in modern plants and checked under the most meticulous quality control procedures, will provide you an effective service. For this, we recommend you to carefully read the entire manual of your product before using it and keep it at hand for future references.
-
Page 3: Table Of Contents
CONTENTS 1 The refrigerator 4 Preparation 2 Important Safety 5 Using your refrigerator 18 Warnings Indicator Panel ......... 18 Intended use ........5 Door Open Alarm: ......21 General safety ........5 Things to do to have the filter usage Child safety ........ -
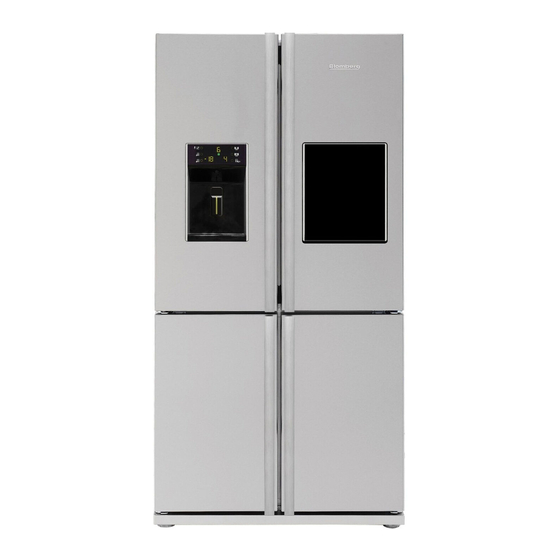
Page 4: The Refrigerator
The refrigerator Fridge compartment door shelves 11- Bottle holder Fridge compartment glass shelves 12- Bottle shelf Diffuser cover 13- Food storage compartment shelves Illumination lens 14- Food storage compartments Movable middle section 15- Water Filter Chiller compartment 16- Butter & Cheese shelf Crisper 17- Fridge compartment Icematic... -
Page 5: Important Safety Warnings
Important Safety Warnings • Please review the following information. • Never use the parts on your refrigerator If these are not followed, personal such as the door and drawer as a injury or material damage may occur. means of support or step. You may Otherwise, all warranty and reliability cause the product to tip over or parts of commitments will become invalid. - Page 6 • Do not use mechanical devices • In products with mechanical control or other means to accelerate the (thermostat), wait for 5 min. to re-plug defrosting process, others than those the product if it is unplugged. recommended by the manufacturer. •...
-
Page 7: Child Safety
Things to be done for • Refrigerator should be disconnected if it energy saving is not going to be used for a long time. Any problem in the cable insulation may • Do not leave the doors of your cause fire. refrigerator open for a long time. -
Page 8: Installation
Installation Plastic wedges will provide the required Please remember that the manufacturer distance between your refrigerator shall not be held liable if the information and the wall in order to allow the air given in the instruction manual is not circulation. -
Page 9: Electric Connection
Electric connection cut out the electric plug and, if there are any locks on the door, make them Connect your refrigerator to a grounded inoperable in order to protect children socket which is being protected by a against any danger. fuse with the appropriate capacity. -
Page 10: Floor Balance Adjustment
Floor balance adjustment Adjusting the gap between the upper door If your refrigerator is unbalanced; First unplug the product. The product must be unplugged when making the balance adjustment. There is the risk of electric shock. 1- Ventilation cover is removed by You can adjust the gap between the unscrewing its screws as illustrated in fridge compartment doors as illustrated... - Page 11 Adjust the door appropriately as you desire by loosing the screws. Fix the door you have adjusted by tightening the screws without changing the position of the door. Replace the hinge cover and fix with the screw.
-
Page 12: Installing Water Filter
Installing Water Filter Place where the external filter is going to be fitted should be determined first. (in some models) (Applies to the filter being used outside Two different water sources may the refrigerator.) Then, determine the be connected to the refrigerator for distance between the filter and the water supply: the mains cold water refrigerator and required hose lengths... -
Page 13: Connection Of Water Hose To The Jug
Connection of Water Hose to 2. Put and fix the pump hose into the jug the Jug as shown in the figure. 3. After completing the connection, plug in (in some models) and run the pump. To connect water to the refrigerator from To provide an efficient operation of the a jug, a pump is needed. -
Page 14: Connection Of The Water Pipe To The Cold Water Mains Line
Connection of the Water Pipe to the Cold Water Mains Line (in some models) If you want to use your refrigerator by connecting it to the cold water mains line, you will have to connect a standard 1/2" valve connection fitting to the cold water supply in your house. - Page 15 To fit the water filter follow the 3. Take out the water filter by-pass cover instructions below referring to figures by rotating it downwards. supplied: 1. Press ice cancel button on the display. 2. Remove the filter cover in the fridge compartment by pulling it forward.
-
Page 16: Prior To First Use Of Water Dispenser
Prior to first use of Water The water filter must be removed as Dispenser shown in the figure when it is going to be replaced or when it will no longer Water mains pressure must not be be used and by-pass cover must be below 1 bar. -
Page 17: Preparation
Preparation Your refrigerator should be installed at least 30 cm away from heat sources such as hobs, ovens, central heater and stoves and at least 5 cm away from electrical ovens and should not be located under direct sunlight. The ambient temperature of the room where you install your refrigerator should at least be 10°C. -
Page 18: Using Your Refrigerator
Using your refrigerator Indicator Panel This touch-control indicator panel allows you to set the temperature without opening the door of your refrigerator. Just touch the relevant button with your finger to set the temperature. 12 15 14 13 1. Eco Extra/Vacation Button 11. - Page 19 1. Eco Extra/Vacation Button If the Flexi Zone Compartment is set as a Press this button briefly to activate the Freezer, then the temperature of the Flexi Eco Extra function. Press and hold this Zone Compartment will change as -18, button for 3 sec.
- Page 20 9. Quick Freeze Function Indicator 14. Economy Mode Indicator It indicates that the Fast Freeze function Indicates that the refrigerator is running is active. Use this function when in energy-efficient mode. Freezer you place fresh food into the freezer Compartment temperature compartment or when you need ice.
-
Page 21: Door Open Alarm
18. Ice Cancel Indicator If you do not want to get ice from the refrigerator, you need to use this function. You may use this function by pressing the ice cancel button for 3 seconds. 19. Cancel Filter Change Warning Button Filter of your refrigerator must be replaced every 6 months. -
Page 22: Things To Do To Have The Filter Usage Time Calculated Automatically
Things to do to have the filter usage time calculated automatically (For products connected to the mains water line and equipped with filter) 1- After plugging the refrigerator in, press A and B buttons together to activate the key lock. 2- Then press Eco-Extra (1), Fridge Compartment Temperature Setting (4), Quick Cool (5) and Freezer Compartment Temperature Setting (3) buttons respectively. -
Page 23: Sliding Body Shelves
Egg tray Crisper You can install the egg holder to the Crisper of your refrigerator is designed desired door or body shelf. specially to keep your vegetables freshly without loosing their humidity. Never store the egg holder in the freezer For this purpose, cool air circulation compartment occurs around the crisper in general. -
Page 24: Movable Middle Section
Movable Middle Section Movable middle section is intended to prevent the cold air inside your refrigerator from escaping outside. 1- Sealing is provided when the gaskets on the door presses on the surface of the movable middle section while the fridge compartment doors are closed. -
Page 25: Sliding Body Shelves With Rear Hangers
Sliding Body Shelves With Using the water spring Rear Hangers Warnings It is normal for the first few glasses of water taken from the dispenser to be warm. Sliding body shelves with rear hangers In cases where the water dispenser has not can be moved back and forth. -
Page 26: Minibar
Minibar Minibar door provides you extra comfort when using your refrigerator. The door shelf in the refrigerator can be accessed without opening the refrigerator door; thanks to this feature, you can easily pick from the refrigerator the foods and drinks which you frequently consume. -
Page 27: Cleaning And Care
Cleaning and care Protection of plastic Never use gasoline, benzene or similar surfaces substances for cleaning purposes. We recommend that you unplug the Do not put the liquid oils or oil-cooked appliance before cleaning. meals in your refrigerator in unsealed Never use any sharp abrasive containers as they damage the plastic instrument, soap, household cleaner,... -
Page 28: Recommended Solutions For The Problems
Recommended solutions for the problems Please review this list before calling the service. It might save you time and money. This list includes frequent complaints that are not arising from defective workmanship or material usage. Some of the features described here may not exist in your product. - Page 29 The fridge is running frequently or for a long time. • Your new product may be wider than the previous one. This is quite normal. Large refrigerators operate for a longer period of time. • The ambient room temperature may be high. This is quite normal. •...
- Page 30 The operation noise increases when the refrigerator is running. • The operating performance of the refrigerator may change due to the changes in the ambient temperature. It is normal and not a fault. Vibrations or noise. • The floor is not even or it is weak. The refrigerator rocks when moved slowly. Make sure that the floor is strong enough to carry the refrigerator, and level.
- Page 31 !קרא מדריך זה, תחילה ,לקוח יקר אנו מקווים שמוצר זה, שיוצר במפעלים מודרניים ונבדק במסגרת נוהלי בקרת האיכות המחמירים .ביותר, ישמש אותך ביעילות לשם כך, מומלץ לקרוא בעיון רב את כל המדריך של המוצר לפני שתשתמש בו ולשמור אותו .בהישג יד לעת הצורך מדריך...
- Page 32 תוכן עניינים 4 הכנה 1 המקרר 5 אופן השימוש במקרר 2 אזהרות בטיחות חשובות 18 ........לוח מחוונים 5 ........השימוש המיועד 21 ......:התראת דלת פתוחה 5 ........בטיחות כללית פעולות שיש לבצע כדי שזמן השימוש במסנן 7 ........בטיחות ילדים 22 .........יחושב...
- Page 33 המקרר מדפי דלת תא הקירור מתקן לאחסון בקבוקים מדפי הזכוכית של תא הקירור 21- מדף לבקבוקים מכסה המפזר 31- מדפי תא אחסון מזון עדשת התאורה הפנימית 41- תאי אחסון מזון חלק אמצעי נייד 51- מסנן מים תא קירור באפס מעלות 61- מדף...
- Page 34 אזהרות בטיחות חשובות • עיין במידע הבא. אם לא תפעל בהתאם ,* אין להשתמש בחלקים שונים של המקרר • .להוראות, ייתכן שייגרם נזק גופני או נזק חומרי כמו הדלת והמגירה, כאמצעי תמיכה או אם לא תפעל בהתאם להוראות, ההתחייבות כמדרגה. אתה עלול לגרום להתהפכות המוצר .לאחריות...
- Page 35 ,)במקררים בעלי בקרה מכנית (תרמוסטט • אין להשתמש בהתקנים מכניים או באמצעים • המתן 5 דקות לפני שתחבר שוב את התקע אחרים שאינם מומלצים על ידי היצרן להאצת .תהליך ההפשרה .לשקע החשמל, אם הוא לא היה מחובר יש למסור מדריך הפעלה זה לבעלים החדש •...
- Page 36 פעולות שיש לבצע לצורך יש לנתק את המקרר מהחשמל אם אין כוונה • חיסכון באנרגיה להשתמש בו לאורך זמן. כל בעיה בבידוד .הכבלים עלולה לגרום לשריפה אין להשאיר את דלתות המקרר פתוחות לזמן • ,יש לנקות לכלוך ואבק מקצה תקע החשמל •...
- Page 37 התקנה זכור שהיצרן לא יישא באחריות כלשהי אם לא .תציית להוראות המופיעות במדריך זה נקודות שיש לקחת בחשבון לפני הובלת המקרר מחדש .1. יש לרוקן ולנקות את המקרר לפני ההובלה 2. לפני האריזה, יש להדק למקומם במקרר את המדפים, האבזרים הנלווים, מגירת הירקות וכו' באמצעות...
- Page 38 אם דלת הכניסה לחדר המיועד להתקנת .על המתח המצוין להיות שווה למתח החשמל המקרר אינה רחבה במידה מספקת למעבר אין להשתמש בכבלים מאריכים וברבי שקעים המקרר, פנה לנציג השירות המורשה כדי .לשם חיבור להסיר את דלתות המקרר ולהעביר את המקרר כבל...
- Page 39 כוונון הרווח בין הדלתות העליונות כוונון ייצוב ביחס לרצפה ;אם המקרר אינו מיוצב ראשית, נתק את המוצר מהחשמל. יש .לנתק את המוצר מהחשמל בעת כוונון הייצוב !קיימת סכנת התחשמלות ניתן לכוונן את הרווח בין דלתות תא הקירור -1 יש להסיר את מכסה המאוורר על ידי .כפי...
- Page 40 כוונן את הדלת בצורה נכונה כרצונך על ידי .שחרור קל של הברגים קבע את הדלת שכווננת על ידי .הידוק הברגים בלי לשנות את מיקום הדלת החזר את מכסה הציר למקומו וקבע אותו .בעזרת הבורג...
- Page 41 התקן מסנן המים יש לקבוע תחילה היכן ימוקם המסנן החיצוני שיש להתקין. (חל על המסנן המשמש מחוץ )(בחלק מהדגמים למקרר.) לאחר מכן, קבע את המרחק בין ניתן לחבר למקרר שני מקורות מים שונים המסנן לבין המקרר ואת אורך הצינור הנמתח לאספקת...
- Page 42 חיבור צינור המים למכל ,2. הנח את צינור המשאבה וקבע אותו אל המכל .כפי שמודגם באיור )(בחלק מהדגמים 3. עם השלמת החיבור, חבר את המשאבה .לחיבור מים למקרר ממכל, דרושה משאבה .לחשמל והפעל אותה פעל בהתאם להוראות שלהלן לאחר חיבור לפעולה...
- Page 43 חיבור צינור המים לצנרת המים הקרים )(בחלק מהדגמים אם ברצונך להשתמש במקרר שלך על ידי ,חיבורו לצנרת המים הקרים יהיה עליך לחבר אל ברז המים הקרים שבמערכת אספקת המים בביתך מתאם חיבור עם שסתום חצי אינץ' רגיל. אם שסתום כזה אינו...
- Page 44 3. הוצא את מכסה עוקף מסנן המים על ידי כדי להתקין את מסנן המים פעל בהתאם .סיבובו כלפי מטה להוראות שלהלן המתייחסות לאיורים שהובאו :לעיל .1. לחץ על לחצן ביטול יצירת קרח שבתצוגה 2. הסר את מכסה המסנן בתא הקירור על ידי .משיכתו...
- Page 45 לפני השימוש הראשון במתקן המים יש להסיר את מסנן המים כפי שמודגם באיור כאשר עומדים להחליף אותו או כאשר הוא יוצא אסור שלחץ המים בצינור הראשי יירד .מכלל שימוש ולחבר אליו מכסה עוקף מסנן .מתחת לבר אחד 'לפני הוצאת המסנן יש לוודא שמצב 'ללא קרח אסור...
- Page 46 הכנה יש להתקין את המקרר במרחק של לפחות ,03 ס"מ ממקור חום, כמו כיריים, תנורים חימום מרכזי ושל לפחות 5 ס"מ מתנורים חשמליים. כמו כן, אין להציבו כשהוא חשוף .לשמש ישירה טמפרטורת החדר שבו יותקן המקרר חייבת להיות לפחות 01 מעלות צלזיוס. לא מומלץ להפעיל...
- Page 47 אופן השימוש במקרר לוח מחוונים .לוח מחוונים זה עם לחצני מגע מאפשר לקבוע את הטמפרטורה מבלי לפתוח את דלת המקרר .רק גע באצבע בלחצן הרלוונטי כדי לקבוע את הטמפרטורה 12 15 14 13 Vacation/) (חיסכון נוסףEco Extra 1. לחצן 11. מחוון טמפרטורת תא הקירור )(חופשה...
- Page 48 אם התא הרב-תכליתי מוגדר כמקפיא, אזי /) (חיסכון נוסףEco Extra 1. לחצן ) (חופשהVacation ,--18טמפרטורת התא הרב-תכליתי תוחלף ל לחץ על לחצן זה במהירות כדי להפעיל את 02-, 22-, 42-, 81-... בהתאמה בכל פעם שאתה לוחץ על הלחצן. אם התא הרב-תכליתי פונקציית...
- Page 49 41. מחוון מצב חיסכון 9. מחוון פונקציית ההקפאה המהירה מציין שהמקרר פועל במצב של יעילות בצריכת .מציין שפונקציית ההקפאה המהירה פעילה החשמל. טמפרטורת תא ההקפאה השתמש בפונקציה זו בעת הנחת מזון טרי .בתא ההקפאה או כאשר אתה צריך קרח מחוון זה יהיה פעיל אם הפונקציה נקבעה כאשר...
- Page 50 81. מחוון ביטול יצירת קרח אם אינך רוצה לקבל קרח מהמקרר, עליך להשתמש בפונקציה זו. תוכל להשתמש בפונקציה זו בלחיצה על לחצן ביטול יצירת .הקרח במשך 3 שניות 91. לחצן ביטול התראה להחלפת מסנן 6-את המסנן במקרר יש להחליף פעם ב חודשים.
- Page 51 פעולות שיש לבצע כדי שזמן השימוש במסנן יחושב אוטומטית )(למוצרים המחוברים לצינור המים הראשי ומצוידים במסנן -1 לאחר חיבור המקרר לחשמל, לחץ בו זמנית על הלחצנים א' וב' כדי להפעיל את נעילת .המקשים א ב -2 לאחר מכן, לחץ על הלחצנים חיסכון נוסף (1), הגדרת הטמפרטורה בתא הקירור (4), קירור .מהיר...
- Page 52 מגירת ירקות מגש ביצים מגירת הירקות במקרר נועדה באופן מיוחד ניתן להתקין את המתקן לאחסון ביצים בדלת לשמור על הירקות טריים מבלי שיאבדו את .הרצויה במדף הרצוי בגוף המקרר הלחות שבהם. לשם כך, באופן כללי מתרחשת אין להתקין את המתקן לאחסון ביצים בתא זרימת...
- Page 53 חלק אמצעי נייד החלק האמצעי הנייד נועד למנוע את בריחת .האוויר הקר מתוך המקרר החוצה 1- מובטח איטום כאשר אוטמי הדלת לוחצים על המשטח של החלק האמצעי הנייד בזמן .שדלתות תא הקירור סגורות 2- סיבה נוספת לכך שהמקרר מצויד בחלק .אמצעי...
- Page 54 שימוש במתקן המים הזזת מדפי גוף המקרר בעזרת מתלים אחוריים אזהרות מגש גלישת מים את מדפי גוף המקרר ניתן להזיז קדימה ואחורה בעזרת מתלים אחוריים. ניתן לכוונן את גובה המדפים האלה על ידי הסרתם והרכבתם שוב במקומות גבוהים או נמוכים יותר. הגבה את...
- Page 55 מיני בר דלת המיני בר מבטיחה נוחות נוספת בעת השימוש במקרר. ניתן להגיע אל מדף הדלת במקרר מבלי לפתוח את דלת המקרר; בזכות תכונה זו תוכל להוציא בקלות מהמקרר את המזון והמשקאות שאתה צורך בתדירות גבוהה. מאחר שאינך חייב לפתוח את דלת המקרר...
- Page 56 ניקוי וטיפול הגנה על משטחי פלסטיק אין להשתמש בבנזין, בבנזן או בחומרים .דומים למטרות ניקוי אין להניח במקרר שמן נוזלי או ארוחות מומלץ לנתק את המקרר מהחשמל לפני שבושלו בשמן במיכלים בלתי אטומים, מכיוון .הניקוי שהם עלולים לגרום נזק למשטחי הפלסטיק אין...
- Page 57 פתרונות מומלצים לבעיות שנן רשימה זו לפני שתקרא לנציג שירות. היא עשויה לחסוך לך זמן וכסף. רשימה זו כוללת תלונות נפוצות שאינן נובעות מפגמים בייצור המקרר או משימוש לקוי בחומרים. ייתכן שכמה .מהתכונות המתוארות כאן לא יהיו קיימות במוצר שלך .המקרר...
- Page 58 .המקרר פועל לעתים תכופות או לפרק זמן ממושך ייתכן שהמקרר החדש רחב יותר מהמקרר הקודם. זוהי תופעה רגילה. מקררים גדולים פועלים • .במשך תקופה ארוכה יותר .טמפרטורת החדר עלולה להיות גבוהה. זוהי תופעה רגילה • ייתכן שהמקרר חובר לאחרונה לחשמל או שהועמס בו מזון. קירור המקרר לחלוטין עשוי להימשך •...
- Page 59 .רעש פעולת המקרר מוגבר כאשר המקרר פועל ביצועי הפעלת המקרר עשויים להשתנות עקב השינויים בטמפרטורת הסביבה. זוהי תופעה • .רגילה; אין כאן תקלה רטט או רעש הרצפה אינה ישרה או שהיא חלשה. המקרר מתנענע כאשר מזיזים אותו לאט. ודא שהרצפה •...
- Page 60 48 8945 0000/AA EN-HE...
Need help?
Do you have a question about the KQD 1360X and is the answer not in the manual?
Questions and answers