HP Z400 Maintenance And Service Manual
Hide thumbs
Also See for Z400:
- Maintenance and service manual (222 pages) ,
- Quickspecs (63 pages) ,
- Installation manual (10 pages)
Table of Contents
Advertisement
Quick Links
Advertisement
Table of Contents
Troubleshooting

Related Manuals for HP Z400


Summary of Contents for HP Z400
- Page 1 HP Z400 Workstation Maintenance and Service Guide...
- Page 2 United States Environmental Protection merchantability and fitness for a particular Agency. purpose, and is subject to change without notice. The warranties for HP products are 504630-007 set forth in the express limited warranty statements accompanying such products. Seventh Edition, November 2010 Nothing herein should be construed as constituting and additional warranty.
-
Page 3: About This Guide
About this guide This guide provides service and maintenance information for the HP Z400 Workstation. It includes these topics: Guide topics Product overview on page 1 Setting up the operating system on page 18 Restoring the operating system on page 24... - Page 4 About this guide ENWW...
-
Page 5: Table Of Contents
Setting up the Microsoft operating system .................. 19 Installing or upgrading device drivers ................ 19 Transferring files and settings to your Windows workstation ......... 19 Setting up Red Hat Enterprise Linux ..................20 Installing with the HP driver CD ................. 20 ENWW... - Page 6 Restoring the operating system .................. 25 Restoring Windows XP Professional ..................26 Creating RestorePlus! media ..................26 Creating HP Backup and Recovery (HPBR) media ............27 Restoring the operating system .................. 28 Using RestorePlus! ..................28 Using HPBR ..................... 28 Using the recovery partition ...............
- Page 7 Proactive Change Notification .................. 49 Subscriber's Choice ....................49 ROM Flash ......................50 Remote ROM Flash ................... 50 HPQFlash ....................50 FailSafe Boot Block ROM ..................51 Recovering the workstation from Boot Block Recovery mode ......51 Workstation security ....................52 Asset tracking ..................
- Page 8 Special handling of components ................69 Cables and connectors ................69 Hard disk drives ..................70 Lithium coin cell battery ................70 Customer self-repair ........................ 71 Removing and installing components ..................72 Component locations ....................73 Predisassembly procedures ..................75 Disassembly order ....................
- Page 9 Installing the rear system fan assembly ............100 Removing the front fan assembly .............. 101 Installing the front fan assembly ............... 104 Airflow guide ....................... 110 Removing the airflow guide ..............110 Installing the airflow guide ..............111 Memory ....................... 116 DIMM installation guidelines ..............
- Page 10 Using the HP Memory Test utility .............. 187 User interface ....................... 189 Survey tab ..................... 189 Test tab ....................191 Status tab ....................193 History tab .................... 193 Errors tab ....................193 Help tab ....................194 Saving and printing information in HP Vision Diagnostics ........... 195 ENWW...
- Page 11 Cleaning the workstation case ....................233 Cleaning the keyboard ......................233 Cleaning the monitor ......................234 Cleaning the mouse ......................234 Appendix D Locating HP resources ................... 235 Product information ......................236 Product support ........................237 Product documentation ......................238 Product diagnostics ......................
- Page 12 Index ..........................241 ENWW...
-
Page 13: Product Overview
Product overview This chapter presents an overview of the hardware components of the workstation. It includes these topics: Topics Product features on page 1 Workstation specifications on page 8 Product features The following sections describe the workstation system board architecture and components, and includes these topics: Topics System board architecture on page 2... -
Page 14: System Board Architecture
System board architecture This section describes the workstation system architecture. The following figures show the typical system board block diagram for 4–DIMM and 6–DIMM Z400 workstations. Figure 1-1 4–DIMM system board block diagram NOTE: The x1, x4, x8, and x16 designators describe the mechanical length of the slot. The number in parentheses lists the number of electrical PCIe lanes routed to the expansion slot. -
Page 15: Processor Technology
Figure 1-2 6–DIMM system board block diagram Processor technology This workstation uses the Intel® X58 Express chipset to support the latest Quad Core Intel® Xeon™ processor W3500 Series, including processors up to 130W. These processors incorporate an integrated 3-channel memory controller, microarchitecture improvements and large L3 cache to provide superior performance. -
Page 16: Graphics
USB 2.0 ports. The 475W power supply is 85% efficient and enables Energy Star Version 5.0 system configurations. HP WattSaver technology enables support of the European Union ERP Lot 6 power limit of 1W in off mode. HP Quiet Fan Technology enables quiet system operation. A plug-in card supports Serial Attached SCSI (SAS) drives. -
Page 17: Workstation Components
Memory module (DIMM) Side access panel System board Rear system fan PCIe card SFF Hard drive PCI card Hard disk drive Airflow guide (for 6-DIMM Z400 product) Optical drive Speaker Processor (CPU) heatsink Front bezel Processor Chassis Product features ENWW... -
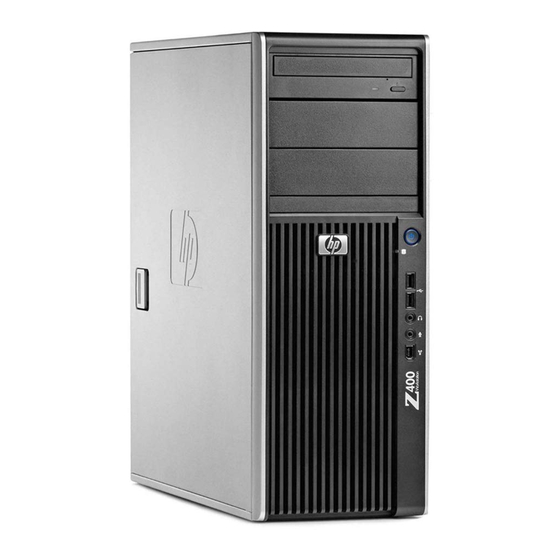
Page 18: Front Panel Components
Front panel components The following figure shows the front panel of a typical workstation configuration. Figure 1-4 Front panel Table 1-2 Front panel connectors Item Symbol Description Item Symbol Description Optical drive manual eject Headphone connector Optical drive eject button Microphone connector Power button 1394a connector (optional and... -
Page 19: Rear Panel Components
Rear panel components The following figure shows the rear panel of a typical workstation configuration. Figure 1-5 Rear panel NOTE: The rear panel connectors are labeled with industry-standard icons and colors to assist in connecting peripheral devices. With the optional 600W power supply, rear appearance and BIST LED location differ. Table 1-3 Rear panel connectors Item... -
Page 20: Workstation Specifications
Workstation specifications This section provides workstation chassis, power supply, and environmental specifications. Physical characteristics The following table lists the workstation physical characteristics. Weight (Typical configuration) 13.5-20.3 kg (29.8-44.7 lb.) Chassis Dimensions Height: 45.0 cm (17.7 in.) Width: 17.0 cm (6.7 in.) Depth: 44.5 cm (17.5 in.) Power supply description The workstation includes either a:... -
Page 21: Power Supply Currents
Power supply currents Table 1-5 Maximum current per rail Voltage rail 475W maximum 600W maximum continuous current continuous current +12 V-CPU 17.5A 18.0A +12 V-B 17.5A 18.0A +12 V-D 18.0A 18.0A V12N 0.30A 0.15A +5 V-SB 2.25A 3.0A 3.3V 15.0A 18.0A 5.1V 21.0A... -
Page 22: Power Supply Specifications
Power supply specifications Table 1-6 Power supply specifications Item Description Power supply 475W Wide Ranging, Active PFC and 85% ● efficient or 600W Wide Ranging, Active PFC and 80% ● efficient (optional) Operating voltage range 90 – 269 VAC Rated voltage range 100–240 VAC 118 VAC Rated line frequency... -
Page 23: Diagnostics And Troubleshooting On
Power consumption and heat dissipation Power consumption and heat dissipation specifications are available for multiple configurations. To review available specifications, see http://www.hp.com/go/quickspecs. To reach zero power consumption, unplug the workstation from the power outlet or use a power strip with an on/off switch. For additional information about power-saving features, see the operating system installation instructions. -
Page 24: Environmental Specifications
Values do not indicate continuous vibration. ENERGY STAR Qualification HP computers marked with the ENERGY STAR logo are compliant with the applicable U.S. Environmental Protection Agency (EPA) ENERGY STAR specifications for computers. The EPA ENERGY STAR logo does not imply endorsement by the EPA. As an ENERGY STAR Partner, Hewlett-Packard Company has determined the products marked with the ENERGY STAR logo are ENERGY STAR qualified per the applicable ENERGY STAR guidelines for energy efficiency. - Page 25 The Power Management feature enables the workstation to enter a low-power (or “sleep”) mode after a period of inactivity. When used with an external monitor that is ENERGY STAR qualified, this feature also supports the similar power management features of the external monitor. To take advantage of this energy savings: The Power Management feature has been preset to suspend the workstation to a sleep state after ●...
-
Page 26: Erp Compliance Mode
Accessibility HP is committed to developing products, services, and information that is easier to access for all customers, including customers with disabilities and age-related limitations. HP products with Windows Vista® Business and Microsoft® Windows® XP Professional preinstalled are designed for accessibility, and these products are tested with industry-leading Assistive Technology products. -
Page 27: Hyper-Threading
The Computer Setup (F10) Utility on page HP Cool Tools An HP workstation with Windows 7 or Windows Vista includes additional software not installed when you first start the workstation. To access or learn more about these additional preinstalled tools on the workstation that can enhance the workstation experience: Open the HP Cool Tools folder by selecting Start>All Programs>HP Cool Tools. -
Page 28: Ensuring Proper Ventilation
Ensuring proper ventilation Proper ventilation for the system is important for workstation operation. Follow these guidelines to ensure adequate ventilation: Operate the workstation on a sturdy, level surface. ● Place the workstation in an area with adequate ventilation. Provide at least 15.24 CM (6 inches) ●... - Page 29 Never restrict the incoming or outgoing airflow of the workstation by blocking any vents or air ● intakes as shown in the following figure. Figure 1-7 Proper workstation placement Workstation specifications ENWW...
-
Page 30: Setting Up The Operating System
This chapter also includes information on how to determine that you have the latest BIOS, drivers, and software updates installed on the workstation. CAUTION: Do not add optional hardware or third-party devices to the HP workstation until the operating system is successfully installed. Adding hardware might cause errors and prevent the operating system from installing correctly. -
Page 31: Setting Up The Microsoft Operating System
Setting up the Microsoft operating system NOTE: If you ordered a downgrade from Windows 7 or Windows Vista to Windows XP Professional operating system, your system will be preinstalled with Windows XP Professional operating system. With this configuration, you will receive recovery media for the Windows 7 or Windows Vista operating system only. -
Page 32: Setting Up Red Hat Enterprise Linux
CDs are currently available for download at http://www.hp.com/support/workstation_swdrivers. Installing with the HP driver CD To install the HP driver CD, see “Installing with the HP Installer Kit for Linux” in the HP Workstations for Linux manual at http://www.hp.com/support/workstation_manuals. Chapter 2 Setting up the operating system... -
Page 33: Installing And Customizing Red Hat-Enabled Workstations
Red Hat Enterprise Linux box set that have been qualified to work on an HP workstation. To use the drivers in the HP Installer kit for Linux other than RHEL, you must manually extract the drivers from the HP Driver CD and install them. HP does not test the installation of these drivers on other Linux distributions nor does HP support this operation. -
Page 34: Determining Current Bios
The F10 Setup utility displays the workstation BIOS version under File > System Information. Note the workstation BIOS version so that you can compare it with the BIOS versions that appear on the HP website. Chapter 2 Setting up the operating system... -
Page 35: Upgrading Bios
HP workstation. If you did not purchase your device from HP, HP recommends visiting the HP Web site first to see if your device and its drivers have been tested for HP workstation compatibility. If no driver is available, visit the device manufacturer's Web site to download the latest drivers. -
Page 36: Restoring The Operating System
Restoring Novell SLED on page 28 Restore methods The Windows 7 or Windows Business Vista operating system can be reinstalled using the HP RestorePlus! process. The Windows XP Professional operating system can be reinstalled using the RestorePlus! process or the HP Backup and Recovery Manager. -
Page 37: Ordering Backup Software
Ordering backup software If you cannot create system recovery CDs or DVDs, you can order a recovery disk set from the HP support center. To obtain the support center telephone number for your region see http://www.hp.com/support/contactHP. Restoring Windows 7 or Windows Vista This section describes how to restore Windows 7 or Windows Vista. -
Page 38: Restoring Windows Xp Professional
Depending on the options, there might be additional DVDs you can create. Follow the prompts to create RestorePlus!, operating system, and HPBR media. If you are unable to create CD/DVDs on your workstation, call HP Support and request a RestorePlus! media kit. For worldwide technical support phone numbers, see http://www.hp.com/support. -
Page 39: Creating Hp Backup And Recovery (Hpbr) Media
The Initial Recovery Point was captured when the RestorePlus! media set was created previously. If the IRP was not created, start the HP Backup and Recovery Manager and create recovery points using the Expert mode. Follow the HPBR online documentation for instructions. -
Page 40: Restoring The Operating System
Restoring the operating system CAUTION: Before you restore the operating system, back up your data. When you run RestorePlus! from media, the process deletes all information on the primary hard drive, including all partitions. If you run RestorePlus! from the recovery partition, only the root (C:) partition is affected. -
Page 41: Creating Restore Media
Creating restore media THE SUSE Linux Enterprise Desktop preload includes a SUSE ISO icon on the desktop. You can click this icon to go to the /iso directory. The /iso directory contains all iso images used to preload your workstation. To recover or restore the original image, follow the instructions in the readme file in the / iso directory to copy the ISO image file onto CDs. -
Page 42: System Management
System management This section describes the tools and utilities that provide system management for the workstation. It includes these topics: Topics BIOS ROM on page 31 The Computer Setup (F10) Utility on page 31 Workstation management on page 43 Chapter 4 System management ENWW... -
Page 43: Bios Rom
POST, PCI device initialization, Plug and Play support, power management, and the Computer Setup (F10) Utility. The BIOS ROM is a 1-MB Serial Peripheral Interface (SPI) port. http://www.hp.com/go/quickspecs to review the latest BIOS ROM specifications. The Computer Setup (F10) Utility... - Page 44 other nonerror text messages. If a POST error occurs, the error is displayed regardless of the mode selected. To manually switch to POST Messages Enabled during POST, press any key except through F12. Specify an Ownership Tag, which appears when the workstation is powered on or restarted. ●...
-
Page 45: Accessing The Computer Setup (F10) Utility
Accessing the Computer Setup (F10) Utility To access the Computer Setup (F10) Utility menu: Power on or restart the workstation. When the display is active and F10=Setup appears in the lower right corner of the screen, press F10. If you do not press at the appropriate time, try again. -
Page 46: The Computer Setup (F10) Utility Menu
The Computer Setup (F10) Utility menu The following table describes the functions available in the Computer Setup (F10) utility menu. NOTE: With new BIOS releases, the following content is subject to change, so the menu might be different than shown. Table 4-1 Computer Setup (F10) Utility menu descriptions Heading... - Page 47 Table 4-1 Computer Setup (F10) Utility menu descriptions (continued) Heading Option Description Apply Defaults Restores the default settings defined in Default Setup. and Exit Ignore Changes Exits workstation setup without applying or saving changes. and Exit Save Changes Saves changes to system configuration and exits the workstation setup. and Exit Storage Device...
- Page 48 Table 4-1 Computer Setup (F10) Utility menu descriptions (continued) Heading Option Description Storage Options Provides these options: Removable Media Boot—Enables and disables the ability to start the ● workstation from removable media. Legacy Diskette Write—Enables and disables the ability to write data to ●...
- Page 49 Table 4-1 Computer Setup (F10) Utility menu descriptions (continued) Heading Option Description Boot Order Lets you configure the boot order of diskette drive and hard disk drive by physically reordering the menu entries. The menu presents the following default boot order: Optical Drive ●...
- Page 50 Table 4-1 Computer Setup (F10) Utility menu descriptions (continued) Heading Option Description Device Security Makes the following devices available or hidden to the workstation: Serial Port ● Front USB Ports ● Rear USB Ports ● Internal USB Ports ● System Audio ●...
- Page 51 Table 4-1 Computer Setup (F10) Utility menu descriptions (continued) Heading Option Description System IDs Provides these options: Asset Tag—A 16-byte string identifying the workstation. ● Ownership Tag—An 80-byte string identifying ownership of the ● workstation. This tag appears on the screen during POST. Universal Unique Identifier (UUID)—Can only be updated if the current ●...
- Page 52 Table 4-1 Computer Setup (F10) Utility menu descriptions (continued) Heading Option Description Setup Security Lets the administrator set the security level of each setup feature. Level Power OS Power Enables or disables: Management Runtime Power Management ● MWAITE-AWARE OS ● Idle Power Savings ●...
- Page 53 Table 4-1 Computer Setup (F10) Utility menu descriptions (continued) Heading Option Description Advanced Power-On Lets you set the following: Options POST Messages—Enables or disables the splash screen during POST. ● F9 Prompt (Displayed or Hidden)—Selecting Displayed displays the ● F9=Boot Menu during POST. Selecting Hidden prevents the text from being displayed.
- Page 54 Table 4-1 Computer Setup (F10) Utility menu descriptions (continued) Heading Option Description Chipset/ Memory Enable/disable these options: PCI SERR# Generation (Enable or Disable)—Controls PCI SERR# ● generation for ill-behaved PCI add-in cards (that can generate SERR# spuriously). PCI VGA Palette Snooping (Enable or Disable)—Controls PCI VGA Palette ●...
-
Page 55: Workstation Management
Installing a remote system on page 44 Replicating the setup on page 45 Updating and managing software on page 47 HP Client Manager Software on page 47 Altiris Client Management Solutions on page 47 System Software Manager on page 49... -
Page 56: Initial Workstation Configuration And Deployment
To initiate a remote system installation, press lower right corner of the HP logo screen. Follow the onscreen instructions to continue the installation process. The default boot order is a BIOS configuration setting that can be changed to always attempt a PXE boot. -
Page 57: Replicating The Setup
Replicating the setup This section provides information about replicating the workstation setup. Copying a setup configuration to a single workstation CAUTION: A setup configuration is model-specific. File system corruption can result if source and target workstations are not the same model. To copy a setup configuration: Select a setup configuration to copy, and then restart the workstation. -
Page 58: Copying A Setup Configuration To Multiple Workstations
For example, do not copy the setup configuration from an HP xw8600 Workstation to an HP Z400 Workstation. This method takes longer to prepare the configuration diskette, but copying the configuration to target workstations is fast. -
Page 59: Updating And Managing Software
Altiris and HP have partnered to provide comprehensive, tightly integrated systems management solutions to reduce the cost of owning HP client PCs. The HP CMS is the foundation for additional Altiris Client Management Solutions that address the following topics. Inventory and asset management ●... -
Page 60: Hp Softpaq Download Manager
HP SoftPaq Download Manager is a free, easy-to-use interface for locating and downloading software updates for the HP client PC models in your environment. By specifying your models, operating system, and language, you can quickly locate, sort, and select the softpaqs you need. To download HP SoftPaq Download Manager, visit http://h20331.www2.hp.com/Hpsub/cache/509658-0-0-225-121.html. -
Page 61: System Software Manager
Subscriber's Choice Subscriber’s Choice is a client-based service from HP that supplies you with personalized product tips, feature articles, and driver and support alerts and notifications based on the profile. Subscriber’s Choice Driver and Support Alerts and Notifications delivers e-mail notifying you that the information you subscribed to in the profile is available for review and retrieval. -
Page 62: Rom Flash
HP PC ROM images over the network. To use Remote ROM Flash, the workstation must be powered on, or turned on using Remote Wakeup. For more information about Remote ROM Flash and HPQFlash, see the HP Client Manager Software or System Software Manager sections at http://www.hp.com/go/ssm. -
Page 63: Failsafe Boot Block Rom
If there is media in the diskette or optical disk drives, remove it. Insert a BIOS image CD into the CD drive. You can also use USB media such as an HP DriveKey. Power off, then power on the workstation. -
Page 64: Workstation Security
Use the following utilities to manage security settings on the HP workstation: (Local) Use the Computer Setup (F10) Utility. ● (Remote) Use HP CMS or System SSM, which let you use a simple command-line utility to control ● security settings and permit the secure and consistent deployment. -
Page 65: Sata Hard Disk Drive Security
To balance this level of security with the need to address the issue of a forgotten password, the HP implementation of DriveLock employs a two-password security scheme. One password is intended to be set and used by a system administrator, while the other is typically set and used by the user. -
Page 66: Drivelock Applications
For users with less stringent security requirements, HP does not recommend enabling DriveLock. Users in this category include personal users, or users who do not maintain sensitive data on their hard disk drives as a common practice. - Page 67 Enabling DriveLock To enable and set the DriveLock user password: Power on or restart the workstation. As soon as the workstation is powered on, press and hold until you enter the Computer Setup (F10) Utility. Press Enter to bypass the title screen, if necessary. If you do not press at the appropriate time, you must restart the workstation, and then press and hold...
-
Page 68: Password Security
Password security The power-on password prevents unauthorized use of the workstation by requiring entry of a password to access applications or data when the workstation is powered on or restarted. The setup password specifically prevents unauthorized access to the Computer Setup (F10) Utility and can also override the power-on password. -
Page 69: Establishing A Power-On Password Using Workstation Setup
Establishing a power-on password using workstation setup Establishing a power-on password through the Computer Setup (F10) Utility prevents access to the workstation when power is connected, unless you specify the password. When a power-on password is set, the Computer Setup (F10) Utility presents Password Options in the Security menu. The password options include Network Server Mode and Password Prompt on Warm Boot. -
Page 70: Entering A Setup Password
Entering a setup password If a setup password has been established on the workstation, you will be prompted to enter it each time you run the Computer Setup (F10) Utility. To enter a setup password: Restart the workstation. As soon as the workstation is powered on, press and hold until you enter the Computer Setup (F10) Utility. -
Page 71: Deleting A Power-On Or Setup Password
Deleting a power-on or setup password To delete a power-on or setup password: Power on or restart the workstation. Choose from the following: To delete the power-on password, go to step 4. ● To delete the setup password, as soon as the workstation is powered on, press and hold ●... -
Page 72: Clearing Passwords
Clearing passwords If you forget the password, you cannot access the workstation. For instructions about clearing passwords, see Configuring password security and resetting CMOS on page 216. Chassis security Side access panel sensor (Smart Cover Sensor) (optional) The optional Side access panel sensor is a combination of hardware and software technology that can alert you when the workstation side access panel has been removed (if the sensor has been configured in the Computer Setup (F10) Utility). -
Page 73: Side Access Panel Solenoid Lock (Optional)
Computer Setup (F10) Utility. The solenoid lock FailSafe Key–available from HP–is is a device for manually disabling the solenoid lock. You will need the FailSafe Key in case of forgotten password, power loss, or workstation malfunction. -
Page 74: Cable Lock (Optional)
If the workstation is connected to a network that is managed by HP CMS, the workstation sends a fault notice to the network management application. With HP CMS, you can also remotely schedule diagnostics to run on managed PCs and create a summary report of failed tests. -
Page 75: Dual-State Power Button
Dual-state power button With ACPI enabled, the power button can function as an on/off switch or as a button. This feature does not completely turn off power, but instead causes the workstation to enter a low-power standby state. This lets you go to standby without closing applications or return to the same operational state without any data loss. -
Page 76: Replacing Components
Replacing components This chapter presents removal and installation procedures for most internal workstation components. It includes these topics: Topics Warnings and cautions on page 65 Service considerations on page 66 Customer self-repair on page 71 Removing and installing components on page 72 Product recycling on page 163 Chapter 5 Replacing components ENWW... -
Page 77: Warnings And Cautions
Observe the following cautions when removing or replacing a processor: — Installing a processor incorrectly can damage the system board. Contact an HP authorized reseller or service provider to install the processor. If you plan to install the processor yourself, read all of the instructions carefully before you begin. -
Page 78: Service Considerations
NOTE: HP accessories are for use in HP Workstation products. They have been extensively tested for reliability and are manufactured to high quality standards. Service considerations Review the following sections, which describe service considerations, before removing and replacing system components. -
Page 79: Preventing Esd Equipment Damage
Preventing ESD equipment damage Many electronic components are sensitive to ESD. Circuitry design and structure determine the degree of sensitivity. The following packaging and grounding precautions are necessary to prevent damage to electric components and accessories: Transport products in static-safe containers such as tubes, bags, or boxes, to avoid hand contact. ●... -
Page 80: Grounding The Work Area
Grounding the work area To prevent static damage in the work area: Cover the work surface with approved static-dissipative material. Use a wrist strap connected to ● the work surface, and properly grounded tools and equipment. Use static-dissipative mats, foot straps, or air ionizers to give added protection. ●... -
Page 81: Tools And Software Requirements
Tools and software requirements The tools necessary for workstation component removal and installation are: Torx T-15 driver ● Flat blade and cross-tip screwdrivers ● Diagnostics software ● Special handling of components The components included in this section require special handling when servicing the workstation. WARNING! Do not use the front bezel as a handle or lifting point when lifting or moving the workstation. -
Page 82: Hard Disk Drives
Hard disk drives Hard disk drives are fragile, precision components. Avoid subjecting them to physical shock and vibration. The following guidelines apply to all drives, including failed drives, replacement drives, and spares. Do not remove hard disk drives from the shipping package for storage. Keep hard disk drives in ●... -
Page 83: Customer Self-Repair
NOTE: Some components, like the liquid cooling system, are not eligible for Customer Self-Repair and must be returned to HP for service. Call HP Support for further instructions before attempting to remove or repair this system. Customer self-repair... -
Page 84: Removing And Installing Components
Removing and installing components This section includes these topics: Topics Component locations on page 73 Power button assembly on page 87 Expansion card slot identification on page 121 Predisassembly procedures Optical disk drive (mini-tower Expansion card on page 124 on page 75 configuration) on page 89 Disassembly order on page 76 Optical disk drive (desktop... -
Page 85: Component Locations
Component locations The following illustration and table identify workstation system board components. Figure 5-1 4-DIMM configuration system board components Table 5-2 4-DIMM system board components ID Item Component Item Component Item Component CPU fan Clear CMOS button PCI 32/33 Rear chassis fan Front power button/LED PCIe2 x16 CPU power... - Page 86 Table 5-2 4-DIMM system board components ID (continued) Item Component Item Component Item Component Password jumper Speaker Serial Chassis intrusion switch Front audio Figure 5-2 6-DIMM configuration system board components Table 5-3 6-DIMM system board components ID Item Component Item Component Item Component...
-
Page 87: Predisassembly Procedures
Table 5-3 6-DIMM system board components ID (continued) Item Component Item Component Item Component Main power SATA ports Audio Battery Internal USB 2 Network/USB Floppy disk drive Front USB Password jumper Speaker Keyboard/mouse Chassis intrusion switch Front 1394a Serial For related system architecture information, see System board architecture on page Predisassembly procedures NOTE:... -
Page 88: Disassembly Order
Disassembly order For convenience, disassembly procedures should be followed in a particular order. Use the following table to determine the sequence in which to access major workstation components. Table 5-4 Workstation component installation To install/ Remove... Then Then Then Then Then Then replace... -
Page 89: Cable Lock (Optional)
Cable lock (optional) If a cable lock is installed on the workstation, remove it before servicing the workstation. Unlock it and pull it out of the cable lock slot as shown in the following figure. Figure 5-3 Removing the cable lock Removing and installing components ENWW... -
Page 90: Side Access Panel
Side access panel Before accessing the internal components of the workstation, you must remove the side access panel. This section describes how to remove and install the side access panel. Removing the side access panel To remove the side access panel: WARNING! Before removing the workstation side access panel, be sure that the workstation is powered off and that the power cord is disconnected from the electrical outlet. -
Page 91: Side Access Panel Sensor (Optional)
Side access panel sensor (optional) The side access panel sensor (also called the hood sensor or Smart Cover Sensor) is a switch that detects when the side access panel is opened. The side access panel sensor is mounted either on a metal bracket attached to the front chassis or on the front fan holder/card guide. -
Page 92: Installing The Side Access Panel Sensor
To remove the side access panel sensor (front fan holder mounting): Power down the workstation (see Predisassembly procedures on page 75). Disconnect power from the workstation (see Predisassembly procedures on page 75). Remove the side access panel (see Removing the side access panel on page 78). - Page 93 NOTE: The metal bracket where the sensor resides is part of the sensor kit and must be installed before installing a sensor for the first time. Installing a front fan or some full-length expansion cards may require that you install a front fan holder/card guide instead of the mounting bracket. See Installing the front fan assembly on page 104 for details on installing the side access panel sensor with the fan...
-
Page 94: Side Access Panel Solenoid Lock
Side access panel solenoid lock The side access panel solenoid lock provides a method to lock the side access panel by means of a local or remote signal-controlled solenoid. This section describes how to remove and install the side access panel solenoid lock. Removing the side access panel solenoid lock To remove the side access panel solenoid lock: Power down the workstation (see... -
Page 95: Bezel
Bezel This section describes how to remove and install the front chassis bezel. Removing the front bezel To remove the front bezel: Remove the side access panel (see Removing the side access panel on page 78). Lift the release tabs (1), and then rotate the front bezel off the chassis (2). Figure 5-9 Removing the front bezel Installing the front bezel... - Page 96 Remove the front bezel (see Removing the front bezel on page 83). Remove the top set of fastening screws from the I/O device assembly (1), as shown in the following figure. Figure 5-10 Removing the front panel I/O device assembly Remove the bottom set of fastening screws from the I/O device assembly (2).
- Page 97 Disconnect the front panel I/O device assembly cables from the system board as shown below. NOTE: Z400s with 6 DIMM slots have an additional cable from the front panel to the 1394a connector on the system board that you must also disconnect. Figure 5-11 Disconnecting the front panel I/O cables Carefully guide the front panel I/O device assembly from the chassis.
-
Page 98: Installing The Front Panel I/O Device Assembly
Installing the front panel I/O device assembly To install the front panel I/O device assembly: Guide the front panel I/O device assembly cables through the chassis openings from which they were removed. Place the front panel I/O device assembly in the chassis. Install the fastening screws in the reverse order from which they were removed. -
Page 99: Power Button Assembly
Power button assembly This section describes how to remove and install the power button assembly. Removing the power button assembly To remove the power button assembly: Power down the workstation (see Predisassembly procedures on page 75). Disconnect power from the workstation (see Predisassembly procedures on page 75). -
Page 100: Installing The Power Button Assembly
Pull the power button assembly (2) from the chassis. Figure 5-14 Removing the power button assembly Installing the power button assembly To replace the power button assembly, reverse the previous steps. Chapter 5 Replacing components ENWW... -
Page 101: Optical Disk Drive (Mini-Tower Configuration)
Optical disk drive (mini-tower configuration) This section describes how to remove and install an optical disk drive in the workstation mini-tower configuration. Removing an optical disk drive from the optical bay (mini-tower configuration) Power down the workstation (see Predisassembly procedures on page 75). - Page 102 Lift the green drive-lock release lever (1) and gently slide the drive out of the chassis (2) as shown in the following figure. Figure 5-16 Removing the optical disk drive After removing the drive, remove the four guide screws on the sides of the drive (two per side) if you plan to install another drive.
-
Page 103: Installing An Optical Disk Drive In The Optical Bay (Mini-Tower Configuration)
Installing the optical disk drive Connect the power and data cables to the drive as shown in the following figure. (See the service label on the side access panel for component locations in your model of Z400.) Removing and installing components... - Page 104 Connect the optical disk drive data cable to the appropriate SATA port on the system board as shown in the following figure. Figure 5-18 Connecting power and data cables Reverse steps 1–5 to replace the components you removed during installation. Chapter 5 Replacing components ENWW...
-
Page 105: Optical Disk Drive (Desktop Configuration)
Optical disk drive (desktop configuration) This section describes how to remove and install an optical disk drive in the workstation desktop configuration. Removing an optical drive (desktop configuration) Power down the workstation (see Predisassembly procedures on page 75). Disconnect power from the system (Predisassembly procedures on page 75), Remove the side access panel... - Page 106 Press down on the yellow drive-lock release lever (1) and gently slide the drive out of the chassis (2). Figure 5-20 Removing the optical drive from chassis After removing the drive (1), remove the four guide screws from the drive (2) if you plan to install another drive.
-
Page 107: Installing An Optical Drive (Desktop Configuration)
Installing an optical drive (desktop configuration) Power down the workstation (see Predisassembly procedures on page 75). Disconnect power from the system (Predisassembly procedures on page 75), Remove the side access panel (Removing the side access panel on page 78), If your system has an airflow guide, remove it (see Removing the airflow guide on page 110). - Page 108 Connect the data (1) and power (2) cables from the system board to the optical disk drive as shown in the following figure. (See the service label on the side access panel for component locations in your model of Z400.) Figure 5-23 Connecting the optical drive cables Reverse steps 1–5 to replace the components you removed during installation.
-
Page 109: Workstation Speaker
Workstation speaker This section describes how to remove and install the workstation speaker. Removing the workstation speaker To remove the workstation speaker: Power down the workstation (see Predisassembly procedures on page 75). Disconnect power from the workstation (see Predisassembly procedures on page 75). -
Page 110: Power Supply
Power supply This section describes how to remove and install a power supply. Removing the power supply To remove the power supply: Power down the workstation (see Predisassembly procedures on page 75). Disconnect power from the workstation (see Predisassembly procedures on page 75). -
Page 111: Power Connections
Power connections For help with identifying power cables, see the following figure and table. Make sure that you route or tie all cables so they cannot interfere with the processor heatsink fan. Figure 5-26 Power connector identification for a typical configuration Table 5-5 Power connector description Item... -
Page 112: Fan Assemblies
Fan assemblies This section describes how to remove and install the front or rear system fan assemblies. Removing the rear system fan assembly To remove the rear system fan assembly: Power down the workstation (see Predisassembly procedures on page 75). Disconnect power from the workstation (see Predisassembly procedures on page 75). -
Page 113: Removing The Front Fan Assembly
Removing the front fan assembly Power down the workstation (see Predisassembly procedures on page 75). Disconnect power from the workstation (see Predisassembly procedures on page 75). Remove the side access panel (see Removing the side access panel on page 78). Remove the front bezel (see Removing the front bezel on page 83). - Page 114 When the top tabs release, rotate the top of the fan holder/card guide into the chassis (1) so that the bottom tabs release from the metal grid on the chassis, and then slide the guide away from the front panel (2). Figure 5-29 Freeing the fan assembly from the chassis Chapter 5 Replacing components...
- Page 115 Rotate the fan holder/card guide assembly slightly to one side (1), and then lift it up and out of the chassis (2). Figure 5-30 Removing the fan holder/card guide assembly Removing and installing components ENWW...
-
Page 116: Installing The Front Fan Assembly
Remove the fan from the fan holder/card guide. Figure 5-31 Removing the fan Installing the front fan assembly NOTE: Only computers having non-factory-integrated, high power PCI cards require the additional cooling provided by the optional front chassis fan included in this kit. This front fan is not recommended for use on computers that have hard drives mounted in the optical bays if your environmental temperature exceeds 27°C (80°F). - Page 117 Insert the fan unit into the fan holder/card guide. Align the fan with the label facing inward. If an airflow indicator is present on the fan, make sure it points toward the holder and the rear of the chassis. Position the power cable so that it has the maximum length to reach the system board. Figure 5-32 Inserting the fan into the fan holder/card guide If a side access panel sensor is present:...
- Page 118 Insert the side access panel sensor into the slot provided on the fan holder/card guide. Figure 5-33 Inserting the side access panel sensor into the fan holder/card guide Chapter 5 Replacing components ENWW...
- Page 119 Route the front chassis cables so that they will clear the fan holder/card guide: Route the front USB and power switch cables along the bottom of the drive bay (1). ● Route the speaker cable along the side wall of the chassis (2). ●...
- Page 120 Insert the fan holder/card guide assembly. Make sure that the fan cable can reach the power receptacle on the system board. TIP: Rotate the fan assembly slightly from side to side to fit it into the chassis. CAUTION: Clamping a cable between the card guide and the chassis might damage the cable. Figure 5-35 Inserting the fan holder/card guide assembly Finish installing the fan holder/card guide assembly, as shown in the following illustration:...
- Page 121 (If installing side access panel sensor) Carefully route the side access panel sensor cable along the drive bay and plug it into the HSENSE connector on the system board (4). NOTE: To locate system board components, see the service label on the side access panel Figure 5-36 Installing the fan holder/card guide assembly Make sure that none of the cables are pinched by the fan holder/card guide assembly.
-
Page 122: Airflow Guide
Airflow guide This section describes how to remove and install the airflow guide used in the 6–DIMM versions of the workstation. Removing the airflow guide Power down the workstation (see Predisassembly procedures on page 75). Disconnect power from the workstation (see Predisassembly procedures on page 75). -
Page 123: Installing The Airflow Guide
Installing the airflow guide Power down the workstation (see Predisassembly procedures on page 75). Disconnect power from the workstation (see Predisassembly procedures on page 75). Remove the side access panel (see Removing the side access panel on page 78). Press the power cables, including P1, down toward the system board between the DIMM slots and the internal bay, as shown in the following figure. - Page 124 Set the airflow guide into the chassis. Place the edge of the airflow guide (1) between DIMM socket #6 and the CPU heatsink. Figure 5-39 Installing the airflow guide Route the power and data cables through the opening next to the internal bay (2). Chapter 5 Replacing components ENWW...
- Page 125 Route the CPU power cable (P3) through the opening next to the power supply as shown in the following figure. Figure 5-40 Routing the CPU power cable Removing and installing components ENWW...
- Page 126 Secure the airflow guide in the chassis. Insert the tab on the airflow guide into the slot next to the yellow ODD release lever (1), and then press down as shown in the following figure. Figure 5-41 Securing the airflow guide Ensure that the airflow guide secures even with the end of the FDD bay, and that the latch (2) engages with the slot in the internal bay cover.
- Page 127 Ensure that the latch on the top of the airflow guide snaps under the edge of the chassis frame as shown in the following figure. Figure 5-42 Securing the airflow guide latch Replace all components that were removed in preparation for component installation. Removing and installing components ENWW...
-
Page 128: Memory
● find which DIMMs are compatible with the workstation CAUTION: HP ships only DIMMs that are electrically and thermally compatible with this workstation. Because third-party DIMMs might not be electrically or thermally compatible, they are not supported by HP. DIMM installation order Review the following figures to determine the correct installation order for DIMMs. -
Page 129: Supported Dimm Configurations
Figure 5-44 6–DIMM load order Supported DIMM configurations The workstation supports these DIMM arrangements, depending on which Z400 product you order: Up to six DIMM slots ● Memory range from 1 GB to 16GB for the 4-DIMM product ● Memory range from 1 GB to 24GB for the 6-DIMM product ●... -
Page 130: Removing A Dimm
Removing a DIMM To remove a DIMM: Power down the workstation (see Predisassembly procedures on page 75). Disconnect power from the workstation (see Predisassembly procedures on page 75). CAUTION: To prevent electrical damage to the DIMMs during removal or installation, power off the workstation and unplug the power cord from the AC power outlet. -
Page 131: Installing A Dimm
Installing a DIMM To install the DIMM: Power down the workstation (see Predisassembly procedures on page 75). Disconnect power from the workstation (see Predisassembly procedures on page 75). CAUTION: To prevent electrical damage to the DIMMs during removal or installation, power off the workstation and unplug the power cord from the AC power outlet. - Page 132 Align the DIMM connector key with the DIMM socket key, and then seat the DIMM firmly in the socket (1), as shown in the following figure. CAUTION: DIMMs and their sockets are keyed for proper installation. To prevent socket or DIMM damage, align these guides properly when installing DIMMs.
-
Page 133: Expansion Card Slot Identification
Expansion card slot identification This section identifies and describes workstation expansion card slots, and presents card configuration information. Slot identification and description The following figure identifies workstation expansion card slots. Figure 5-48 Identifying expansion card slots The following table describes the workstation PCIe card slots. Table 5-6 PCI slots Slot... -
Page 134: Card Configuration Restrictions For Power Supplies
Slots one and three use open-ended PCIe connectors, so a PCIe x16 card can be inserted. Graphics cards greater than 75 watts require the use of an auxiliary power cable adapter. Card configuration restrictions for power supplies CAUTION: To prevent damage, the overall power consumption of the workstation (including I/O cards, CPU, and memory) must not exceed the maximum rating of the workstation power supply. -
Page 135: Choosing An Expansion Card Slot
Choosing an expansion card slot Whenever possible, use the following tips to help you select the proper slot for an expansion card: Insert the primary graphics card in a PCIe x16 slot intended for graphics. ● Insert a second graphics card in a second PCIe x16 slot intended for a secondary graphics card. ●... -
Page 136: Expansion Card
Expansion card PCIe I/O slots can support other PCIe cards with less bus bandwidth than what is physically defined for the slot. Expansion card slot description NOTE: The x1, x4, x8, and x16 designators describe the mechanical length of the slot. The number in parentheses shows how many electrical PCIe lanes are routed to the expansion slot. - Page 137 Remove the expansion card support, if installed. Some workstation models use a bar support; remove the two screws (1) and lift up on the support (2). Figure 5-49 Removing expansion card support Other workstation models use a hold down clamp; grasp the top of the clamp (1), squeeze the release handles until the bottom of the clamp releases from the clamp rail (2) (it should click when it releases), and swing the clamp out from the back panel (3).
- Page 138 Push down on the expansion card retention clamp levers on the inside of the chassis to open the retention clamp (1) as shown below. Figure 5-51 Removing the expansion card Release the expansion card slot latch (2), and then carefully lift the card from the chassis (3). Install an expansion slot cover and close the expansion card retention clamp.
-
Page 139: Installing An Expansion Card
Installing an expansion card Visit http://www.hp.com/go/quickspecs to learn which graphics cards are supported in the workstation, how much memory each graphics card includes, and graphics card power requirements. To install an expansion card: Power down the workstation (see Predisassembly procedures on page 75). -
Page 140: Battery
Battery This section describes how to remove and install the battery. The battery that comes with the workstation provides power to the real-time clock and has a minimum lifetime of about three years. WARNING! This workstation includes a lithium battery. There is a risk of fire and chemical burn if the battery is handled improperly. -
Page 141: Installing The Battery
Pull the tab (1) on the battery holder, and then lift it straight up (2), as shown in the following figure. Figure 5-53 Removing the battery Installing the battery To install the battery: Confirm the polarity (positive or negative) of the battery to position it correctly in the battery holder. -
Page 142: Installing The Hard Disk Drive
Lift the green hard disk drive release lever (1), then slide the hard disk drive (2) from the chassis as shown. Figure 5-54 Removing the drive from the chassis Replace the side access cover when finished. Installing the hard disk drive Installation guidelines The workstation typically ships with an HDD, but additional drives can be added to expand data storage:... -
Page 143: Installation
The cables plug into the system board connectors in the following manner: SATA HDD cables are plugged into SATA ports, starting at SATA port zero. ● SAS HDD cables do not plug into system board connectors, but into a separate SAS controller ●... - Page 144 If installing a SAS drive, attach a SAS-to-SATA cable adapter to the connector on the SAS hard drive as shown in the following figure. NOTE: SAS Drives require a separate SAS Controller plug-in card. Figure 5-57 Attaching the cable adapter Chapter 5 Replacing components ENWW...
- Page 145 Push the hard disk drive into the selected bay until it snaps into place (1), as shown in the following figure. Figure 5-58 Installing the HDD drive Attach a power cable (2) to the drive, and attach a data cable (3) from the SATA port or SAS controller to the hard disk drive.
-
Page 146: Liquid Cooling Solution
This section describes how to remove and install a processor liquid cooling solution (LCS). NOTE: The LCS is not eligible for Customer Self-Repair. Call HP Support for further instructions before attempting to remove or repair this system. Removing the liquid cooling solution... - Page 147 Remove the two LCS VR fan assembly bracket screws and remove the assembly from the chassis, as shown in the following figure. Figure 5-60 Removing the LCS VR fan assembly Removing and installing components ENWW...
- Page 148 Disconnect the rear system fan cable from the system board as shown in the following figure. Figure 5-61 Disconnecting the rear system fan cable Chapter 5 Replacing components ENWW...
- Page 149 Remove the screws and the LCS radiator assembly from the chassis as shown in the following figure. Figure 5-62 Removing the LCS radiator assembly Removing and installing components ENWW...
- Page 150 Disconnect the LCS pump cable from the system board as shown in the following figure. Figure 5-63 Disconnecting the LCS pump cable Chapter 5 Replacing components ENWW...
- Page 151 Remove the cold plate assembly. Slowly and evenly loosen one pair of diagonally opposite screws (1) on the LCS cold plate assembly until the screw shanks disengage from the system board, and then loosen the remaining pair (2), as shown below. Figure 5-64 Loosening the LCS cold plate screws in sequence Lift the cold plate assembly from the CPU, and then remove the entire LCS unit from the...
- Page 152 With the LCS unit removed, gently twist the cold plate assembly (1), and remove it from the retention ring (2), as shown in the following figure. Figure 5-65 Removing the cold plate assembly from the retention ring Use alcohol and a soft cloth to clean the thermal interface residue from the CPU and the cold plate assembly, allowing the alcohol to dry completely afterward.
- Page 153 Remove the rear system fan from the LCS radiator fan holder by lifting the fan holder tabs (1), and then rotating the fan out of the holder (2), as shown in the following figure. (Release the tabs when the fan is removed.) Figure 5-66 Removing the rear system fan from the radiator fan holder Reinstall the rear system fan (see...
-
Page 154: Installing A Liquid Cooling Solution
Installing a liquid cooling solution Disconnect power from the system (Predisassembly procedures on page 75), Remove the side access panel (see Removing the side access panel on page 78). If your system has an airflow guide, remove it (see Removing the airflow guide on page 110). - Page 155 Set the cold plate retention ring on the CPU heatsink mounting base, and then slightly tighten a single retention screw (see Installing the CPU heatsink on page 155) as shown in the following figure. CAUTION: Do not scratch the system board while maneuvering the cold plate assembly or you might damage components.
- Page 156 Install the LCS cold plate. Remove the plastic cover from the bottom of the cold plate as shown in the following figure. Figure 5-69 Removing the protective cap Perform one of the following tasks: If you are reusing the original LCS unit, apply thermal compound to the center of the ●...
- Page 157 CPU as shown in the following figure. TIP: Ensure that the HP logo is positioned horizontally as shown in the figure. Figure 5-70 Positioning the LCS cold plate Gently twist the cold plate body until it locks into place in the retention ring as shown in the previous figure.
- Page 158 Carefully tighten the four cold plate retention screws a little at a time in diagonal pairs—first set (1), and then set (2)—to 6 in.-lbs. of torque. CAUTION: Do not overtighten the heatsink screws. If you overtighten them, you might strip the threads in the system board tray.
- Page 159 Connect the LCS pump cable to the system board as shown in the following figure. Figure 5-72 Connecting the LCS pump cable Removing and installing components ENWW...
- Page 160 Install the LCS radiator with attached rear system fan in the chassis. as shown in the following figure. Align the LCS radiator assembly in the chassis as shown in the following figure. TIP: Align the radiator assembly with the rear system fan screw holes in the chassis. Figure 5-73 Aligning the LCS radiator assembly Chapter 5 Replacing components...
- Page 161 Fasten the LCS radiator assembly to the chassis as shown in the following figure. Figure 5-74 Fastening the LCS radiator assembly Removing and installing components ENWW...
- Page 162 Connect the rear system fan cable to the system board as shown in the following figure. Figure 5-75 Connecting the rear system fan cable Chapter 5 Replacing components ENWW...
- Page 163 Install the LCS VR fan in the chassis. Place the LCS VR fan in the chassis so that the fan bracket holes align with the holes in the chassis as shown in the following figure. Figure 5-76 Aligning the LCS VR fan bracket Removing and installing components ENWW...
- Page 164 Fasten the LCS VR fan assembly to the chassis as shown in the following figure. Figure 5-77 Fastening the LCS VR fan Chapter 5 Replacing components ENWW...
- Page 165 Connect the LCS VR fan cable to the system board as shown in the following figure. Figure 5-78 Connecting the LCS VR fan cable Reinstall all removed components and reconnect any cables that have been disconnected. Removing and installing components ENWW...
-
Page 166: Cpu Heatsink
CPU heatsink This section describes how to remove and install a CPU heatsink. Removing the CPU heatsink To remove a heatsink: Power down the workstation (see Predisassembly procedures on page 75). Disconnect power from the workstation (see Predisassembly procedures on page 75). -
Page 167: Installing The Cpu Heatsink
Disconnect the CPU heatsink fan cable from the system board (1), as shown in the following figure. Figure 5-80 Disconnecting the heatsink fan cable Before lifting the heatsink, gently twist the heatsink to break the thermal compound between the CPU and the heatsink. Lift the CPU heatsink out of the chassis (2). - Page 168 Align the four mounting screws with the mounting holes in the system board and carefully place the heatsink on the CPU. Ensure that the heatsink is placed properly with the fan positioned toward the front, facing the memory DIMMs. CAUTION: Do not overtighten the heatsink screws.
-
Page 169: Cpu
This section describes how to remove and install a CPU. Removing a CPU To remove a CPU: Power down the workstation (see Predisassembly procedures on page 75). Disconnect power from the workstation (see Predisassembly procedures on page 75). Remove the side access panel (see Removing the side access panel on page 78). -
Page 170: Installing A Cpu
Installing a CPU NOTE: HP recommends that you do not swap processors (CPUs) from one system board to another. To install a CPU: Power down the workstation (see Predisassembly procedures on page 75). Disconnect power from the workstation (see Predisassembly procedures on page 75). -
Page 171: System Board
System board This section describes replacing the system board. Removing the system board To remove the system board: Power down the workstation (see Predisassembly procedures on page 75). Disconnect power from the workstation (see Predisassembly procedures on page 75). Remove the side access panel (see Removing the side access panel on page 78). -
Page 172: Installing The System Board
TIP: If you leave the heatsink installed, you can grasp it and use it to guide the system board out of the chassis. Installing the system board To install the system board: Insert the system board with the rear chassis side of the board tilted slightly downward. Push back on the board while maintaining downward pressure on the board to clear the release mechanism. -
Page 173: Converting To Desktop Configuration
Converting to desktop configuration This workstation can be operated in the mini-tower or the desktop configuration. Follow these steps to convert to desktop configuration operation: With power removed from the workstation, remove the side access panel (see Removing the side access panel on page 78). - Page 174 On the back of the front bezel, squeeze the HP logo mounting tabs (1), and then press the logo outward (2), as shown in the following figure. Figure 5-87 Rotating the HP logo Rotate the HP logo 90 degrees counterclockwise, and then release the logo and press it back into place in the front bezel.
-
Page 175: Product Recycling
83) and the side access panel (see Installing the side access panel on page 78) when finished. Product recycling HP encourages customers to recycle used electronic hardware, HP original print cartridges, and rechargeable batteries. For information about recycling HP components or products, see http://www.hp.com/go/recycle. Product recycling... -
Page 176: Diagnostics And Troubleshooting
Locating warranty information on page 167 Diagnosis guidelines on page 168 Troubleshooting checklist on page 170 HP troubleshooting resources and tools on page 170 Troubleshooting scenarios and solutions on page 173 Self-troubleshooting with HP Vision Diagnostics on page 184 Diagnostic codes and errors on page 195... -
Page 177: Calling Technical Support
On most models, the serial number and product number labels can be found on the top panel or side of the workstation and at the rear of the workstation. For a listing of all worldwide technical support phone numbers, visit http://www.hp.com/support, select your region, and click Contact HP in the upper-left corner. - Page 178 Each HP Workstation has two unique serial number labels (1) and a Certificate of Authentication (COA) label (2) as shown in the figure below. Figure 6-1 Workstation label locations In general, the serial number labels can be found on the top panel or on the side of the workstation and at the rear of the workstation (your workstation may look different).
-
Page 179: Locating Warranty Information
For additional warranty information: Go to: http://www.hp.com/#Support resources, click on Warranty information. Under Additional Under Select your product, click on Workstations. Workstations, click on HP Z400 Workstation. This displays information about Under Personal warranties, upgrades, extensions. Locating warranty information ENWW... -
Page 180: Diagnosis Guidelines
If you have installed an operating system other than the factory-installed operating system, check ● to be sure that it is supported on your system by visiting http://www.hp.com/go/quickspecs. Verify that the monitor is turned on and the green monitor light is on. Note that not all monitors are ●... -
Page 181: Diagnosis During Operation
Upgrade the BIOS. A new release of the BIOS might have been released that supports new ● features or fixes your problem. For more detailed information, see the troubleshooting chapter in the Maintenance and Service ● Guide at http://www.hp.com/support/workstation_manuals. Diagnosis guidelines ENWW... -
Page 182: Troubleshooting Checklist
7 Help and Support Center functions. This customized utility allows you to access specific information about an HP Workstation such as configuration information by clicking Start > Help and Support. The interface also provides customized help and support links to the HP Web site related to the HP Workstation. -
Page 183: E-Support
Instant Support and Active Chat HP Instant Support is a set of Web-based support tools that automate and speed up the resolution of desktop computing, tape storage, and printing problems. Active Chat enables you to electronically submit a support ticket to HP over the Web. When you submit a support ticket, Active Chat collects information about the computer and pass it to an online support specialist. -
Page 184: Customer Advisories, Customer And Security Bulletins, And Customer Notices
If you have installed an operating system other than the factory-installed operating system, check ● to be sure that it is supported on your system by visiting http://www.hp.com/go/quickspecs. Verify that the monitor is turned on and the green monitor light is on. -
Page 185: Customizing The Monitor Display
Troubleshooting scenarios and solutions This section presents an extensive overview of various troubleshooting scenarios and possible solutions for a Windows-based workstation. NOTE: For Linux troubleshooting information, refer to the HP Workstations for Linux User Manual at http://www.hp.com/support/linux_user_manual. Solving minor problems Table 6-1... - Page 186 Table 6-1 Minor problems (continued) Problem Cause Possible Solution Workstation seems to be Program in use has If possible, use the Windows Task Manager to isolate and frozen. stopped responding to terminate the offending process. commands. Attempt the normal Windows shutdown procedure. Restart the workstation using the power button.
-
Page 187: Solving Power Supply Problems
Table 6-1 Minor problems (continued) Problem Cause Possible Solution CAUTION: Internal components might be powered even when the workstation is off. To prevent damage, disconnect the workstation power cord before you remove a component. Diagnose faulty device To verify the presence of a faulty device, you must disconnect all devices one at a time, removing the graphics card last: Disconnect AC power to the computer. -
Page 188: Testing Power Supply
Testing power supply Before replacing the power supply, use the Built-In Self-Test (BIST) feature to learn if the power supply still works. To test the power supply: Disconnect the AC power. Remove the internal power supply cables from the system board. (You do not need to remove the power supply from the chassis.) If necessary, disconnect the PCIe power cable from the graphics card. -
Page 189: Solving Diskette Problems
Table 6-2 Power supply problems (continued) Problem Cause Solution Replace the device causing the failure Continue adding devices one at a time to verify that all devices are functioning. Verify power supply functionality. Disconnect AC power. Remove the internal power supply cables from the system board. - Page 190 Table 6-3 Diskette problems (continued) Problem Cause Solution Diskette drive cannot write to a Diskette is not formatted. Format the diskette. diskette. Diskette is write-protected. Use another diskette or remove the write protection. Writing to the wrong drive. Verify the drive letter in the path statement. There is not enough space on Use another diskette.
-
Page 191: Solving Hard Drive Problems
Solving hard drive problems Table 6-4 Hard drive problems Problem Cause Solution Hard drive error occurs. Hard disk has bad sectors or Locate and block the usage of bad sectors. If necessary, has failed. reformat the hard disk. If the drive is detected by the BIOS, run DPS Self-test. Right-click Start, select Explore, and select a drive. - Page 192 Table 6-4 Hard drive problems (continued) Problem Cause Solution Nonsystem disk or NTLDR missing System is trying to start from a Remove the diskette from the drive. message. nonbootable diskette. System is trying to start from a Insert a bootable diskette into the drive and restart damaged hard drive.
-
Page 193: Solving Display Problems
Solving display problems Table 6-5 Display problems Problem Cause Solution Blank screen (no video). The cable connections are not Verify the cable connections from the monitor to the correct. workstation and to a working electrical outlet. The monitor is off. Turn the monitor on (LED is on). - Page 194 Monitor cannot display Change the requested resolution. requested resolution. The picture is broken up, rolls,...
-
Page 195: Solving Audio Problems
Solving audio problems Table 6-6 Audio problems Problem Cause Solution Double-click the Speaker icon on the taskbar and use the Sound does not come out of the Software volume control is speaker or headphones. turned down. volume slider to adjust the volume. The external speakers are not Turn on the external speakers. -
Page 196: Solving Printer Problems
Hewlett-Packard Vision Field Diagnostics let you view information about the hardware configuration and perform hardware troubleshooting for HP Desktop and Workstation systems. These tools let you isolate potential issues and determine if problems relate to the operating system or the hardware. These diagnostics run outside the operating system by DVD, CD, or USB flash drive, making them easy to access and use. -
Page 197: Overview
The utility simplifies the process of effectively identifying, diagnosing, and isolating hardware issues. Invoke HP Vision Diagnostics to display the Survey tab. This tab shows the current configuration of the workstation. From the Survey tab, you can access several categories of information about the workstation. -
Page 198: Downloading And Accessing Hp Vision Diagnostics
Downloading and accessing HP Vision Diagnostics Follow these steps to download the HP Vision Diagnostics utility from the HP Web site to a CD, DVD, or USB flash drive. Then use the disk or drive to perform diagnostics on the workstation: Go to http://www.hp.com. -
Page 199: Accessing Hp Vision Diagnostics On The Workstation
If the workstation is booted from a CD, a separate boot CD will be required to use the memory diagnostic. Hence, HP recommends that a USB key be used to boot the diagnostic utilities. It is faster than using a CD, and it accommodates both Memory and Vision diagnostics. - Page 200 Restart the workstation with the with the DVD installed in the optical drive. The workstation boots to the DVD and initiates the memory diagnostic utility. Follow the diagnostic prompts to troubleshoot workstation memory. Chapter 6 Diagnostics and troubleshooting ENWW...
-
Page 201: User Interface
Help — User help about HP Vision Diagnostics. ● There are also some common operations that are part of the utility. They include: Exit Diagnostics button — This button will close HP Vision Diagnostic application and reboot ● your system. Any running test will be aborted. - Page 202 Input Devices — Shows user input devices such as all connected mice and keyboards. ● Memory — Shows system memory information. ● Miscellaneous — List any devices or data that don't belong to any other Category. ● Processors - Shows system processors. ●...
-
Page 203: Test Tab
Memory can not be tested from within the HP Vision Diagnostics application. To test the memory in your workstation, exit HP Vision Field Diagnostic, boot to either the CD or USB flash drive and select HP Memory Test from the boot menu. - Page 204 Choose how you want the test to be executed, either Number of Loops or Total Test Time. When choosing to run the test over a specified number of loops, enter the number of loops to perform. If you want the diagnostic test for a specified time period, enter the amount of time in minutes.
-
Page 205: Status Tab
The Times Failed is the number of times the device has failed a test. ● The Defect Code provides a numerical code for the failure. The error codes are defined in the ● Help tab. The Description section describes the error that the diagnostic test found. ● Self-troubleshooting with HP Vision Diagnostics ENWW... -
Page 206: Help Tab
The Help tab contains a Vision Help section, and a Test Components section. This tab includes search and index features. You may also review the HP End User License Agreement (EULA), as well as the HP Vision Field Diagnostic application version information on this tab. -
Page 207: Saving And Printing Information In Hp Vision Diagnostics
Saving and printing information in HP Vision Diagnostics You can save the information displayed in the HP Vision Diagnostics Survey, History and Errors tabs to a diskette or a USB flash drive. You can not save to the hard drive. The system will automatically create an html file that has the same appearance as the information displayed on the screen. - Page 208 CPU. If fan is plugged in and seated properly, but is not spinning, the problem might be in the CPU fan. Contact HP for assistance. Verify that the fan assembly is properly attached. If problems persist, there might be a problem with the CPU heatsink. Contact HP for assistance.
- Page 209 Five beeps. Reseat DIMMs. Replace DIMMs one at a time to isolate faulty module. Replace third-party memory with HP memory. The problem might be on the system board. Contact HP for assistance. Red Power LED blinks six Pre-video graphics error.
- Page 210 CMOS. pause. Seven beeps. The problem might be on the system board. Contact HP for assistance. Red Power LED blinks eight Invalid ROM based on bad CAUTION:...
-
Page 211: Led Color Definitions
Possible cause Recommended action Red Power LED blinks nine System powers on but does The system board might have a problem. Contact HP for assistance. times, once every second, not start. The CPU might have a problem. Contact HP for assistance. - Page 212 Table 6-9 LED color definitions (continued) LED state LED color System status Flashing Blue System is in Standby. Solid or flashing System has experienced an error. (See POST error messages on page 201.) None No light System is in Hibernate, or is off. Chapter 6 Diagnostics and troubleshooting ENWW...
-
Page 213: Post Error Messages
POST error messages The Power-On Self Text (POST) is a series of diagnostic tests that runs automatically when the workstation is powered on. Audible and visual messages occur before the operating system starts if the POST encounters a problem. POST checks the following items to ensure that the workstation system is functioning properly: Keyboard ●... - Page 214 Windows utilities. Verify that the memory modules are installed properly. If third-party memory has been added, test the memory configuration using HP memory. Verify the memory module type. 201—Memory Error RAM failure. Run the Computer Setup (F10) utility or the Windows utilities.
- Page 215 Table 6-10 POST error messages (continued) Screen message Probable cause Recommended action 213—Incompatible Memory A memory module in the memory Verify the memory module type. Modules socket identified in the error message Insert the DIMM in another memory socket. is missing critical SPD information, or is incompatible with the chipset.
- Page 216 Table 6-10 POST error messages (continued) Screen message Probable cause Recommended action 513—Front Chassis fan not Front fan missing, disconnected, or Reseat the fan cable. detected defective. Reseat the fan. Replace the fan. 514—Memory fan not Memory fan missing, disconnected, or Reseat the fan cable.
- Page 217 Reseat or replace the missing mechanism cable. 920—Fatal error on QPI link X Fatal error detected on QPI link x, Potential system board problem; contact HP Support. where x is 0 or 1. This type of error is identified on the line following the error message.
- Page 218 The microcode update failed. Check the processor Error stepping. stepping to ensure it is a supported stepping. If it is contact, HP Support. 1802—Processor Not The system board does not support the Replace the processor with a compatible one. Supported processor.
-
Page 219: Configuring Raid Devices
RAID configuration, see http://www.hp.com/support/ workstation_manuals. Maximum hard drive configurations This section lists the maximum number of hard drives supported on HP workstations for RAID configurations. NOTE: This section applies to internal workstation configurations that do not use add-in cards and JBODs. -
Page 220: Configuring Sata Raid Devices
BIOS is only used to support serial-attached optical drives. This section does not apply to configuring SATA RAID in the Linux environment. For Linux SATA RAID, refer to the Software RAID in Linux Workstations section in the HP Workstations for Linux User Guide at http://www.hp.com/support/linux_user_manual. -
Page 221: Configuring System Bios
Configuring system BIOS Configure the system BIOS to enable embedded SATA RAID functionality. To enter the system BIOS setup, press F10. Use the arrow keys to highlight the desired language, and then press Enter. Use the arrows to highlight Storage>Storage Options, and then press Enter. Use the up or down arrow key to highlight SATA Emulation. -
Page 222: Creating Raid Volumes
Creating RAID volumes To create RAID volumes, use the Intel Matrix Storage Manager option ROM Configuration utility. To enter the Intel Matrix Storage Manager option ROM Configuration utility, press Ctrl+l when prompted If required, see Deleting RAID volumes on page 215 to make enough physical drives available to create the RAID volume. -
Page 223: Configuring Sas Raid Devices
This section does not apply to configuring SAS RAID in the Linux environment. For Linux SAS RAID information, including supported configurations, refer to Installing and Configuring SAS Hardware RAID on HP Linux Workstations at http://www.hp.com/support/xw8600_manuals. Up to the workstation-specific maximum number of internal SAS hard disk drives ●... -
Page 224: Sas Raid 0 Configuration
SAS RAID 0 configuration Use the following procedure to configure an Integrated Striped (IS) volume with the BIOS-based configuration utility. The procedure assumes that the system has the required disk and disk controllers. Start the LSI Corporation Configuration Utility. During BIOS start up, you are prompted to Press Ctrl-C to start LSI Corp. -
Page 225: Sas Raid 1 Configuration
SAS RAID 1 configuration Use the following procedure to configure an Integrated Mirroring (IM) volume with the BIOS-based configuration utility. The procedure assumes that the system has the required drives and drive controllers. Start the LSI Corporation Configuration Utility. During BIOS start up, you are prompted to Press Ctrl-C to start LSI Corp. -
Page 226: Sas Raid 1E Configuration
SAS RAID 1E configuration Use the following procedure to configure an Integrated Mirroring Extended (IME) volume with the BIOS- based configuration utility. The procedure assumes that the system has the required disk and disk controllers. Start the LSI Corporation Configuration Utility. During BIOS start up, you are prompted to Press Ctrl-C to start LSI Corp. -
Page 227: Deleting Raid Volumes
Deleting RAID volumes Use the LSI Logic Corporation Configuration Utility to delete SAS RAID volumes. Start the LSI Corporation Configuration Utility. During BIOS start up, you are prompted to Press Ctrl-C to start LSI Corp. Configuration Utility. On the Main menu of the BIOS-based configuration utility, use the arrow keys to select an adapter. -
Page 228: Configuring Password Security And Resetting Cmos
Configuring password security and resetting CMOS This chapter describes how to configure password security and to reset CMOS, and includes these topics: Topics Preparing to configure passwords on page 217 Resetting the password jumper on page 218 Clearing and Resetting the CMOS on page 219 Chapter 8 Configuring password security and resetting CMOS ENWW... -
Page 229: Preparing To Configure Passwords
Preparing to configure passwords The Computer Setup (F10) Utility lets you create setup and power-on passwords. There are three possibilities for setting passwords: Define a setup password only ● Define a power-on password only ● Define both ● When defining a setup password only, you cannot enter the setup utility without the password. No password is needed to start from power-on. -
Page 230: Resetting The Password Jumper
Reconnect the external equipment. Reconnect AC power to the workstation. Power on the workstation. Wait for the workstation to display the HP splash screen. Repeat steps 1 through 5. Replace the jumper from pins 1 and 2. Repeat steps 7 through 10. -
Page 231: Clearing And Resetting The Cmos
Clearing and Resetting the CMOS This section describes the steps necessary to successfully clear and reset the CMOS. The CMOS of the workstation stores password information and information about the workstation configuration. Using the CMOS Button To clear CMOS using the Clear CMOS button, use the following procedure: WARNING! To reduce the risk of personal injury from electrical shock and hot surfaces, disconnect the power cord from the wall outlet and let the internal system components cool before you touch them. -
Page 232: Using The Computer Setup (F10) Utility To Reset Cmos
Using the Computer Setup (F10) Utility to Reset CMOS To reset CMOS using the Computer Setup (F10) Utility: Access the Computer Setup (F10) Utility menu. When the Computer Setup message appears in the lower-right corner of the screen, press F10, and then press Enter to bypass the title screen, if necessary. -
Page 233: Appendix A Connector Pins
Connector pins Workstation keyboard Signal Data Unused Ground +5 VDC Clock Unused Workstation mouse Signal Data Unused Ground +5 VDC Clock Unused Workstation Ethernet 10/100– 1000–Mb MbSignal signal (+) Transmit Data TX/RX (-) Transmit Data TX/RX – (+) Receive Data TX/RX Unused TX/RX... - Page 234 Workstation USB Signal +5 VDC - Data + Data Ground Microphone cable (1/8 inch) Signal 1 (Tip) Audio 2 (Ring) Power 3 (Shield) Ground Headphone cable (1/8 inch) Signal 1 (Tip) Audio_Left 2 (Ring) Audio_Right 3 (Shield) Ground Audio line-in cable (1/8 inch) Signal 1 (Tip) Audio_In_Left...
- Page 235 SATA drive Signal Signal Signal Data Cable Power Cable Power Cable 3.3V power 5V power 3.3V power Ground Ground Ground Reserved S5** Ground Ground S6** Ground 12V power Ground 5V power 12V power * S2 and S3 differential signal pair 12V power **S5 and S6 differential signal pair SAS drive...
- Page 236 SAS drive Segment Backplane Plug and receptacle cable receptacles Power segment precharge GROUND GROUND GROUND precharge GROUND READY LED GROUND precharge Signal Signal Signal Red Analog Monitor ID Green Analog DDC Serial Data Blue Analog Horizontal Sync Monitor ID +5 VDC Vertical Sync DDC Serial Clock Appendix A Connector pins...
- Page 237 DVI-I cable Signal Signal T.M.D.S DATA 2- HOT PLUG DETECT T.M.D.S DATA 2+ T.M.D.S DATA 0- T.M.D.S DATA 2/4 SHIELD T.M.D.S DATA 0+ T.M.D.S DATA 4- T.M.D.S DATA 0/5 SHIELD T.M.D.S DATA 4+ 2 T.M.D.S DATA 5- DDC CLOCK T.M.D.S DATA 5+ DDC DATA T.M.D.S CLOCK SHIELD ANALOG VERT.
- Page 238 Display port ML_Lane 1(p) AUX CH(p) ML_Lane 1(n) ML_Lane 2(p) AUX CH(n) Hot Plug Detect ML_Lane 2(n) DP_PWR Return ML_Lane 3(p) DP_PWR Main power cable, P1 Signal Signal Signal +3.3V +5 Vaux +3.3V +12 V-B +12 V-B 12 V-D +3.3V –12V 12 V-D PS_ON_L...
- Page 239 CPU power cable, P3 Color Signal 12V CPU 12V CPU CAUTION: Ensure that you can differentiate between which power cable connects to the PCIe x16 graphics card and which power cable connects to the system board. These two cables have different pin counts and different colors. The PCIe power cable has a 6-pin black connector, and the CPU power cable has an 4-pin white connector.
- Page 240 Internal USB 1 2x5 Signal USB6# USB9# CAUTION: Possible equipment damage. USB6 The 2x5 connector can be mated to either USB9 a wide 2x5 option cable connector or a narrow 1x5 option cable connector. To prevent damage to the connectors, always connect a narrow 1x5 option cable (not keyed) connector to pins 1,3,5, and 7 only of the...
- Page 241 CPU fan Signal +12V TACH1 TACH2 Signal Signal Ground FLP_DIR# FLP_LOWDEN# Ground Tach FLP_STEP# FLP_WDO Ground FLP_STEP# Unused Ground Ground FLP_WRTEN# FLP_INDEX# Ground Ground FLP_TRACK# FLP_MOTOR# Ground Ground FLP_WP# Unused Ground Ground FLP_RD_D# FLP_SEL_A# Ground Ground FLP_HD_SEL# Unused Ground Ground FLP_DSKCHG# ENWW...
- Page 242 Internal serial Signal Signal DTR1# RXD1 +3.3V AUX CTS1# RTS1# DSR1# COM DETECT TXD1 DCD21# -12V Ground +12V Ground Appendix A Connector pins ENWW...
-
Page 243: Appendix B System Board Designators
System board designators This appendix describes the system board designators for this workstation. Designator Silk screen Component MTG1-MTG10 Mounting holes Crisis recovery header/jumper E49 PSWD Clear password header/jumper J9 RJ/USB LAN/DUAL USB J10 QUAD USB Quad rear USB J20 SLOT6 PCI PCI slot J21 SLOT5 PCI PCI slot... - Page 244 Designator Silk screen Component P66 - P67 P66 - P67 SATA Connectors SATA4 - SATA5 P70 CPU0 FAN Primary CPU fan header P93 FRNTFAN Front fan header P94 IOH FAN IOH fan header P124 P124 HLCK Side access panel solenoid lock header XBT1 XBT1 BAT Battery holder...
-
Page 245: Appendix C Routine Care
Routine Care General cleaning safety precautions Never use solvents or flammable solutions to clean the workstation. ● Never immerse any component in water or cleaning solutions; apply any liquids to a clean cloth ● and then use the cloth on the component. Always unplug the workstation before cleaning the keyboard, mouse, or air vents. -
Page 246: Cleaning The Monitor
Clean under a key with a swab moistened with isopropyl alcohol and squeezed out. Be careful ● not to wipe away lubricants necessary for proper key functions. Allow the parts to air dry before reassembly. Use tweezers to remove any fibers or dirt in confined areas. ●... -
Page 247: Appendix D Locating Hp Resources
Locating HP resources This section provides information on the following HP resources for your workstation: Topics Product information on page 236 HP Cool Tools ● Regulatory information ● Accessories ● System board ● Serial number and Certificate of Authenticity labels ●... -
Page 248: Product Information
To access or learn more about these applications, choose one of the following options: Click the HP Cool Tools icon on the desktop, or ● Open the HP Cool Tools folder by selecting Start >... -
Page 249: Product Support
For a listing of all worldwide technical support phone numbers, see http://www.hp.com/support/, select your region, and click Contact HP in the upper-left corner. Business Support Center (BSC) For software/driver downloads, warranty information, single-topic documents, user manuals, or service manuals, see http://www.hp.com/go/bizsupport. -
Page 250: Product Documentation
User Guide and the Maintenance and Service Guide. Product notifications Subscriber's Choice is an HP program that allows you to sign up to receive driver and software alerts, proactive change notifications (PCNs), the HP newsletter, customer advisories, and more. Sign up at http://www.hp.com/go/... -
Page 251: Product Diagnostics
Topic Location Diagnostics tools The HP Vision Field Diagnostics utility can be downloaded from the HP Web site. To use this utility, refer to the appropriate section of the workstation Maintenance and Service Guide. Audible beep and LED code Refer to the appropriate section of the workstation... -
Page 252: Product Updates
To locate the current workstation BIOS on your Microsoft Windows workstation, select Start>Help and Support>Pick a Task>Use Tools to view...>Tools>My Computer Information>View general system information..Operating system For information on operating systems supported on HP workstations, see http://www.hp.com/go/wsos. Appendix D Locating HP resources ENWW... - Page 253 BIOS ROM 31 Updating 19, 23 Specifications 10 System fans 11 Voltages 8 Clearing and resetting CMOS HP Backup and Recovery 27 Product features HP resources ERP compliance mode 14 Computer Setup (F10) Utility Locating 235 Front panel components 6...
- Page 254 Restoring the operating system Restore methods 24 Windows Vista 25 Windows XP 26 Software Ordering 25 Support Locating HP resources 235 Updating the workstation First boot update 21 Updating drivers 23 Updating the BIOS 23 Windows operating system monitor 173...
Need help?
Do you have a question about the Z400 and is the answer not in the manual?
Questions and answers