Table of Contents
Advertisement
Quick Links
To prevent accidents and machine damage, read these
instructions before installation or use. Use the washer only as
instructed in this owner's guide and installation instructions
included with your washer. Keep this guide for future
reference
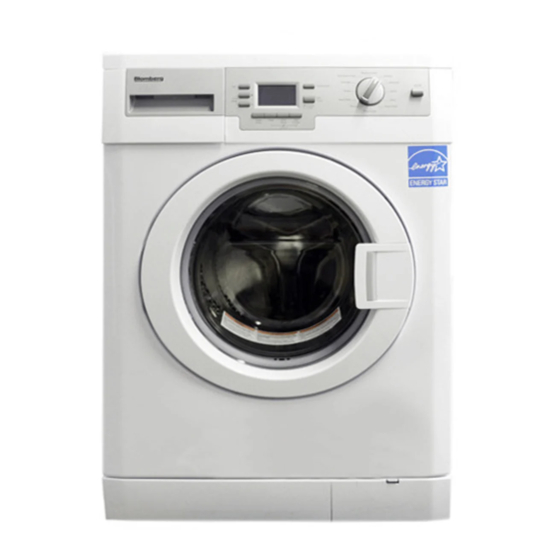
Front-Loading Automatic Washer
WM 87120 NBL00
Owner's Guide & Installation Instructions
As an ENERGY STAR® partner,
BLOMBERG has determined that this
product meets the ENERGY STAR®
guidelines for energy efficiency.
Advertisement
Table of Contents

Related Manuals for Blomberg WM 87120 NBL00


Summary of Contents for Blomberg WM 87120 NBL00
- Page 1 Keep this guide for future reference Front-Loading Automatic Washer WM 87120 NBL00 Owner’s Guide & Installation Instructions As an ENERGY STAR® partner, BLOMBERG has determined that this product meets the ENERGY STAR® guidelines for energy efficiency.
- Page 2 Please read this guide first! Dear Customer, We hope that your product which has been manufactured in modern facilities and passed through a strict quality control procedure will give you the best results. Therefore, we advise you to read through this document carefully before using your product and keep it for future reference.
-
Page 3: Table Of Contents
Detergent Use ....17 9 WARRANTY STATEMENT Detergent Quantity ....17 FOR THE BLOMBERG CLOTHES Detergent Dispenser ... . .17 WASHERS Water Consumption. -
Page 4: Your Washer
Overview 1 - Detergent Dispenser 4 - Control Panel 2 - Loading Door 5 - Filter Cap 3 - Top Lid 6 - Height-adjustable Feet... -
Page 5: Specifications
Specifications Front Loading Automatic Washer Models WM 87120 NBL00 Height (in) / (cm) 33.1 (in) / 84 (cm) Width (in) / (cm) 23.6 (in) / 60 (cm) Depth (in) / (cm) 24.4 (in) / 62 (cm) Net Weight (lbs) / (kg) 168 (Ibs) / 76 (kg) Electricity (V/Hz.) -
Page 6: Important Safety Instructions
Important Safety Instructions • Do not tamper with controls. B WARNING - To reduce the risk of fire, • Do not repair or replace any electric shock or injury to persons part of the appliance or attempt while using your appliance follow any servicing unless specifically basic safety precautions, including recommended in the user- the following: maintenance instructions or in... - Page 7 • Do not operate this appliance if it is materials from the pockets of your damaged, malfunctioning, partially clothing as small items such as coins, disassembled, or has missing or pins etc could severely damage the broken parts, including a damaged appliance. cord or plug. • Do not install and operate the • Store laundry detergents and appliance in places exposed to additives in a cool, dry place out...
- Page 8 • All broken and faulty components, panels and parts must only be replaced with original Blomberg spare parts by a Blomberg Service technician. • Do not force the washer door open when it is locked. The door must be closed any time during the programme cycle.
-
Page 9: Installation Instructions
Installation Instructions • It is not recommended to install and Read this first ! operate the washer on a wooden This washer can be individually installed floor or soft floor. If you have to install in free-standing and built-in installations. your washer on a wooden or frame You can also install your washer with construction floor, the floor must be your dryer as a free-standing or built-in... -
Page 10: Allowable Clearances For Undercounter Installation
Tilt the washer to remove the packaging reinforcement. Remove the packaging reinforcement by pulling the ribbon. Minimum counter width should be 50” (127 cm) for a pair of Blomberg washer & dryer. Custom undercounter installation – Washer & Dryer Removing shipping bolts... -
Page 11: Levelling The Washer
(208-240V, 60Hz) located on the appliance. For this purpose, a junction box (as seen in picture below) must be obtained. Junction box is supplied with Blomberg Clothes Dryer (model no: DV Electrical Connection 16540 NBL00) and it works as a... -
Page 12: Power Supply And Circuit
electric shock. Always unplug the plumber. cable by grasping the plug, not the cord. The washer has two bolted ½’’ water B WARNING – Do not use wet hands supply hoses and ¾’’ female hose when plugging/unplugging the power connections that can be connected to cable. -
Page 13: Drainage
An additional clip etc can be used for connections). safe connection. • Always use genuine “Blomberg” • Drain hose may also be connected to water supply hoses when connecting a minimum 1.26 in (32 mm) diameter with this washer. Old or worn-out stand pipe. -
Page 14: Transportation
checked for any leaks by turning on environmental-friendly disposal of the both faucets. packaging of your appliance. • Drain installation is done properly and Appliance Disposal drain hose is checked and secured to prevent any flooding. A WARNING - Be sure to unplug • Washer is connected the junction the power cable, cut off the plug box which is plugged to a properly and disable the door lock before... -
Page 15: Operating Instructions
Operating Instructions First Use B WARNING – To reduce the risk of fire, electric shock, or injury to persons, Normal wash Permanent Gentle/Delicate read the IMPORTANT SAFETY setting Press or Wrinkle setting INSTRUCTIONS before operating this Resistant setting appliance. Before the first use, Do not wring. -
Page 16: Preparing The Laundry
before or after washing to prevent cycle. Washing results are adversely dye transfer. affected by an overloaded drum. Overloading may also cause wrinkling C Wash heavily and lightly soiled items and abrasion on clothes. separately. Make sure power button is off before C Lint producers (towels, linen etc) and loading the washer. -
Page 17: Detergent Use
Any residual metal items may cause powder detergent is max. 1/3 cup (80 rusting on the rubber seal. ml). Recommended amount of liquid • If there is any water left in rubber seal, detergent is max. 1/4 cup (60 ml). remove with a soft cloth. Light soiling Detergent Use No visible stains or soiling Normal soiling About Detergent... -
Page 18: Water Consumption
Use the detergent manufacturer’s 1/3 cup (80 ml) of bleach and pour it dosing cup and follow the instructions into the special container located in the on the package. right compartment of the dispenser. This container ensures dispensing and If you use a liquid detergent, be sure dilution of bleach during the first rinse to use a HE (High efficiency) detergent of wash cycle. -
Page 19: Selecting A Program And Operating Your Washer
Selecting a Program and Operating Your Washer Control panel 1 - Spin Speed Adjustment Button 2 - Display 3 - Temperature Adjustment Button 4 - Program Selection Knob 5 - On/Off Button 6 - Time Delaying Button (+/-) 7 - Auxiliary Function Buttons 8 - Start/Pause/Cancel Button Display symbols a - Door Locked Symbol... -
Page 20: Turning The Washer On
Turning the washer on bathrobes,garments, T-shirts,sweat- Plug in your washer. Turn the tap on shirts , etc.). You can select wash completely. Check if the hoses are temperature according to the soiling connected tightly. Place the laundry in level and/or care label of items. Sanitary the washer. -
Page 21: Special Programs
rinse cycle. It is recommended for baby There are four temperature options clothes and clothes worn by allergic being cold,warm,hot and extra hot. people. Temperature selectability depends on • Hand wash the type of wash cycle. You can wash your woolen/delicate clothes that bear “hand wash only”... -
Page 22: Program Cycle Selection Table
Program Cycle Selection Table Extra Hot Heavy 145F / 63°C White and colorfast Normal/ items made of cotton 122F / 50°C Heavy Regular/ and linen (towels, 1200 Full • SW,S,R,A,RH Cotton jeans, T-shirts, Hot- Warm Light 91F/ 33°C sweatshirts, work cold clothes) Cold... -
Page 23: Auxiliary Functions
Auxiliary functions • : Selectable Auxiliary Function Selection Buttons * : Automatically selected, not cancellable. - : See program description for maximum load. Selectable options of a wash cycle are extra rinse “R”, super wash “SW”, soak "S", rinse hold "RH" and anti crease “A”. 1. -
Page 24: Time Display
the end of the time delay countdown decreased. process, time delaying symbol • Anti-Crease fades and the washing starts as the With this function ( d), drum movement program duration is displayed. will be lessened to prevent creasing and spinning speed is limited. In addition, Changing the delay time washing is carried out at a higher water If you want to change the time during... -
Page 25: Starting The Program
Starting the Program Changing the selections after the program has started 1. Press Start/Pause/Cancel button to start the program. The selected spin speed and program 2. The start symbol which indicates that temperature fade out. An empty frame the program has started will light up. appears. -
Page 26: Child-Proof Lock
When the electricity is off in door locked position, door will keep the locked position for two minutes. After two minutes, door is allowed to open. Ending the program through canceling “Start/Pause/Cancel” button is pressed for 3 seconds to cancel the In case the door is not locked, “door”... -
Page 27: Preparation
Preparation 1. Turn on both hot and cold water Canceling a program faucets fully. Check and be sure the 1. Press and hold the `Start/Pause/ water connection is tight. Cancel` button for about 3 seconds; 2. Place the laundry in the drum. the “Start” symbol will start flashing. 3. Add laundry additives (e.g. detergent, fabric softener,bleach). Starting 1. Press the “On/Off” button. - Page 28 4. Press “Start/Pause/Cancel” button. After the program is finished Program indicator symbols on the screen will light up after the program is finished. “End” will appear on the screen. 1. Open the loading door and remove the laundry when the door locked symbol on the display fades out. 2. Press the “On/Off” button .
-
Page 29: User Maintenance Instructions
User maintenance instructions rubber seal. A WARNING – Be sure to unplug the power cable before attempting maintenance or cleaning of your appliance to minimize the risk of electric shock. Cleaning detergent dispenser Remove any powder/liquid residue buildup in the dispenser drawer. To do this;... -
Page 30: Cleaning The Water Inlet Strainers
painted and plastic parts. filter. Cleaning the water inlet In addition, water may have to be strainers drained off completely in the following cases: There is a strainer at the end of each • before transporting the appliance water inlet valve at the back side of (e.g. -
Page 31: Descaling The Washer
Take the manufacturer’s instructions into account if you are using a descaling agent. Descaling agents may contain materials that are hazardous for washer components. Use descaling agents compatible for use in clothes washers. When using a powder descaling agent, add 1 cup to the main wash • Place a large container at the end of compartment of the dispenser and the hose. -
Page 32: Troubleshooting
Troubleshooting Problem Cause Explanation / Suggestion There may be some water in your It is not harmful to your washer. You appliance when you receive it. should run a “sanitary” cycle without Water in the washer. This is from the quality control any clothes and laundry additives process and is normal. - Page 33 Be sure the strainers and rubber Inlet hose connections may be seals of the water inlet hoses are leaking. solid and securely fitted. End of the drain hose may be Tightly attach the drain hose to the loosely inserted into the waste waste pipe or sink (See “Installation pipe or sink.
- Page 34 The washer will wait until there is a sufficient amount of water, which Water pressure may be low. may lengthen the cycle time to avoid poor washing results due to insufficient water. Cycle time is lengthened to avoid Supply voltage may be low. poor washing results when the supply voltage is low.
- Page 35 The automatic spin correction system might have been activated due to the unbalanced distribution of the laundry in the drum. The laundry in the drum may be It continuously spins. There may be an imbalance of tangled up too much. Laundry Remaining time does not load in the drum.
- Page 36 The automatic spin correction system might have been activated due to the unbalanced distribution of the laundry in the drum. No spinning is performed when the laundry is There may be an imbalance of not evenly distributed in the drum load in the drum.
- Page 37 Select the proper program cycle Wrong program cycle and and temperature for the laundry to temperature might have been be washed (See “Laundry Tips” & selected. “Program Cycle Selection”). Use the recommended amount of Using insufficient amount of HE detergent appropriate for water detergent. hardness and soil level of laundry. Use liquid detergent for cold wash cycle for good wash results.
- Page 38 If the water hardness is higher, using insufficient amount of detergent can Using insufficient amount of cause the laundry to become stiff detergent. in time. Use appropriate amount of detergent according to the water hardness. You may have added too much softener beyond max fill line.
- Page 39 There may be an imbalance of laundry in the machine. The laundry in the drum may be tangled up too much. Laundry should be Intermediate spins may be rearranged and re-spun. No spinning skipped. is performed when the laundry is not evenly distributed in the drum to prevent any damage to the appliance and to its environment.
- Page 40 Stop the program cycle (See Clanking noise in the Metal objects such as coins, pins “Cancelling a Program”) ,check the drum. may be in the drum. drum for any foreign objects. Disconnect inlet hoses from the Water inlet hoses or valves may valves. Clean inlet strainers and valve be clogged.
- Page 41 The plug might not be plugged in the mains outlet. Check the plug. Washer does work. Fuse may have blown. Check the fuse / circuit breaker. Nothing is displayed on Power may be cut off. Check the supply power. the screen. The “On/Off” button might Press this button.
-
Page 42: Warranty Statement For The Blomberg Clothes Washers
WARRANTY STATEMENT FOR THE BLOMBERG CLOTHES WASHERS The warranties provided by Blomberg in these Disclaimers of warranties and exclusions: statements only apply to Blomberg washers Warranty does not cover service costs by an sold to the original purchaser or homeowner authorized service agent to correct installation, in the US and Canada. -
Page 43: How To Get Service
HOW TO GET SERVICE Please contact the Distributor for your State or Province as listed on the Distributor Contact List, or call our Toll Free Number at 1 800 459 9848 for direction to an Authorized Blomberg Service Agent.