Table of Contents
Advertisement
Quick Links
Advertisement
Table of Contents

Related Manuals for Blomberg LWF411452AW


Summary of Contents for Blomberg LWF411452AW
- Page 1 Washing Machine User manual LWF411452AW...
- Page 2 Please read this user manual first! Dear Customer, Thank you for preferring a Blomberg product. We hope that you get the best results from your product which has been manufactured with high quality and state-of-the-art technology. Therefore, please read this entire user manual and all other accompanying documents carefully before using the product and keep it as a reference for future use.
-
Page 3: Table Of Contents
TABLE OF CONTENTS 1 General safety instructions 1.1 Life and property safety ---------------------------------------------------------------------------5 1.2 Children's safety -----------------------------------------------------------------------------------5 1.3 Electrical safety ------------------------------------------------------------------------------------6 1.4 Hot surface safety ---------------------------------------------------------------------------------7 2 Important instructions for the environment 2.1 Compliance with WEEE Directive ------------------------------------------------------------------7 2.2 Package information ------------------------------------------------------------------------------7 3 Intended use 4 Your product 4.1 Overview -------------------------------------------------------------------------------------------8... - Page 4 TABLE OF CONTENTS 4.6 Operating the product ----------------------------------------------------------------------------22 4.6.1 Control panel ----------------------------------------------------------------------------------------------22 4.6.2 Display symbols ------------------------------------------------------------------------------------------22 4.6.3 Programme and consumption table ---------------------------------------------------------------------23 4.6.4 Programme selection ------------------------------------------------------------------------------------25 4.6.5 Programmes ----------------------------------------------------------------------------------------------25 4.6.6 Temperature selection-----------------------------------------------------------------------------------28 4.6.7 Spin speed selection -------------------------------------------------------------------------------------29 4.6.8 Auxiliary function selection ------------------------------------------------------------------------------30 4.6.8.1 Auxiliary functions-----------------------------------------------------------------------------------31 4.6.8.2 Functions/Programmes Selected by Pressing the Function Keys for 3 Seconds ----------------32 4.6.9 End Time --------------------------------------------------------------------------------------------------33...
-
Page 5: General Safety Instructions
General safety instructions This section includes security instructions which may help prevent the injuries and material damage risks. All kinds of warranties shall be invalid if these instructions are not observed. 1.1 Life and property safety Never place the product on a carpet-covered floor. Electrical parts will get overheated since air cannot circulate from under the device. -
Page 6: Electrical Safety
Packaging materials may be dangerous for children. Keep packaging materials in a safe place away from reach of children. Electrical products are dangerous for children. Keep children away from the product when it is in use. Do not allow them to play with the product. -
Page 7: Hot Surface Safety
1.4 Hot surface safety While washing the laundry at high temperatures, the loading door glass will get hot. Considering this fact, during the washing operation keep children away from the loading door of the product to prevent them touching it. Important instructions for the environment 2.1 Compliance with WEEE Directive This product complies with EU WEEE Directive (2012/19/EU). -
Page 8: Your Product
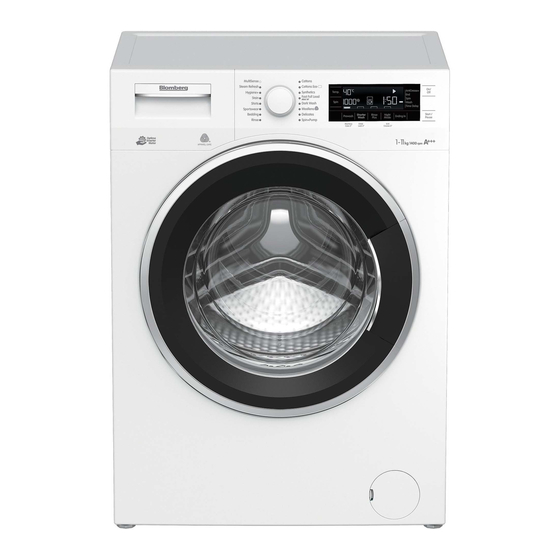
Your product 4.1 Overview 1- Power cable 2- Top panel 3- Control panel 4- Drain hose 5- Loading door 6- Filter cap 7- Adjustable feet 8- Detergent drawer 8 / EN Washing Machine / User’s Manual... -
Page 9: Package Contents
4.2 Package Contents 9- Power cable 10- Drain hose 11- Transportation safety bolts* 12- Mains water inlet hose (One of the following filter types is used for the mains hose connection.) a- Electronic water shut-off b- Mechanical water shut-off c- Standard 13- Liquid detergent container** 14- User Manual 15- Blind plug***... -
Page 10: Technical Specifications
4.3 Technical specifications Complying Commission Delegated Regulation (EU) No 1061/2010 Supplier name or trademark Blomberg Model name LWF411452AW Rated capacity (kg) Energy efficiency class / Scale from A+++ (Highest Efficiency) to D (Lowest Efficiency) A+++ Annual Energy Consumption (kWh) Energy consumption of the standard 60°C cotton programme at full load (kWh) 1,270 Energy consumption of the standard 60°C cotton programme at partial load (kWh) -
Page 11: Installation
4.4 Installation • Preparation of the location and electrical, tap water and waste water installations at the place of installation is the customer's responsibility. • Make sure that the water inlet and discharge hoses as well as the power cable are not folded, pinched or crushed while pushing the product into its place after installation or cleaning procedures. -
Page 12: Removing The Transportation Locks
4.4.3 Removing the transportation locks Loose all bolts with an appropriate wrench until they turn freely. Remove the transport safety bolts by rocking them slightly. Insert the plastic covers from the bag containing the user manual into the openings on the rear panel. -
Page 13: Connecting The Drain Hose To The Drain
4.4.5 Connecting the drain hose to the drain • Attach the end of the drain hose directly to the waste water drain, lavatory or bathtub. CAUTION: Your drain house will be flooded if the hose comes out of its housing during water discharge. -
Page 14: Electrical Connection
4.4.7 Electrical connection Connect the product to a grounded outlet protected by a 13 A fuse. Our company shall not be liable for any damages that will arise when the product is used without grounding in accordance with the local regulations. •... -
Page 15: Initial Use
Important Fitting a different plug As the colours of the wires in the mains lead of this appliance may not correspond with the coloured markings identifying the terminals on your plug, proceed as follows: Connect the green - yellow or green (earth) wire to the terminal in the plug marked ‘E’... -
Page 16: Preparation
4.5 Preparation 4.5.1 Sorting the laundry * Sort laundry according to type of fabric, colour, and degree of soiling and allowable water temperature. * Always obey the instructions given on the garment tags. LAUNDRY WASH SYMBOLS Symbols for washing on machine WASH Maximum... -
Page 17: Preparing Laundry For Washing
4.5.2 Preparing laundry for washing • Laundry items with metal attachments such as, underwiring, belt buckles or metal buttons will damage the product. Remove the metal pieces or wash the clothes by putting them in a laundry bag or pillow case. •... -
Page 18: Loading The Laundry
4.5.4 Loading the laundry 1. Open the laundry cover. 2. Put the laundry items into the product in a loose manner. 3. Push and close the loading cover until you hear the locking sound. Ensure that no items are caught in the door. The loading door is locked while a programme is running. The door can only be opened a while after the programme comes to an end. - Page 19 Choosing the detergent type Detergent type to be used depends on the fabric type and colour. • Use different detergents for coloured and white laundry. • Wash your delicate clothes only with special detergents (liquid detergent, wool shampoo, etc.) used solely for delicate clothes. •...
- Page 20 Using gel and tablet detergent • If the gel detergent thickness is fluidal and your product does not contain a special liquid detergent cup, put the gel detergent into the main wash detergent compartment during first water intake. If your product contains a liquid detergent cup, fill the detergent into this cup before starting the programme.
-
Page 21: Tips For Efficient Washing
4.5.7 Tips for efficient washing Clothes Delicates/ Light Colours and Black/Dark Colours Woollens/ Whites Colours Silks (Recommended (Recommended (Recommended (Recommended temperature temperature temperature range temperature range range based on range based on based on soiling level: based on soiling level: soiling level: cold soiling level: cold 40-90 o C) -
Page 22: Operating The Product
4.6 Operating the product 4.6.1 Control panel MultiSense Cottons Steam Refresh Cottons Eco AntiCrease+ Synthetics Temp. Hygiene+ Fast Full Load Stain Spin Mini 14’ Spin Wash Dark Wash Shirts Time Delay Sportswear Woollens Bedding Delicates Start / Shorter Rinse Night Prewash Ending In Pause... -
Page 23: Programme And Consumption Table
4.6.3 Programme and consumption table Auxiliary functions Selectable Programme temperature range °C 2,25 1400 • • • • • Cold-90 Cottons 1,40 1400 • • • • • Cold-90 1,10 1400 • • • • • Cold-90 60** 1,270 1400 Cold-60 Cottons Eco 60**... - Page 24 The auxiliary functions in the table may vary according to the model of your machine. Water and power consumption may vary subject to the changes in water pressure, water hardness and temperature, ambient temperature, type and amount of laundry, selection of auxiliary functions and spin speed, and changes in electric voltage.
-
Page 25: Programme Selection
4.6.4 Programme selection 1 Determine the programme suitable for the type, quantity and soiling level of the laundry in accordance with "Programme and consumption table". Programmes are limited with the highest spin speed appropriate for that particular type of fabric. When selecting a programme, always consider the type of fabric, colour, degree of soiling and permissible water temperature. - Page 26 "Woolens programme of this machine is approved by “The Woolmark Company” for washing machine-washable woolen products provided that the products are washed in accordance with the instructions on the product tag and the instructions published by the manufacturer of this machine. M1422" In UK, Ireland, Hong Kong and India, the Woolmark trademark is a Certification trademark.
- Page 27 • Steam Refresh Use this programme to reduce the creases and ironing times of a small amount of unspotted cotton, synthetic or mixed laundry. When this programme is selected, it is normal to hear boiling noises since the steam generator boils water to produce steam. •...
-
Page 28: Temperature Selection
• Sportswear You can use this programme to wash sports and outdoors garments that contain cotton/ synthetics mix and water repellent covers such as gore-tex etc. It makes sure your garments are washed gently thanks to special rotating movements. • Stain The machine has a special stain programme which enables the removal of different types of stains in the most effective way. -
Page 29: Spin Speed Selection
88:88 1888 Press the Temperature Adjustment button to change the temperature. Temperature will decrease by steps of 10 °C. Finally, “-” symbol indicating the cold wash option appears on the display. 88:88 1888 No change can be made in programmes where temperature adjustment is not allowed. You can also change the temperature after the washing starts. -
Page 30: Auxiliary Function Selection
This function holds the laundry in the final rinsing water. 88:88 If you want to spin your laundry after the Rinse Hold function: - Adjust the Spin Speed. - Press Start / Pause / Cancel button. The programme will resume. Machine drains the water and spins the laundry. -
Page 31: Auxiliary Functions
Also the frames of the auxiliary function suitable for the current programme after the washing has started remains illuminated. You can select or cancel the auxiliary functions whose frames are illuminated. If the wash cycle has reached a point where you cannot select the auxiliary function, the function's frame turns off. -
Page 32: Functions/Programmes Selected By Pressing The Function Keys For 3 Seconds
4.6.8.2 Functions/Programmes Selected by Pressing the Function Keys for 3 Seconds • Machine Care Press and hold the 1st auxiliary function key for 3 seconds to select the programme. Use regularly (once in every 1-2 months) to clean the drum and provide the required hygiene. -
Page 33: End Time
4.6.9 End Time Time display Remaining time for the completion of the programme while it is running is displayed as “01:30” in hours and minutes format. Programme time may differ from the values in section "Programme and consumption table" depending on the water pressure, water hardness and temperature, ambient temperature, amount and the type of laundry, auxiliary functions selected and the changes at the mains voltage. -
Page 34: Starting The Programme
4.6.10 Starting the programme 1 Press Start / Pause button to start the programme. 2 The Start / Pause button's light which was off before starts to illuminate steadily now, indicating that the programme has started. 88:88 1888 3 Loading door is locked. The door lock symbol appears on the display after the loading door is locked. -
Page 35: Cancelling The Programme
Switching the machine to pause mode: Press the Start / Pause button to switch the machine to pause mode. Pause symbol will flash on the display. 88:88 1888 Changing the programme selection after programme has started: The programme change is not allowed when the current programme is running. You can select the new programme after switching the current programme to pause mode. -
Page 36: Maintenance And Cleaning
4.7 Maintenance and cleaning Service life of product extends and frequently experienced problems will be reduced if it is cleaned at regular intervals. 4.7.1 Cleaning the detergent drawer Clean the detergent drawer at regular intervals (every 4-5 washing cycles) as shown below in order to prevent accumulation of powder detergent in time. -
Page 37: Cleaning The Water Intake Filters
4.7.4 Cleaning the water intake filters There is a filter at the end of each water intake valve at the rear of the product and also at the end of each water intake hose where they are connected to the tap. These filters prevent foreign substances and dirt in the water to enter the product. - Page 38 In order to clean the dirty filter and discharge the water: 1 Unplug the product to cut off the supply power. CAUTION: Temperature of the water inside the product may rise up to 90 ºC. To avoid the burning risk, clean the filter after the water inside the product is cooled down. 2.
-
Page 39: Troubleshooting
Troubleshooting Problem Reason Solution Programme does not start • Press the Start / Pause / Cancel Start / Pause / Cancel button was not pressed. button. after closing the door • Reduce the amount of laundry and It may be difficult to close the loading door in case make sure that the loading door is of excessive loading. - Page 40 Problem Reason Solution Washing takes longer Water pressure is low. • Product waits until taking in adequate amount of water to prevent poor time than specified in the washing quality due to the decreased manual.(*) amount of water. Therefore, the washing time extends.
- Page 41 Problem Reason Solution Washing performance is Insufficient amount of detergent has been used • Use the recommended amount of detergent appropriate for water over a long period of time. poor: Laundry turns hardness and the laundry. Grey. (**) • Select the proper temperature for the Washing was made at low temperatures for a laundry to be washed.
- Page 42 Problem Reason Solution It does not rinse well. • Use a detergent appropriate for The amount, brand and storage conditions of the detergent used are inappropriate. the washing machine and your laundry. Keep detergents closed in an environment free of humidity and do not expose them to excessive temperatures.
- Page 43 Problem Reason Solution Detergent residue in the Detergent is put in wet drawer. • Dry the detergent drawer before putting in detergent. detergent drawer. (**) • Keep detergents closed in an Detergent has become damp. environment free of humidity and do not expose them to excessive temperatures.
- Page 44 Repairs necessary as a direct or indirect result of: Accidental damage, misuse or abuse of a product. An attempted repair of a product by anyone other than a Blomberg Approved Engineer (the “Engineer”). Installation or use of a product where such installation or use fails to meet the requirements contained in this guarantee or the User Instructions Booklet.
- Page 45 Optional extras, where available (i.e. extendable feet) are supplied on a chargeable basis only. Does Blomberg offer replacements? This is a repair-only guarantee. On occasion the Manufacturer may at its sole discretion, replace your product with a new product instead of carrying out a repair. Where a replacement is offered, this would normally be an identical model, but when this is not possible, a model of similar specification will be provided.
- Page 46 Will there be any charge for the repairs? It is your responsibility to provide evidence to the Engineer that your product is covered by this guarantee with a proof of purchase. The Manufacturer reserves the right to charge for the reasonable cost of any service call if: ...
- Page 47 Should you experience any difficulty in obtaining service contact the Blomberg Customer Helpline on Tel: 0333 207 9870 or e-mail: customerservice@support.Blomberguk.com...
- Page 48 www.blomberginternational.com info@blomberginternational.com 22- 2 2- 2-1 2 05 6323 Document Number 2...