Table of Contents
Advertisement
Quick Links
Advertisement
Table of Contents

Related Manuals for Draytek VigorAP 710


Summary of Contents for Draytek VigorAP 710
- Page 1 VigorAP 710 User’s Guide...
- Page 2 VigorAP 710 User’s Guide...
- Page 3 ’ ’ Version: 1.0 Firmware Version: V1.1.0 (For future update, please visit DrayTek web site) Date: February 24, 2014 VigorAP 710 User’s Guide...
- Page 4 Web registration is preferred. You can register your Vigor modem via Owner http://www.draytek.com. Firmware & Tools Due to the continuous evolution of DrayTek technology, all modems will be regularly Updates upgraded. Please consult the DrayTek web site for more information on newest firmware, tools and documents.
-
Page 5: Federal Communication Commission Interference Statement
Product: VigorAP 710 DrayTek Corp. declares that VigorAP 710 is in compliance with the following essential requirements and other relevant provisions of R&TTE Directive 1999/5/EEC, ErP 2009/125/EC and RoHS 2011/65/EU. The product conforms to the requirements of Electro-Magnetic Compatibility (EMC) Directive 2004/108/EC by complying with the requirements set forth in EN55022/Class B and EN55024/Class B. - Page 6 VigorAP 710 User’s Guide...
-
Page 7: Table Of Contents
3.4.6 WMM Configuration ......................39 3.4.7 Station List ........................41 3.5 Wireless LAN Settings for AP Bridge-Point to Point/AP Bridge-Point to Multi-Point Mode .. 42 3.5.1 General Setup......................... 42 3.5.2 AP Discovery ........................45 3.5.3 WDS AP Status ......................46 VigorAP 710 User’s Guide... - Page 8 4.2 Checking If the Network Connection Settings on Your Computer Is OK or Not ....90 4.3 Pinging the Modem from Your Computer................92 4.4 Backing to Factory Default Setting If Necessary ..............93 4.5 Contacting Your Dealer ......................94 VigorAP 710 User’s Guide viii...
-
Page 9: Preface
Thank you for purchasing this VigorAP 710, the concurrent dual band wirelessaccess point offering high-speed data transmission. With this high cost-efficiency VigorAP 710, computers and wireless devices which are compatible with 802.11n/802.11a can connect to existing wired Ethernet network via this VigorAP 710, at the speed of 300Mbps. -
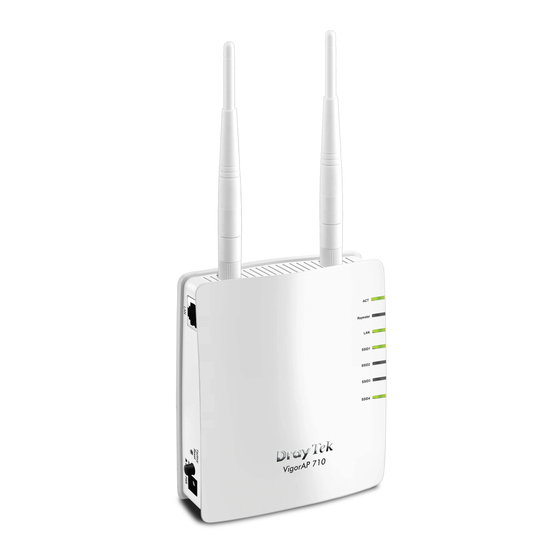
Page 10: Led Indicators And Connectors
WPS. When the orange LED blinks with 1 second cycle for 2 minutes, it means that the AP is waiting for wireless client to connect with it. VigorAP 710 User’s Guide... - Page 11 Restore the default settings. Usage: Turn on the router. Press the button and keep for more than 6 seconds. Then the router will restart with the factory default configuration. PWR: Connecter for a power adapter. ON/OFF: Power switch. VigorAP 710 User’s Guide...
-
Page 12: Hardware Installation
This section will guide you to install the VigorAP 710 through hardware connection and configure the device’s settings through web browser. Before starting to configure VigorAP 710, you have to connect your devices correctly. Connect a computer to VigorAP710. Connect the A/C power adapter to the wall socket, and then connect it to the PWR connector of the access point. -
Page 13: Network Configuration
After the network connection is built, the next step you should do is setup VigorAP 710 with proper network parameters, so it can work properly in your network environment. Before you can connect to the access point and start configuration procedures, your computer must be able to get an IP address automatically (use dynamic IP address). - Page 14 Then, select Internet Protocol Version 4 (TCP/IPv4) and click Properties. Under the General tab, click Use the following IP address. Then input the following settings in respective field and click OK when finish. IP address: 192.168.1.9 Subnet Mask: 255.255.255.0 VigorAP 710 User’s Guide...
-
Page 15: Windows 2000 Ip Address Setup
Area Connection, and Local Area Connection Properties window will appear. Select Internet Protocol (TCP/IP), then click Properties. Select Use the following IP address, then input the following settings in respective field and click OK when finish. IP address: 192.168.1.9 Subnet Mask: 255.255.255.0 VigorAP 710 User’s Guide... -
Page 16: Windows Xp Ip Address Setup
Connections, and then double-click Local Area Connection, Local Area Connection Status window will appear, and then click Properties. Select Use the following IP address, then input the following settings in respective field and click OK when finish: IP address: 192.168.1.9 Subnet Mask: 255.255.255.0. VigorAP 710 User’s Guide... -
Page 17: Windows Vista Ip Address Setup
Connection Properties window will appear, select Internet Protocol Version 4 (TCP / IPv4), and then click Properties. Select Use the following IP address, then input the following settings in respective field and click OK when finish: IP address: 192.168.1.9 Subnet Mask: 255.255.255.0. VigorAP 710 User’s Guide... -
Page 18: Accessing To Web User Interface
IP address of the computer to be the same subnet as the default IP address of VigorAP 710 192.168.1.2. For the detailed information, please refer to the later section - Trouble Shooting of the guide. -
Page 19: Changing Password
Enter the new login password on the field of Password. Then click OK to continue. Now, the password has been changed. Next time, use the new password to access the Web User Interface for this modem. VigorAP 710 User’s Guide... -
Page 20: Quick Start Wizard
There are six operation modes for wireless connection. Settings for each mode are different. Wireless Mode At present, VigorAP 710 can connect to 11b only, 11g only, 11n only, Mixed (11b+11g), Mixed (11g+11n) and Mixed (11b+11g+11n) stations simultaneously. Simply choose Mixed (11b+11g+11n) mode. - Page 21 Station List provides the knowledge of connecting wireless clients now along with its status code. Click this button to open the AP Discovery dialog. VigorAP 710 AP Discovery can scan all regulatory channels and find working APs in the neighborhood.
-
Page 22: Configuring 2.4Ghz Wireless Settings Based On The Operation Mode
Select WEP, TKIP or AES as the encryption algorithm. Type the Security key number if required. Type the peer MAC address for the access point that VigorAP Peer MAC Address 710 connects to. VigorAP 710 User’s Guide... - Page 23 Select WEP, TKIP or AES as the encryption algorithm. Type the Security key number if required. Type the peer MAC address for the access point that VigorAP Peer MAC Address 710 connects to. VigorAP 710 User’s Guide...
- Page 24 LAN-A is specified for connection. Select WEP, TKIP or AES as the encryption algorithm. Type the Security key number if required. Type the peer MAC address for the access point that VigorAP Peer MAC Address 710 connects to. VigorAP 710 User’s Guide...
- Page 25 5 ASCII characters or 10 hexadecimal values in 64-bit encryption level, or restricted to 13 ASCII characters or 26 hexadecimal values in 128-bit encryption level. The allowed content is the ASCII characters from 33(!) to 126(~) except '#' and ','. VigorAP 710 User’s Guide...
- Page 26 Security Mode. WPA2/PSK Select TKIP or AES as the algorithm for WPA. Pass Phrase It is available when WPA/PSK or WPA2/PSK is selected. After finishing this web page configuration, please click Next to continue. VigorAP 710 User’s Guide...
-
Page 27: Configuring 2.4Ghz Security Settings
VigorAP 710 offers 2.4GHz wireless connection capability. You can setup 2.4GHz features in Quick Start Wizard first. Available settings are explained as follows: Item Description Mode There are several modes provided for you to choose. Disable - The encryption mechanism is turned off. - Page 28 Disable - Disable the WEP Encryption. Data sent to the AP will not be encrypted. Enable - Enable the WEP Encryption. Such feature is available for WEP/802.1x mode. After finishing this web page configuration, please click Next to continue. VigorAP 710 User’s Guide...
-
Page 29: Finishing The Wireless Settings Wizard
RX Packets Displays the total number of received packets at the LAN interface. TX Bytes Displays the total transmitted size at the LAN interface. RX Bytes Displays the total number of received size at the LAN interface. VigorAP 710 User’s Guide... - Page 30 VigorAP 710 User’s Guide...
-
Page 31: Advanced Configuration
Open a web browser on your PC and type http://192.168.1.2. The window will ask for typing username and password. Please type “admin/admin” on Username/Password for administration operation. Now, the Main Screen will appear. Be aware that “Admin mode” will be displayed on the bottom left side. VigorAP 710 User’s Guide... -
Page 32: Operation Mode
AP Bridge-Point to This mode can establish wireless connection with another Point VigorAP 710 using the same mode, and link the wired network which these two VigorAP 710s connected together. Only one access point can be connected in this mode. -
Page 33: Lan
Default Gateway In general, it is not really necessary to specify a gateway for VigorAP 710. However, if it is required, simply type an IP address as the gateway for VigorAP 710. It will be convenient for the access point acquiring more service (e.g., accessing NTP server) from Vigor router. - Page 34 ISP often provides you more than one DNS Server. If your ISP does not provide it, the modem will automatically apply default secondary DNS Server IP address: 194.98.0.1 to this field. After finishing this web page configuration, please click OK to save the settings. VigorAP 710 User’s Guide...
-
Page 35: General Concepts For Wireless Lan
In an Infrastructure Mode of wireless network, VigorAP 710 plays a role as an Access Point (AP) connecting to lots of wireless clients or Stations (STA). All the STAs will share the same Internet connection via VigorAP 710. - Page 36 Start PBC button or using PIN Code. On the side of VigorAP 710 series which served as an AP, press WPS button once on the front panel of VigorAP 710 or click Start PBC on web configuration interface. On the side of a station with network card installed, press Start PBC button of network card.
-
Page 37: Wireless Lan Settings For Ap Mode
Note: The Wireless LAN settings will be changed according to the Operation Mode selected in section 3.1. By clicking the General Setup, a new web page will appear so that you could configure the SSID and the wireless channel. Please refer to the following figure for more information. VigorAP 710 User’s Guide... - Page 38 Internet through Vigor router. The number you can set is from 3 to 64. Mode At present, VigorAP 710 can connect to 11b only, 11g only, 11n only, Mixed (11b+11g), Mixed (11g+11n) and Mixed (11b+11g+11n) stations simultaneously. Simply choose Mixed (11b+11g+11n) mode.
- Page 39 Note: Vigor N61 wireless adapter supports this function. Therefore, you can use and install it into your PC for matching with Packet-OVERDRIVE (refer to the following picture of Vigor N61 wireless utility window, choose Enable for TxBURST on the tab of Option). VigorAP 710 User’s Guide...
- Page 40 Antenna VigorAP 710 can be attached with two antennas to have good data transmission via wireless connection. However, if you have only one antenna attached, please choose 1T1R. The default setting is the maximum (100%). Lower down the Tx Power value may degrade range and throughput of wireless.
-
Page 41: Security
PSK. The WPA encrypts each frame transmitted from the radio using the key, which either PSK (Pre-Shared Key) entered manually in this field below or automatically negotiated via 802.1x authentication. WEP/802.1x - The built-in RADIUS client feature enables VigorAP 710 User’s Guide... - Page 42 VigorAP 710 to assist the remote dial-in user or a wireless station and the RADIUS server in performing mutual authentication. It enables centralized remote access authentication for network management. The WPA encrypts each frame transmitted from the radio using the key, which either PSK (Pre-Shared Key) entered manually in this field below or automatically negotiated via 802.1x authentication.
- Page 43 Available settings are explained as follows: Item Description Use internal RADIUS There is a RADIUS server built in VigorAP 710 which is used Server to authenticate the wireless client connecting to the access point. Check this box to use the internal RADIUS server for wireless security.
-
Page 44: Access Control
Choose Blocked MAC address filter, so that all of the devices with the MAC addresses listed on the MAC Address Filter table will be blocked and cannot access into VigorAP 710. MAC Address Filter Display all MAC addresses that are edited before. -
Page 45: Wps
VigorAP 710 will wait for WPS requests from wireless clients about two minutes. The WPS LED on VigorAP 710 will blink fast when WPS is in progress. It will return to normal condition after two minutes. (You need to... -
Page 46: Ap Discovery
(You need to setup WPS within two minutes). VigorAP 710 can scan all regulatory channels and find working APs in the neighborhood. Based on the scanning result, users will know which channel is clean for usage. Also, it can be used to facilitate finding an AP for a WDS link. -
Page 47: Wmm Configuration
It means transmission opportunity. For WMM categories of Txop AC_VI and AC_VO that need higher priorities in data transmission, please set greater value for them to get highest transmission opportunity. Specify the value ranging from 0 to 65535. VigorAP 710 User’s Guide... - Page 48 It is an abbreviation of Admission control Mandatory. It can restrict stations from using specific category class if it is checked. Note: VigorAP 710 provides standard WMM configuration in the web page. If you want to modify the parameters, please refer to the Wi-Fi WMM standard specification.
-
Page 49: Station List
Access Control. General – Display general information (e.g., MAC Address, General/Advanced SSID, Auth, Encrypt, TX/RX Rate) for the station. Advanced – Display more information (e.g., AID, PSM, WMM, RSSI PhMd, BW, MCS, Rate) for the station. VigorAP 710 User’s Guide... -
Page 50: Wireless Lan Settings For Ap Bridge-Point To Point/Ap Bridge-Point To Multi-Point Mode
Point-to Multi-Point Mode allows VigorAP 710 to connect up to four VigorAP 710s which uses the same mode. All wired Ethernet clients of every VigorAP 710 will be connected together. By clicking the General Setup, a new web page will appear so that you could configure the Phy mode, security, Tx Burst and choose proper mode. - Page 51 Item Description Enable Wireless LAN Check the box to enable wireless function. Mode At present, VigorAP 710 can connect to 11b only, 11g only, 11n only, Mixed (11b+11g), Mixed (11g+11n) and Mixed (11b+11g+11n) stations simultaneously. Simply choose Mixed (11b+11g+11n) mode.
- Page 52 Vigor N61 wireless utility window, choose Enable for TxBURST on the tab of Option). Antenna VigorAP 710 can be attached with two antennas to have good data transmission via wireless connection. However, if you have only one antenna attached, please choose 1T1R.
-
Page 53: Ap Discovery
This page is used to scan the existence of the APs on the wireless LAN. Yet, only the AP which is in the same channel of VigorAP 710 can be found. Please click Scan to discover all the connected APs. -
Page 54: Wds Ap Status
VigorAP 710 can display the status such as MAC address, physical mode, power save and bandwidth for the working AP connected with WDS. Click Refresh to get the newest information. When you choose AP Bridge-WDS as the operation mode, the Wireless LAN menu items will include General Setup, Security, Access Control, WPS, AP Discovery, WDS AP Status, WMM Configuration and Station List. - Page 55 Check the box to enable wireless function. Check the box to set the maximum number of wireless stations Enable Limit Client which try to connect Internet through Vigor router. The number you can set is from 3 to 64. VigorAP 710 User’s Guide...
- Page 56 Mode At present, VigorAP 710 can connect to 11b only, 11g only, 11n only, Mixed (11b+11g), Mixed (11g+11n) and Mixed (11b+11g+11n) stations simultaneously. Simply choose Mixed (11b+11g+11n) mode. Hide SSID Check it to prevent from wireless sniffing and make it harder for unauthorized clients or STAs to join your wireless LAN.
- Page 57 Note: Vigor N61 wireless adapter supports this function. Therefore, you can use and install it into your PC for matching with Packet-OVERDRIVE (refer to the following picture of Vigor N61 wireless utility window, choose Enable for TxBURST on the tab of Option). VigorAP 710 User’s Guide...
- Page 58 Antenna VigorAP 710 can be attached with two antennas to have good data transmission via wireless connection. However, if you have only one antenna attached, please choose 1T1R. The default setting is the maximum (100%). Lower down the Tx Power value may degrade range and throughput of wireless.
-
Page 59: Security
PSK. The WPA encrypts each frame transmitted from the radio using the key, which either PSK (Pre-Shared Key) entered manually in this field below or automatically negotiated via 802.1x authentication. WEP/802.1x - The built-in RADIUS client feature enables VigorAP 710 User’s Guide... - Page 60 VigorAP 710 to assist th122222222222222222222222e remote dial-in user or a wireless station and the RADIUS server in performing mutual authentication. It enables centralized remote access authentication for network management. The WPA encrypts each frame transmitted from the radio using the key, which either PSK (Pre-Shared Key) entered manually in this field below or automatically negotiated via 802.1x authentication.
- Page 61 Available settings are explained as follows: Item Description Use internal RADIUS There is a RADIUS server built in VigorAP 710 which is used Server to authenticate the wireless client connecting to the access point. Check this box to use the internal RADIUS server for wireless security.
-
Page 62: Access Control
Choose Blocked MAC address filter, so that all of the devices with the MAC addresses listed on the MAC Address Filter table will be blocked and cannot access into VigorAP 710. MAC Address Filter Display all MAC addresses that are edited before. -
Page 63: Wps
VigorAP 710 will wait for WPS requests from wireless clients about two minutes. The WPS LED on VigorAP 710 will blink fast when WPS is in progress. It will return to normal condition after two minutes. (You need to... -
Page 64: Ap Discovery
This page is used to scan the existence of the APs on the wireless LAN. Yet, only the AP which is in the same channel of VigorAP 710 can be found. Please click Scan to discover all the connected APs. -
Page 65: Wds Ap Status
VigorAP 710 can display the status such as MAC address, physical mode, power save and bandwidth for the working AP connected with WDS. Click Refresh to get the newest information. WMM is an abbreviation of Wi-Fi Multimedia. It defines the priority levels for four access categories derived from 802.1d (prioritization tabs). - Page 66 “Check” the box means the AP router will not answer any response request for the transmitting packets. It will have better performance with lower reliability. After finishing this web page configuration, please click OK to save the settings. VigorAP 710 User’s Guide...
-
Page 67: Station List
Click this button to add current typed MAC address into Access Control. General/Advanced General – Display general information (e.g., MAC Address, SSID, Auth, Encrypt, TX/RX Rate) for the station. Advanced – Display more information (e.g., AID, PSM, WMM, RSSI PhMd, BW, MCS, Rate) for the station. VigorAP 710 User’s Guide... -
Page 68: Wireless Lan Settings For Universal Repeater Mode
Repeater, WMM Configuration and Station List. By clicking the General Setup, a new web page will appear so that you could configure the SSID and the wireless channel. Please refer to the following figure for more information. VigorAP 710 User’s Guide... - Page 69 Internet through Vigor router. The number you can set is from 3 to 64. Mode At present, VigorAP 710 can connect to 11b only, 11g only, 11n only, Mixed (11b+11g), Mixed (11g+11n) and Mixed (11b+11g+11n) stations simultaneously. Simply choose Mixed (11b+11g+11n) mode.
- Page 70 VigorAP 710 while site surveying. The system allows you to set three sets of SSID for different usage. SSID Set a name for VigorAP 710 to be identified. Default setting is DrayTek. Isolate LAN Check this box to make the wireless clients (stations) with the same SSID not accessing for wired PC in LAN.
- Page 71 Vigor N61 wireless utility window, choose Enable for TxBURST on the tab of Option). Antenna VigorAP 710 can be attached with two antennas to have good data transmission via wireless connection. However, if you have only one antenna attached, please choose 1T1R.
-
Page 72: Security
There are several modes provided for you to choose. Disable - The encryption mechanism is turned off. WEP - Accepts only WEP clients and the encryption key should be entered in WEP Key. WPA/PSK or WPA2/PSK or Mixed (WPA+WPA2)/PSK - VigorAP 710 User’s Guide... - Page 73 Key) entered manually in this field below or automatically negotiated via 802.1x authentication. WEP/802.1x - The built-in RADIUS client feature enables VigorAP 710 to assist the remote dial-in user or a wireless station and the RADIUS server in performing mutual authentication. It enables centralized remote access authentication for network management.
- Page 74 Available settings are explained as follows: Item Description Use internal RADIUS There is a RADIUS server built in VigorAP 710 which is used Server to authenticate the wireless client connecting to the access point. Check this box to use the internal RADIUS server for wireless security.
-
Page 75: Access Control
Choose Blocked MAC address filter, so that all of the devices with the MAC addresses listed on the MAC Address Filter table will be blocked and cannot access into VigorAP 710. MAC Address Filter Display all MAC addresses that are edited before. -
Page 76: Wps
VigorAP 710 will wait for WPS requests from wireless clients about two minutes. The WPS LED on VigorAP 710 will blink fast when WPS is in progress. It will return to normal condition after two minutes. (You need to... -
Page 77: Ap Discovery
This page is used to scan the existence of the APs on the wireless LAN. Yet, only the AP which is in the same channel of VigorAP 710 can be found. Please click Scan to discover all the connected APs. -
Page 78: Universal Repeater
WDS and normal AP mode. Available settings are explained as follows: Item Description SSID Set the name of access point that VigorAP 710 wants to connect to. MAC Address Type the MAC address of access point that VigorAP 710 wants (Optional) to connect to. - Page 79 Static IP – The wireless station shall specify a static IP for connecting to Internet via Vigor router. Router Name Type a name for the router as identification. Simply use the default name. IP Address This setting is available when Static IP is selected as Connection Type. VigorAP 710 User’s Guide...
-
Page 80: Wmm Configuration
WMM accessing categories. For the service of voice or video image, please set small value for AC_VI and AC_VO categories For the service of e-mail or web browsing, please set large value for AC_BE and AC_BK categories. VigorAP 710 User’s Guide... - Page 81 “Check” the box means the AP router will not answer any response request for the transmitting packets. It will have better performance with lower reliability. After finishing this web page configuration, please click OK to save the settings. VigorAP 710 User’s Guide...
-
Page 82: Station List
Access Control. General/Advanced General – Display general information (e.g., MAC Address, SSID, Auth, Encrypt, TX/RX Rate) for the station. Advanced – Display more information (e.g., AID, PSM, WMM, RSSI PhMd, BW, MCS, Rate) for the station. VigorAP 710 User’s Guide... -
Page 83: Radius Server
VigorAP 710 offers a built-in RADIUS server to authenticate the wireless client that tries to connect to VigorAP 710. The AP can accept the wireless connection authentication requested by wireless clients. Available settings are explained as follows: Item Description Enable RADIUS Check it to enable the internal RADIUS server. -
Page 84: Applications
Secret Key – Type the password for the user to be authenticated by VigorAP 710 while the user tries to use VigorAP 710 as the external RADIUS server. Confirm Secrete Key – Type the password again for confirmation. Configure ... - Page 85 Action Specify which action should apply the schedule. Acts Specify how often the schedule will be applied. Once -The schedule will be applied just once Routine -Specify which days in one week should perform the schedule. VigorAP 710 User’s Guide...
-
Page 86: Apple Ios Keep Alive
To keep the wireless connection (via Wi-Fi) on iOS device in alive, VigorAP 710 will send the UDP packets with 5353 port to the specific IP every five seconds. -
Page 87: System Maintenance
Display the period that such device connects to Internet. Operation Mode Display the operation mode that the device used. System Memory total Display the total memory of your system. Memory left Display the remaining memory of your system. VigorAP 710 User’s Guide... -
Page 88: Tr-069
Display the channel that the station used for connecting with such device. This device supports TR-069 standard. It is very convenient for an administrator to manage a Auto Configuration Server, e.g., TR-069 device through an VigorACS SI. VigorAP 710 User’s Guide... - Page 89 Such information is useful for Auto Configuration Server (ACS). Enable– Check the box to allow the CPE Client to connect with Auto Configuration Server. On – Choose the interface for VigorAP 710 connecting to ACS server. Port – Sometimes, port conflict might be occurred. To solve such problem, you might change port number for CPE.
-
Page 90: Administrator Password
Type in new password in this filed. Confirm Password Type the new password again for confirmation. When you click OK, the login window will appear. Please use the new password to access into the web user interface again. VigorAP 710 User’s Guide... -
Page 91: Configuration Backup
Click Backup button to get into the following dialog. Click Save button to open another dialog for saving configuration as a file. In Save As dialog, the default filename is config.cfg. You could give it another name by yourself. VigorAP 710 User’s Guide... -
Page 92: Time And Date
It allows you to specify where the time of the router should be inquired from. Available parameters are explained as follows: Item Description Current System Time Click Inquire Time to get the current time. VigorAP 710 User’s Guide... -
Page 93: Management
Note: When the system pops up Reboot System web page after you configure web settings, please click OK to reboot your modem for ensuring normal operation and preventing unexpected errors of the modem in the future. VigorAP 710 User’s Guide... -
Page 94: Firmware Upgrade
Click System Maintenance>> Firmware Upgrade to launch the Firmware Upgrade Utility. Click Browse to locate the newest firmware from your hard disk and click Upgrade. Diagnostic Tools provide a useful way to view or diagnose the status of your VigorAP 710. At present, only System Log is offered. -
Page 95: Speed Test
Click the Start button on the page to test the speed. Such feature can help you to find the best installation place for Vigor AP. When you click the menu item under Support Area, you will be guided to visit www.draytek.com and open the corresponding pages directly. VigorAP 710 User’s Guide... - Page 96 This page is left blank. VigorAP 710 User’s Guide...
-
Page 97: Trouble Shooting
Power on the modem. Make sure the POWER LED, ACT LED and SSID LED are bright. If not, it means that there is something wrong with the hardware status. Simply back to “1.3 Hardware Installation” to execute the hardware installation again. And then, try again. VigorAP 710 User’s Guide... - Page 98 Go to Control Panel and then double-click on Network Connections. Right-click on Local Area Connection and click on Properties. Select Internet Protocol (TCP/IP) and then click Properties. VigorAP 710 User’s Guide...
- Page 99 Select Obtain an IP address automatically and Obtain DNS server address automatically. Double click on the current used Mac Os on the desktop. Open the Application folder and get into Network. On the Network screen, select Using DHCP from the drop down list of Configure IPv4. VigorAP 710 User’s Guide...
-
Page 100: Pinging The Modem From Your Computer
Open the Application folder and get into Utilities. Double click Terminal. The Terminal window will appear. Type ping 192.168.1.2 and press [Enter]. If the link is OK, the line of “64 bytes from 192.168.1.2: icmp_seq=0 ttl=255 time=xxxx ms” will appear. VigorAP 710 User’s Guide... -
Page 101: Backing To Factory Default Setting If Necessary
While the modem is running, press the Factory Reset button and hold for more than 5 seconds. When you see the ACT LED blinks rapidly, please release the button. Then, the modem will restart with the default configuration. VigorAP 710 User’s Guide... -
Page 102: Contacting Your Dealer
If the modem still cannot work correctly after trying many efforts, please contact your dealer for further help right away. For any questions, please feel free to send e-mail to support@draytek.com. VigorAP 710 User’s Guide...