Cisco SPA 303 User Manual
Ip phone for 8x8 virtual office
Hide thumbs
Also See for SPA 303:
- Administration manual (325 pages) ,
- User manual (53 pages) ,
- Setup and troubleshooting manual (11 pages)
Table of Contents
Advertisement
Advertisement
Chapters
Table of Contents

Related Manuals for Cisco SPA 303


Summary of Contents for Cisco SPA 303
- Page 1 USER GUIDE Cisco Small Business SPA 303 IP Phone for 8x8 Virtual Office...
- Page 2 May 2011 Cisco and the Cisco Logo are trademarks of Cisco Systems, Inc. and/or its affiliates in the U.S. and other countries. A listing of Cisco's trademarks can be found at www.cisco.com/go/trademarks. Third party trademarks mentioned are the property of their respective owners. The use of the word partner does not imply a partnership relationship between Cisco and any other company.
-
Page 3: Table Of Contents
(Optional) Installing the Cisco SPA 303 Stand (Optional) Connecting a PC to Your Cisco SPA 303 (Optional) Connecting Wired and Wireless Headsets (Optional) Mounting Your Cisco SPA 303 Phone to the Wall Reversing the Handset Retention Tab Verifying Phone Startup Upgrading Your Phone’s Firmware... - Page 4 Using the Corporate Directory Using the Call History Lists Deleting All Numbers from the Missed Calls, Received Calls, or Placed Calls List Accessing Voicemail Recording Calls (Virtual Office Pro Users Only) Cisco Small Business IP Phone SPA 303 User Guide (SIP)
- Page 5 Turning on the Screen Saver Immediately Updating Your Ring Tone Advanced Procedures for Technical Support Personnel Viewing Status Information and Statistics Rebooting, Restarting, and Resetting a Phone Appendix A: Where to Go From Here Cisco Small Business IP Phone SPA 303 User Guide (SIP)
-
Page 6: Chapter 1: Getting Started
Getting to Know the Cisco SPA 303, page 7 About This Document This guide describes the concepts and tasks necessary to use and configure your Cisco Small Business IP Phone. This document describes using the Cisco Small Business IP Phones with 8x8 Virtual NOTE Office. - Page 7 Where to Go From Here Cisco provides a wide range of resources to help you obtain the full benefits of the Cisco SPA 30X phones. This appendix provides link to many of these resources. Cisco Small Business IP Phone SPA 303 User Guide (SIP)
-
Page 8: Overview Of The Cisco Small Business Ip Phones
4-way navigations key Caring for Your Phone The Cisco Small Business IP phones are electronic devices that should not be exposed to excessive heat, sun, cold or water. To clean the equipment, use a slightly moistened paper or cloth towel. Do not spray or pour cleaning solution directly onto the hardware unit. -
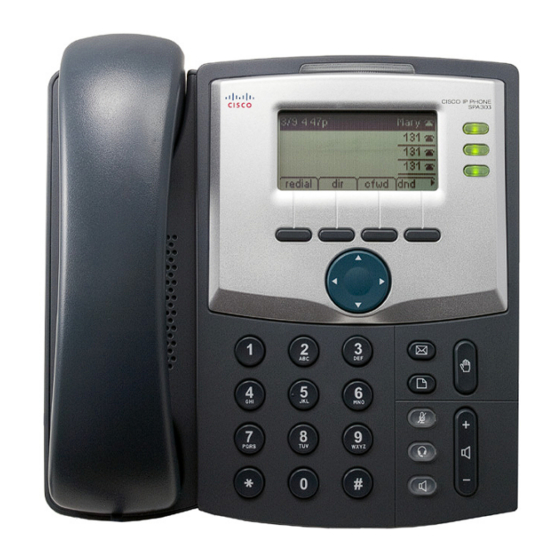
Page 9: Getting To Know The Cisco Spa 303
Indicator message. Flashes red during an incoming call or when the phone’s firmware is being updated. LCD Screen Displays date and time, phone station name, line extensions, and softkey options. Cisco Small Business IP Phone SPA 303 User Guide (SIP) - Page 10 Speaker button Push to turn the speaker on or off. When the speaker is on, the button glows green. Keypad Use to dial phone numbers, enter letters, and choose menu items. Cisco Small Business IP Phone SPA 303 User Guide (SIP)
-
Page 11: Softkey Buttons
Dials into the 8x8 conference bridge. delChr Deletes the last number or letter. delete Deletes an entire item (for example, a number from the Call History list). dial Dials a number. Cisco Small Business IP Phone SPA 303 User Guide (SIP) - Page 12 Performs a call transfer. xfer2vm Transfers an active call to voice mail. Enters a submenu and when pressed, toggles between Yes or No to enable or disable an option. Cisco Small Business IP Phone SPA 303 User Guide (SIP)
-
Page 13: Using Keypad Shortcuts
For example, to change your ring settings, press the Setup button, then press 3 for Settings and 2 for Ring Type. Menus and options vary depending on phone model. NOTE Cisco Small Business IP Phone SPA 303 User Guide (SIP) -
Page 14: Chapter 2: Installing Your Phone
Installing Your Phone This chapter describes how to install your Cisco Small Business IP Phone and connect it to your network. It contains the following sections: • Before You Begin, page 12 • Installing Your Cisco SPA 303 IP Phone, page 13 •... -
Page 15: Installing Your Cisco Spa 303 Ip Phone
(Optional) Route the phone cord through the cable slot (labeled 4 in Figure STEP 3 Insert the other end of the phone cord into the port at the bottom of the handset (not shown). STEP 4 Cisco Small Business IP Phone SPA 303 User Guide (SIP) -
Page 16: Connecting The Power
(Optional) Connecting Your Cisco SPA 303 to the Wireless Network You can use the Cisco WBP54G Wireless-G Bridge for Phone Adapters to connect the IP phone to a Wireless-G network instead of the wired local network. Cisco does not recommend connecting a PC to the phone when it is operating wirelessly. -
Page 17: (Optional) Installing The Cisco Spa 303 Stand
(Optional) Connecting a PC to Your Cisco SPA 303 To connect a PC to your phone (optional): Cisco does not recommend connecting a PC to the phone when it is operating wirelessly. NOTE To provide network access to a PC, connect one end of an additional Ethernet cable (not... -
Page 18: (Optional) Mounting Your Cisco Spa 303 Phone To The Wall
Installing Your Phone (Optional) Mounting Your Cisco SPA 303 Phone to the Wall In general, to connect a headset. connect the 2.5mm connector from the headset into the headset port on the right side of the IP phone as shown in the following graphic: (Optional) Mounting Your Cisco SPA 303 Phone to the Wall To mount the phone to the wall, you must purchase the MB100 wall mount bracket kit. - Page 19 Installing Your Phone (Optional) Mounting Your Cisco SPA 303 Phone to the Wall Figure 2 MB100 Wall Mount Kit Cisco Small Business IP Phone SPA 303 User Guide (SIP)
- Page 20 Installing Your Phone (Optional) Mounting Your Cisco SPA 303 Phone to the Wall To attach the Mounting Bracket (MB), align the two cleats on the MB with the holes in the STEP 1 phone’s base. Orient the MB such that the phone’s Ethernet and handset ports are accessible after STEP 2 installation.
- Page 21 Installing Your Phone (Optional) Mounting Your Cisco SPA 303 Phone to the Wall (Optional) If a Wi-Fi or PoE dongle is installed, place in the tray. STEP 4 Cisco Small Business IP Phone SPA 303 User Guide (SIP)
- Page 22 Installing Your Phone (Optional) Mounting Your Cisco SPA 303 Phone to the Wall Plug in the Ethernet and power cables. Cisco Small Business IP Phone SPA 303 User Guide (SIP)
- Page 23 Installing Your Phone (Optional) Mounting Your Cisco SPA 303 Phone to the Wall Hang onto screws mounted in the wall. STEP 5 Cisco Small Business IP Phone SPA 303 User Guide (SIP)
-
Page 24: Reversing The Handset Retention Tab
Installing Your Phone (Optional) Mounting Your Cisco SPA 303 Phone to the Wall Reversing the Handset Retention Tab If you mount the phone to a vertical surface, you must reverse the handset retention tab on the phone body so that the handset does not fall off the phone when it is placed on the cradle. -
Page 25: Verifying Phone Startup
Verifying Phone Startup After receiving power and network connectivity, the phone executes a boot-up sequence. During this sequence, phones with screens display the Cisco logo and then “Initializing Network.” All of the lights on the phone will flash. After your phone is successfully connected to the network and receives a basic configuration, the extension number appears on the display screen (on models with a display screen) and the phone has a dial tone. -
Page 26: Upgrading Your Phone's Firmware
8x8 service. If you are using your Cisco phone with 8x8, do not upgrade your phone’s firmware without consulting 8x8 Support. 8x8 may automatically upgrade your phones without any action on your part necessary as new features become available that are compatible with your service. -
Page 27: Chapter 3: Using Basic Phone Functions
Forwarding Calls — Online Setup, page 32 • Forwarding Calls — Phone-based Setup, page 33 • Setting Do Not Disturb, page 33 • Placing a Three-Way Conference Call, page 34 • Using Conference Bridges, page 35 Cisco Small Business IP Phone SPA 303 User Guide (SIP) -
Page 28: Using Phone Hardware And Accessories
The handset can be on the hook when using the speakerphone or headset function. If switching from the handset to the speakerphone, make sure the speakerphone or headset light is illuminated before placing the handset back on the hook. Cisco Small Business IP Phone SPA 303 User Guide (SIP) -
Page 29: Adjusting Call Volume And Muting
Using Mute (Cisco SPA 303) To mute the phone microphone, speaker, or headset microphone, press the Mute button on the phone. The button glows red. Press the Mute button again to unmute. Cisco Small Business IP Phone SPA 303 User Guide (SIP) -
Page 30: Placing Or Answering A Call
To resume the call, press the Flash button (Cisco SPA 301) or the flashing red line button for the call (Cisco SPA 303). If you have multiple calls (Cisco SPA 303), all calls are put on hold except the active call. -
Page 31: Using Mute (Cisco Spa 303)
• If you are using the handset, hang up. • If you are using the speakerphone, press the Speaker button (Cisco SPA 303). • If you are using the headset, either press the Headset button (wired) or replace the handset (wireless) - Cisco SPA 303. -
Page 32: Transferring Calls
STEP 1 Enter the number to which you want to transfer the call and press dial. The call is transferred STEP 2 with no further action required on your part. Cisco Small Business IP Phone SPA 303 User Guide (SIP) -
Page 33: Performing An Transfer To Voicemail
Scroll to Call History and press the Select softkey. STEP 2 Scroll to Missed Calls and press the Select softkey. STEP 3 Choose the call you want to return and press the Dial softkey. STEP 4 Cisco Small Business IP Phone SPA 303 User Guide (SIP) -
Page 34: Using The Intercom
Select the Settings button, and then select the My Rules tab. STEP 2 Update your Call Forwarding Rules and press Save. STEP 3 You can return to Virtual Office Online at any time to update your Call Forwarding Rules. Cisco Small Business IP Phone SPA 303 User Guide (SIP) -
Page 35: Forwarding Calls - Phone-Based Setup
To activate Do Not Disturb, press the dnd softkey. The LCD screen indicates that Do Not Disturb is turned on for your phone. • To deactivate Do Not Disturb, press the -dnd softkey. Cisco Small Business IP Phone SPA 303 User Guide (SIP) -
Page 36: Placing A Three-Way Conference Call
(You can cancel the conference by pressing the EndCall softkey before connecting the calls, then press the Resume softkey to resume the original call.) When you hang up, the other two parties are disconnected. NOTE Cisco Small Business IP Phone SPA 303 User Guide (SIP) -
Page 37: Using Conference Bridges
• Create a conference that expires in 2 weeks press 1 • Create a non expiring conference press 2 • Create a conference with a custom expiration date press 3 Cisco Small Business IP Phone SPA 303 User Guide (SIP) - Page 38 Enter your extension then press #. STEP 1 Enter your password then press #. (Voicemail Password) STEP 2 Enter the conference ID you want to delete then press #. STEP 3 Cisco Small Business IP Phone SPA 303 User Guide (SIP)
-
Page 39: Using The Phone Directories
Press the play softkey to play the selected ring tone or the select softkey to assign that ringtone to the person whose number you are adding to the directory. Press save to save the entry. STEP 5 Cisco Small Business IP Phone SPA 303 User Guide (SIP) -
Page 40: Using The Corporate Directory
STEP 2 Input last name, first name, and/or location and press submit: STEP 3 In the results, scroll to the desired entry and press Dial to dial the contact. STEP 4 Cisco Small Business IP Phone SPA 303 User Guide (SIP) -
Page 41: Using The Call History Lists
STEP 3 delete all numbers from the list. Press the Exit softkey to return to the previous menu. Press the Cancel softkey to return to the STEP 4 main screen. Cisco Small Business IP Phone SPA 303 User Guide (SIP) -
Page 42: Accessing Voicemail
Press the record soft key. STEP 2 You will see a "Recording is ON" confirmation message on the phone screen. To turn Call Recording off: Press the exit soft key. STEP 1 Cisco Small Business IP Phone SPA 303 User Guide (SIP) -
Page 43: Chapter 4: Using Advanced Phone Features
• Creating Speed Dials, page 42 • Customizing Your LCD Screen, page 43 • Updating Your Ring Tone, page 45 • Advanced Procedures for Technical Support Personnel, page 45 Cisco Small Business IP Phone SPA 303 User Guide (SIP) -
Page 44: Creating Speed Dials
For a new speed dial, scroll to select an unused speed dial (marked with Not Assigned). To edit STEP 3 a previously existing speed dial, select it. Press edit. STEP 4 Enter the number to assign to the speed dial and press ok. STEP 5 Cisco Small Business IP Phone SPA 303 User Guide (SIP) -
Page 45: Using Speed Dials
To configure your screen saver: Press the Setup button. STEP 1 Scroll to Screen Saver Mode and press the Select softkey. STEP 2 Cisco Small Business IP Phone SPA 303 User Guide (SIP) -
Page 46: Turning On The Screen Saver Immediately
The screen saver must be enabled in order to immediately activate it. NOTE Press the Setup button. STEP 1 Scroll to Screen Saver Mode. STEP 2 Press the activ softkey. STEP 3 Cisco Small Business IP Phone SPA 303 User Guide (SIP) -
Page 47: Updating Your Ring Tone
Follow these procedures if instructed to do so by technical support person who are assisting you. Viewing Status Information and Statistics To view status information and statistics: Press the Setup button. STEP 1 Cisco Small Business IP Phone SPA 303 User Guide (SIP) -
Page 48: Rebooting, Restarting, And Resetting A Phone
Scroll to Restart and press the Select softkey. STEP 2 When the confirmation message appears, press the OK softkey to confirm or press the Cancel STEP 3 softkey to close the message without restarting the phone. Cisco Small Business IP Phone SPA 303 User Guide (SIP) - Page 49 Important: Resetting your phone to the factory default is not recommended unless you are working directly with a member of the 8x8 Support team. Your phone will no longer be connected to 8x8 service if it is reset it to the Cisco factory default. Press the Setup button.
-
Page 50: Where To Go From Here
Where to Go From Here Cisco provides a wide range of resources to help you and your customer obtain the full benefits of the Cisco Small Business SPA 303 IP Phone. Support Cisco Small Business Support www.cisco.com/go/smallbizsupport Community Cisco Small Business Support www.cisco.com/go/smallbizhelp... - Page 51 Where to Go From Here Other Cisco-provided documentation may be useful as a reference, but it often refers to features NOTE that are supported only on specific plans of specific providers or PBXs. It also may exclude some cloud-provided services for your business that are provided by 8x8, Inc. This document has been modified by 8x8 to specifically include the features supported and provided by 8x8 service.