Table of Contents
Advertisement
Quick Links
HITACHI
nspire
the
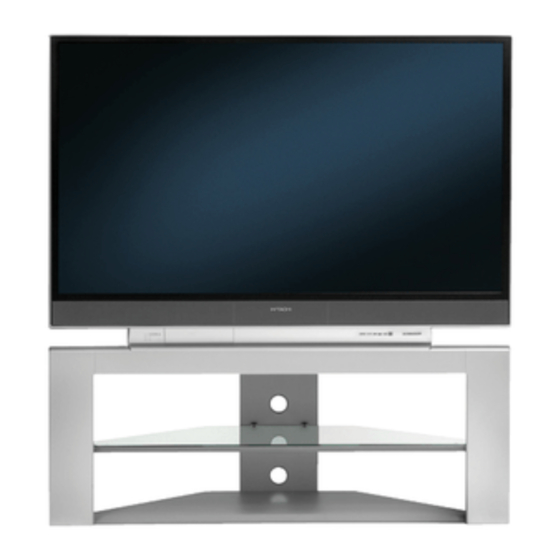
LCD REAR PROJECTION
TELEVISION
Operating
Guide for
55VS69 and 62VS69
IMPORTANT SAFETY INSTRUCTIONS ............................................................................
2-3
FIRST TIME USE ....................................................................................................................... 4-19
THE REMOTE CONTROL ....................................................................
20-31
ON-SCREEN DISPLAY ....................................................................................................
32-55
LAMP REPLACEMENT ..................
56-59
USEFUL INFORMATION.................................................................................
60-63
LICENSEAGREEMENT .................................................................................................................. 64
APPENDIXES ................................................................................................................................. 65
INDEX............................................................................................................................................. 66
As an Energy Star _ Partner,
Hitachi, Ltd. has determined
that this product meets the
Energy Star_ guidelines for
energy efficiency
Advertisement
Table of Contents

Related Manuals for Hitachi 62VS69


Summary of Contents for Hitachi 62VS69
- Page 1 ON-SCREEN DISPLAY ....................32-55 LAMP REPLACEMENT ....56-59 USEFUL INFORMATION................. 60-63 LICENSEAGREEMENT ........................64 APPENDIXES ..........................65 INDEX............................. 66 As an Energy Star _ Partner, Hitachi, Ltd. has determined that this product meets the Energy Star_ guidelines for energy efficiency...
-
Page 2: Read Before Operating
Our reputation has been built on the quality, 10. Protect the power cord from being walked on or performance, and ease of sewice of HITACHI pinched particularly at plugs, convenience televisions. receptacles, and the point where they exit from the apparatus. - Page 3 (in the changes or modifications made to this device that are not US) or the Electronic Product Stewardship Canada expressly approved by Hitachi America, Ltd. Home www.epsc.ca 0n Canada). Electronics Division may void the user's authority to FOR MORE INFORMATION, CALL 1-800-HITACHI.
-
Page 4: Remote Control Battery
0000 ,,s,© 6 ®®® ®@@ ©@@ 0@© For US models: For optional accessories, please access our website at ®®®® www.hitachi.us/tv ®® Remote Control Unit CLU-4351UG2 (Part No. HL02072). Two "AA" size, 1.5V batteries (For Remote Control Unit). REMOTE CONTROL BATTERY... - Page 5 LCD Rear PTV against a wall, keep it at least 10cm (4 inches) from the wall. VIEWING The major benefit of the HITACHI LCD Rear PTV is its large viewing screen. To see this large screen at its best,...
-
Page 6: Antenna Connections
Most video/audio connections between components can be made with shielded video and audio cables that have phono connectors. For best performance, video cables should use 75-Ohm coaxial shielded wire. Cables can be purchased from most stores that sell audio/video products. Below are illustrations and names of common connectors. - Page 7 In addition to controlling all of the functions on your HITACHI LCD Rear Projection TV, the new remote control designed to operate different types of devices, such as, DVD Players, CBL (Cable Boxes), set-top-boxes, satellite receivers, and VCRs. The remote control...
- Page 8 "-""_Push to open the Front Control Panel Door Front Control Panel Buttons & Connections _PUT 5=W_3_50 MENU VOL- VOL+ OH- CH÷ INPUT _ELECT £ EXiT -- CURSOR PH37381 MENU/SELECT button This button allows you to enter the MENU, making it possible to set TV features to your preference without...
- Page 9 Indicator This light is off during normal operation. If light is lit, the lamp has failed. See page 56-59 for lamp replacement procedure. Consult your Hitachi dealer for proper part. If light is blinking, lamp cover is not assembled securely...
- Page 10 The front p anel jacks a reprovided asaconvenience toallow you toeasily c onnect acamcorder orVCR asshown inthefollowing examples: 1)Example ofhow toconnect aVCR : ONPUT 5 CH÷ ONPUT S:VIDEO _EAUDO0 _" ©© NXOT _ENU VOL- VOL+ ELECT CURSOR L/MONC PH37381 S-INPUT (Optional, see note) @e?? S-VHS...
- Page 11 Dolby Laboratories. Upgrade Card This card slot is for future software upgrades. Hitachi will notify you if a software upgrade required for your TV. In order to receive written notification, please complete and return your warranty...
- Page 12 If the CableCARD is properly installed or not installed, TV AS CENTER (INPUTS 1-4) the TV will display the following respective screens. These jacks are for stereo amplifiers with center signal output capability. This feature allows the TV speakers to be used as a center speaker. The TV must be set as a center channel by selecting...
- Page 13 Additional CableCARD Information After the CableCARD has been successfully installed, a CableCARD Information menu appears in the SETUP menu of the On-Screen Display. Follow the instructions below to access the CableCARD Information menu. Press the MENU button on the Remote Control access the Main Menu screen.
- Page 14 TIPS ON REAR PANEL CONNECTIONS S-VIDEO, Y-PBPR and HDMI _li. Outside Antenna orDigital Cable External connections are provided Digital high performance laserdisc Component with HDMI players, VCRs etc. that have output this feature. Use these capability connections in place of the OABLE standard video connection...
- Page 15 Match t henumbers below tothediagram f or speaker placement. O The television's internal speakers will a ctas center speaker (select AUDIO - INTERNAL SPEAKERS AS CENTER). These FRONT left and right speakers connected to the FRONT output of a separate audio amplifier.
- Page 16 The exact arrangement youuse toconnect theVCR, camcorder, laserdisc player, DVD player orHDTV S et T op Box toyour T Vsetisdependent onthemodel and features ofeach component. Check t he owner's manual of each component forthelocation ofvideo and audio inputs a nd outputs. The following connection diagrams areoffered assuggestions.
- Page 17 CONNECTING A COMPOSITE VIDEO STEREO AUDIO SOURCE TO INPUT1 - INPUT5 Connect the cable from the VIDEO OUT of the VCR or the laserdisc player to the INPUT (VIDEO) jack, as shown on the TV set on the right. Connect the cable from the AUDI©...
- Page 18 CONNECTING A COMPONENT SOURCE WITH HDMI OR DVI CAPABILITY TO INPUT Connect the HDMI or DVI to HDMI connection cable from the output of the HDTV set top box or DVD player to the HDMI input as shown on the TV set on the right.
- Page 19 CONNECTING A COMPONENT SOURCE TO INPUT 3 OR 4: Y-PePR. Connect the cable from the Y OUT of the Laserdisc/DVD player or HDTV set top box to the INPUT (Y) jack, as shown on the TV set on the right. Connect the cable from the CB/PB OUT or B-Y OUT of the Laserdisc/DVD...
- Page 20 Inaddition tocontrolling allthe functions onyour HITACHI LCD Rear Projection TV, the new remote control is designed to operate different types of VCRs, CATV (Cable TV) converters, set-top-boxes, satellite POWER receivers (SAT) and DVD players with one touch. Basic operation keys are grouped together in one area.
- Page 21 POWER button Press this button to turn the TV set on or off when the remote is in TV mode. POWER MODE buttons These buttons allow the remote to control your TV, VCR, DVD, Cable box/Satellite box depending which button is pressed.
- Page 22 ASPECT button Press this button to quickly change the picture format ASPECT ratio. Depending on the input signal format received, the picture format ratio allows you to adjust the images through the following options. 4:3 STANDARD 4:3 ZOOMI/ZOOM2 Use this aspect mode to display conventional (4:3) Use these aspect modes to zoom in on...
- Page 23 INFO button display for Analog Channels INPUTS button When the remote control is in TV mode, press this button to access the INPUTS menu. Use the CURSOR and SELECT buttons to scroll and select the inputs that are being used. Pressing INPUTS button repeatedly...
- Page 24 Press the FAV CH button to switch to Favorite VOLUME (VOL), MUTE button (FAY) channel mode. You will know you are in Press the VOLUME button (A or V) until you obtain the desired sound level. Favorite Channel mode when (FAV) is displayed and the displayed channel is GREEN.
- Page 25 Your HITACHI LCD Rear P rojection TVincorporates Tuner technology designed forimproved viewing enjoyment. This Two Tuner feature allows youtoview _m_:_ antenna inputs o nboth themain picture a nd sub-picture Con,_otth_ simultaneously, with separate tuning c ontrol foreach. CabEeand/or Air cables...
- Page 26 PIP Mode Picture-in-Picture This feature is only available with a Digital 16:9, 720p and 1080i signal. To prevent a pattern burn, occasionally move the sub-picture using the CURSOR buttons. SPLIT Mode Picture-in-Picture Split Mode PIP displays the main picture and sub- picture evenly on the screen.
- Page 27 SPLIT FREEZE PAUSE button Press the PAUSE button to freeze the picture you If you wish to freeze the sub-picture, press the are currently viewing (only the right sub-picture will PAUSE button. This is convenient when trying to freeze). Press the EXIT button to return to normal write down the address for a mail order company, viewing.
- Page 28 OPERATING THE PRECODED FUNCTION FOR YOUR CABLE BOX. POWER This remote is designed to operate different types of cable boxes. You must first program the remote to match the remote system of your cable box (refer below for pre-codes). Turn ON your cable box. 2.
- Page 29 The remote will now control your set-top- box/satellite receiver. ®® SATELLITE BRAND CODES ECOSTAR ..............HITACHI ............... HUGHES ..............RCA ................SONY ................TOP BOX BRAND CODES SAT (Set-Top-Box/Satellite) button PANASONIC ..............This button...
-
Page 30: Dvd Brand
DVD player. You will need to set the display type of your DVD player to 16:9 WlDESCREEN. DVD BRAND CODES APEX ................GO VIDEO ..............HITACHI ................ KENWOOD ..............PANASONIC ..............PIONEER ..............DVD button RCA ................This button allows... - Page 31 This button allows the remote to control your VCR FISHER ............. 34, 37, 38, 39 player by setting it to VCR mode. HITACHI ........00, 01, 02, 03, 04, 05, 06 JVC ..............49, 50, 51 PRECODED VCR Buttons MAGNAVOX ............
- Page 32 Press MENU on the remote control to display the different features on your HITACHI LCD Rear Projection Press the CURSOR buttons to navigate highlight a different feature of the On-Screen Display menu. Press the SELECT button to select. Press EXIT on the remote control to quickly exit from a menu.
- Page 33 Picture M ode Select between the twopicture Signal Meter Access Signal Meter. modes; Day andNight. Auto Channel Scan Set Auto Channel Scan. Contrast Adjust contrast. Channel List Set Channel List. Brightness Adjust brightness. Color Adjust color. Tint Adjust tint. Sharpness Adjust sharpness.
- Page 34 Select VIDEO to adjust picture settings and improve picture quality. You can independently customize each of the Video Inputs to your preference to increase viewing performance and pleasure depending upon the video program being viewed. If RESET is selected, only the selected input will reset to initial conditions.
-
Page 35: Aspect Mode
This involves a process known as 3:2 pulldown. When Auto Movie Mode is turned ON from the VIDEO menu, your Hitachi LCD Rear Projection Television will activate the circuitry for this special feature to improve... - Page 36 Vertical Position This function allows you to select when aspect style is either 4:3 EXPANDED/ZOOMI/ZOOM2 16:9 ZOOM. Vertical position can be changed with these modes. For example, it will be useful for centering the picture area at both the top and bottom of the picture with 480i/480P signal.
- Page 37 £Wj_N realistic 3D Sound experience from just two external speakers (or) the two internal speakers of your HITACHI Television. If your HITACHI Television is connected to an external audio system, SRS will also create an incredible...
-
Page 38: Second Audio Program
Audio Source STEREO Multi-Channel Television Sound will allow you to select STEREO (a stereo broadcast), MONO (monaural sound) used when receiving a weak stereo broadcast SECOND AUDIO PROG (SA) which may be a secondary language, weather report, etc. The sources received will be displayed at the top left... - Page 39 Use thefunctions below ifyour T Visconnected toan amplifier/receiver with OPTICAL DIGITAL INPUT with Dolby Digital or PCM decoder capabilities. 1. Use the CURSOR buttons • or • to highlight the function to be adjusted. Press the CURSOR buttons • or I_ to adjust the function.
-
Page 40: Signal Meter
Select CHANNEL MANAGER to set your Antenna options, run Auto Channel Scan, Check Signal Meter and Set Channel List. Use the CURSOR buttons • or • to highlight the function to be adjusted. Press the SELECT button or CURSOR button •... - Page 41 Auto Channel Scan This feature will automatically store active TV channels in Auto Channel Scan memory. Use the CURSOR buttons • or • to highlight CABLE or AIR. Press the CURSOR buttons _1 or • to highlight START or RESET option. Press the SELECT button to select.
- Page 42 This function will b lock out t hepicture a nd sound o fthe selected channel orvideo i nput. I tcan also beused to keep the TVfrom being viewed forascheduled time period t hatyou set. The code toenter theLocks f eature i safour d igit access code number.
- Page 43 Movie Ratings Use Movie Ratings to prevent viewing of any movie that you feel may be inappropriate due to its content. Use the CURSOR buttons • or • to select the MOVIE RATING category that you want to block. Press SELECT to block the MOVIE RATING that...
- Page 44 TV Ratings Use TV RATINGS to prevent the viewing of any TV program that you feel may be inappropriate due to its content. Use the CURSOR buttons • or • to select the "IV RATING category that you want to block. Press SELECT to block the "rv RATING that you...
- Page 45 Canadian Ratings (Eng) Use CANADIAN RATINGS (ENG) to block any type of movie and television program in Canada that you feel might be inappropriate in its content. Use the CURSOR buttons • or • to select the CANADIAN RATINGS (ENG) category that you want to block.
- Page 46 Canadian Ratings (Frn) Use CANADIAN RATINGS (FRN) to block Canadian French programs according to various program ratings that you feel might be inappropriate in its content. Use the CURSOR buttons • or • to select the CANADIAN RATINGS (FRN) category that you want to block.
- Page 47 Select TIMERS tosetyour C lock, Sleep T imer, Event Timer and Day/Night Timer Recordings. 1. Use the CURSOR buttons • or • to highlight the function to be adjusted. Press the SELECT button or CURSOR button I_ to select. Set The Clock The Clock must be adjusted...
- Page 48 Set Sleep Timer Select this feature to set your SLEEP TIMER from 30 minutes to 3 hours (30 minute increments). Press the CURSOR buttons _1 or • repeatedly set your Timer from 0:00, 0:30, 1-00, 1:30, 2:00, 2:30 and 3:00. Set Day/Night Timer Select this feature to activate...
- Page 49 Set Event Timer This function will automatically operate the Projection TV viewing reservation of a program. If the clock is not set, you can not use this function and the screen below will appear. The message on the screen will disappear after 3 seconds, then the screen automatically goes to...
- Page 50 Select SETUP when setting your TV up for the first time. Use the CURSOR buttons • or • to highlight the function to be adjusted. Press the SELECT button or CURSOR button • to select. Menu Preference This feature will allow you to select any one of three different languages for all on-screen...
- Page 51 Lamp Power Control Use this featureto have the TV turned OFF automatically when a video signal is not detected 15 minutes. Press the CURSOR buttons • or I_ to highlight Yes or No. Set The Inputs Use this feature to give a name to any of the five video inputs.
- Page 52 INPUT 4 Auto Link Use this function to automatically turn the TV on and tune to INPUT 4 when it detects a video signal to INPUT 4. Use the CURSOR buttons _1 or • to highlight AUTO LINK setting of your choice. When AUTO is selected, the TV will turn on and...
-
Page 53: Use Cursor
Digital Captions Set captions for digital programs. This function will help choose and set available language, font, size and style of digital captions. Use the CURSOR buttons •, •, • or • highlight and select DIGITAL CAPTIONS feature. Press EXIT to quit menu or CURSOR button 41to return to previous menu. - Page 54 MONITOR: Available Monitor Out S ignals Input Mode Monitor Out S-Video Video L/R HiFi ANT Digital N o Macrovision S-Video YES YES (Air or Channe Macrovision S-Video Cable) Analog Channel Video Input1 HDMI 1 S-Video 1 Video Input 2 S-Video 2 Video 2 YES YES Input 3...
- Page 55 (MMC CARD}. If a future software upgrade is required for your TV, HITACHI will notify and provide you with a flash card. In order to receive written notification and the flash card, please complete and return the warranty card.
- Page 56 Lamp Life The lamp life may vary based on usage of the LCD Rear PTV. Turning on and off frequently may shorten the life of the lamp. Lamp Replacement After extended use, if the TV picture turns dark, the color looks unusual or LAMP INDICATOR light turns on, then it...
- Page 57 Lamp Replacement Turn off theTV and unplug the power cord. Wait at least 30 minutes to allow the lamp to cool down before replacing 120V At the rear of the TV, locate the LAMP COMPARTMENT. Using a Phillips type screwdriver loosen the screw until the LAMP COVER...
- Page 58 3. Loosen thescrew securing thelamp unit w ith aPhillips head s crew driver asshown. Remove thelamp unit b yholding thelamp h andle, then pulling outwards. PULL OUTWARDS THE LAMP UNIT LAMP UNIT LAMP UNIT Turn counterclockwise to loosen the lamp unit screw. Replace with the new lamp.
- Page 59 Be sure to install the lamp cover by re-engaging the two clips and slide to the right. Then tighten the screw of the lamp cover before turning the power on, otherwise it may cause unusual colors. If the lamp cover is not installed and you try to turn ON the TV ,the power will be off and the Lamp Indicator will flash (see page 9).
- Page 60 Poor reception on some channels • • • • This protective technology should provide for years of Picture rolls vertically • • lasting entertainment from No color O your HITACHI LCD Rear Projection Television. P°°r c°l°r ! O 010010 IOIO...
-
Page 61: Ignition Noise
IGNITION NOISE: Black s pots o rhorizontal streaks may appear, picture m ay flutter o rdrift. Usually caused b yinterference from automobile ignition systems, neon lamps, electrical drills, and other electrical appliances. GHOSTS: Ghosts are caused b ythetelevision signal following twopaths. One isthe direct path and theother i sreflected from tallbuildings, hills orsome o ther objects. -
Page 62: Component Video: Y-Pb/Pr
FEATURES: INPUTS: Superfine Picture Quality; 1280 L ine H orizontal Power Input ........AC 120V, 6OHz Resolution Stand-by Power ......Less than 1 Watt Remote (Controls many PVR/VCR brands, cable Power Consumption - Refer to rear panel at the boxes, satellite boxes, and other audio e quipment). back of the T.V. - Page 63 In Canada: 1-800-HITACHI (1-800-448-2244) convenient and expedient assistance. Our service hotline operator will direct you to the HITACHI Monday - Friday (EST) ......9:00am - 7:00pm Authorized Service Facility nearest you. Just present Saturday (EST) ........9:00am...
-
Page 64: End User License Agreement
North America only. You agree that you will not export you ("you" or "your"), in your capacity as the owner of a HITACHI brand re-export the Software. You specifically agree not to export or re- digital television (the "DTV'),... -
Page 65: Auto Aspect
Appendix IMAGE INPUT AUTO ASPECT INPUT FORMAT ASPECT VIDEO On/Off Air or Cable NTSC (Analog Channels 16:9 Input 1 HDMI 480i/480p 16:9 Letter Letter No Info. On/Off NTSC 16:9 16:9 Inputs S-Video 1 Video Letter Letter No Info. On/Off 16:9 480i/480p 16:9 Inputs 3 &... - Page 66 Accessories ..............Input button ............7, 23 Antennas (Connecting) ..........Aspect Ratio ............. Lamp Replacement ..........60-63 Audio Language Languages ............Menu Language ............ Dolby D igital ............Audio Language ........... DRC (Dynamic Range Compression) ....Locks SRS ............... Change Access Code ...........
- Page 67 HITACHI Inspire QR66311...