Table of Contents
Advertisement
Quick Links
Advertisement
Chapters
Table of Contents

Related Manuals for Breville BOV820


Summary of Contents for Breville BOV820
- Page 1 Smart Oven ™ Instruction Book – BOV820...
-
Page 2: Table Of Contents
RECOMMENDS the protective cover fitted on the power plug. SAFETY FIRST • Do not use the appliance At Breville we are very ® near the edge of a safety conscious. We design benchtop or table. Ensure... - Page 3 • A fire may occur if the • Do not touch hot surfaces. oven is covered or touches To avoid burns, use flammable material, extreme caution when including curtains, removing pans, dishes draperies, walls, and the and accessories such like, when in operation. as the included grilling •...
- Page 4 Do not use the appliance • Caution should be exercised when using pans outdoors, or for anything and dishes constructed of other than its intended materials other than metal. use. Misuse can cause Ensure pans and dishes injury. are oven safe before using •...
- Page 5 SPECIFIC children) with reduced physical, sensory or INSTRUCTIONS mental capabilities, FOR BOV820 or lack of experience and knowledge, unless • We recommend the oven they have been given is operated on a dedicated supervision or instruction circuit separated from concerning the use of the other appliances.
- Page 6 To protect against • The bulb gets hot quickly. electric shock or Only ever use the light fire, do not immerse the button to turn on the light. power cord, power plug • Do not operate the light or appliance in water if the bulb housing, or any other liquid.
- Page 7 BREVILLE ASSIST™ PLUG appliance Your Breville ® comes with a unique Assist ™ Plug, conveniently designed with a finger hole to ease removal from the power outlet. This symbol indicates, temperature of accessible surfaces may be high when the appliance is operating and for some time after use.
-
Page 8: Components
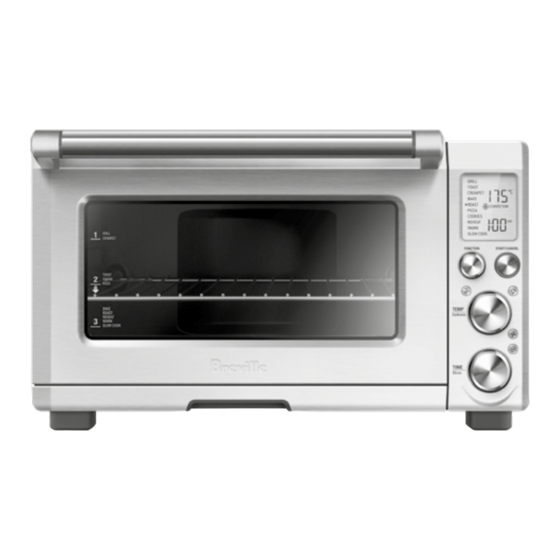
F. Top rack height position: GRILL function. G. Middle rack height position: TOAST, Crumpet, PIZZA and COOKIES functions. H. Bottom rack height position: BAKE, ROAST, REHEAT, WARM and SLOW COOK functions. I. Wire rack J. Crumb tray K. Ventilation slots L. Breville Assist™ Plug... - Page 9 Accessories sold separately: Bamboo Cutting Board Part No: BOV800CB M. LCD screen N. START/CANCEL button O. FUNCTION dial TEMPERATURE conversion button Q. TEMPERATURE dial/toast and crumpet darkness control R. TIME dial/toast and crumpet slice selection OVEN LIGHT button CONVECTION button FROZEN FOODS button...
-
Page 10: Quick Start Guide
Quick Start Guide This Quick Start Guide is designed for first time use. For safety and more information, refer to rest of the Instruction Booklet. PREPARING THE OVEN 8. Turn the FUNCTION dial to the right until the indicator reaches the PIZZA function. In order to remove any protective substances on the heating elements, it is necessary to run the oven empty for 15 minutes. - Page 11 ELEMENT IQ™ The Breville Smart Oven™ Pro features Element IQ™, a cooking technology that adjusts the ® power of the heating elements to cook food more evenly and quickly. Each of the oven’s functions is preset with our recommended setting, however we suggest experimenting with these depending on the recipe, amount of food and your personal taste.
-
Page 12: Functions
4. The bottom figure on the LCD screen indicates the preset cooking time for Functions the selected setting. For the TOAST and CRUMPET settings it indicates the number of slices. Turn the TIME dial to the left to OPERATING YOUR OVEN reduce the cooking time or to the right to increase the cooking time. -
Page 13: Grill Function
GRILL FUNCTION 6. For settings that feature a preheat cycle (BAKE, ROAST, PIZZA, COOKIES, SLOW The GRILL function is ideal for open-faced COOK), press the START/CANCEL button sandwiches, small cuts of meat, poultry and before placing food in the oven. The button fish, sausages and vegetables. -
Page 14: Toast Function
7. The timer will be displayed and 5. The darkness setting and number of automatically begin to count down. slices can be adjusted before or during the The temperature and time can be adjusted toasting cycle. during the grilling cycle by turning the a) The darkness setting is indicated by the corresponding TEMPERATURE and TIME row of circles at the top of the LCD screen. -
Page 15: Crumpet Function
CRUMPET FUNCTION 5. The darkness setting and number of crumpets can be adjusted before or during The CRUMPET function crisps the top of your the toasting cycle. crumpet while only lightly toasting the base. a) The darkness setting is indicated by the row This function is also ideal for toasting bagels or of triangles at the top of the LCD screen. -
Page 16: Bake Function
BAKE FUNCTION 5. Press the START/CANCEL button to activate the BAKE function. The button The BAKE function cooks food evenly backlight will illuminate red, the oven throughout. This function is ideal for baking alert will sound and the LCD screen will cakes, muffins, brownies and pastries. -
Page 17: Roast Function
ROAST FUNCTION 5. Press the START/CANCEL button to activate the ROAST function. The button The ROAST function is ideal for cooking a backlight will illuminate red, the oven variety of meats and poultry. Food will be alert will sound and the LCD screen will tender and juicy on the inside and roasted to illuminate orange. -
Page 18: Pizza Function
PIZZA FUNCTION 5. Press the START/CANCEL button to activate the PIZZA function. The button The PIZZA function melts and browns cheese backlight will illuminate red, the oven and toppings, while crisping up the pizza crust.. alert will sound and the LCD screen will illuminate orange. -
Page 19: Cookies Function
A note on pizza stones COOKIES FUNCTION When using a pizza stone, it is necessary The COOKIES function is ideal for baking to first heat the stone (without a pizza) for homemade or commercially prepared cookies optimum results. and other baked treats. Ready-to-bake crescent rolls, cinnamon scrolls, 1. -
Page 20: Reheat Function
5. Press the START/CANCEL button to 4. Turn the FUNCTION dial until the activate the COOKIES function. The button indicator on the LCD screen reaches backlight will illuminate red, the oven the REHEAT function. The top figure alert will sound and the LCD screen will on the LCD screen indicates the preset illuminate orange. -
Page 21: Warm Function
WARM FUNCTION illuminate orange. 7. The timer will be displayed and The WARM function maintains hot foods at automatically begin to count down. the recommended temperature to prevent The temperature and time can be adjusted bacterial growth (70°C/160°F or above). during the warming cycle by turning the 1. - Page 22 Time can be adjusted during the slow The only exception is the optional Breville ® cook cycle by turning the corresponding Bamboo Cutting Board and Serving Tray that TIME dial.
-
Page 23: Replacing The Oven Light
REPLACING THE OVEN LIGHT WARNING Always unplug oven and let cool before replacing bulb. Only use a 25-Watt, 220–240V, G9 type oven bulb. 4. Use a soft cloth to insert the new bulb. 1. Remove the wire rack from the oven before Do not directly touch the surface of the bulb replacing the light. -
Page 24: Care & Cleaning
CLEANING THE INTERIOR Care & Cleaning 1. The walls on the inside of the oven feature a non-stick coating for easy cleaning. To clean any spattering that may occur while Before cleaning, ensure the oven is turned off cooking, wipe the walls with a soft, damp by pressing the START/CANCEL button on sponge. - Page 25 5. Ensure the door is closed. 6. Store the appliance in an upright position standing level on its support legs. Do not store anything on top. The only exception is the optional Breville Bamboo Cutting ® Board and Serving Tray.
-
Page 26: Troubleshooting
Troubleshooting POSSIBLE PROBLEM EASY SOLUTION • Oven will not switch "ON". Check that the power plug is securely inserted into the outlet. • Insert the power plug into an independent outlet. • Insert the power plug into a different outlet. •... - Page 27 8–10 minutes from start-up, including opening the oven door when the ‘preheat’ alert sounds, to reach the target temperature. To ensure the fastest heat up time, the Breville ® oven uses the maximum allowable power from the outlet (1500W for baking, 2400W for toasting).
- Page 28 Notes...
- Page 29 Notes...
-
Page 30: Warranty
During this warranty period, Breville will provide repairs and replacement for any defective product (based on Breville’s Warranty Policy). Also, all legal warranty rights under Korea’s legislation will be protected and... - Page 31 Smart Oven ™ 설명서 – BOV820...
- Page 32 중요 안전 지침 목차 사용하기 전에 모든 지침을 읽고 나중에 참조할 수 2 Breville®은 안전을 최우선으로 합니다 있도록 잘 보관합니다. 8 제품 구조 10 빠른 시작 가이드 전기 제품을 사용할 때는 12 기능 항상 다음을 포함한 기본 − 오븐 작동...
- Page 33 • 오븐 작동 중 오븐을 덮거나 • 뜨거운 표면을 만지면 커튼, 직물, 벽 등 가연성 안 됩니다. 화상 방지를 물질에 닿으면 화재가 위해 뜨거운 기름 등의 발생할 수 있습니다. 고열 액체가 들어 있는 팬이나 접시 또는 그릴 랙 • 고압 가스나 전기 버너 및...
- Page 34 • 금속 이외의 재료로 사용하거나 원래의 용도 만들어진 팬과 접시를 이외의 용도로 사용하면 사용할 때는 주의해야 안 됩니다. 잘못 사용하면 합니다. 오븐에서 부상을 입을 수 있습니다. 사용하기 전에 팬과 • 오븐 세척에 스팀 접시가 오븐에서 사용이 청소기를 사용하면 안 가능한지 확인합니다. 됩니다.
- Page 35 BOV820에 대한 • 이 제품은 어린이를 포함하여 신체적, 감각적, 구체적인 지침 정신적 능력이 떨어지거나 경험과 지식이 부족한 • 이 오븐을 다른 기기와 사람이 사용하도록 분리된 전용 회로에서 제작되지 않았습니다. 단, 작동하는 것을 권장합니다. 그러한 사람의 안전을 확실하지 않은 경우 면허를...
- Page 36 • 빵 부스러기 쟁반을 • 25W, 220–240V, G9형 정기적으로 청소합니다. 오븐 전구만 사용합니다. 빵 부스러기 쟁반을 • 전구를 다룰 때는 항상 청소하려면: 부드러운 천을 사용하고 피부의 유분이 전구를 −오븐을 끄고, 손상시킬 수 있으므로 −오븐을 완전히 식힌 다음 표면을 직접 만지면 전원 콘센트에서 전원 코드를 분리합니다. 안 됩니다. −빵 부스러기 쟁반을...
-
Page 37: Breville®은 안전을 최우선으로 합니다
BREVILLE ASSIST™ 플러그 Breville® 제품에는 전원 콘센트에서 플러그를 쉽게 분리할 수 있도록 손가락 구멍을 낸 고유한 Assist™ 플러그가 함께 제공됩니다. 뜨거운 표면 만지지 마십시오 이 기호는 제품이 작동 중일 때와 사용 후 일정 시간 동안에는 접근 가능한 표면의 온도가 높을 수... -
Page 38: 제품 구조
그릴(GRILL) 기능. G. 중간 선반 높이 위치: 토스트(TOAST), 크럼펫(Crumpet), 피자(PIZZA) 및 쿠키(COOKIES) 기능. H. 하단 선반 높이 위치: 베이킹(BAKE), 로스팅(ROAST), 재가열(REHEAT), 보온(WARM) 및 슬로우 쿠킹(SLOW COOK) 기능. I. 철제 선반 J. 빵 부스러기 쟁반 K. 환기구 L. Breville Assist™ 플러그... - Page 39 별도로 판매되는 액세서리: 대나무 도마 부품 번호: BOV800CB M. LCD 화면 N. 시작/취소(START/CANCEL) 버튼 O. 기능(FUNCTION) 다이얼 온도(TEMPERATURE) 변환 버튼 Q. 온도(TEMPERATURE) 다이얼/토스트 및 크럼펫 구움 색 조절 R. 시간(TIME) 다이얼/토스트 및 크럼펫 조각 선택 오븐 조명(OVEN LIGHT) 버튼 컨벡션(CONVECTION) 버튼 냉동식품(FROZEN FOODS) 버튼...
-
Page 40: 빠른 시작 가이드
빠른 시작 가이드 이 빠른 시작 가이드는 처음 사용할 때 참조하시기 바랍니다. 안전 및 자세한 정보는 사용 설명서의 나머지 부분을 참조하시기 바랍니다. 오븐 준비 8. 표시등이 피자(PIZZA) 기능을 가리킬 때까지 기능(FUNCTION) 다이얼을 발열체의 보호 물질을 제거하려면 오븐을 15분 오른쪽으로 돌립니다. 동안... - Page 41 ELEMENT IQ™ Breville® Smart Oven Pro에는 발열체의 세기를 조절하여 음식을 더 고르고 빠르게 조리하는 ™ 조리 기술인 Element IQ 가 탑재되어 있습니다. 각 오븐의 기능은 권장 설정으로 사전 설정되어 ™ 있지만 조리법, 음식의 양 및 개인 취향에 따라 시도해 볼 것을 권장합니다.
-
Page 42: 오븐 작동
4. LCD 화면의 하단 숫자는 선택한 설정에 기능 대한 사전 설정 조리 시간을 나타냅니다. 토스트(TOAST) 및 크럼펫(CRUMPET) 설정의 경우 조각 수를 나타냅니다. 조리 시간을 줄이려면 시간(TIME) 다이얼을 왼쪽으로 돌리고 조리 시간을 늘리려면 오븐 작동 오른쪽으로 돌립니다. 1. 선반의 살이 위쪽을 향하도록 철제 선반을 시간(TIME) 배치하고... -
Page 43: 그릴(Grill) 기능
그릴(GRILL) 기능 6. 예열 사이클이 있는 설정(베이킹(BAKE), 로스팅(ROAST), 피자(PIZZA), 그릴(GRILL) 기능은 오픈 샌드위치, 쿠키(COOKIES), 슬로우 쿠킹(SLOW 작은 고기 부위, 가금류, 생선, 소시지 및 COOK))의 경우 오븐에 음식을 넣기 전에 채소에 이상적입니다. 그릴은 캐서롤과 시작/취소(START/CANCEL) 버튼을 그라탕의 윗면을 노릇노릇하게 굽는 데에도 누릅니다. -
Page 44: 토스트(Toast) 기능
7. 타이머가 표시되고 자동으로 카운트다운이 5. 굽기 전이나 굽는 동안 구움 색 설정과 조각 시작됩니다. 해당 온도(TEMPERATURE) 수를 조정할 수 있습니다. 및 시간(TIME) 다이얼을 돌려 그릴 사이클 a) 구움 색 설정은 LCD 화면 상단 동그라미의 동안 온도와 시간을 조정할 수 있습니다. 줄로... -
Page 45: 크럼펫(Crumpet) 기능
크럼펫(CRUMPET) 기능 5. 굽기 전이나 굽는 동안 구움 색 설정과 크럼펫 수를 조정할 수 있습니다. 크럼펫(CRUMPET) 기능은 크럼펫의 윗부분을 a) 구움 색 설정은 LCD 화면 상단의 바삭하게 하고 밑부분만 살짝 구워 줍니다. 삼각형의 줄로 표시됩니다. 구움 색 설정을 이 기능은 베이글이나 한 면을 다른 면보다 줄이려면... -
Page 46: 베이킹(Bake) 기능
베이킹(BAKE) 기능 5. 시작/취소(START/CANCEL) 버튼을 눌러 베이킹(BAKE) 기능을 활성화합니다. 버튼 베이킹(BAKE) 기능은 음식을 전체적으로 백라이트에 빨간색 불이 들어오고 오븐 고르게 요리합니다. 이 기능은 케이크, 경고음이 울리면서 LCD 화면에 주황색 머핀, 브라우니 및 페이스트리를 굽는 데 불이 들어옵니다. LCD 화면에 깜박이는 이상적입니다. -
Page 47: 로스팅(Roast) 기능
로스팅(ROAST) 기능 최대 10시간을 선택합니다. 5. 시작/취소(START/CANCEL) 버튼을 눌러 로스팅(ROAST) 기능은 다양한 육류 및 가금류 로스팅(ROAST) 기능을 활성화합니다. 요리에 이상적입니다. 음식의 속은 부드럽고 버튼 백라이트에 빨간색 불이 들어오고 육즙이 많아지며 겉은 완벽하게 구워집니다. 오븐 경고음이 울리면서 LCD 화면에 1. 선반의 살이 위쪽을 향하도록 하여 철제 주황색... -
Page 48: 피자(Pizza) 기능
피자(PIZZA) 기능 5. 시작/취소(START/CANCEL) 버튼을 눌러 피자(PIZZA) 기능을 활성화합니다. 버튼 피자(PIZZA) 기능은 치즈와 토핑을 녹여서 백라이트에 빨간색 불이 들어오고 오븐 노릇노릇하게 굽는 동시에 피자 크러스트를 경고음이 울리면서 LCD 화면에 주황색 바삭하게 만드는 기능입니다. 불이 들어옵니다. LCD 화면에 깜박이는 '예열 중(PREHEATING)'이 표시됩니다. 1. -
Page 49: 쿠키(Cookies) 기능
쿠키(COOKIES) 기능 피자 스톤에 관한 참고 사항 피자 스톤을 사용할 때 최적의 결과를 얻으려면 쿠키(COOKIES) 기능은 홈메이드 또는 먼저 피자 없이 스톤을 가열해야 합니다. 시판되고 있는 쿠키 및 기타 구운 과자를 굽는 데 이상적입니다. 1. 선반의 살이 위쪽을 향하도록 하여 철제 즉석에서... -
Page 50: 재가열(Reheat) 기능
5. 시작/취소(START/CANCEL) 버튼을 눌러 4. LCD 화면의 표시등이 재가열(REHEAT) 쿠키(COOKIES) 기능을 활성화합니다. 기능을 가리킬 때까지 기능(FUNCTION) 버튼 백라이트에 빨간색 불이 들어오고 다이얼을 돌립니다. LCD 화면의 상단 오븐 경고음이 울리면서 LCD 화면에 그림은 '165°C'의 사전 설정 온도를 주황색 불이 들어옵니다. LCD 화면에 나타내고... -
Page 51: 보온(Warm) 기능
보온(WARM) 기능 7. 타이머가 표시되고 자동으로 카운트다운이 시작됩니다. 해당 온도(TEMPERATURE) 보온(WARM) 기능은 뜨거운 음식을 및 시간(TIME) 다이얼을 돌려 보온 사이클 권장 온도로 유지하여 박테리아 증식을 동안 온도와 시간을 조정할 수 있습니다. 방지합니다(70°C/160°F 이상). 시작/취소(START/CANCEL) 버튼을 눌러 언제든지 사이클을 멈출 수 있습니다. 1. - Page 52 중앙에 놓아서 공기가 음식의 모든 면으로 뜨겁습니다. 따라서 오븐 위에 물건을 보관하지 흐르도록 합니다. 않는 것을 권장합니다. 8. 예열 경고음이 울린 후 타이머가 옵션인 Breville® 대나무 도마와 오븐 상단의 자동으로 카운트다운을 시작합니다. 골이 있는 부분에 들어맞는 서빙 트레이만 해당 시간(TIME) 다이얼을 돌려 슬로우 가능합니다.
-
Page 53: 오븐 조명 교체
오븐 조명 교체 4. 부드러운 천을 사용하여 새 전구를 삽입합니다. 피부의 유분이 전구를 손상시킬 수 있으므로 손가락으로 전구 경고 표면을 직접 만지면 안 됩니다. 전구를 교체하기 전에 항상 오븐의 플러그를 뽑고 식힙니다. 25W, 220–240V, G9형 오븐 전구만 사용합니다. 1. 조명을 교체하기 전에 오븐에서 철제 선반을... -
Page 54: 관리 및 청소
내부 청소 관리 및 청소 1. 오븐 내부의 벽에는 논스틱 코팅이 되어 있어 쉽게 청소할 수 있습니다. 요리하는 동안 발생할 수 있는 튄 자국을 청소하려면 부드럽고 젖은 스펀지로 벽을 닦아 줍니다. 청소하기 전에 제어판의 시작/취소(START/ 얼룩이 생기는 것을 방지하기 위해 CANCEL) 버튼을... - Page 55 확인합니다. 그릴 선반을 베이킹 팬에 삽입하고 중간 선반 높이 위치의 철제 선반에 놓습니다. 5. 도어가 닫혀 있는지 확인합니다. 6. 지지대 다리의 수평을 맞추고 똑바로 서 있는 상태로 제품을 보관합니다. 위에 어떤 것도 올려놓으면 안 됩니다. 옵션인 Breville® 대나무 도마와 서빙 트레이만 가능합니다.
-
Page 56: 문제 해결
문제 해결 가능한 문제 손쉬운 해결책 오븐이 "켜기(ON)"로 전환되지 • 전원 플러그가 콘센트에 제대로 꽂혀 있는지 확인합니다. 않습니다. • 전원 플러그를 독립된 콘센트에 연결합니다. • 전원 플러그를 다른 콘센트에 연결합니다. • 필요한 경우 회로 차단기를 재설정합니다. 오븐 LCD 기본 설정으로 •... - Page 57 계산되었습니다. 이 때문에 '예열' 경고 시 LCD 화면의 온도가 목표 온도와 일치하지 않습니다. '예열' 경고음이 울릴 때 오븐 도어를 여는 것을 포함하여 오븐 작동을 시작한 후 목표 온도에 도달하는 데 8-10분 가량이 소요됩니다. 가장 빠른 예열 시간을 보장하기 위해 Breville® 오븐은 콘센트의 최대 허용 전력(베이킹 1500W, 토스팅 2400W)을 사용합니다.
- Page 58 제공합니다(Breville의 보증 정책에 따름). 또한, 고객이 대한민국의 법률에 따라 제품의 하자에 관하여 행사할 수 있는 법적 권리는 보호되며 Breville의 보증정책으로 인하여 이러한 법적 권리가 훼손되는 것은 아닙니다. Breville의 보증 서비스에 관한 자세한 내용과 고객센터에 대한 문의 방법을 살펴 보시려면 www.breville.com�kr을 방문해 주시기 바랍니다.
- Page 59 참고...
- Page 60 브레빌코리아 유한회사 서울특별시 강남구 테헤란로 ���, ��층 ���호 (대치동) 고객 서비스 센터: ���-���-���� Copyright Breville Pty. Ltd. 2022. 지속적인 제품 개선으로 인해, 본 책자에 담긴 제품 삽화 및 사진은 실제 제품과 약간 다를 수 있습니다. XXX KOR � A22 BOV820 KOR – C22...