
Related Manuals for Makita XCV22


Summary of Contents for Makita XCV22
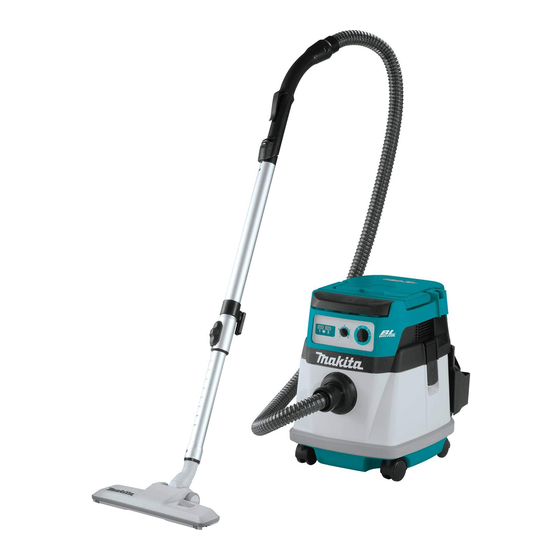
- Page 1 INSTRUCTION MANUAL MANUAL DE INSTRUCCIONES Cordless Vacuum Cleaner Aspiradora Inalámbrica XCV22 XCV25 IMPORTANT: Read Before Using. IMPORTANTE: Lea antes de usar.
-
Page 2: Specifications
ENGLISH (Original instructions) SPECIFICATIONS Model: XCV22 XCV25 Standard filter type Powder filter (for dry dust) Maximum air volume (with BL1850B, Φ38 mm (1-1/2") x 2.5 m (98-1/2") hose) 2.4 m /min (84.74 cu.ft/min) Vacuum (with BL1850B, Φ38 mm (1-1/2") x 2.5 m (98-1/2") hose) - Page 3 Do not put any object into openings. Solidifying and conductive fine • Do not use with any opening blocked; powder (metal or carbon powder) keep free of dust, lint, hair, and any- Dehumidifier • thing that may reduce air flow. Large amount of powder (flour, •...
- Page 4 Symbols Use appliances only with specifi- cally designated battery packs. Use of any other battery packs may create The followings show the symbols used for a risk of injury and fire. tool. When battery pack is not in use, keep it away from other metal volts objects, like paper clips, coins, keys, nails, screws or other small...
- Page 5 16. Always close the lid of the slot when causing fires, personal injury and damage. It will operating. also void the Makita warranty for the Makita tool and 17. Do not remove the wireless unit from the slot charger. while the power is being supplied to the tool.
-
Page 6: Functional Description
26. Do not insert any devices other than Makita your hands and result in damage to the cleaner and wireless unit into the slot on the tool. - Page 7 To remove the battery cartridge, slide it from the tool Indicating the remaining battery while sliding the button in front of the cartridge. capacity CAUTION: Always install the battery cartridge fully until the red indicator cannot be seen. If not, it may accidentally fall out of the cleaner, causing injury to you or someone around you.
-
Page 8: Overload Protection
Suction power can be increased by turning the suc- Tool / battery protection system tion force adjusting knob from the symbol to symbol. The tool is equipped with a tool/battery protection sys- tem. This system automatically cuts off power to the NOTICE: Always set the stand-by switch to the "O"... - Page 9 Installing the paper pack ASSEMBLY Optional accessory CAUTION: Always be sure that the tool is WARNING: When using the paper pack, also switched off and the battery cartridge is removed use the prefilter together that is preinstalled on before carrying out any work on the tool. the tool.
-
Page 10: Installing The Tool Box
Spread the bag around the top of the tank so that the NOTE: Take the polyethylene bag carefully out of the prefilter edge can catch and hold the bag securely. tank so that the polyethylene bag cannot be caught and torn by the protrusion inside the tank when emp- tying it. - Page 11 Insert the hose onto the mounting port of the tank and Adjusting the length of the slide- turn it clockwise until it locks. type extension wand Optional accessory With pressing the slide button, adjust the wand length. The length is locked when releasing the slide button. Connecting the attachment with lock function Optional accessory...
- Page 12 ► 1. Lid NOTE: Wireless activation needs Makita tools Insert the wireless unit to the slot and then close the lid. equipped with the wireless unit.
- Page 13 Tool registration for the cleaner NOTE: A Makita tool supporting the wireless activa- tion function is required for the tool registration. NOTE: Finish installing the wireless unit to the tool before starting the tool registration.
- Page 14 Connect the hose of the cleaner with the tool. CAUTION: Always check if the wireless acti- vation function works before starting a work with the tool. To stop the wireless activation, push the wireless activa- tion button on the tool, or set the stand-by switch on the cleaner to "I"...
- Page 15 Press the wireless activation button on the cleaner Erasing all tool registrations for 6 seconds. The wireless activation lamp blinks in green and then become red. After that, press the wire- You can erase all tool registrations from the cleaner as less activation button on the tool in the same way.
- Page 16 Description of the wireless activation lamp status ► 1. Wireless activation button 2. Wireless activation lamp The wireless activation lamp shows the status of the wireless activation function. Refer to the below table for the meaning of the lamp status. Status Wireless activation lamp Description...
- Page 17 Before asking for repairs, conduct your own inspection first. If you find a problem that is not explained in the manual, do not attempt to dismantle the tool. Instead, ask Makita Authorized Service Centers, always using Makita replace- ment parts for repairs.
-
Page 18: Maintenance
Discoloration, deformation or cracks may result. To maintain product SAFETY and RELIABILITY, repairs, any other maintenance or adjustment should be performed by Makita Authorized or Factory Service Centers, always using Makita replacement parts. Storage of accessories Cleaning of powder filter (HEPA) and... -
Page 19: Optional Accessories
OPTIONAL ACCESSORIES CAUTION: These accessories or attachments are recommended for use with your Makita tool specified in this manual. The use of any other accessories or attachments might present a risk of injury to persons. Only use accessory or attachment for its stated purpose. -
Page 20: Instrucciones Importantes De Seguridad
ESPAÑOL (Instrucciones originales) ESPECIFICACIONES Modelo: XCV22 XCV25 Tipo de filtro estándar Filtro de polvo (para polvo seco) Volumen de aire máximo 2,4 m /min (84,74 cu.ft/min) (con BL1850B, manguera de Φ38 mm (1-1/2″) x 2,5 m (98-1/2″)) Aspiradora (con BL1850B, manguera de Φ38 mm (1-1/2″) x 2,5 m (98-1/2″)) - Page 21 No manipule la batería ni el aparato Objetos afilados (cristal, cubier- • con las manos mojadas. tos, astillas de madera, meta- les, piedras, clavos, cuchillas, No introduzca ningún objeto en las aber- tachuelas, etc.) turas. No lo utilice con ninguna abertura bloqueada;...
- Page 22 Los niños deben supervisarse para No utilice un paquete de baterías asegurar que ellos no empleen los o aparato que esté dañado o haya aparatos como juguete. sido modificado. Las baterías daña- das o modificadas podrían com- Uso y cuidado de la herramienta portarse de manera impredecible a batería causando un incendio, explosión o...
- Page 23 Asimismo, esto invalidará la garan- corriente, sobrecalentamiento, tía de Makita para la herramienta y el cargador Makita. posibles quemaduras e incluso una Consejos para alargar al máximo descompostura.
-
Page 24: Descripción De Las Piezas
No exponga la unidad inalámbrica a la lluvia ni 26. No inserte ningún otro dispositivo que no sea a condiciones de humedad. la unidad inalámbrica de Makita en la ranura de No utilice la unidad inalámbrica en lugares la herramienta. -
Page 25: Descripción Del Funcionamiento
Para quitar el cartucho de batería, sáquelo de la herra- DESCRIPCIÓN DEL mienta mientras desliza el botón enfrente del cartucho. FUNCIONAMIENTO PRECAUCIÓN: Siempre introduzca comple- tamente el cartucho de batería hasta que el indi- cador rojo no pueda verse. De lo contrario, podría PRECAUCIÓN: Asegúrese siempre de que la salirse accidentalmente de la aspiradora y ocasio-... -
Page 26: Protección Contra Sobrecarga
Indicación de capacidad restante de Sistema de protección para la la batería herramienta/batería La herramienta está equipada con un sistema de protección de la herramienta/batería. Este sistema corta en forma automática el suministro de energía al motor para prolongar la vida útil de la herramienta y la batería. -
Page 27: Montaje
Para poner la aspiradora en el modo en espera, oprima MONTAJE nuevamente el botón de encendido/apagado. Para apagar la aspiradora, ajuste el interruptor de modo en espera en el lado “O”. PRECAUCIÓN: Asegúrese siempre de que la La potencia de succión se puede ajustar según sus herramienta esté... - Page 28 Instalación de la bolsa de papel para Instalación de la bolsa de polietileno polvo La aspiradora también se puede utilizar sin la bolsa de polietileno. Sin embargo, con el uso de la bolsa de Accesorio opcional polietileno resulta más fácil vaciar el tanque sin ensu- ciarse las manos.
-
Page 29: Conexión De La Manguera
Cierre la cubierta de la batería y ponga el seguro. Vaciado de la bolsa de polietileno ADVERTENCIA: Asegúrese siempre de que la aspiradora esté apagada y que el cartucho de batería haya sido extraído antes de vaciar la bolsa de polietileno. El no hacerlo podría ocasionar una descarga eléctrica y lesiones personales graves. - Page 30 Conexión del aditamento con la Ajuste de la longitud del tubo de función de bloqueo extensión de tipo corredera Accesorio opcional Accesorio opcional Inserte el aditamento en la entrada de succión hasta Ajuste la longitud del tubo mientras presiona el botón que escuche un clic.
- Page 31 Cuando inserte la unidad inalámbrica, alinee las partes Makita. salientes con las partes cóncavas en la ranura. NOTA: Antes de usar por primera vez la función de activación inalámbrica con cada herramienta, es necesario registrar la herramienta.
- Page 32 Registro de herramientas para la aspiradora NOTA: Para el registro de la herramienta, se requiere una herramienta Makita compatible con la función de activación inalámbrica. NOTA: Termine de instalar la unidad inalámbrica en la herramienta antes de comenzar con el registro de la herramienta.
- Page 33 Oprima el botón de activación inalámbrica en la NOTA: Las luces indicadoras de activación inalámbrica herramienta durante un lapso breve. La luz indicadora terminarán parpadeando en verde después de un lapso de activación inalámbrica parpadeará en azul. de 20 segundos. Oprima el botón de activación inalám- brica en la herramienta mientras la luz indicadora de acti- vación inalámbrica en la aspiradora esté...
- Page 34 Si la cancelación se realiza exitosamente, las luces indi- Cancelación del registro de cadoras de activación inalámbrica se encenderán en rojo herramientas para la aspiradora durante 2 segundos y comenzarán a parpadear en azul. NOTA: Las luces indicadoras de activación inalám- Realice el siguiente procedimiento para cancelar el brica terminarán parpadeando en rojo después de un registro de la herramienta para la aspiradora.
- Page 35 Descripción del estado de la luz indicadora de activación inalámbrica ► 1. Botón de activación inalámbrica 2. Luz indica- dora de activación inalámbrica La luz indicadora de activación inalámbrica muestra el estado de la función de activación inalámbrica. Consulte la tabla a continuación para ver qué...
- Page 36 Antes de solicitar alguna reparación, primero realice una inspección por su cuenta. Si detecta algún problema que no esté explicado en el manual, no intente desensamblar la herramienta. En vez de esto, solicite la reparación a un centro de servicio autorizado de Makita, usando siempre piezas de repuesto Makita. Estado de la anomalía Causa probable (avería)
-
Page 37: Mantenimiento
Para mantener la SEGURIDAD y FIABILIDAD del pro- ducto, las reparaciones, y cualquier otra tarea de man- tenimiento o ajuste deberán ser realizadas en centros de servicio autorizados o de fábrica Makita, empleando siempre repuestos Makita. 37 ESPAÑOL... -
Page 38: Accesorios Opcionales
Estos accesorios o aditamen- tos están recomendados para utilizarse con su el prefiltro herramienta Makita especificada en este manual. El empleo de cualquier otro accesorio o aditamento La obstrucción del filtro de polvo, el prefiltro y el puede conllevar el riesgo de lesiones personales. - Page 39 En caso de no disponer de esta hoja de garantía anexa, consulte los detalles sobre la garantía descritos en el sitio web de su país respectivo indicado a continuación. Estados Unidos de América: www.makitatools.com Canadá: www.makita.ca Otros países: www.makita.com 39 ESPAÑOL...
- Page 40 Para reducir la exposición a estos productos químicos: trabaje en un área bien ventilada y póngase el equipo de seguridad indicado, tal como las máscaras contra polvo que están especialmente diseñadas para filtrar partículas microscópicas. Makita Corporation 3-11-8, Sumiyoshi-cho, Anjo, Aichi 446-8502 Japan 885781-942...