
Related Manuals for Makita MKTNXT707PT


Summary of Contents for Makita MKTNXT707PT
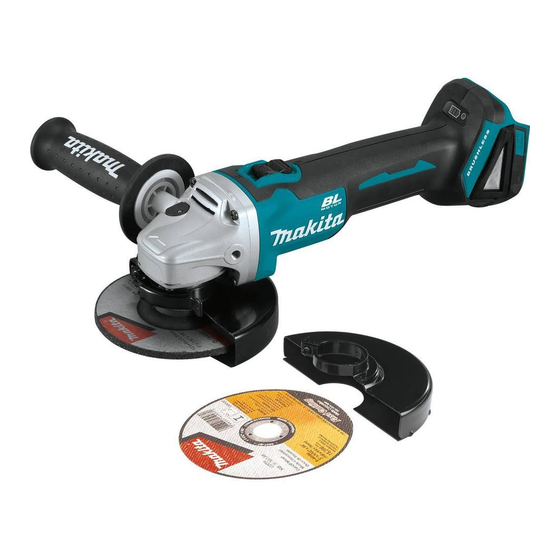
- Page 1 INSTRUCTION MANUAL MANUAL DE INSTRUCCIONES Cordless Angle Grinder Esmeriladora Angular Inalámbrica XAG03 XAG04 015078 IMPORTANT: Read Before Using. IMPORTANTE: Leer antes de usar.
-
Page 2: Specifications
ENGLISH (Original instructions) SPECIFICATIONS Model XAG03 XAG04 Wheel diameter 115 mm (4-1/2") 125 mm (5") Max. wheel thickness 6 mm (1/4") 6 mm (1/4") Spindle thread 5/8" Rated speed (n) / No load speed (n 8,500 /min With battery cartridge BL1815N, BL1820, BL1820B 348 mm (13-3/4") Overall length With battery cartridge BL1830, BL1830B,... - Page 3 12. Prevent unintentional starting. Ensure the Battery tool use and care switch is in the off-position before connecting 24. Recharge only with the charger specified by to power source and/or battery pack, picking the manufacturer. A charger that is suitable for up or carrying the tool.
- Page 4 The outside diameter and the thickness of your 13. Regularly clean the power tool’s air vents. The accessory must be within the capacity rating of motor’s fan will draw the dust inside the housing your power tool. Incorrectly sized accessories and excessive accumulation of powdered metal cannot be adequately guarded or controlled.
- Page 5 b) The grinding surface of centre depressed edge of the workpiece on both sides of the wheel. wheels must be mounted below the plane of f) Use extra caution when making a “pocket the guard lip. An improperly mounted wheel that cut”...
- Page 6 It will also ・ direct current void the Makita warranty for the Makita tool and charger. Tips for maintaining maximum battery life ・ rated speed...
-
Page 7: Functional Description
Indicating the remaining battery capacity FUNCTIONAL DESCRIPTION (Only for battery cartridges with "B" at the end of the model number.) CAUTION: Always be sure that the tool is switched off and the 1. Indicator lamps • battery cartridge is removed before adjusting or 2. - Page 8 Automatic speed change function 1. Slide switch 1. Mode indicator 015082 To start the tool, slide the slide switch toward the "I 015142 (ON)" position by pushing the rear of the slide switch. For continuous operation, press the front of the slide switch to lock it.
- Page 9 Installing or removing wheel guard (For depressed center wheel, multi disc / Battery indicator Blinking abrasive cut-off wheel, diamond wheel) WARNING: Protection lock works When using depressed center grinding • 015200 wheel/Multi-disc, wire wheel brush, cut-off wheel In this situation, the tool does not start even if turning or diamond wheel, the wheel guard must be fitted the tool off and on.
-
Page 10: Operation
For tool with locking screw type wheel guard Installing or removing abrasive disc (optional accessory) 1. Wheel guard 2. Bearing box 1. Sanding lock nut 3. Screw 2. Abrasive disc 3. Rubber pad 015303 Mount the wheel guard with the protrusions on the 015092 wheel guard band aligned with the notches on the Mount the rubber pad onto the spindle. - Page 11 Grinding and sanding operation Operation with abrasive cut-off / diamond wheel (optional accessory) 1. Lock nut 2. Abrasive cut-off wheel/diamond wheel 3. Inner flange 4. Wheel guard for abrasive cut-off wheel/diamond 015097 wheel ALWAYS hold the tool firmly with one hand on housing 010855 and the other on the side handle.
-
Page 12: Maintenance
These accessories or attachments are recommended • Remove the battery cartridge from the tool and place it for use with your Makita tool specified in this manual. upside down allowing easy access to spindle. Remove The use of any other accessories or attachments any accessories on spindle. - Page 13 If you need any assistance for more details regarding wheels. If you decide to use your Makita grinder these accessories, ask your local Makita Service Center. with approved accessories which you purchase Makita genuine battery and charger •...
- Page 14 COMPLETE tool, freight prepaid, to one of Makita’s Factory or Authorized Service Centers. If inspection shows the trouble is caused by defective workmanship or material, Makita will repair (or at our option, replace) without charge. This Warranty does not apply where:...
-
Page 15: Especificaciones
ESPAÑOL (Instrucciones originales) ESPECIFICACIONES Modelo XAG03 XAG04 Diámetro de disco 115 mm (4-1/2") 125 mm (5") Grosor máximo del disco 6 mm (1/4") 6 mm (1/4") Rosca del eje 5/8" Velocidad reportada (n) / Velocidad sin carga (n 8 500 r/min Con cartucho de batería BL1815N, BL1820, BL1820B 348 mm (13-3/4") Longitud total... - Page 16 riesgo de que se produzca una descarga eléctrica. interruptor es peligrosa y debe ser reemplazada. Si no es posible evitar usar una herramienta Desconecte la clavija de la fuente de energía y/o eléctrica en condiciones húmedas, utilice un la batería de la herramienta eléctrica antes de alimentador protegido con interruptor de circuito realizar ajustes, cambiar accesorios o guardar las de falla en tierra (ICFT).
- Page 17 ayuda médica. Puede que el líquido expulsado encajen con el equipo de montura de la herramienta de la batería cause irritación o quemaduras. eléctrica se desequilibrarán, vibrarán excesivamente y Servicio de mantenimiento puede que generen pérdida del control. 28. Haga que una persona calificada repare la No use accesorios dañados.
- Page 18 13. Limpie periódicamente aberturas e) No monte una cadena de sierra para labrado ventilación de la herramienta eléctrica. El en madera, ni tampoco un disco dentado para ventilador del motor atraerá polvo hacia adentro de sierra. Dichos discos generan retroceso bruscos y la carcasa y puede que la acumulación excesiva de pérdida del control con frecuencia.
- Page 19 b) Evite colocar su cuerpo en línea directa o detrás Advertencias de seguridad adicionales: del disco giratorio. Cuando el disco, en su punto de 16. Cuando utilice discos de amolar de centro operación, se esté alejando de su cuerpo, es posible hundido, asegúrese de utilizar solamente que un retroceso brusco proyecte el disco en rotación y discos reforzados con fibra de vidrio.
- Page 20 PRECAUCIÓN: Use solo baterías auténticas de Makita. ・ velocidad indicada El uso de baterías no auténticas de Makita, o baterías que hayan sido alteradas, puede que resulte en la ・ velocidad en vacío o sin carga explosión de la batería, originando un incendio, así...
-
Page 21: Descripción Del Funcionamiento
Indicación de la capacidad restante de la DESCRIPCIÓN DEL batería FUNCIONAMIENTO (Solo para cartuchos de batería con una "B" al final del número de modelo.) PRECAUCIÓN: 1. Luces Asegúrese siempre de que la herramienta esté • indicadoras apagada y el cartucho de batería extraído antes 2. - Page 22 1. Interruptor Estado indicador de la batería Capacidad restante de la deslizable Encendido batería Intermitencia APAGADO ("ON") 50 % - 100 % 20 % - 50 % 015082 Para iniciar la herramienta, deslice interruptor deslizable hacia la posición de encendido "I (ON)" al presionar la 0 % - 20 % parte trasera del interruptor deslizable.
- Page 23 Protección contra sobrecarga ENSAMBLE Cuando la herramienta es utilizada de tal manera que cause un consumo anormalmente alto de corriente, la herramienta automáticamente se para sin indicación PRECAUCIÓN: alguna. En este caso, apague la herramienta y detenga Asegúrese siempre de que la herramienta esté •...
- Page 24 Afloje la palanca en el protector de disco tras haber 1. Contratuerca aflojado el tornillo. Coloque el protector de disco con la 2. Disco de centro protuberancia en la banda de este protector alineada hundido con la ranura de la caja de cojinetes. Luego gire el 3.
-
Page 25: Operación
OPERACIÓN ADVERTENCIA: No deberá ser nunca necesario forzar la herramienta. • El peso de la herramienta aplica la presión adecuada . El forzamiento y la presión excesivos podrán ocasionar una peligrosa rotura del disco. Reemplace el disco SIEMPRE si deja caer la •... - Page 26 Retire el cartucho de la batería de la herramienta y Operación con disco de corte abrasivo/ colóquela boca arriba para permitir un fácil acceso al disco de diamante (accesorio opcional) eje. Coloque la brida interior y el disco de corte abrasivo / disco de diamante en el eje.
-
Page 27: Mantenimiento
015094 Centros de Servicio Autorizados por Makita, empleando Retire el cartucho de la batería de la herramienta y siempre repuestos Makita. colóquela boca arriba para permitir un fácil acceso al eje. -
Page 28: Accesorios Opcionales
Si decide usar su esmeriladora Makita con los accesorios aprobados los cuales adquirió de su distribuidor Makita o del centro de producción, asegúrese de obtener todos los sujetadores y... - Page 29 Modelo 115 mm (4-1/2") Modelo 125 mm (5") Empuñadura 36 Protector del disco (para disco esmerilador) Brida interior 45 Brida interior 45 Disco de centro hundido/multidisco Contratuerca 5/8 - 45 Contratuerca 5/8 - 45 Plato de goma 100 Plato de goma 115 Disco de lija Contratuerca de lijado 5/8 - 48 Contratuerca de lijado 5/8 - 48...
- Page 30 COMPLETA, porte pagado con antelación, a una de las fábricas o centros de servicio autorizados Makita. Si la inspección muestra que el problema ha sido causado por mano de obra o material defectuoso, Makita la reparará (o a nuestra opción, reemplazará) sin cobrar.
- Page 32 Para reducir la exposición a estos productos químicos: trabaje en un área bien ventilada y póngase el equipo de seguridad indicado, tal como las máscaras contra polvo que están especialmente diseñadas para filtrar partículas microscópicas. Makita Corporation 3-11-8, Sumiyoshi-cho, Anjo, Aichi 446-8502 Japan www.makita.com...