Makita UC014G Instruction Manual
Cordless chain saw
Hide thumbs
Also See for UC014G:
- Instruction manual (157 pages) ,
- Instruction manual (108 pages) ,
- Instruction manual (156 pages)

Related Manuals for Makita UC014G


Summary of Contents for Makita UC014G
- Page 1 INSTRUCTION MANUAL Cordless Chain Saw UC014G UC015G UC016G UC017G Read before use.
-
Page 2: Specifications
SPECIFICATIONS Model: UC014G UC015G UC016G UC017G Overall length 445 mm (without guide bar) Rated voltage D.C. 36 V - 40 V max Net weight 4.5 kg 6.2 - 6.9 kg Standard guide bar length 300 mm 350 mm 400 mm... -
Page 3: Safety Warnings
Applicable battery cartridge and charger Battery cartridge BL4040 / BL4050F* * : Recommended battery Charger DC40RA / DC40RB / DC40RC • Some of the battery cartridges and chargers listed above may not be available depending on your region of residence. WARNING: Only use the battery cartridges and chargers listed above. - Page 4 Avoid body contact with earthed or grounded Always wear protective goggles to protect surfaces, such as pipes, radiators, ranges and your eyes from injury when using power tools. refrigerators. There is an increased risk of elec- The goggles must comply with ANSI Z87.1 in the USA, EN 166 in Europe, or AS/NZS 1336 tric shock if your body is earthed or grounded.
-
Page 5: General Chain Saw Safety Warnings
When using the tool, do not wear cloth work Wear eye protection. Further protective equip- gloves which may be entangled. The entangle- ment for hearing, head, hands, legs and feet is recommended. Adequate protective equipment ment of cloth work gloves in the moving parts may result in personal injury. -
Page 6: Additional Safety Instructions
• Maintain a firm grip, with thumbs and Operation fingers encircling the chain saw handles, Before starting work, check that the chain with both hands on the saw and position saw is in proper working order and that its your body and arm to allow you to resist condition complies with the safety regulations. - Page 7 Avoid storing battery cartridge in a con- causing fires, personal injury and damage. It will tainer with other metal objects such as also void the Makita warranty for the Makita tool and nails, coins, etc. charger. Do not expose battery cartridge to water Tips for maintaining maximum or rain.
-
Page 8: Parts Description
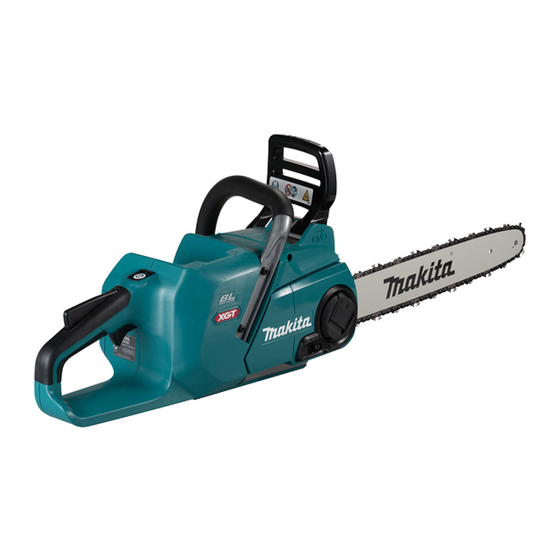
PARTS DESCRIPTION Fig.2 Battery cartridge Front hand guard Lever Guide bar Saw chain Adjusting dial Main power lamp Main power switch Lock-off lever Rear handle Switch trigger Front handle Oil tank cap Guide bar cover Adjusting screw (for oil pump) Chain catcher 8 ENGLISH... -
Page 9: Functional Description
Indicating the remaining battery capacity FUNCTIONAL DESCRIPTION Press the check button on the battery cartridge to indi- cate the remaining battery capacity. The indicator lamps light up for a few seconds. CAUTION: Always be sure that the tool is switched off and the battery cartridge is removed before adjusting or checking function on the tool. -
Page 10: Overheat Protection
WARNING: NEVER tape down or defeat pur- If no improvement can be found by restoring protection pose and function of lock-off lever. system, then contact your local Makita Service Center. NOTICE: CAUTION: If the tool stops due to a cause... -
Page 11: Adjusting The Chain Lubrication
Checking the chain brake Adjusting the chain lubrication You can adjust the oil pump feed rate with the adjusting screw. CAUTION: Hold the chain saw with both The amount of oil can be adjusted using the universal wrench. hands when switching it on. Hold the rear handle with your right hand, the front handle with your left. - Page 12 Turn the lever counterclockwise until the sprocket Turn the adjusting dial to "-" direction to slide the cover comes off. adjusting pin in the direction of arrow. Fig.10 ► 1 . Lever 2. Sprocket cover Remove the sprocket cover. Check the direction of the saw chain. Match the direction of the saw chain with that of the mark on the chain saw body.
-
Page 13: Removing The Saw Chain
12. Turn the lever clockwise until the sprocket cover is Pull the lever up while pressing its edge. secured then return it to the original position. Fig.17 ► 1 . Lever Turn the lever counterclockwise until the sprocket cover comes off. Fig.15 ► 1 . -
Page 14: Operation
The oil delivery may otherwise be impaired. NOTICE: Use the saw chain oil exclusively for Makita chain saws or equivalent oil available in the market. NOTICE: Never use oil including dust and parti- Fig.20... -
Page 15: Working With The Chain Saw
Push the button on the oil tank cap so that the After refilling, hold the chain saw away from the button on the other side stands up, and then remove the tree. Start it and wait until lubrication on saw chain is oil tank cap by turning it. - Page 16 If you cannot cut the timber right through with a single Continue the cut by applying slight pressure to stroke: the front handle, easing the saw back slightly. Move Apply light pressure to the handle and continue sawing the spike bumper further down the timber and raise the and draw the chain saw back a little;...
- Page 17 Burrowing and parallel-to-grain cuts — Consider the following with respect to each tree: • Direction of lean; CAUTION: Burrowing and parallel-to-grain • Loose or dry branches; cuts may only be carried out by persons with • Height of the tree; special training.
-
Page 18: Maintenance
Discoloration, deformation or cracks may result. To maintain product SAFETY and RELIABILITY, repairs, any other maintenance or adjustment should be performed by Makita Authorized or Factory Service Centers, always using Makita replacement parts. Sharpening the saw chain Fig.35... -
Page 19: Cleaning The Guide Bar
— The chip thickness is determined by the distance — The file can be guided more easily if a file holder between the depth gauge (round nose) and the (optional accessory) is employed. The file holder cutting edge. has markings for the correct sharpening angle of 30°... -
Page 20: Replacing The Sprocket
Cleaning the sprocket cover Replacing the sprocket Chips and saw dust will accumulate inside of the CAUTION: A worn sprocket will damage a sprocket cover. Remove the sprocket cover and saw new saw chain. Have the sprocket replaced in this chain from the tool then clean the chips and saw dust. -
Page 21: Instructions For Periodic Maintenance
Instructions for periodic maintenance To ensure long life, prevent damage and ensure the full functioning of the safety features, the following maintenance must be performed regularly. Warranty claims can be recognized only if this work is performed regularly and prop- erly. -
Page 22: Troubleshooting
Before asking for repairs, conduct your own inspection first. If you find a problem that is not explained in the manual, do not attempt to dismantle the tool. Instead, ask Makita Authorized Service Centers, always using Makita replace- ment parts for repairs. - Page 24 Makita Corporation 3-11-8, Sumiyoshi-cho, Anjo, Aichi 446-8502 Japan 885959-923 www.makita.com 20211112...