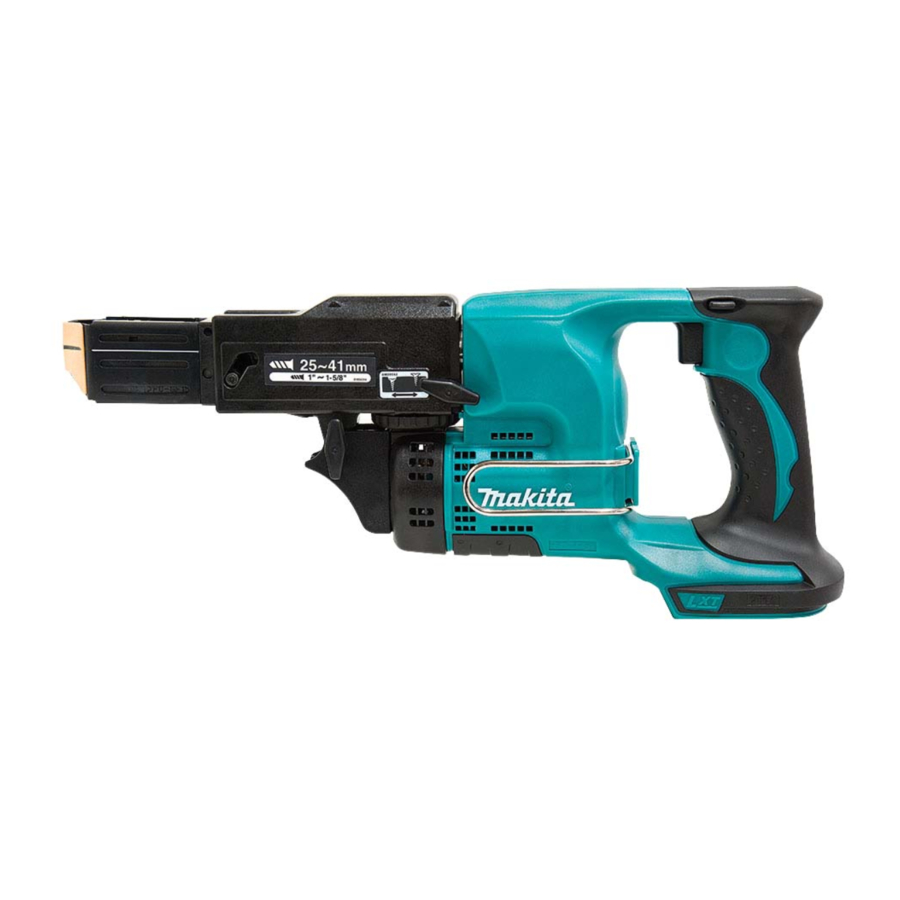
Makita DFR450X Instruction Manual
Cordless auto feed screwdriver
Hide thumbs
Also See for DFR450X:
- Instruction manual (53 pages) ,
- Instruction manual (13 pages) ,
- Instruction manual (49 pages)
Table of Contents
Advertisement
Quick Links
Advertisement
Table of Contents

Related Manuals for Makita DFR450X


Summary of Contents for Makita DFR450X
- Page 1 INSTRUCTION MANUAL Cordless Auto Feed Screwdriver DFR450X Read before use.
-
Page 2: Specifications
SPECIFICATIONS Model DFR450X Screw strip 4 mm x 25 mm - 41 mm No load speed(min 4,000 Overall length 369 mm Net weight 1.9 - 2.9 kg Rated voltage D.C. 18 V • Due to our continuing program of research and development, the specifications herein are subject to change without notice. • Specifications may differ from country to country. • The weight may differ depending on the attachment(s), including the battery cartridge. The lightest and heavi- est combination, according to EPTA-Procedure 01/2014, are shown in the table. -
Page 3: Ec Declaration Of Conformity
Personal safety EC Declaration of Conformity Stay alert, watch what you are doing and use common sense when operating a power tool. For European countries only Do not use a power tool while you are tired or The EC declaration of conformity is included as Annex A under the influence of drugs, alcohol or med- to this instruction manual. -
Page 4: Cordless Screwdriver Safety Warnings
Power tool use and care Do not expose a battery pack or tool to fire or excessive temperature. Exposure to fire or tem- Do not force the power tool. Use the correct perature above 130 °C may cause explosion. power tool for your application. The correct power tool will do the job better and safer at the Follow all charging instructions and do not charge rate for which it was designed. -
Page 5: Functional Description
To remove the battery cartridge, slide it from the tool SAVE THESE INSTRUCTIONS. while sliding the button on the front of the cartridge. To install the battery cartridge, align the tongue on the battery cartridge with the groove in the housing and slip CAUTION: Only use genuine Makita batteries. it into place. Insert it all the way until it locks in place Use of non-genuine Makita batteries, or batteries that with a little click. If you can see the red indicator on the have been altered, may result in the battery bursting upper side of the button, it is not locked completely. causing fires, personal injury and damage. It will also void the Makita warranty for the Makita tool and CAUTION: charger. •... - Page 6 Battery protection system (Lithium- Indicator lamps Remaining capacity ion battery with star marking) Lighted Blinking 75% to 100% 50% to 75% 25% to 50% 0% to 25% Charge the battery. The battery may have malfunctioned. ► 1 . Star marking Lithium-ion batteries with a star marking are equipped with a protection system. This system automatically NOTE: Depending on the conditions of use and the cuts off power to the tool to extend battery life.
- Page 7 Adjusting the driving depth Reversing switch action Depress the stopper base as far as it will go. While keeping it in this position, turn the adjusting knob until the bit tip projects approx. 5 mm from the stopper base. Drive a trial screw. If the screw head projects above the driving surface, turn the adjusting knob in the A direc- tion; if the screw head is countersunk, turn the adjusting knob in the B direction. ► 1 . Reversing switch lever This tool has a reversing switch to change the direction of rotation.
- Page 8 Press the dust cover toward the plane bearing and pull out Removing screw strip the bit. If the dust cover cannot be moved as far as the plane bearing, try it again after turning the bit slightly. To remove the screw strip, just pull it out in the direction To install the bit, insert it into the socket while turning it of the arrow.
-
Page 9: Driving Operation
OPERATION CAUTION: • Driving at a position closer than 15 mm to the wall or driving with the stopper base in contact Driving operation with the wall may damage the screw heads and cause wear on the bit. This may also lead to poor fastening of screws and malfunction of the tool. MAINTENANCE CAUTION: • Always be sure that the tool is switched off and the battery cartridge is removed before attempt- ing to perform inspection or maintenance. -
Page 10: Optional Accessories
To maintain product SAFETY and RELIABILITY, repairs, any other maintenance or adjustment should be per- formed by Makita Authorized Service Centers, always using Makita replacement parts. OPTIONAL ACCESSORIES CAUTION: • These accessories or attachments are recom- mended for use with your Makita tool specified in this manual. The use of any other accessories... - Page 12 Makita Europe N.V. Jan-Baptist Vinkstraat 2, 3070 Kortenberg, Belgium Makita Corporation 3-11-8, Sumiyoshi-cho, Anjo, Aichi 446-8502 Japan 885285C932 www.makita.com 20190418...