
Related Manuals for Makita XRU23


Summary of Contents for Makita XRU23
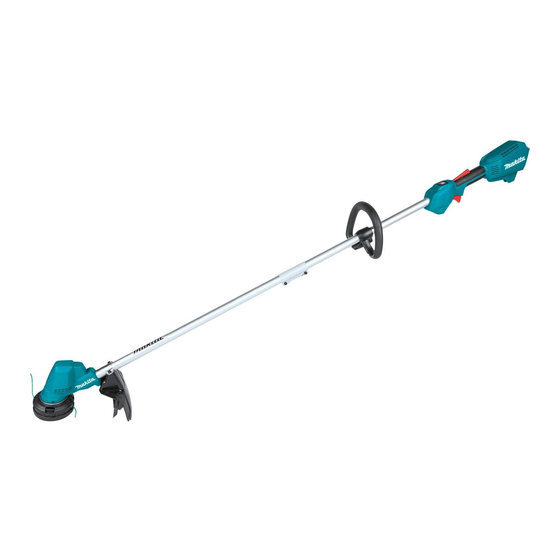
- Page 1 INSTRUCTION MANUAL MANUAL DE INSTRUCCIONES Cordless Grass Trimmer Cortador Inalámbrico de Pasto XRU23 IMPORTANT: Read Before Using. IMPORTANTE: Lea antes de usar.
-
Page 2: Specifications
ENGLISH (Original instructions) SPECIFICATIONS Model: XRU23 Type of handle Loop handle No load speed 2: 0 - 6,000/min 1: 0 - 4,500/min Overall length 1,670 mm (65-3/4″) (without cutting tool) Nylon cord diameter 2.0 mm (0.08″) Applicable cutting tool and Nylon cutting head 330 mm (13″) - Page 3 The string trimmer should be switched off immediately if it shows any signs of abnormal operation. Don't force the tool. It will do the job better and with less likelihood of a risk of injury at the rate for which it was designed. Don't overreach.
- Page 4 Have servicing performed by a qualified repair Do not use a cutting tool which is not recom- person using only identical replacement parts. mended by Makita. This will ensure that the safety of the product is Do not operate the tool in bad weather or if maintained.
- Page 5 21. Do not use the tool on steep slopes. Symbols 22. The shoulder harness must be used during operation, if supplied with the tool. The followings show the symbols used for tool. 23. Do not start the tool when the cutting tool is tangled with cut grass.
- Page 6 Use of non-genuine Makita batteries, or batteries that have been altered, may result in the battery bursting causing fires, personal injury and damage. It will also void the Makita warranty for the Makita tool and charger. Tips for maintaining maximum...
-
Page 7: Parts Description
PARTS DESCRIPTION Indicator lamps Main power button Battery cartridge Lock-off lever Switch trigger Handle Pipes Joint Protector * All the components listed in the table are to be assembled as shown in the figure above. 7 ENGLISH... -
Page 8: Functional Description
Tool / battery protection system FUNCTIONAL DESCRIPTION The tool is equipped with a tool/battery protection sys- tem. This system automatically cuts off power to the motor to extend tool and battery life. The tool will auto- WARNING: matically stop during operation and the indicator lamps Always be sure that the tool is light up if the tool is placed under one of the following switched off and the battery cartridge is removed... -
Page 9: Overdischarge Protection
Overheat protection for tool or battery Main power switch When the tool or battery cartridge is overheated, the Tap the main power button to turn on the tool. tool stops automatically and the indicator lamp lights To turn off the tool, press and hold the main power up in red. -
Page 10: Electronic Function
To prevent the switch trigger from being accidentally Electric brake pulled, a lock-off lever is provided. To start the tool, depress the lock-off lever and pull the switch trigger. This tool is equipped with an electric brake. If the tool The tool speed increases by increasing pressure on the consistently fails to quickly stop after the switch trigger switch trigger. - Page 11 Insert the upper pipe into the joint while holding Cut the cable tie (nylon fastener), and remove it down the stopper pin. Make sure that the pin pops up from the tool. through the stopper hole and securely locks the lower pipe.
-
Page 12: Adjusting Handle Position
NOTE: Turn the tool upside down so that you can replace the cutting tool easily. Nylon cutting head NOTICE: Be sure to use genuine Makita nylon cutting head. Insert the hex wrench through the hole in the motor housing to lock the spindle. Rotate the spindle until the hex wrench is fully inserted. -
Page 13: Operation
OPERATION NOTE: The holes in the motor housing are on the left side and right side. Place the nylon cutting head onto the spindle and Correct handling of the tool tighten it securely by hand. WARNING: Always position the tool on your right- hand side. -
Page 14: Maintenance
To maintain product SAFETY and RELIABILITY, repairs, any other maintenance or adjustment should be performed by Makita Authorized or Factory Service Centers, always using Makita replacement parts. Cleaning the tool Clean the tool by wiping off dust, dirt, or cut off grass with a dry cloth or one dipped in soapy water and wrung out. - Page 15 95-M10L 4 m (13 ft) 100 mm (3-15/16″) 80 mm (3-1/8″) 15 ENGLISH...
- Page 16 96-M10L 4 m (13 ft) 100 mm (3-15/16″) 16 ENGLISH...
-
Page 17: Troubleshooting
Before asking for repairs, conduct your own inspection first. If you find a problem that is not explained in the manual, do not attempt to dismantle the tool. Instead, ask Makita Authorized Service Centers, always using Makita replace- ment parts for repairs. -
Page 18: Especificaciones
ESPAÑOL (Instrucciones originales) ESPECIFICACIONES Modelo: XRU23 Tipo de mango Mango redondo Velocidad sin carga 2: 0 - 6 000 r/min 1: 0 - 4 500 r/min Longitud total 1 670 mm (65-3/4″) (sin la herramienta de corte) Diámetro del cordón de nailon 2,0 mm (0,08″) - Page 19 Evite la puesta en marcha accidental: Use gafas de seguridad. Las gafas protectoras protegen sus ojos de los residuos y piedras — Asegúrese de que el interruptor se que salgan proyectados. Use siempre gafas encuentre en la posición de apagado protectoras para evitar lesiones en los ojos antes de instalar el paquete de batería.
- Page 20 14. No abra ni dañe la(s) batería(s). Los electrolitos No utilice una herramienta de corte que no sea liberados son corrosivos y pueden ocasionar recomendada por Makita. daños en los ojos o la piel. Éstos pueden ser No utilice la herramienta cuando haya mal tóxicos si se llegan a tragar.
- Page 21 10. Durante la operación, siempre sostenga la 26. Utilice únicamente la herramienta de corte herramienta con ambas manos. Nunca sos- marcada con una velocidad igual o mayor a la tenga la herramienta con una mano durante el velocidad marcada en la herramienta. uso.
- Page 22 El cartucho de batería lesiones personales y daños. Asimismo, esto inva- puede explotar si se tira al fuego. lidará la garantía de Makita para la herramienta y el No clave, corte, aplaste, lance o deje caer el cargador Makita.
-
Page 23: Descripción De Las Piezas
Consejos para alargar al máximo Cargue el cartucho de batería a una tempera- tura ambiente de 10 °C - 40 °C (50 °F - 104 °F). la vida útil de la batería Si un cartucho de batería está caliente, déjelo enfriar antes de cargarlo. -
Page 24: Descripción Del Funcionamiento
Sistema de protección para la DESCRIPCIÓN DEL herramienta/batería FUNCIONAMIENTO La herramienta está equipada con un sistema de protección para la herramienta/batería. Este sistema ADVERTENCIA: Asegúrese siempre de que corta automáticamente la alimentación al motor para la herramienta esté apagada y que el cartucho prolongar la vida de la herramienta y la batería. - Page 25 Protección contra el sobrecalentamiento NOTA: Dependiendo de las condiciones de uso y de la herramienta o la batería la temperatura ambiente, la indicación podrá diferir ligeramente de la capacidad real. Cuando la herramienta o el cartucho de batería se NOTA: La primera luz indicadora (extrema izquierda) sobrecalientan, la herramienta se detendrá...
-
Page 26: Montaje
Freno eléctrico AVISO: No jale fuerte el gatillo interruptor sin presionar la palanca de desbloqueo. Esto podría dañar el interruptor. Esta herramienta está equipada con un freno eléctrico. Si de manera consistente la herramienta no logra dete- Se proporciona una palanca de desbloqueo para evitar nerse rápidamente después de soltar el gatillo interrup- que el gatillo interruptor sea jalado accidentalmente. - Page 27 Apriete firmemente el perno de cabeza hueca Instalación de los componentes hexagonal para fijar la unión. principales Ensamblado del tubo PRECAUCIÓN: Evite cortar el sujetacables (sujetador de nailon) hasta que los tubos doblados se hayan ensamblado firmemente. Ponga rectos los tubos plegados en dos, y luego alinee el pasador del tope del tubo superior con el orificio del tope en la unión.
-
Page 28: Instalación Del Protector
Fije el ángulo y la posición del mango tal como se Instalación del protector muestra en la ilustración, y luego apriete el perno. ADVERTENCIA: Nunca utilice la herramienta sin el protector ilustrado en su lugar. El no seguir esta indicación podría causar lesiones personales graves. -
Page 29: Operación
Almacenamiento de la llave Allen (hexagonal) AVISO: Asegúrese de utilizar un cabezal de corte de nailon original de Makita. PRECAUCIÓN: Tenga cuidado de no dejar Inserte la llave hexagonal a través del orificio en la llave hexagonal insertada en el cabezal de la la carcasa del motor para bloquear el eje. -
Page 30: Limpieza De La Herramienta
óptimo y reducen el riesgo de lesiones. ducto, las reparaciones, y cualquier otra tarea de man- tenimiento o ajuste deberán ser realizadas en centros de servicio autorizados o de fábrica Makita, empleando siempre repuestos Makita. Limpieza de la herramienta Limpie la herramienta quitando el polvo, la tierra o los residuos de pasto con un paño seco o un paño... - Page 31 95-M10L 4 m (13 ft) 100 mm (3-15/16″) 80 mm (3-1/8″) 31 ESPAÑOL...
- Page 32 96-M10L 4 m (13 ft) 100 mm (3-15/16″) 32 ESPAÑOL...
-
Page 33: Resolución De Problemas
Antes de solicitar alguna reparación, primero realice una inspección por su cuenta. Si detecta algún problema que no esté explicado en el manual, no intente desensamblar la herramienta. En vez de esto, solicite la reparación a un centro de servicio autorizado de Makita, usando siempre piezas de repuesto Makita. Estado de la anomalía Causa probable (avería) - Page 36 Makita Corporation 3-11-8, Sumiyoshi-cho, 885822-944 Anjo, Aichi 446-8502 Japan XRU23-1 EN, ESMX 20200803 www.makita.com...