
Related Manuals for Makita XRU08


Summary of Contents for Makita XRU08
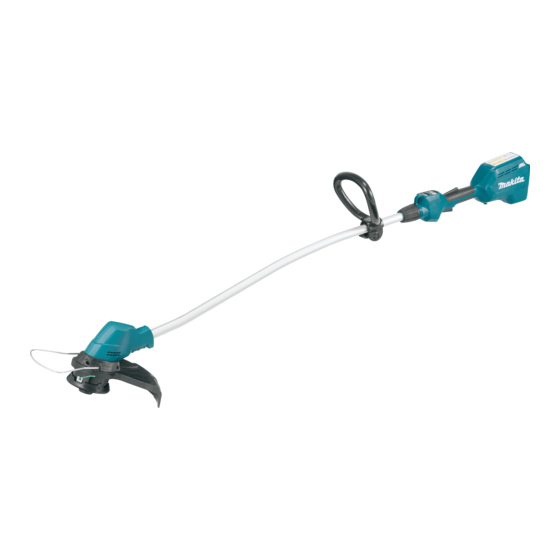
- Page 1 INSTRUCTION MANUAL MANUAL DE INSTRUCCIONES Cordless Grass Trimmer Cortador Inalámbrico de Pasto XRU08 IMPORTANT: Read Before Using. IMPORTANTE: Lea antes de usar.
-
Page 2: Specifications
ENGLISH (Original instructions) SPECIFICATIONS Model: XRU08 Type of handle Loop handle No load speed (RPM) 5,000 / 6,000 /min Overall length 1,534 - 1,634 mm (60-1/2″ - 64/1/2″) Nylon cord diameter 2.0 - 2.3 mm (0.08″ - 0.09″) Applicable cutting tool... - Page 3 In order to avoid either head, eye, hand or foot Use power tools only with specifically desig- injuries as well as to protect your hearing the nated battery packs. Use of any other battery following protective equipment and protective packs may create a risk of injury and fire. clothing must be used during operation of the When battery pack is not in use, keep it away equipment.
- Page 4 Before starting make sure that the nylon cut- 20. Hold the power tool by insulated gripping sur- ting head has no contact with hard objects faces only, because the cutter blade may contact such as branches, stones etc. as the nylon hidden wiring.
- Page 5 Only use genuine Makita batteries. Use of non-genuine Makita batteries, or batteries that have been altered, may result in the battery bursting causing fires, personal injury and damage. It will also void the Makita warranty for the Makita tool and charger. 5 ENGLISH...
-
Page 6: Parts Description
PARTS DESCRIPTION Battery cartridge Lock-off lever Switch trigger Power lamp Main power button Reverse button Hook Lock sleeve Grip Protector (cutting tool Shoulder harness guard) Installing or removing battery FUNCTIONAL cartridge DESCRIPTION CAUTION: Always switch off the tool before installing or removing of the battery cartridge. WARNING: Always be sure that the tool is switched off and the battery cartridge is removed... -
Page 7: Overdischarge Protection
Blinking If the tool does not start, the battery may be overheated. In this situation, let the battery cool before starting the tool again. ► 1. Red indicator 2. Button 3. Battery cartridge Overdischarge protection To remove the battery cartridge, slide it from the tool When the battery power is nearly used up, the capacity while sliding the button on the front of the cartridge. - Page 8 Indicator lamps Remaining capacity Lighted Blinking 75% to 100% 50% to 75% 25% to 50% 0% to 25% Charge the ► 1. Lock-off lever 2. Switch trigger battery. The battery NOTE: The tool is automatically turned off after the may have tool is left one minute without any operations.
-
Page 9: Nylon Cutting Head
CAUTION: Make sure to tighten the lock sleeve before operation. Otherwise the tool may lose control and result in personal injury. To adjust the length of the shaft, turn the lock sleeve counterclockwise until the arrow mark on the lock sleeve indicates the unlock mark on the housing, and pull out or push in the shaft to the desired length. -
Page 10: Installing The Guard
► 1. Protector holder 2. Projection Installing the guard Tighten the hex bolts securely to fasten the protec- tor and the protector holder. WARNING: Never use the tool without the guard illustrated in place. Failure to do so can cause serious personal injury. CAUTION: Take care not to injure yourself on the cutter for cutting the nylon cord. -
Page 11: Operation
CAUTION: Make sure to remove the hex wrench after installation. NOTICE: Be sure to use genuine Makita nylon cutting head. Attachment of shoulder harness Turn the tool upside down so that you can replace the cutting tool easily. -
Page 12: Maintenance
Replacing the nylon cord WARNING: Use nylon cord with diameter specified in “SPECIFICATIONS” only. Never use heavier line, metal wire, rope or the like. Use rec- ommended nylon cord only, otherwise it may cause damage to the tool and result in serious personal injury. -
Page 13: Troubleshooting
Before asking for repairs, conduct your own inspection first. If you find a problem that is not explained in the manual, do not attempt to dismantle the tool. Instead, ask Makita Authorized Service Centers, always using Makita replace- ment parts for repairs. -
Page 14: Optional Accessories
Remove the battery immediately! • alterations have been made to the tool. OPTIONAL IN NO EVENT SHALL MAKITA BE LIABLE FOR ANY ACCESSORIES INDIRECT, INCIDENTAL OR CONSEQUENTIAL DAMAGES FROM THE SALE OR USE OF THE PRODUCT. THIS DISCLAIMER APPLIES BOTH... -
Page 15: Especificaciones
ESPAÑOL (Instrucciones originales) ESPECIFICACIONES Modelo: XRU08 Tipo de mango Mango redondo Velocidad sin carga (RPM) 5 000 r/min / 6 000 r/min Longitud total 1 534 mm - 1 634 mm (60-1/2″ - 64/1/2″) Diámetro del cordón de nailon 2,0 mm - 2,3 mm (0,08″ - 0,09″) - Page 16 Equipo de protección personal Cuando utilice la herramienta, use siempre un calzado resistente con suela antiderrapante. Use una vestimenta adecuada. La vestimenta Esto lo protegerá contra lesiones a causa de que lleve deberá ser funcional y adecuada, residuos que salgan proyectados y asegurará que es decir, deberá...
- Page 17 Asegúrese de que no haya niños ni otras per- Antes de comenzar a cortar, el cabezal de sonas en un rango de 15 metros (50 pies), y corte de nailon deberá alcanzar su velocidad cuide también que no haya animales alrededor de trabajo completa.
- Page 18 Revise si hay sujetadores que estén sueltos o Instrucciones importantes de piezas dañadas, tal como grietas en el cabezal seguridad para el cartucho de de corte de nailon. batería Siga las instrucciones para la lubricación y el cambio de los accesorios si aplica para el caso.
-
Page 19: Descripción De Las Piezas
Pare siem- lesiones personales y daños. Asimismo, esto inva- pre la operación y cargue el cartucho de lidará la garantía de Makita para la herramienta y el batería cuando note menos potencia en la cargador Makita. herramienta. -
Page 20: Descripción Del Funcionamiento
Sistema de protección para la DESCRIPCIÓN DEL herramienta/batería FUNCIONAMIENTO La herramienta está equipada con un sistema de pro- tección de la herramienta/batería. Este sistema corta ADVERTENCIA: Asegúrese siempre de que en forma automática el suministro de energía al motor la herramienta esté apagada y que el cartucho para prolongar la vida útil de la herramienta y la batería. - Page 21 NOTA: Dependiendo de las condiciones de uso y la temperatura ambiente, la indicación podrá diferir ligeramente de la capacidad real. Accionamiento del interruptor de encendido ADVERTENCIA: Antes de colocar el car- tucho de batería en la herramienta, compruebe siempre que el gatillo interruptor se acciona debi- damente y que regrese a la posición de apagado (OFF) cuando lo suelte.
-
Page 22: Ajuste De Velocidad
Ajuste de velocidad NOTA: Durante la rotación inversa, la herramienta sólo funcionará durante un breve lapso de tiempo y luego se detendrá automáticamente. Puede ajustar la velocidad de la herramienta pulsando el botón de encendido principal. NOTA: Una vez que se haya detenido la herramienta, Cada vez que pulse el botón de encendido principal, se la rotación regresará... -
Page 23: Instalación Del Protector
► 1. Eje 2. Manguito de bloqueo Instalación del protector ADVERTENCIA: Nunca utilice la herramienta MONTAJE sin el protector ilustrado en su lugar. El no seguir esta indicación podría causar lesiones personales graves. ADVERTENCIA: Asegúrese siempre de que la herramienta esté apagada y que el cartucho de PRECAUCIÓN: Tenga cuidado de no las- batería haya sido extraído antes de realizar cual-... - Page 24 AVISO: Asegúrese de utilizar un cabezal de corte de nailon original de Makita. Voltee la herramienta al revés para que pueda Para reducir el riesgo de daños a objetos en frente del reemplazar fácilmente la herramienta de corte.
-
Page 25: Operación
Para extraer el cabezal de corte de nailon, gírelo en Enganche el broche del arnés para hombro a la pieza sentido inverso al de las manecillas del reloj mientras del gancho en la carcasa. Colóquese el arnés para sujeta la arandela receptora con la llave hexagonal. hombro. - Page 26 Reemplazo del cordón de nailon ADVERTENCIA: Utilice el cordón de nailon únicamente con el diámetro especificado en la sección “ESPECIFICACIONES”. Nunca use una línea más pesada, alambre de metal, cuerda o similares. Utilice únicamente el cordón de nailon recomendado; el no hacerlo podría ocasionar daños a la herramienta y lesiones personales graves.
-
Page 27: Resolución De Problemas
Antes de solicitar alguna reparación, primero realice una inspección por su cuenta. Si detecta algún problema que no esté explicado en el manual, no intente desensamblar la herramienta. En vez de esto, solicite la reparación a un centro de servicio autorizado de Makita, usando siempre piezas de repuesto Makita. Estado de la anomalía Causa probable (avería) -
Page 28: Accesorios Opcionales
ADVERTENCIA: No instale una cuchilla un defecto de mano de obra o material, Makita hará la metálica en esta herramienta y sólo use los acce- reparación (o a su discreción, el reemplazo) sin ningún sorios o aditamentos recomendados que se indi- cargo.