Makita DVC261 Instruction Manual
Cordless backpack vacuum cleaner
Hide thumbs
Also See for DVC261:
- Instruction manual (116 pages) ,
- Instruction manual (81 pages) ,
- Instruction manual (77 pages)
Table of Contents
Advertisement
Quick Links
Download this manual
See also:
Instruction Manual
Advertisement
Table of Contents

Related Manuals for Makita DVC261


Summary of Contents for Makita DVC261
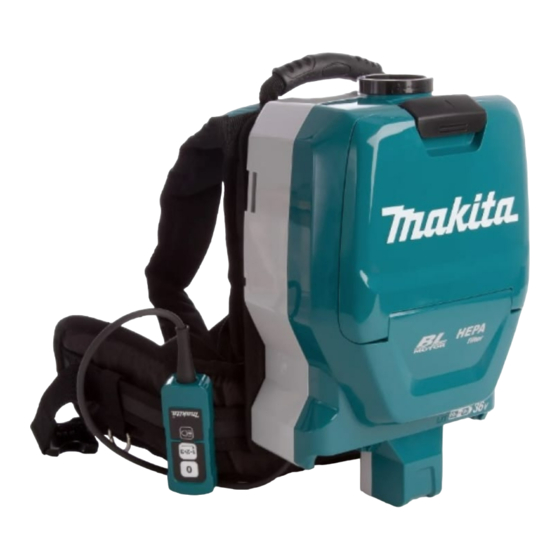
- Page 1 INSTRUCTION MANUAL Cordless Backpack Vacuum Cleaner DVC261 Read before use.
-
Page 2: Specifications
SPECIFICATIONS Model: DVC261 Capacity Filter bag 2.0 L Dust bag 1.5 L Maximum air volume With hose ø28 mm x 1.0 m 2.0 m /min With hose ø32 mm x 1.0 m 2.2 m /min With hose ø38 mm x 1.5 m 2.3 m... -
Page 3: Ec Declaration Of Conformity
12. DISCONNECT THE BATTERIES. When not in WARNING: The vibration emission during actual use, before servicing, and when changing use of the power tool can differ from the declared accessories. emission value depending on the ways in which the 13. Clean and service the cleaner immediately tool is used. - Page 4 Keep handles dry, clean and free from oil and also void the Makita warranty for the Makita tool and grease. charger. Important safety instructions for Tips for maintaining maximum...
-
Page 5: Functional Description
Overheat protection FUNCTIONAL DESCRIPTION When the tool is overheated, the tool stops automati- cally. Let the tool cool down before turning the tool on CAUTION: Always be sure that the tool is again. switched off and the battery cartridge is removed Overdischarge protection before adjusting or checking function on the tool. -
Page 6: Adjusting Belts
Shoulder belts Switch box position The switch box can be hooked on either side of the lower belt. Arrange the cord so that the switch box comes to your desired side. To prevent the cord from being damaged, pass the cord through the hook as illustrated. -
Page 7: Led Light
Switch action Hose band You can change the suction power in three steps: nor- Hose band can be used for holding the hose or free nozzle. mal (1), high (2), and max (3). To secure the hose to the vacuum cleaner body, pass the hose band through the slot on the body. - Page 8 Follow the procedures below, depending on the ASSEMBLY type of the extension wand : NOTE: The slide-type extension wand and the ring- type extension wand are not compatible with each CAUTION: Always be sure that the tool is other. If you want to change the slide-type extension switched off and the battery cartridge is removed wand to the ring-type extension wand or vice versa, before carrying out any work on the tool.
-
Page 9: Connecting The Tool
For the ring-type extension wand For the aluminum bending pipe / aluminum straight pipe Shoulder the vacuum cleaner body then twist and insert (Only for the model with ø38 mm hose and front cuff 38) the extension wand into the bent pipe assembly. To Shoulder the vacuum cleaner body then twist and insert disconnect, twist and extract it. - Page 10 Connect the front cuff to the tool's extraction outlet. Supplied Hose end type Action hose diameter ø38 mm Replace the hose with the one for dust extraction (ø28 mm, with front cuff). with snap-on part Attach the joint 22-38 or the front cuff 24. with front cuff 38 NOTE: Always use a suitable front cuff.
- Page 11 Unlock the latch by lifting the bottom side. Push Attaching bent pipe assembly the grooved area to lift the front latching side. Pull the latch to open the lid. Optional accessory NOTE: You don't need to perform this procedure if your model comes with the bent pipe assembly attached to the hose.
-
Page 12: Operation
When using the dust bag, insert the brim of the dust bag OPERATION into the slit. WARNING: Operators shall be adequately instructed on the use of the vacuum cleaner. WARNING: This vacuum cleaner is not suit- able for picking up hazardous dust. CAUTION: This cleaner is for dry use only. -
Page 13: Maintenance
To maintain product SAFETY and RELIABILITY, restarting. repairs, any other maintenance or adjustment should be performed by Makita Authorized or Factory Service Replace the filter bag when it becomes full. Open Centers, always using Makita replacement parts. the lid and take out the filter bag. Pull the strip on the side of the opening to shut the filter bag and dispose of Cleaning the HEPA filter the filter bag in whole. -
Page 14: Cleaning The Dust Bag
Beat the dust off from the filter. The filter can be Clearing the clog washed with water. Rinse away the dust and particles on the filter every 1 or 2 month. After that, dry the filter When clearing the clog, remove the hose or the exten- completely in a shaded and well-ventilated place to sion wand, or the bent pipe assembly to check inside. prevent unpleasant odor or malfunctions. -
Page 15: Optional Accessories
OPTIONAL ACCESSORIES CAUTION: These accessories or attachments are recommended for use with your Makita tool specified in this manual. The use of any other accessories or attachments might present a risk of injury to persons. Only use accessory or attachment for its stated purpose. If you need any assistance for more details regard- ing these accessories, ask your local Makita Service Center. - Page 16 Makita Europe N.V. Jan-Baptist Vinkstraat 2, 3070 Kortenberg, Belgium Makita Corporation 3-11-8, Sumiyoshi-cho, Anjo, Aichi 446-8502 Japan 885661A221 www.makita.com 20180720...