Cisco 8811 User Manual
8800 series
Hide thumbs
Also See for 8811:
- Quick start manual ,
- Administration manual (280 pages) ,
- User manual (170 pages)
Table of Contents
Advertisement
Quick Links
Advertisement
Table of Contents

Related Manuals for Cisco 8811


Summary of Contents for Cisco 8811
- Page 1 Cisco IP Phone 8800 Series User Guide First Published: 2015-11-25 Last Modified: 2018-03-27 Americas Headquarters Cisco Systems, Inc. 170 West Tasman Drive San Jose, CA 95134-1706 http://www.cisco.com Tel: 408 526-4000 800 553-NETS (6387) Fax: 408 527-0883...
- Page 2 Cisco and the Cisco logo are trademarks or registered trademarks of Cisco and/or its affiliates in the U.S. and other countries. To view a list of Cisco trademarks, go to this URL: /www.cisco.com/go/trademarks . Third-party trademarks mentioned are the property of their respective owners. The use of the word partner does not imply a partnership relationship between Cisco and any other company.
-
Page 3: Table Of Contents
Activate and Sign In to Your Phone Sign In to Your Phone Sign In to Your Extension from Another Phone Sign Out of Your Extension from Another Phone Self Care Portal Speed-Dial Numbers Buttons and Hardware Navigation Cisco IP Phone 8800 Series User Guide... - Page 4 Badged Icons Differences Between Phone Calls and Lines USB Ports Mobile Device Charging Bluetooth and Your Phone Accessibility Features for the Cisco IP Phone 8800 Series Hearing-Impaired Accessibility Features Vision-Impaired and Blind Accessibility Features Voice Feedback Mobility-Impaired Accessibility Features Cisco IP Phone 8800 Series Wall Mount Kit Accessibility...
- Page 5 View the Call Queue in a Hunt Group Answer Calls Automatically Trace a Suspicious Call Video Calls Make a Video Call Stop Your Video Toggle Between Phone and Video Display Adjust the Picture-In-Picture Position Video Calls and Security Cisco IP Phone 8800 Series User Guide...
- Page 6 Prioritized Calls Make a Priority Call Answer a Priority Call Answer a Priority Call While on Another Call Multiple Lines Answer the Oldest Call First View All Calls on Your Phone View Important Calls Cisco IP Phone 8800 Series User Guide...
- Page 7 Move a Call from Your Mobile Phone to Your Desk Phone Transfer a Call from Your Mobile Phone to Your Desk Phone C H A P T E R Contacts Corporate Directory Dial a Contact in the Corporate Directory Cisco IP Phone 8800 Series User Guide...
- Page 8 C H A P T E R Applications Available Applications View Active Applications Switch to Active Applications Close Active Applications C H A P T E R Settings Change the Wallpaper Change the Ringtone Cisco IP Phone 8800 Series User Guide...
- Page 9 Test Your Microphone Third Party Headsets Audio Quality Wired Headsets Bluetooth Wireless Headsets Wireless Headsets Standard Headsets Connect a Standard Headset Set Up a Wideband Standard Headset USB Headsets Connect a USB Headset Cisco IP Phone 8800 Series User Guide...
- Page 10 Wireless Headsets Enable an E-Hookswitch Headset Swap Headsets While on a Call Cisco IP Phone 8800 Key Expansion Module Key Expansion Module Buttons and Hardware Place a Call on the Key Expansion Module Adjust the Key Expansion Module Screen Brightness...
- Page 11 Contents Important Online Information Cisco IP Phone 8800 Series User Guide...
- Page 12 Contents Cisco IP Phone 8800 Series User Guide...
-
Page 13: Chapter 1 Your Phone
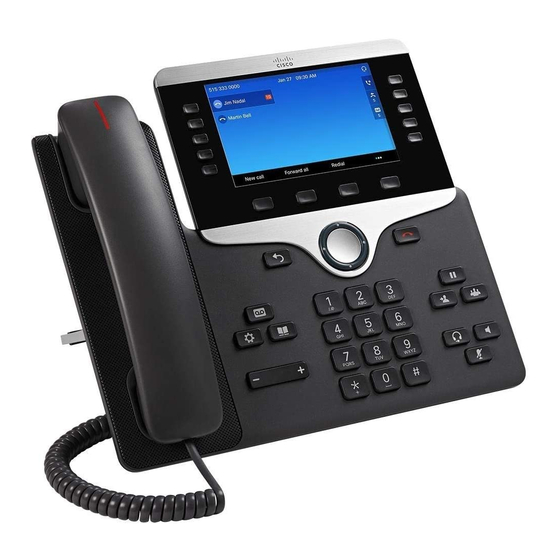
Phone Line Modes, page 32 • Additional Help and Information , page 33 The Cisco IP Phone 8800 Series The Cisco IP Phones 8811, 8841, 8845, 8851, 8851NR, 8861, 8865, and 8865NR deliver easy-to-use, highly-secure voice communications. Cisco IP Phone 8800 Series User Guide... -
Page 14: New And Changed Information
You can use the information in the following sections to understand what has changed in the document. Each section contains the major changes. New Information for Firmware Release 12.1(1) Table 2: Cisco IP Phone 8800 User Guide revisions for Firmware Release 12.1(1). Revision Updated Section Updated for Call History. -
Page 15: New Information For Firmware Release 12.0(1)
Modify a Speed Dial Button from Your Phone, on page 40 Delete a Speed Dial Button from Your Phone, on page 41 New Information for Firmware Release 12.0(1) Table 3: Cisco IP Phone 8800 User Guide revisions for Firmware Release 12.0(1). Revision Updated Section... -
Page 16: New Information For Firmware Release 11.5(1)Sr1
Phone Screen Features, on page 18 Enhanced Line Mode, on page 32 New Information for Firmware Release 11.5(1)SR1 Table 5: Cisco IP Phone 8800 User Guide revisions for Firmware Release 11.5(1)SR1. Revision Updated Section Updated for Cisco IP Phone 8865NR support... -
Page 17: New Information For Firmware Release 11.5(1)
Your Phone New Information for Firmware Release 11.5(1) New Information for Firmware Release 11.5(1) Table 6: Cisco IP Phone 8800 User Guide revisions for Firmware Release 11.5(1). Revision Updated Section Updated the following sections for Enhance • Differences Between Phone Calls and Line Mode. -
Page 18: Phone Setup
Change the Viewing Angle of Your Phone You can change the angle of the phone to eliminate glare on the screen. If your phone has a video camera , you can change the angle to improve the camera view. Cisco IP Phone 8800 Series User Guide... -
Page 19: Connect To The Network
Through Expressway and you connect your phone to the network, it connects to the Expressway server automatically. Set Up Wi-Fi Client The Cisco IP Phone 8861 and 8865 can access a Wi-Fi network. You need a power adapter to power the phone. The Cisco IP Phone 8865NR cannot be used with a Wi-Fi network. Note The phone PC port is disabled when Wi-Fi is enabled on your phone. -
Page 20: Connect To A Preconfigured Wi-Fi Network
Press Apply to save the changes, or press Revert to cancel the changes. Connect to a Preconfigured Wi-Fi Network You can connect to a Wi-Fi network with your Cisco IP Phone 8861 and 8865. But the Cisco IP Phone 8865NR does not support Wi-Fi. -
Page 21: Set Up A Phone For Use With Vpn
Step 3 Select one of the following menu items: • All phones connected to the Ethernet: Ethernet setup • Cisco IP Phone 8861 and 8865 users that use Wi-Fi: Network setup > Wi-Fi client setup Step 4 Select IPv4 Setup. -
Page 22: Activate Your Phone Automatically With A Qr Code
When the scan succeeds, your phone registers with the server, and you're ready to make your first call. Secure the Phone with a Cable Lock You can secure your Cisco IP Phone 8800 Series with a laptop cable lock up to 20 mm wide. Cisco IP Phone 8800 Series User Guide... -
Page 23: Activate And Sign In To Your Phone
Sign In to Your Extension from Another Phone You can use Cisco Extension Mobility to sign in to a different phone in your network and have it act the same as your phone. After you sign in, the phone adopts your user profile, including your phone lines, features, established services, and web-based settings. -
Page 24: Sign Out Of Your Extension From Another Phone
Use the Self Care Portal to subscribe to a phone service before you access it on your phone. If you have a Cisco IP Phone 8800 Key Expansion Module connected to your phone, you can also configure the expansion module buttons for speed dial and other phone services. -
Page 25: Speed-Dial Numbers
For example, two commas (,,) represent a pause of 4 seconds. The rules for dial strings are: • Use the comma to separate the parts of the dial string. • An authorization code must always precede a billing code in the speed-dial string. Cisco IP Phone 8800 Series User Guide... -
Page 26: Buttons And Hardware
Buttons and Hardware The Cisco IP Phone 8800 Series has two distinct hardware types: • Cisco IP Phones 8811, 8841, 8851, 8851NR, and 8861—do not have a camera. • Cisco IP Phones 8845, 8865, and 8865NR—have a built-in camera. Cisco IP Phone 8800 Series User Guide... - Page 27 Your Phone Buttons and Hardware The following figure shows the Cisco IP Phone 8845. Figure 1: Cisco IP Phone 8845 Buttons and Hardware Handset and Handset light strip Indicates whether you have an incoming call (flashing red) or a new voice message (steady red).
-
Page 28: Navigation
Use the outer ring of the Navigation cluster to scroll through menus and to move between fields. Use the inner Select button of the Navigation cluster to select menu items. If a menu item has an index number, you can enter the index number with the keypad to select the item. Cisco IP Phone 8800 Series User Guide... -
Page 29: Softkey, Line, And Feature Buttons
Red, steady—Remote line in use (shared line or Line Status) • Red, flashing—Remote line on hold Your administrator can set up some functions as softkeys or as feature buttons. You can also access some functions with softkeys or the associated hard button. Cisco IP Phone 8800 Series User Guide... -
Page 30: Phone Screen Features
The screen is made up of three sections: the header row, the middle section, and the footer row. Figure 2: Cisco IP Phone 8800 Screen At the top of the screen is the header row. The header row displays the phone number, current date and time, as well a number of icons. -
Page 31: Badged Icons
If you use a USB hub and remove the USB cable from the phone during an active call, your phone might restart. Related Topics The Cisco IP Phone 8800 Series, on page 1 Mobile Device Charging You can use the USB ports on your phone to charge your mobile device if the device has a USB connection. -
Page 32: Bluetooth And Your Phone
• In some situations, your device will not display the charging icon. For example, the icon may not display when the device is fully charged. • When more than one Cisco IP Phone 8800 Key Expansion Module is attached to your phone, the back USB port cannot fast-charge the device. -
Page 33: Accessibility Features For The Cisco Ip Phone 8800 Series
Accessibility Features for the Cisco IP Phone 8800 Series The Cisco IP Phones 8811, 8841, 8845, 8851, 8851NR, 8861, and 8865 provide accessibility features for the blind, and the visually, hearing, and mobility impaired. Because many of these features are standard, they can be used by users with disabilities without requiring any special configuration. -
Page 34: Hearing-Impaired Accessibility Features
Your Phone Hearing-Impaired Accessibility Features Hearing-Impaired Accessibility Features Your phone comes with standard accessibility features that require little or no setup. Figure 3: Hearing-Impaired Accessibility Features—Cisco IP Phone 8861 Shown Table 8: Hearing-Impaired Accessibility Features Item Accessibility Feature Description Visual message-waiting This lighted strip is visible from all angles. - Page 35 Americans with Disabilities Act (ADA). • Section 508 loudness requirements, which are met by using industry-standard inline handset amplifiers. Acoustic coupled TTY and Cisco IP Phones support these TTY and TDD TDD support (handset) features: • Acoustic or direct connect TTYs from industry-leading manufacturers.
-
Page 36: Vision-Impaired And Blind Accessibility Features
Vision-Impaired and Blind Accessibility Features Vision-Impaired and Blind Accessibility Features Your phone comes with standard accessibility features that require little or no setup. Figure 4: Vision-Impaired and Blind Accessibility Features—Cisco IP Phone 8861 Shown Table 9: Vision-Impaired and Blind Accessibility Features Item... - Page 37 • Red, flashing—Remote line on hold. Back-lit color LCD screen on Allows you to adjust your phone screen's brightness. the Cisco IP Phone • The Cisco IP Phone 8811 has a grayscale LCD with adjustable contrast. Softkeys Provide access to special functions. The functions are displayed on the LCD.
- Page 38 • This key is located at speakerphone. the bottom left of the Press the right side of the rocker key to increase the phone. volume; press the left side of the rocker key to decrease the volume. Cisco IP Phone 8800 Series User Guide...
-
Page 39: Voice Feedback
For your handset, lift the receiver from the cradle, and adjust the volume. For your headset, select the Headset button, and adjust the volume. Adjust the volume for handset, headset, and speakerphone separately, and when you first enable Voice Feedback. Cisco IP Phone 8800 Series User Guide... -
Page 40: Mobility-Impaired Accessibility Features
Your phone comes with standard accessibility features that require little or no setup. To check which phone model you have, press Applications and select Phone information. The Model number field shows your phone model. Figure 5: Mobility-Impaired Accessibility Features—Cisco IP Phone 8861 Shown Cisco IP Phone 8800 Series User Guide... -
Page 41: Cisco Ip Phone 8800 Series Wall Mount Kit Accessibility
Cisco IP Phone 8800 Series Wall Mount Kit Accessibility The Cisco IP Phone 8800 Series phones can be mounted on a wall using one of the following wall mount kits: • Wallmount Kit for Cisco IP Phone 8800 Series—used to mount a single phone on the wall. -
Page 42: Phone Firmware And Upgrades
Phone Firmware and Upgrades • Wallmount Kit for Cisco IP Phone 8800 Video Series—used to mount a single video phone on the wall. The Wallmount Kit for Cisco IP Phone 8800 Series and Wallmount Kit for Cisco IP Phone 8800 Series with single KEM meet the 307.2 Protrusion Limits section of the Americans with Disabilities Act (ADA) ADAAG... -
Page 43: View The Progress Of A Phone Firmware Upgrade
If your phone is active, it waits until it has been inactive for a set interval before it notifies you of the pending power shutdown. Turn On Your Phone When your phone turns off to save energy, the phone screen is blank and the Select button lights up. Cisco IP Phone 8800 Series User Guide... -
Page 44: Phone Line Modes
If you use Enhanced line mode, you will see the line label display the following information for incoming calls: • The Caller ID. • The line label or name of the shared line, which then changes to show incoming phone number. Cisco IP Phone 8800 Series User Guide... -
Page 45: Additional Help And Information
Your Phone Additional Help and Information This action only occurs on the Cisco IP Phone 8800 Series phone. It does not occur on lines set up on your key expansion module. Additional Help and Information If you have questions about the functions available on your phone, contact your administrator. -
Page 46: Report Call Quality Issues
Report All Phone Issues You can use the Cisco Collaboration Problem Report Tool (PRT) to collect and send phone logs, and to report problems to your administrator. If you see a message that the PRT upload has failed, the problem report is saved on the phone and you should alert your administrator. -
Page 47: Lost Phone Connectivity
Cisco One-Year Limited Hardware Warranty Terms Special terms apply to your hardware warranty and services that you can use during the warranty period. Your formal Warranty Statement, including the warranties and license agreements applicable to Cisco software, is available on Cisco.com at this URL: https://www.cisco.com/go/hwwarranty. - Page 48 Your Phone Cisco One-Year Limited Hardware Warranty Terms Cisco IP Phone 8800 Series User Guide...
-
Page 49: Calls
Your phone works just like a regular phone. But we make it easier for you to make calls. Make a Call Use your phone just like any other phone to make a call. Procedure Enter a number and pick up the handset. Cisco IP Phone 8800 Series User Guide... -
Page 50: Make A Call With The Speakerphone
Press a number on the keypad to see the available options, and then press the number again to move through the choices. For example, press the number 1 three times to enter the @ symbol. Cisco IP Phone 8800 Series User Guide... -
Page 51: Redial A Number
You can see all the speed-dial numbers that you add in the Self Care portal. Use the down button in the navigation cluster to scroll through your speed-dial numbers, then select a speed-dial number. Before You Begin Set up speed-dial codes in the Self Care portal. Cisco IP Phone 8800 Series User Guide... -
Page 52: Add A Speed Dial Button From Your Phone
Portal. This method is quick way to add a favorite phone number as a speed-dial to your phone. In addition to being supported on the Cisco IP Phones 8800 Series, this method of adding speed-dial buttons is supported on the following key expansion modules: •... -
Page 53: Delete A Speed Dial Button From Your Phone
You can use your phone to delete a speed-dial button. This method only works if you added the speed-dial buttons from the phone. It does not apply to speed-dial buttons added from the Self Care Portal, or from the Cisco Unified Communications Manager by your administrator. Procedure Step 1 Press and hold a line key for 2 seconds. -
Page 54: Dial An International Number
Press Callback while you are listening to the busy tone or ring sound. Step 2 Press Exit to exit the confirmation screen. Step 3 When you hear the ringtone that the person is available and see the message, press Dial to place the call again. Cisco IP Phone 8800 Series User Guide... -
Page 55: Calls That Require A Billing Code Or Authorization Code
Answer Calls Your Cisco IP Phone works just like a regular phone. But we make it easier for you to answer calls. Answer a Call Procedure When your phone rings, press the flashing line button to answer the call. -
Page 56: Decline A Call
When DND is turned on, the header section of the phone screen changes color and Do not disturb is displayed on the phone screen. When you turn on DND, it affects all lines on your phone. However, you will always receive intercom and emergency calls, even when DND is turned on. Cisco IP Phone 8800 Series User Guide... -
Page 57: Answer A Coworker's Phone (Call Pickup)
Do one of the following actions: • Enter the number of the phone line with the call that you want to pick up. For example, if the call is ringing on line 12345, enter 12345. Cisco IP Phone 8800 Series User Guide... -
Page 58: Answer A Call From An Associated Group (Other Pickup)
Sign out of your hunt group to stop receiving calls from it. You continue receiving calls placed directly to you. Procedure Step 1 Press Hunt Group to sign in. Step 2 Press Hunt Group again to sign out. Cisco IP Phone 8800 Series User Guide... -
Page 59: View The Call Queue In A Hunt Group
When your phone automatically answers the incoming call, talk to the caller using your headset. If you don't want to use your headset anymore, press the Headset button to turn it off, and use the handset or speakerphone instead. Related Topics Headsets, on page 95 Cisco IP Phone 8800 Series User Guide... -
Page 60: Trace A Suspicious Call
Video Settings, on page 88 Make a Video Call Cisco IP Phones 8845, 8865, and 8865NR support video calls as long as the person you're calling also has a video phone. The ring on the outside of the camera controls the shutter. -
Page 61: Toggle Between Phone And Video Display
Your administrator can take steps to protect your video calls from tampering by people outside your company. If you see the Secure icon displayed during a video call, your administrator has taken steps to ensure your privacy. Cisco IP Phone 8800 Series User Guide... -
Page 62: Mute Your Call
When you've left a call on hold too long, you'll be notified with these cues: • Single ring, repeating at intervals • Flashing amber line button • Flashing message indicator on the handset • Visual notification on the phone screen Cisco IP Phone 8800 Series User Guide... -
Page 63: Swap Between Active And Held Calls
Your phone displays the number where the system parked the call. The parked call is put on hold, and you can press Resume to resume the call on your phone. Step 2 (Optional) Communicate the parked number to the person who needs to answer the call. Cisco IP Phone 8800 Series User Guide... -
Page 64: Retrieve A Call On Hold With Call Park
Step 3 Press Transfer again to park the call. Retrieve a Call on Hold with Manual Directed Call Park You can pick up a call that was parked to a dedicated call park number. Cisco IP Phone 8800 Series User Guide... -
Page 65: Forward Calls
If you don't want to talk, transfer the call before the other person answers. You can also swap between both callers to consult with them individually before you remove yourself from the call. Cisco IP Phone 8800 Series User Guide... -
Page 66: Conference Calls And Meetings
You can talk to a person before you add them to a conference. You can also swap between the conference call and the call with the other person. Procedure Step 1 Call a new conference participant, but do not add the participant to the conference. Cisco IP Phone 8800 Series User Guide... -
Page 67: View And Remove Conference Participants
You cannot join a meet-me conference until the conference hosts dials in. If you hear a busy tone, the host has not dialed into the conference. Hang up and try your call again. Procedure Dial the meet-me phone number that the conference host provides. Cisco IP Phone 8800 Series User Guide... -
Page 68: Intercom Calls
You receive a message on your phone screen, and an audible alert. Your phone answers the intercom call in whisper mode. Procedure Step 1 Press Intercom to switch to connected mode. In connected mode, you can speak to the intercom caller. Step 2 Press Intercom to end the call. Cisco IP Phone 8800 Series User Guide... -
Page 69: Supervise And Record Calls
The priorities range from level 1 (low) to level 5 (high). This system of priorities is called multilevel precedence and preemption (MLPP). Your administrator sets up the priorities that you can use and determines whether you need special sign-in information. Cisco IP Phone 8800 Series User Guide... -
Page 70: Make A Priority Call
Pick up the handset. Step 2 Press PrecLevel. Step 3 Select a priority level for the call. Step 4 (Optional) Enter your credentials on the authorization screen. Step 5 Enter the destination number. Cisco IP Phone 8800 Series User Guide... -
Page 71: Answer A Priority Call
The list of all calls is useful if you have multiple lines or if you share lines with other users. The list displays all your calls together. You can also display your active calls on your primary line, which is useful if you want all your calls displayed on a single screen. Cisco IP Phone 8800 Series User Guide... -
Page 72: View Important Calls
All available lines are displayed in the list. If you require a line that is not in the list, contact your administrator. Step 6 Click Apply. Step 7 To view the filter, press Back. Cisco IP Phone 8800 Series User Guide... -
Page 73: Use A Line Filter
You or your coworker can join a call on the shared line. Your administrator needs to enable the feature on your phone. If you try to add yourself to a call on a shared line and see a message that you cannot be added, try again. Cisco IP Phone 8800 Series User Guide... -
Page 74: Get Notified Before You Join A Call On A Shared Line
Visual confirmation is displayed on your phone screen for as long as the feature is enabled. Procedure Step 1 Press Privacy to enable the feature. Step 2 Press Privacy again to turn off the feature. Cisco IP Phone 8800 Series User Guide... -
Page 75: Mobile Devices And Your Desk Phone
Cisco IP Phone 8851 and 8861 support this feature. Do not pair two or more Cisco IP Phone 8800 Series desk phones. Phone Calls with Intelligent Proximity When you use Bluetooth, you can pair your mobile device (phone or tablet) to your desk phone. -
Page 76: Switch Connected Mobile Devices
Calls Phone Calls with Intelligent Proximity Switch Connected Mobile Devices If you have more than one paired mobile device in range of your Cisco IP Phone, you can choose which mobile device to connect. Procedure Step 1 Press Applications Step 2 Select Bluetooth. -
Page 77: Handle An Incoming Mobile Call
Adjust the Mobile Device Volume Volume controls on your phone and mobile device are synchronized. Synchronization only occurs when there is an active call. Before You Begin Your mobile phone is paired to your desk phone. Cisco IP Phone 8800 Series User Guide... -
Page 78: View Your Mobile Contacts On Your Desk Phone
Step 2 Select your mobile phone. Delete Contacts in Your Mobile Device Contact List You can remove your mobile contacts list from your desk phone. The contacts list on your mobile phone remains intact. Cisco IP Phone 8800 Series User Guide... -
Page 79: View Your Mobile Call History On Your Desk Phone
Your tablet is paired to your desk phone and you receive a call on the tablet. Procedure Step 1 On the tablet, set the audio path to use Bluetooth. Step 2 Use the headset, handset, or speakerphone to listen to the audio on the phone. Cisco IP Phone 8800 Series User Guide... -
Page 80: Move The Audio From Your Desk Phone To Your Tablet
Related Topics Self Care Portal, on page 12 Enable Mobile Connect Procedure Step 1 Press Mobility to display the current remote destination status (Enabled or Disabled). Step 2 Press Select to change the status. Cisco IP Phone 8800 Series User Guide... -
Page 81: Move A Call From Your Desk Phone To Your Mobile Phone
You can transfer a call from your mobile phone to your desk phone. Before You Begin You need to enable Mobile Connect on your desk phone. Get the access code from your administrator. Cisco IP Phone 8800 Series User Guide... - Page 82 Hang up the call on your mobile phone to disconnect the mobile phone, but not the call. Step 3 Press Answer on your desk phone within 10 seconds and start talking on the desk phone. Cisco IP Phone 8800 Series User Guide...
-
Page 83: Contacts
You can add special speed-dial codes for people who you often call. You can set up your personal directory from your phone or from the Self Care portal. Use your phone to assign speed-dial codes to the directory entries. Cisco IP Phone 8800 Series User Guide... -
Page 84: Sign In And Out Of A Personal Directory
Step 4 Press New. Step 5 Enter first name, last name, and optionally a nickname. Step 6 Press Phones, enter the phone number along with any required access codes, and then press Submit. Cisco IP Phone 8800 Series User Guide... -
Page 85: Search For A Contact In Your Personal Directory
Select the personal address book entry that you want to dial. Step 5 Select the required fast-dial code and press Call. Assign a Fast-Dial Code to a Contact A fast-dial code makes it easier to call a contact. Cisco IP Phone 8800 Series User Guide... -
Page 86: Call A Contact With A Fast-Dial Code
Step 1 Press Contacts Step 2 Sign in to your personal directory. Step 3 Select Personal Fast Dials and scroll to a fast-dial code. Step 4 Select the required fast-dial code and press Call. Cisco IP Phone 8800 Series User Guide... -
Page 87: Edit A Contact In Your Personal Directory
Sign in to your personal directory. Step 3 Select Personal Fast Dials and search for a fast-dial code. Step 4 Select the required code and press Remove. Step 5 Select the index and press Remove. Cisco IP Phone 8800 Series User Guide... -
Page 88: Cisco Web Dialer
Cisco Web Dialer You can use Cisco Web Dialer, a web browser, and your Cisco IP phone to make calls from web and desktop applications. Use your web browser and go to a website or your company directory, and then click a hyperlinked phone number to begin your call. -
Page 89: Recent Calls
If you have more than one line, select a line to view. If two lines on your phone are configured for the same number, only the line that receives the call shows the call details in the call history. Cisco IP Phone 8800 Series User Guide... -
Page 90: Return A Recent Call
Press Clear. Step 5 Press Delete. Delete a Call Record You can edit Recents to remove a single call from your history. This helps preserve important contact information because Recents holds only 150 calls. Cisco IP Phone 8800 Series User Guide... - Page 91 (Optional) Select All Lines or the required line. Step 4 Highlight the individual record or call group that you want to delete. Step 5 Press Delete. Step 6 Press Delete again to confirm. Cisco IP Phone 8800 Series User Guide...
- Page 92 Recent Calls Delete a Call Record Cisco IP Phone 8800 Series User Guide...
-
Page 93: Voicemail
You will also hear a stutter tone played from your handset, headset, or speakerphone when you use a phone line. This stutter tone is line-specific. You only hear it when you use a line that has voice messages. Cisco IP Phone 8800 Series User Guide... -
Page 94: Access Voicemail
This option is useful if you prefer a list of voicemail messages, but you occasionally access your messages without the visual prompts. Procedure Step 1 In the screen, press the Audio softkey. Step 2 When prompted, enter your voicemail credentials. Cisco IP Phone 8800 Series User Guide... -
Page 95: Applications
Close Active Applications, page 84 Available Applications Cisco phones don't include these applications by default. But your company might have added applications such as the weather, stock information, company news, to-do lists, or similar information and services. View Active Applications You can easily see what applications you already have open. -
Page 96: Switch To Active Applications
Close Active Applications Procedure Step 1 Press Applications Step 2 Select Running applications. Step 3 Select a running application and press Close app to close the application. Step 4 Press Close, then press Exit. Cisco IP Phone 8800 Series User Guide... -
Page 97: Settings
Step 1 Press Applications Step 2 Select Settings > Wallpaper. Step 3 Select a wallpaper option and perform any of the steps: • Press Preview to see the wallpaper on your phone screen. Cisco IP Phone 8800 Series User Guide... -
Page 98: Change The Ringtone
Step 4 Press Save. Adjust the Contrast You can change the contrast of your Cisco IP Phone 8811 to make the screen easier to read. To check which phone model you have, press Applications and select Phone information. The Model number field shows your phone model. -
Page 99: Change The Font Size
Press Exit to return to the Applications window. Change the Phone Name You can change the name of the phone from the default name. Your mobile device displays this name when you pair your mobile device with your desk phone. Cisco IP Phone 8800 Series User Guide... -
Page 100: Adjust The Headset Feedback
If you have a video phone, you have settings to control the video. Adjust the Video Brightness If the lighting in your office makes it hard to see the video, you can adjust the brightness. Cisco IP Phone 8800 Series User Guide... -
Page 101: Adjust The Video Bandwidth
Before You Begin Connect the computer to the PC port of your phone with an Ethernet cable, and login to Cisco Jabber for Windows or Cisco Jabber for Mac. The phone must be connected to the first network interface card (NIC1) in the computer. -
Page 102: Adjust The Volume During A Call
Adjust the Volume During a Call • Cisco Jabber for Mac 10.8.1 or later Contact your administrator if you do not have the latest version of Cisco Jabber or MSI. For a list of hardware and software requirements, see: • Cisco Jabber for Windows release notes at http://www.cisco.com/c/en/us/support/unified-communications/... -
Page 103: Adjust Voice Speed
Voice Feedback, on page 27 Phone Display Language Your phone can display text in many languages. Your administrator sets the language the phone uses. If you want the language changed, contact your administrator. Cisco IP Phone 8800 Series User Guide... - Page 104 Settings Phone Display Language Cisco IP Phone 8800 Series User Guide...
-
Page 105: Accessories
(a line, a speed dial, or a feature). If your phone's line buttons are already in use, your phone won't display any additional features. Table 12: Accessory Support for the Cisco IP Phone 8800 Series 8811... - Page 106 8851NR 8861 8865 8865NR Headset Analog Headset Analog Wideband Headset Bluetooth — — — — Headset — — — Microphone External — — — — — Speakers External — — — — — Cisco IP Phone 8800 Series User Guide...
-
Page 107: View The Accessories Associated With Your Phone
Cisco Headset 500 Series The Cisco Headset 531 and Cisco Headset 532 are two headsets developed for Cisco IP Phones and devices. The 531 headset features a single earpiece, and offers lightweight comfort. The 532 headset features two earpieces for use in a noisy environment or busy office. - Page 108 Accessories Cisco Headset 500 Series The Cisco Headset 531 and 532 can be used as standard headsets on the phones. You plug the headset into the headset port using the RJ connector. The Cisco Headset USB Adapter is available for use with the Cisco Headset 531 and 532. With the adapter, you can test your headset, and customize your bass and treble, gain or microphone volume, and sidetone or feedback settings.
-
Page 109: Adjust Your Bass And Treble
Microphone volume is also known as gain, and this setting is used when you are on a call with a variety of loud and soft voices. This setting equalizes the voices heard in your earpiece by making loud voices softer, and quiet voices louder. Cisco IP Phone 8800 Series User Guide... -
Page 110: Test Your Microphone
Either the remote party or both the remote party and the Cisco IP Phone user may hear an audible hum or buzz. A range of outside sources can cause humming or buzzing sounds;... -
Page 111: Audio Quality
The Cisco IP Phone uses a shared key authentication and encryption method to connect with headsets. The Cisco IP Phone can connect with up to 50 headsets, one at a time. The last connected headset is used as the default. Pairing is typically performed once for each headset. - Page 112 When headsets are more than 30 feet (10 meters) away from the Cisco IP Phone, Bluetooth drops the connection after a 15- to 20-second timeout. The paired headset reconnects when it is comes back into range of the Cisco IP Phone. For certain phone types that operate in power-save modes, you can wake up the headset by tapping on the operational button.
-
Page 113: Wireless Headsets
The cable channel reduces the strain on the connector and the printed circuit board. Set Up a Wideband Standard Headset You can use a headset that supports wideband audio. Wideband audio improves the quality of the sound you hear in the headset. Cisco IP Phone 8800 Series User Guide... -
Page 114: Usb Headsets
• For optimum headset coverage, use your Bluetooth headset within 10 feet (3 meters) of the phone. • Your phone supports the Bluetooth Handsfree Profile. If your Bluetooth headset supports these features, you can use your headset to: ◦ Answer a call ◦ End a call Cisco IP Phone 8800 Series User Guide... -
Page 115: Turn Bluetooth On Or Off
For more information, see the documentation from your Bluetooth headset manufacturer. Related Topics Bluetooth and Your Phone, on page 20 The Cisco IP Phone 8800 Series, on page 1 View Your Paired Bluetooth Devices, on page 64 Turn Bluetooth On or Off When Bluetooth is active, the Bluetooth icon appears in the phone screen header. -
Page 116: Disconnect A Bluetooth Headset
Enable an E-Hookswitch Headset Electronic Hookswitch headsets use a base station and a wireless headset. The base station plugs into your phone headset jack. After installing the headset, you enable it on the Cisco Unified Communications Manager. Procedure Step 1... -
Page 117: Swap Headsets While On A Call
• Cisco IP Phone 8865 Key Expansion Module—Dual LCD screen module for video phones, 14 line keys, 2 pages, configure with one-column display only. If you are in Enhanced line mode, and you receive a call on a key expansion line, then a Call Alert displays on the phone, and the Caller ID displays on the expansion module line. - Page 118 Accessories Cisco IP Phone 8800 Key Expansion Module Cisco IP Phone 8851/8861 Key Expansion Module require firmware release 12.0(1) or later, and Cisco Unified Communications Manager 10.5(2) or later to function. Enhanced line mode (ELM) is supported only on the Cisco IP Phone 8851/8861 Key Expansion Module and the Cisco IP Phone 8865 Key Expansion Module.
-
Page 119: Key Expansion Module Buttons And Hardware
2. The lights in each button indicate the state of the page as follows: • green steady—Page is in view. • light off—Page is not in view. • amber steady—Page is not in view with one or more alerting calls on the page. Cisco IP Phone 8800 Series User Guide... - Page 120 In this configuration, the key expansion module displays nine lines on page 1, and nine lines on page 2. Figure 10: Key Expansion Module with One Column Cisco IP Phone 8800 Series User Guide...
-
Page 121: Place A Call On The Key Expansion Module
Figure 11: Key Expansion Module with Two Columns Place a Call on the Key Expansion Module Procedure Step 1 Press the line button on the key expansion module. Step 2 Dial a phone number. Step 3 Pick up your handset. Cisco IP Phone 8800 Series User Guide... -
Page 122: Adjust The Key Expansion Module Screen Brightness
Select Settings > Brightness > Brightness - Key expansion module x, where x is the number of the key expansion module. Step 3 Press right on the Navigation pad to increase brightness. Press left on the Navigation pad to decrease brightness. Step 4 Press Save. Cisco IP Phone 8800 Series User Guide... -
Page 123: Product Safety And Security
Health-Care Environments This product is not a medical device and uses an unlicensed frequency band that is susceptible to interference from other devices or equipment. Cisco IP Phone 8800 Series User Guide... -
Page 124: External Devices
EMC Directive [89/336/EC]. Bluetooth Wireless Headset Performance Cisco IP phones support Bluetooth Class 2 technology when the headsets support Bluetooth. Bluetooth enables low-bandwidth wireless connections within a range of 30 feet (10 meters). The best performance is in the 3- to 6-foot (1- to 2-meter) range. -
Page 125: Phone Behavior During Times Of Network Congestion
(2) l’utilisateur du dispositif doit être prêt à accepter tout brouillage radioélectrique reçu même si ce brouillage est susceptible de compromettre le fonctionnement du dispositif. Canadian RF Exposure Statement THIS DEVICE MEETS THE LIMITS AS REFERENCED BY ISED RSS-102 R5 FOR EXPOSURE TO RADIO WAVES Cisco IP Phone 8800 Series User Guide... -
Page 126: Compliance Information For Brazil
Site Anatel: http://www.anatel.gov.br FCC Compliance Statements The Federal Communications Commission requires compliance statements for the following: Cisco IP Phone 8800 Series User Guide... -
Page 127: Fcc Part 15.19 Statement
This product contains cryptographic features and is subject to U.S. and local country laws that govern import, export, transfer, and use. Delivery of Cisco cryptographic products does not imply third-party authority to import, export, distribute, or use encryption. Importers, exporters, distributors, and users are responsible for compliance with U.S. - Page 128 Important Online Information End User License Agreement The End User License Agreement (EULA) is located here: https://www.cisco.com/go/eula Regulatory Compliance and Safety Information Regulatory Compliance and Safety Information (RCSI) is located here: https://www.cisco.com/c/dam/en/us/td/docs/voice_ip_comm/cuipph/8800-series/regulatory_compliance/ RCSI-0313-book.pdf Cisco IP Phone 8800 Series User Guide...