
Related Manuals for Makita XMU04


Summary of Contents for Makita XMU04
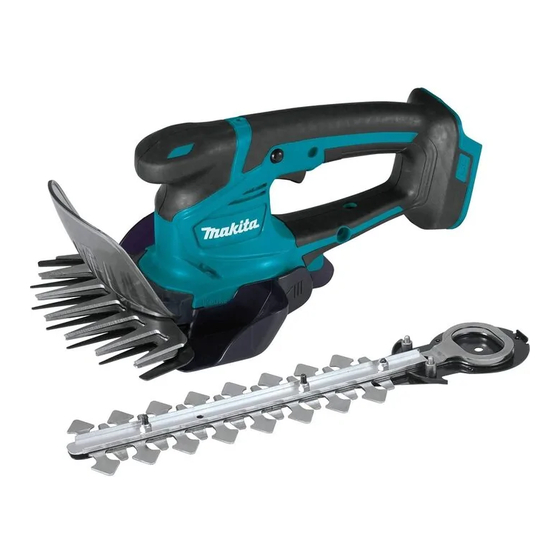
- Page 1 INSTRUCTION MANUAL MANUAL DE INSTRUCCIONES Cordless Grass Shear Tijeras Inalámbricas para Hierba XMU04 Read before use. Lea antes de usar.
-
Page 2: Specifications
ENGLISH (Original instructions) SPECIFICATIONS Model: XMU04 Cutting width 160 mm (6-5/16") Strokes per minute 2,500/min Dimensions 353 mm x 177 mm x 131 mm (13-7/8" x 7" x 5-1/8") (L x W x H) Rated voltage D.C. 18 V Standard battery cartridge... - Page 3 If devices are provided for the connection of Follow all charging instructions and do not dust extraction and collection facilities, ensure charge the battery pack or tool outside the these are connected and properly used. Use of temperature range specified in the instruc- dust collection can reduce dust-related hazards.
- Page 4 14. Store idle appliances indoors - When not in use, 26. Keep hands away from blades. appliances should be stored indoors in dry, and 27. Before cutting grass, remove foreign matter high or locked-up place out of reach of children. such as rocks and large sticks from the work 15.
- Page 5 Symbols Use of non-genuine Makita batteries, or batteries that have been altered, may result in the battery bursting The followings show the symbols used for tool. causing fires, personal injury and damage. It will also void the Makita warranty for the Makita tool and charger. volts Tips for maintaining maximum battery life direct current Charge the battery cartridge before completely dis- charged.
-
Page 6: Functional Description
Indicating the remaining battery FUNCTIONAL capacity DESCRIPTION Only for battery cartridges with the indicator CAUTION: Always be sure that the tool is switched off and the battery cartridge is removed before adjusting or checking function on the tool. Using the tool as cordless hedge trimmer This tool can be used as a cordless hedge trimmer by installing the shear blades for hedge trimmer (optional... -
Page 7: Overheat Protection
The lamp lights up The tool has Charge the battery. without pressing the lock-off button. Ask your local red. * stopped because Makita Service Center for repairs. the remaining battery capacity is empty. WARNING: Never disable the lock function or tape down the lock-off button. - Page 8 Change the fixed position of the grass receiver by moving it in the direction of the arrow. NOTE: The shearing height value is a guideline. The actual shearing height may vary depending on the condition of the lawn or the ground. NOTE: Try a test shearing in a less conspicuous place to get your desired height. ASSEMBLY CAUTION: Always be sure that the tool is Installing or removing the grass switched off and the battery cartridge is removed receiver...
- Page 9 ► 1 . Hinge 2. Grass receiver Remove the undercover, shear blades, and crank. Align the protrusions on the grass receiver with the grooves on the tool by sliding the grass receiver toward the front of the tool and moving it in the direction of the arrow. NOTICE: Do not attach the hinge of the grass receiver to the tool forcibly after aligning the pro-...
- Page 10 Adjust the three pins so that they are lined up on Turn the shear blades upside down and install the alignment line. them so that the pins on the tool fit in the hole on the base plate. Make sure that the shear blades are fixed securely in place. ► 1 . Alignment line Apply a small amount of grease to the periphery Place the undercover so that on the under- of the crank. Attach the crank to the pins with the small cover is aligned with on the lock lever. and large rounds facing up. While pressing the undercover, turn the under- ► 1 . Crank cover clockwise until on the undercover is aligned with...
- Page 11 Make sure that the lock lever fits in the groove on While pressing the lock lever, turn the undercover the undercover. counterclockwise until on the undercover is aligned with on the lock lever. ► 1 . Lock lever CAUTION: Never use the tool without install- ing the undercover. Remove the undercover. 10.
- Page 12 Attach the blade cover to the shear blades. Adjust the three pins so that they are lined up on the alignment line. ► 1 . Screws NOTE: The shear blades can be removed without removing the screws. Remove the crank from the shear blades. ► 1 . Alignment line Apply a small amount of grease to the periphery of the crank. Attach the crank to the pins with its small and large rounds facing down. ► 1 . Crank NOTE: The crank may remain in the tool. NOTE: Attach the blade cover and the storage case to the removed shear blades, and then store the blades.
- Page 13 Turn the shear blades upside down and install them so that the pin on the tool fits in the hole on the shear blades. Insert the claw of the base plate into the While pressing the undercover, turn the under- groove on the tool. Make sure that the shear blades are cover clockwise until on the undercover is aligned fixed securely in place. with on the lock lever.
-
Page 14: Operation
Installing or removing the chip receiver Optional accessory CAUTION: When installing or removing the chip receiver, always wear gloves and attach the blade cover so that your hands and face do not directly contact the blade. The chip receiver gathers discarded leaves and makes clean-up afterward much easier. It can be installed on either side of the tool. - Page 15 CAUTION: Overreaching with a hedge trim- mer, particularly from a ladder, is extremely dangerous. Do not work while standing on anything wobbly or infirm. NOTICE: Do not attempt to cut branches thicker than 10 mm in diameter with the tool. Cut branches to the desired height using branch cutters before using the tool.
-
Page 16: Cleaning The Tool
MAINTENANCE CAUTION: Always be sure that the tool is switched off and the battery cartridge is removed before attempting to perform inspection or maintenance. To maintain product SAFETY and RELIABILITY, repairs, any other maintenance or adjustment should be performed by Makita Authorized or Factory Service Centers, always using Makita replacement parts. 16 ENGLISH... -
Page 17: Optional Accessories
Should any trouble develop during this one year period, return the COMPLETE tool, freight prepaid, to one of Makita’s Factory or Authorized Service Centers. If inspection shows the trouble is caused by defective workmanship or material, Makita will repair (or at our option, replace) without charge. This Warranty does not apply where: • repairs have been made or attempted by others: •... -
Page 18: Especificaciones
ESPAÑOL (Instrucciones originales) ESPECIFICACIONES Modelo: XMU04 Ancho de corte 160 mm (6-5/16″) Carreras por minuto 2 500 cpm Dimensiones 353 mm x 177 mm x 131 mm (13-7/8″ x 7″ x 5-1/8″) (La x An x Al) Tensión nominal 18 V c.c. Cartucho de batería estándar BL1815N / BL1820B / BL1830 / BL1830B / BL1840B / BL1850B / BL1860B Peso neto 1,4 kg - 1,8 kg (3,2 lbs - 3,9 lbs) •... - Page 19 Use equipo de protección personal. Póngase Mantenga las herramientas de corte limpias siempre protección para los ojos. El equipo y filosas. Si recibe un mantenimiento adecuado protector tal como máscara contra el polvo, zapa- y tiene los bordes afilados, es probable que la tos de seguridad antiderrapantes, casco rígido y herramienta se atasque menos y sea más fácil protección para oídos utilizado en las condiciones controlarla.
- Page 20 15. Dé un mantenimiento cuidadoso al aparato Advertencias de seguridad para las - Mantenga el borde de corte afilado y limpio tijeras inalámbricas para hierba para lograr un desempeño óptimo y reducir así el riesgo de lesiones. Siga las instrucciones para la lubricación y el cambio de los accesorios. ADVERTENCIA: Al utilizar aparatos eléctricos Inspeccione el cable del aparato periódicamente de jardinería, siempre deben tomarse en cuenta las y en caso de presentar daños, llévelo a repa- precauciones básicas de seguridad a fin de reducir rar a una instalación de servicio autorizada.
- Page 21 24. El servicio del aparato solamente deberá ser Un usuario con experiencia deberá enseñar realizado por personal de reparaciones califi- a los usuarios primerizos cómo manejar el cado. El servicio o mantenimiento realizados por cortasetos. personal no calificado podría ocasionar un riesgo El cortasetos no deberá ser utilizado por niños de lesiones. ni por personas menores de 18 años. Esta 25.
- Page 22 Makita, o de baterías alteradas, puede ocasio- nar que las baterías exploten causando un incendio, Instrucciones importantes de lesiones personales y daños. Asimismo, esto inva- seguridad para el cartucho de lidará la garantía de Makita para la herramienta y el cargador Makita. batería Consejos para alargar al máximo Antes de utilizar el cartucho de batería, lea la vida útil de la batería...
-
Page 23: Descripción Del Funcionamiento
DESCRIPCIÓN DEL PRECAUCIÓN: Introduzca siempre com- pletamente el cartucho de batería hasta que FUNCIONAMIENTO el indicador rojo no pueda verse. Si no, podría accidentalmente salirse de la herramienta y caer al suelo causando una lesión a usted o alguien a su PRECAUCIÓN: Asegúrese siempre de que la alrededor. herramienta esté apagada y el cartucho de batería PRECAUCIÓN: No instale el cartucho de haya sido extraído antes de realizar cualquier... -
Page 24: Protección Contra Sobrecarga
La luz roja se La herramienta Cargue la batería. enciende. * se ha detenido Solicite la reparación en el centro de servicio Makita debido a que la de su localidad. capacidad restante de la batería se ha ADVERTENCIA: Nunca deshabilite la fun- agotado. -
Page 25: Montaje
Ajuste de la altura del cizallado MONTAJE (para tijeras para hierba) PRECAUCIÓN: Asegúrese siempre de que la PRECAUCIÓN: Cuando cambie la altura del herramienta esté apagada y el cartucho de batería cizallado, asegúrese de colocar la cubierta de las haya sido extraído antes de realizar cualquier cuchillas y tenga cuidado de que sus dedos no trabajo en la misma. - Page 26 Instalación o extracción del colector de hierba PRECAUCIÓN: Al instalar o extraer el colec- tor de hierba, asegúrese de colocar la cubierta de las cuchillas y tenga cuidado de que sus dedos no queden atrapados entre la herramienta y el colector de hierba.
- Page 27 ► 1 . Línea de alineación Aplique una pequeña cantidad de grasa a la peri- feria de la manivela. Instale la manivela en las clavijas con las partes redondas pequeñas y grandes orienta- das hacia arriba. ► 1 . Subcubierta 2. Cuchillas de cizalla 3. Manivela Instalación de las cuchillas de cizalla Tenga listas la manivela, la subcubierta y las cuchillas de cizalla nuevas. ► 1 . Manivela Ajuste las cuchillas y la placa de la base de manera que el orificio en la placa de la base y las dos protuberancias en las cuchillas queden alineados. ► 1 . Manivela 2. Subcubierta 3. Cuchillas de cizalla Retire la cubierta de las cuchillas de cizalla viejas y luego colóquela en las nuevas.
- Page 28 ► 1 . Palanca de bloqueo Coloque la subcubierta de manera que el sím- bolo en la subcubierta quede alineado con el sím- PRECAUCIÓN: Nunca utilice la herramienta bolo en la palanca de bloqueo. sin haber instalado la subcubierta. 10. Retire la cubierta de las cuchillas y luego encienda la herramienta para verificar que funcione correctamente. AVISO: Si las cuchillas de cizalla no funcionan correctamente es porque las cuchillas no están bien embonadas en la manivela.
- Page 29 ► 1 . Manivela NOTA: La manivela puede permanecer en la Retire la subcubierta. herramienta. NOTA: Coloque la cubierta de las cuchillas de cizalla extraídas, póngalas en el estuche y luego guárdelas. Instalación de las cuchillas de cizalla Tenga listas la manivela, la subcubierta y las cuchillas de cizalla nuevas. Afloje los dos tornillos con un destornillador y extraiga las cuchillas de cizalla. ► 1 . Manivela 2. Subcubierta 3. Cuchillas de cizalla Coloque la cubierta de las cuchillas de cizalla.
- Page 30 ► 1 . Línea de alineación Aplique una pequeña cantidad de grasa a la peri- ► 1 . Barreta feria de la manivela. Instale la manivela en las clavijas con las partes redondas pequeñas y grandes orienta- Apriete los dos tornillos firmemente con un das hacia abajo. atornillador. ► 1 . Manivela ► 1 . Tornillos Deslice las cuchillas de cizalla de manera que el Coloque la subcubierta de manera que el sím- orificio en la placa de la base quede colocado en el cen- bolo en la subcubierta quede alineado con el sím- tro de los anillos de las cuchillas. bolo en la palanca de bloqueo. Coloque de cabeza las cuchillas de cizalla e instálelas de manera que la clavija en la herramienta encaje en el orificio en las cuchillas de cizalla. Inserte Mientras presiona la subcubierta, gírela en el la barreta de la placa de la base en la ranura en la sentido de las manecillas del reloj hasta que el sím- herramienta. Asegúrese de que las cuchillas de cizalla...
-
Page 31: Operación
► 1 . Ganchos 2. Orificios Para extraer el colector de residuos, presione las palan- 10. Asegúrese de que la palanca de bloqueo encaje cas en ambos lados para liberar los ganchos. en la ranura en la subcubierta. ► 1 . Palancas ► 1 . Palanca de bloqueo AVISO: Nunca intente extraer el colector de PRECAUCIÓN: Nunca utilice la herramienta residuos aplicando una fuerza excesiva con sin haber instalado la subcubierta. - Page 32 Pode las ramas largas a la altura deseada con algún ADVERTENCIA: Mantenga las manos aleja- cortador de ramas antes de usar esta herramienta. das de las cuchillas. AVISO: No utilice la herramienta en ninguna forma que ocasione que el motor se detenga o PRECAUCIÓN: Si es posible, evite utilizar rote extremadamente lento.
-
Page 33: Mantenimiento De Las Cuchillas
Para mantener la SEGURIDAD y FIABILIDAD del pro- El atar un cordón a la altura deseada y podar a lo largo ducto, las reparaciones, y cualquier otra tarea de man- de éste puede ayudarlo a cortar la parte superior de un tenimiento o ajuste deberán ser realizadas en centros seto de manera uniforme. de servicio autorizados o de fábrica Makita, empleando siempre repuestos Makita. Limpieza de la herramienta Quite el polvo de la herramienta con un paño seco o humedezca un paño en agua y jabón y exprímalo para limpiarla. AVISO: Nunca use gasolina, bencina, diluyente (tíner), alcohol o sustancias similares. -
Page 34: Accesorios Opcionales
► 1 . Orificio ACCESORIOS OPCIONALES PRECAUCIÓN: Estos accesorios o aditamen- tos están recomendados para utilizarse con su herramienta Makita especificada en este manual. El empleo de cualquier otro accesorio o aditamento puede conllevar el riesgo de lesiones personales. Utilice los accesorios o aditamentos solamente para su fin establecido. Si necesita cualquier ayuda para más detalles en relación con estos accesorios, pregunte a su centro de... - Page 35 GARANTÍA LIMITADA DE UN AÑO DE MAKITA Ésta Garantía no aplica para México Política de garantía Cada herramienta Makita es inspeccionada y probada exhaustivamente antes de salir de la fábrica. Se garan- tiza que está libre de defectos de mano de obra y mate- riales por el período de UN AÑO a partir de la fecha ori- ginal de compra. Si durante este período de un año se desarrollara algún problema, devuelva la herramienta...
- Page 36 Para reducir la exposición a estos productos químicos: trabaje en un área bien ventilada y póngase el equipo de seguridad indicado, tal como las máscaras contra polvo que están especialmente diseñadas para filtrar partículas microscópicas. Makita Corporation 3-11-8, Sumiyoshi-cho, Anjo, Aichi 446-8502 Japan 885551A949...