Panasonic DP-2500 Operating Instructions Manual
Options da-ar250/as200/ds200/ds205/ds210/ds215/fg230/fg231/fk200/fk210/fs200/md200 da-ne200/pc200/pc210/sm08b/sm16b/sm28b/uc200/xn200/xt200; ue-410047/410048/403171
Hide thumbs
Also See for DP-2500:
- Operating instructions manual (199 pages) ,
- Technical manual (342 pages) ,
- User manual (105 pages)
Table of Contents
Advertisement
Quick Links
Digital Copier
Operating Instructions (For Copier)
DP-2500/3000
Options
DA-AR250/AS200/DS200/DS205/DS210/DS215/FG230/FG231/FK200/FK210/FS200/MD200
DA-NE200/PC200/PC210/SM08B/SM16B/SM28B/UC200/XN200/XT200; UE-410047/410048/403171
Before operating this copier, please read
these instructions completely and keep these
operating instructions for future reference.
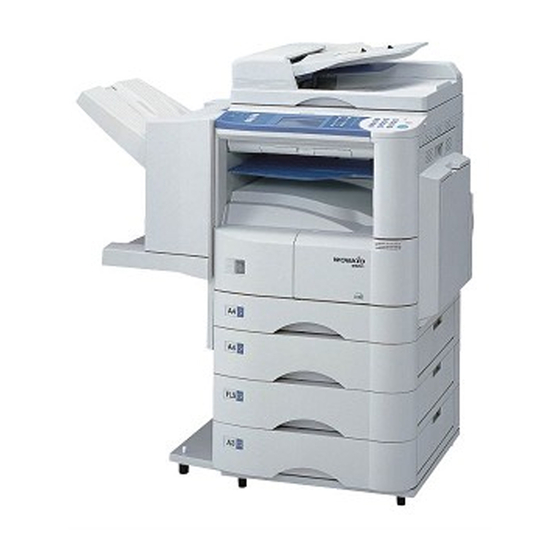
Digital copier with options
(See P .48)
English
J
?
I
Advertisement
Table of Contents

Related Manuals for Panasonic DP-2500


Summary of Contents for Panasonic DP-2500
- Page 1 Digital Copier Operating Instructions (For Copier) DP-2500/3000 Options DA-AR250/AS200/DS200/DS205/DS210/DS215/FG230/FG231/FK200/FK210/FS200/MD200 DA-NE200/PC200/PC210/SM08B/SM16B/SM28B/UC200/XN200/XT200; UE-410047/410048/403171 Before operating this copier, please read these instructions completely and keep these operating instructions for future reference. Digital copier with options (See P .48) English...
-
Page 2: Operation Chart
Operation Chart Common Features and Usage Basic Operation Original Load Paper Turn Power Switch On Position of the Original Commonly Used Functions and Operating Procedures Full Size Makes a copy that is the same size as the original Reduction or Enlargement Copies the original at a fixed reduction or enlargement ratio Memory Capacity... -
Page 3: Touch Panel Display
Touch Panel Display Function Categories Operation Chart Basic Menu (See page 13) # Text, Text/Photo, Photo Mode Key $ Exposure Control Keys % Output Tray Indication & Output Tray Select Key ( Paper Tray Indication ) Paper Tray Selection Key * JOB STATUS Key 2-Sided/Original H H H H H Copy (See page 16) # 1 \ 2 Copy Key... -
Page 4: Energy Star
Energy Star The DP-2500/3000 copier complies with Tier 2 of the Environmental Protection Agency’s Energy Star Program. This voluntary program specifies specific energy consumption and usage standards for copiers. These copiers will automatically “power down” after a specified period of non-use. -
Page 5: Table Of Contents
Table of Contents Getting To Know Your Machine Operation Chart ... 2 Common Features and Usage ... 2 Touch Panel Display ... 3 Before Starting Precautions ... 7 Control Panel ... 10 Touch Panel Display ... 11 Making Copies Basic Menu ... 13 Full Size Copying ... - Page 6 Table of Contents Options Accessories ... 48 Problem Solving Problem Solving ... 55 Troubleshooting ... 66 Others Specifications ... 69 Options and Supplies ... 71 Components ... 48 Automatic Document Feeder ... 49 Finisher/Exit Guide Unit ... 51 Adding Paper (J) ... 55 Replacing the Toner Cartridge and Waste Toner Box (?) ...
-
Page 7: Precautions
Precautions For Your Safety Laser Safety LASER SAFETY This unit employs a laser. Only qualified service personnel should attempt to service this device due to possible eye injury. CAUTION: USE OF CONTROLS, ADJUSTMENTS OR PERFORMANCE PROCEDURES OTHER THAN THOSE SPECIFIED HEREIN MAY RESULT IN HAZARDOUS RADIATION EXPOSURE. - Page 8 C High quality paper of 16 lbs - 24 lbs (15 – 34 lbs via sheet bypass) may be used. C For optimum performance, it is recommended that only Panasonic Brand supplies are used in the copier. The copier should be installed in a well-ventilated...
- Page 9 Installation The maximum power consumption is 1.4 kW. A properly wired (grounded), dedicated, 12A, 120V AC outlet is required. Do not use an extension cord. The main plug on this equipment must be used to disconnect the main power. Please ensure that the socket outlet is installed near the equipment and is easily accessible.
-
Page 10: Control Panel
Control Panel MULTI-SIZE COPY SORT FEED CONTRAST INTERNET PRINTER LCD CONTRAST Key C Adjusts the contrast of the touch panel display. SORT/FINISH Key C When sorting and stapling with Finisher (Option). MULTI-SIZE FEED Key C When Multi-sized originals are copied using ADF/i-ADF (Option). COPY Key &... -
Page 11: Touch Panel Display
Touch Panel Display MULTI-SIZE COPY SORT FEED ADD TONER Touch Panel ON LINE CONTRAST Display INTERNET PRINTER ON LINE DATA C Use only soft finger pressure to activate the Touch Panel Display. DO NOT ATTENTION USE SHARP OBJECTS such as pens, fingernails etc., as this may damage the panel. - Page 12 Control Panel Touch Panel Display Indications Warning Indications ?: Add Toner J: Add Paper 2: Call Service 2: Replace Drum Original Size Indication Copy Image Indication & Rotate Mode Indication SADF/Multi-Size Feed Mode Indication Copy Paper Indication Copy Paper Size Indication Finisher Functions Indication Number of Copies Machine/User Error Code Indication (E1-01, U13, etc.,)
-
Page 13: Basic Menu
Basic Menu Full Size Copying Copying the Same Size Originals (1:1) Copy size is automatically selected. MULTI-SIZE COPY SORT FEED ADD TONER ON LINE CONTRAST INTERNET PRINTER ON LINE DATA Touch Panel Display Press the COPY Key Place the Original Initial Screen (When placing Letter size originals) Original Mode Select Key... -
Page 14: Reduction Or Enlargement Copying
Basic Menu Reduction or Enlargement Copying Copying with Preset Ratios MULTI-SIZE SORT FEED CONTRAST Place the Press the COPY Key Original C If the desired copy size is different from the paper size loaded in the paper tray, use NOTE sheet bypass. -
Page 15: Using The Sheet Bypass
Using the Sheet Bypass Copying on Special Paper, etc. Sheet Bypass Side Guides C Do not feed curled paper through the sheet bypass to avoid misfeed. ATTENTION C Adjust the side guides properly to avoid skewing, wrinkling or misfeeding. NOTE Basic Menu Place the original. -
Page 16: 2-Sided/Original H H H H H Copy
2-Sided/Original H H H H H Copy 2-Sided/Orig. H H H H H Copy Key Initial Screen C Touch the desired key to select a function. 1 \ 2 2 \ 1 2 \ 2 Book \ 2 2 Page N in 1 Booklet SADF... -
Page 17: 2/2 \ 1/2 \ 2 Copy
1 \ \ \ \ \ 2/2 \ \ \ \ \ 1/2 \ \ \ \ \ 2 Copy 1 \ \ \ \ \ 2 Copy From 1-Sided originals to 2- Sided copies. (From Copier Platen & i-ADF/ ADF/ADU) Procedure ADF/i-ADF... -
Page 18: Book \ 2 Copy
2-Sided/Original H H H H H Copy Book \ \ \ \ \ 2 Copy Book \ \ \ \ \ 2 Copy From book originals to 2-Sided copies. Ledger size originals only. (Using ADU) MULTI-SIZE COPY SORT FEED CONTRAST INTERNET PRINTER Place the Original... -
Page 19: Page Copy
2 Page Copy 2 Page Copy Copying two facing pages or a Ledger size original on two separate Letter size sheets. Procedure MULTI-SIZE COPY SORT FEED ADD TONER ON LINE CONTRAST INTERNET PRINTER ON LINE DATA Place the Touch Originals 2 Page Mode Platen Ledger size original... -
Page 20: N In 1 Copy
2-Sided/Original H H H H H Copy N in 1 Copy 2 in 1 Copy From two 1-Sided originals, side by side, to 1-Sided pages. Procedure ADF/i-ADF C The ADF/i-ADF is required for N in 1 copy. NOTE C To reset each mode menu, touch the CANCEL key on the touch panel. MULTI-SIZE COPY SORT... -
Page 21: Booklet Copy
Booklet Copy Booklet Copy From four or more 1-Sided originals, side by side, to 2-Sided copies. Procedure ADF/i-ADF Face-Up Place the Originals C The ADF/i-ADF is required for Booklet copy. NOTE C For Booklet Copy, use Letter C To reset each mode menu, touch the CANCEL key on the touch panel. 2-Sided/Original H H H H H Copy ENERGY SAVER DP-3000... -
Page 22: Sadf Mode
2-Sided/Original H H H H H Copy SADF Mode SADF (Single Sheet Automatic Document Feeder) Function A special original (like a thin paper etc.,) can be fed from the ADF/i-ADF original tray and copied continuously with manual operation. Before using this feature, the SADF Mode must be enabled in the copier function settings. (See P .41) Procedure Place the Original... -
Page 23: Zoom/Effects
Zoom/Effects Zoom/Effects Key Initial Screen C Touch the desired key to select a function. Zoom Page Numbering Margin Book Edge C For combining Zoom/Edit functions and other functions, see page 35. NOTE C To reset Zoom/Effects mode, press the RESET key. Copies with variable zoom ratios from 25% to 400% in 1% increments. -
Page 24: Zoom Copying
Zoom/Effects Zoom Copying Zoom Copies with variable zoom ratios from 25% to 400% in 1% increments. MULTI-SIZE COPY SORT FEED CONTRAST INTERNET PRINTER Place the Original <To set the width and length Zoom Ratio individually> Adjust the Zoom Ratio using the G·F keys or the keypad, and then touch the OK key. -
Page 25: Page Numbering
Page Numbering Feature The page number can be automatically printed on each page. MULTI-SIZE COPY SORT FEED ADD TONER ON LINE CONTRAST INTERNET PRINTER ON LINE DATA Place the Original Select ZOOM/ (ADF/iADF) EFFECT Mode The page numbering format can be changed in function mode. (See page 37) NOTE The “n/m”... -
Page 26: Margin/Book/Edge
Zoom/Effects Margin/Book/Edge Procedure MULTI-SIZE SORT FEED CONTRAST Place the Original Margin Book Edge NOTE C To reset each mode menu, touch the CANCEL key on the touch panel. DP-3000 COPY ADD TONER ON LINE INTERNET PRINTER ON LINE DATA Select ZOOM/ Select Edge EFFECT Mode Margin or Book... -
Page 27: Insertion/Overlay
Insertion/Overlay Insertion/Overlay Key Initial Screen C Touch the desired key to select a function. OHP Interleaving Overlay C The i-ADF/ADF is required for OHP Interleaving function. NOTE C To reset INSERTION/OVERLAY, press the RESET key. Inserts paper between OHP film. Overlays a second image onto the first by using a second original or a file stored in memory. -
Page 28: Ohp Interleaving
Insertion/Overlay OHP Interleaving OHP Interleaving Inserts paper between OHP film. Blank Paper Procedure ADF/i-ADF Place the OHP (Sheet Bypass) Select Blank/Copied and touch the OK key Select PAPER TRAY and touch the OK key C To reset each mode menu, touch the CANCEL key on the touch panel. NOTE Copied Paper MULTI-SIZE... -
Page 29: Overlay
Overlay Overlay Copy 2 images onto the same sheet. 1st-page Procedure MULTI-SIZE COPY SORT FEED ADD TONER ON LINE CONTRAST INTERNET PRINTER ON LINE DATA Place the Select INSERTION/ Original OVERLAY Mode Insertion/Overlay File ENERGY SAVER INTERRUPT FUNCTION RESET DP-3000 ORIGINAL COPY REDIAL/... - Page 30 Insertion/Overlay Overlay C Do not turn Off the power switch if the file has been stored, otherwise the file ATTENTION C Only Letter NOTE # Touch NO, if the overlay image is NOT stored in $ Touch YES, if the overlay image is stored in will be erased.
-
Page 31: Job Memory
Job Memory Five Copy Jobs Can Be Programmed in Memory (M1 to M5) for Recall at a Later Time. DP-3000 MULTI-SIZE COPY SORT FEED ADD TONER ON LINE CONTRAST INTERNET PRINTER ON LINE DATA Touch to display the details of the contents which have been stored. C JOB MEMORY mode will not be deleted even if the power switch is turned off. -
Page 32: Other Features
% Touch the INTERRUPT key again to continue the original job. Note: The ADF/iADF can not be used with interrupt. (Use only the Platen) Modes Power Consumption Approximately149 Wh Approximately 49 Wh Approximately 1.8 Wh (DP-2500) Approximately 1.9 Wh (DP-3000) CLEAR STOP WXYZ START ALARM ACTIVE Warm Up Time 30 sec. -
Page 33: Manual Skyshot Mode/Digital Skyshot Mode
Manual Skyshot Mode/Digital Skyshot Mode When coping from the Platen With the Platen Cover or ADF/iADF Open. Two types of Skyshot Modes can be selected. Manual Skyshot Mode: Making copies from small originals without dark areas around the image. DIGITAL SKYSHOT : Making copies by detecting the skyshot area. - Page 34 Other Features Manual Skyshot Mode/Digital Skyshot Mode Setting the Manual Skyshot Mode Platen Upper- Left Corner C C C C C Set Manual Skyshot Mode first. (See page 38, No. 07) C When changing the M1 or M2 Size, consult with the key operator. NOTE C When using the manual skyshot mode, the M1 and M2 are turned ON and other job C To reset the manual skyshot mode, press the RESET key.
-
Page 35: Combined Function Table
Combined Function Table 2-SIDED/ORIG. H H H H H COPY Next Selections First Selections 1 \ \ \ \ \ 2 A A A A A O A O O O O O O O O O O O O O 2 \ \ \ \ \ 1 A A A A A A A O O O O O O O O O O O O O O 2 \ \ \ \ \ 2... -
Page 36: Function
Function Using Function Modes to Change the Initial Copy Modes GENERAL FUNCTIONS General Functions for Key Operator Procedure MULTI-SIZE COPY SORT FEED ADD TONER ON LINE CONTRAST INTERNET PRINTER ON LINE DATA C Please refer to each operating instructions for options function settings. NOTE COPIER SETTINGS... -
Page 37: General Functions
GENERAL FUNCTIONS Using Function Modes to Change the Initial Copy Modes Screen Modes 00 SORT MODE DEFAULT 01/02 02 POWER ON DEFAULT 05 SORT MEMORY USAGE 06 DEPT. COUNTER 02/02 07 PAGE NUMBERING 09 KEY OPERATOR MODE Input the Key Operator ID code. Not required in copying mode, but needed when installing options for NOTE advanced functions (see page 71). -
Page 38: Copier Settings
Function COPIER SETTINGS Using Function Modes to Change the Initial Copy Modes Screen 00 MARGIN VALUE DEF. 01 EDGE VALUE DEF. 02 BOOK VALUE DEF. 01/02 03 MARGIN REDUCTION 04 2-SIDED MODE DEF. 05 REDUCE Nin1 SPACE 06 DIGITAL SKYSHOT 07 MANUAL SKYSHOT 02/02 08 AUTO EXPOSURE... -
Page 39: General Functions For Key Operator
General Functions for Key Operator Input the Key Operator ID Code to Change Settings Screen Modes 00 PAPER SIZE 01 AUTO RESET TIME 02 ENERGY SAVER MODE 01/05 03 ENERGY SAVER TIME 04 LANGUAGE DEFAULT 05 SPECIAL TRAY 1 06 SPECIAL TRAY 2 02/05 09 KEY/TOUCH BEEP C It is necessary to input the Key Operator ID code before changing items on... - Page 40 Function General Functions for Key Operator Input the Key Operator ID Code to Change Settings Screen 10 ORIG. SET BEEP 11 ORIG. SET BEEP ADF 03/05 14 DEPT. COUNTER MODE 20 DATE & TIME 21 DAYLIGHT TIME 22 TCP/IP ADDRESS 05/05 23 TCP/IP SUBNET MSK 24 TCP/IP G/W ADDR.
-
Page 41: Copier Settings For Key Operator
Copier Settings for Key Operator Input the Key Operator ID Code to Change Settings Screen Modes 00 PAPER SIZE PRIO. 01 ORIGINAL DEFAULT 02 TEXT CONTRAST 01/04 03 T/P CONTRAST 04 PHOTO CONTRAST 06 INTERLEAVING DEF. 02/04 09 SADF MODE C It is necessary to input the Key Operator ID code before changing items on NOTE this page. - Page 42 Function Copier Settings for Key Operator Input the Key Operator ID Code to Change Settings Screen 10 MAX. COPY SETTING 11 MULTISIZE ROTATE 12 M1, SIZE 03/04 13 M2, SIZE 16 MEM. O/F WARNING 18 COPY OUTPUT TRAY 19 OVERLAY CONTRAST Not required in copying mode, but needed when installing options for advanced NOTE functions (see page 48).
-
Page 43: Function Setting
Function Setting Changing the Auto Exposure Setting You can select whether the copying density is adjusted automatically for text and photographic originals. MULTI-SIZE COPY SORT FEED ADD TONER ON LINE CONTRAST INTERNET PRINTER ON LINE DATA Proceed as Follows: Press the FUNCTION Key ENERGY SAVER INTERRUPT FUNCTION... -
Page 44: Function Setting For Key Operator
Function Function Setting for Key Operator Changing the Paper Size The paper trays are designed to accommodate Invoice, Letter, Letter R, Legal and Ledger Size paper. To change the paper size, perform the steps shown below. CONTRAST Proceed as Follows: # Touch GENERAL FUNCTIONS $ Proceed to next page % Select 09 KEY OPERATOR MODE key... - Page 45 Changing the Paper Guide and Paper Size Indicator in the Paper Tray Paper Guide a a a a a Stopper Size Indicator C It is recommended that the paper guide b be fixed in place with screws. NOTE Consult an authorized servicing dealer for details on how to fasten using screws.
- Page 46 Function Function Setting for Key Operator Departmental Counter Key Operator can manage, limit copies, counters and code numbers for each department. (Maximum department number: 50) SORT CONTRAST Proceed as Follows: # Select GENERAL FUNCTIONS $ Proceed to next page and select 09 KEY OPERATOR MODE key.
- Page 47 Change the Department Counter Number, ID Code and limit the Maximum Number of Copies Exit function mode C To reset the function mode, press the RESET key. NOTE Number of Department Counter # Touch the DEPT. COUNTER key. $ Select the desired department using the scroll key. % Input “0”...
-
Page 48: Accessories
Accessories Components 1-Bin Finisher (DA-FS200) C Large capacity (Max. 1000 copies) Exit Tray (Inner) (DA-XN200) C The table below shows the options which are required for various functions. NOTE C Contact your authorized servicing dealer for details on combinations of options. Options i-ADF 1-Bin Finisher... -
Page 49: Automatic Document Feeder
Automatic Document Feeder ADF (DA-AS200)/i-ADF (DA-AR250) 1. Features # Automatic Original Feeding C The ADF/i-ADF tray can hold up to 50 originals of 20 lbs paper. (30 originals/Legal, Ledger) It can accommodate originals from Invoice to Ledger size. C Automatic original size detection. $ Duplex Copying (DA-AR250) CThe i-ADF allows you to copy 2-Sided originals either manually or automatically. - Page 50 Accessories Automatic Document Feeder 3. Operation Operation Procedure Place the Original Inappropriate Originals C Paper with a smooth surface such as glossy and coated papers CTransparencies C Originals with a Lead Edge that is “creased”, “folded”, “punched” or “glued” Originals Legal Letter R Ledger...
-
Page 51: Finisher/Exit Guide Unit
Finisher/Exit Guide Unit 1. Features DA-FS200 (Finisher) Shift-Group C Shift electronic sort copy DA-FK200/FK210 (Dual-Path Exit Guide Unit/Paper Transport Unit) C Feeds paper to Finisher 2. Operation ADF/i-ADF Face-Up Platen Staple Position During staple sorting, if more than the allowable maximum number of sheets (30 sheets: Letter, Letter ;... - Page 52 Accessories Finisher/Exit Guide Unit 3. Replacing the Staple Cartridge The message shown on the left appears when the staples run out. Hold the latch and pull out the Finisher. Remove the Staple Cartridge. # Remove the empty Staple Case. $ Install the new Staple Case. Pull out the tape.
- Page 53 Accessories Reinstall the Staple Cartridge. Return the Finisher to the original position. (Check that the latch is securely fastened.)
- Page 54 Accessories Finisher/Exit Guide Unit 4. If the unit fails to staple after replacing the Staple Cartridge, follow the instructions below. Remove the Staple Cartridge. # Open the Staple Cover. $ Remove the residual staple. % Close the Staple Cover. Reinstall the Staple Cartridge.
-
Page 55: Problem Solving
Problem Solving Adding Paper (J J J J J ) 550-Sheet Paper Tray C Do not use paper with folds or wrinkles. ATTENTION Refer to page 44 for details on changing the paper size for the Paper Tray. C Unused paper should always be placed into a bag and the opening should be sealed for storage. -
Page 56: Replacing The Toner Cartridge And Waste Toner Box (?)
Problem Solving Replacing the Toner Cartridge and Waste Toner Box (? ? ? ? ? ) C For optimum copy quality use the recommended Panasonic toner. Store toner in a cool ATTENTION dark place. Do not unseal toner before use. Use it as fast as possible after unsealing. - Page 57 C Do not reuse the toner from the Waste Toner Box. ATTENTION Problem Solving Shake the new Toner Cartridge well. Install the new Toner Cartridge into the machine, and pull out the protective seal. Note: Pull on the seal slowly and straight out.
-
Page 58: Removing A Misfed Paper
Problem Solving Removing a Misfed Paper Paper Misfeed Indicators and Locations When a paper misfeed occurs, the Misfeed Indicator and the misfeed location(s) will be displayed on the Touch Panel Display. SORT CONTRAST Paper Misfeed Locations Finisher Copier Paper Feed Unit ADF/i-ADF C Make sure that the Misfeed Indicator goes off after removing the misfed paper. - Page 59 C Make sure that the Misfeed Indicator goes off after removing all misfed paper. ATTENTION Problem Solving Finisher C Make sure that the Misfeed Indicator goes off after removing all misfed paper. Pull out the Finisher. Lift up the lever and clear the paper jam.
- Page 60 Problem Solving Removing a Misfed Paper C Make sure that the Misfeed Indicator goes off after removing all misfed paper. ATTENTION Paper Transport Area C Make sure that the Misfeed Indicator goes off after removing all misfed paper. Push the latch to open the cover. Remove the misfed paper.
- Page 61 (To be continued) C Make sure that the Misfeed Indicator goes off after removing all misfed paper. ATTENTION Problem Solving Paper Entry Area C Make sure that the Misfeed Indicator goes off after removing all misfed paper. Open the Right Cover. Remove the misfed paper.
- Page 62 Problem Solving C Make sure that the Misfeed Indicator goes off after removing all misfed paper. ATTENTION Automatic Duplex Unit (ADU) # Open the Paper Feed Guide. $ Remove the misfed paper. Close the Right Cover.
- Page 63 C Make sure that the Misfeed Indicator goes off after removing all misfed paper. ATTENTION Problem Solving System Console C Make sure that the Misfeed Indicator goes off after removing all misfed paper. # Pull out the Paper Tray. $ Remove the misfed paper. % Return the Paper Tray to the original position.
- Page 64 Problem Solving C Push the tab ATTENTION C Make sure that the Misfeed Indicator goes off after removing all misfed paper. ADF/i-ADF C Make sure that the Misfeed Indicator goes off after removing all misfed paper. # Open the ADF Cover. $ Remove the misfed paper.
- Page 65 C Make sure that the Misfeed Indicator goes off after removing all misfed paper. ATTENTION Problem Solving # Lift up the ADF Input Tray. $ Remove the misfed paper. % Close the ADF Input Tray. & Open and close the ADF Cover to reset the error.
-
Page 66: Troubleshooting
Troubleshooting Before Calling Service Unit Does Not Operate Does the display light? Does the Energy Saver key flash (or light) and displays are turned OFF? (See page 32) Does any of the U## codes and messages appear on the display? (U0, U4, U10, U12, U13...etc.,) Does the Add Staples indicator and message appear on the display? -
Page 67: Copier Care
Check Light Copies Does the exposure indicator say “LIGHTER”? Does the Add Toner indicator and message appear on the display? (?) Marked Copies Is the copier Platen Glass or Platen Cover dirty? Is the original an OHP film or a dark original? If the measures outlined above do not solve the problem, call your Service provider. -
Page 68: Replacing The Battery
Troubleshooting Replacing the Battery The copier has an internal battery (Product No.: CR2032) which maintains the date setting in the event of a power outage. Battery Replacement Required Message Battery Replacement Procedure C The service life of the battery is approximately 1 year when the machine is turned “Off”. ATTENTION denotes hazards that could result in minor injury or damage to the machine. -
Page 69: Specifications
Quantity Selector: Max. 999 sheets (output tray capacity is 250 sheets) Electrical Requirements: 120V AC, 50/60Hz, 12A Energy Consumption: Max. 1.4 kW, 1.8 Wh in Sleep Mode: DP-2500 Dimensions (W)(D)(H): 23.5 (W) 121 lbs (55 kg): DP-2500 Weight: 134 lbs (61 kg): DP-3000 Temperature: 50°... - Page 70 Specifications ADF (DA-AS200), i-ADF (DA-AR250) Tray Capacity: Paper Size: Paper Weight: Electrical Requirements: Dimensions (W)(D)(H): Weight: 1-Bin Finisher (DA-FS200) Paper Size: Paper Weight: Stacking Capacity: Staple Sort and Shift Sorting Stacks: Electrical Requirements: Dimensions (W)(D)(H): Weight: 3rd/4th Paper Feed Module (DA-DS200/205/210/215) Paper Size: Paper Weight: Electrical Requirements:...
-
Page 71: Options And Supplies
Options and Supplies The DP-2500/3000 is a digital photocopier which can produce images with great clarity. Furthermore, its copying functionality can also be greatly enhanced by the addition of the following options and supplies. We hope you find that the wide ranging capabilities will make your office-place more productive and efficient. - Page 72 Options and Supplies For Fax Part Name Fax Communication Kit 2nd G3 Fax Communication Port Kit 10/100 Ethernet Interface/ Internet Fax Kit Handset Kit Handset Mounting Kit Expansion Flash Memory Card Verification Stamp For Printer Part Name Parallel Port Interface Kit PCL6 Emulation Kit 10/100 Ethernet Interface/ Internet Fax Kit...
-
Page 73: Important Information
TO LIABILITY FOR ANY DAMAGE, INCLUDING, BUT NOT LIMITED TO DIRECT, INDIRECT, SPECIAL, INCIDENTAL OR CONSEQUENTIAL DAMAGES OR LOSS OF PROFITS SUSTAINED BY THE CUSTOMER IN CONNECTION WITH THE USE OR APPLICATION OF THIS PANASONIC COPIER. SEE YOUR DEALER FOR DETAILS OF DEALER’S WARRANTY.”...