Panasonic WORKIO DP-130 Operating Instructions Manual
For document management system, printer and class 2 fax modem
Hide thumbs
Also See for WORKIO DP-130:
- Operating instructions manual (37 pages) ,
- Operating instructions manual (28 pages)
Table of Contents
Advertisement
Software
Operating Instructions
(For Document Management System, Printer and Class 2 Fax Modem)
DP-130P/135P/135FP/150P/150PA/150FP/150FX
Model No.
DP-1510P/1810P/1810F/2000/2010E/2500/3000
Before operating this software, please read these instructions completely and keep these operating instructions for future reference.
English
Advertisement
Table of Contents

Related Manuals for Panasonic WORKIO DP-130


Summary of Contents for Panasonic WORKIO DP-130
-
Page 1: Operating Instructions
Software Operating Instructions (For Document Management System, Printer and Class 2 Fax Modem) DP-130P/135P/135FP/150P/150PA/150FP/150FX Model No. DP-1510P/1810P/1810F/2000/2010E/2500/3000 Before operating this software, please read these instructions completely and keep these operating instructions for future reference. English... - Page 2 The following trademarks and registered trademarks are used throughout this manual: Microsoft, MS-DOS, Windows and Windows NT are registered trademarks of Microsoft Corporation in the USA and other countries. i386, i486 and Pentium are trademarks of Intel Corporation. Centronics is a registered trademark of Centronics Data Computer Corporation. TrueType is a registered trademark of Apple Computer, Inc.
-
Page 3: Table Of Contents
Table of Contents Before Use Precautions ........................For User in USA ..................... External View and Control Panel .................. External View ....................Control Panel....................10 Printer Section Installing the Printer Driver ..................15 Windows 98/Me/NT/2000/XP ................. 15 Installing the LPR (Line Printer Remote) Monitor ............18 Windows 98/Me.................... - Page 4 Table of Contents Document Management System Section Document Viewer ......................103 Main Window ....................103 Basic Operations.................... 105 Annotation Function ..................106 File Menu ....................... 107 Edit Menu....................... 111 View Menu ..................... 112 Page Menu..................... 113 Annotation Menu .................... 116 Window Menu ....................
- Page 5 Appendix ......................... 175 Printing/Scanning Area................... 175 Parallel Interface Connector................176 Class 2 Fax Modem Section Installing the Panasonic Class 2 Fax Modem .............. 178 Installation (Windows 98/Me) ................. 178 Installation (Windows NT 4.0) ................ 184 Installation (Windows 2000/XP) ..............187...
-
Page 6: Before Use
This device may not cause harmful interference, and (2) this device must accept any interference received, including interference that may cause undesired operation. Responsible Party: Matsushita Electric Corporation of America One Panasonic Way, Secaucus, NJ 07094 Technical Support: Panasonic Document Imaging Company/Technical Support Department Two Panasonic Way, Secaucus, NJ 07094 1-800-225-5329 Email: consumerproducts@panasonic.com... -
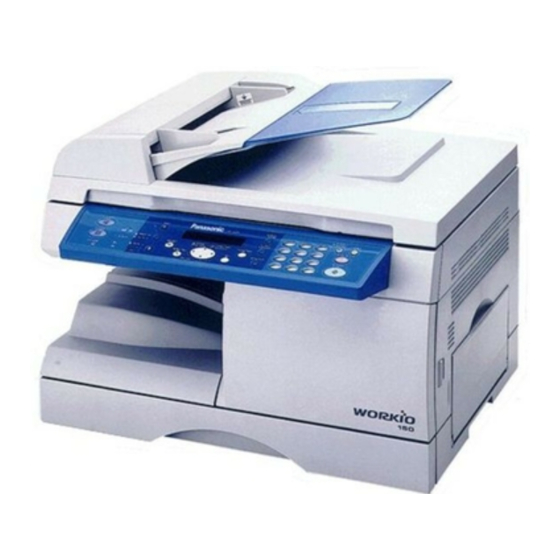
Page 7: External View And Control Panel
External View and Control Panel External View DP-130P/135P/135FP/150P/150PA/150FP/150FX Parallel interface connector Connect to the PC Power Switch Usually set to (l) position. Parallel interface cable (A cable does not come with the unit.) Use a cable of IEEE 1284 specifications, with a maximum length of 20 ft (6m). Consult a service provider for details. - Page 8 External View and Control Panel External View DP-1510P/1810P/1810F/2010E Parallel interface connector Connect to the PC Power Switch Usually set to (l) position. Parallel interface cable (A cable does not come with the unit.) Use a cable of IEEE 1284 specifications, with a maximum length of 20 ft (6m). Consult a service provider for details.
- Page 9 External View and Control Panel External View DP-2000/2500/3000 Power Switch Usually set to (l) position. Parallel interface connector Connect to the PC Parallel interface cable (A cable does not come with the unit.) Use a cable of IEEE 1284 specifications, with a maximum length of 20 ft (6m). Consult a service provider for details.
-
Page 10: Control Panel
External View and Control Panel Control Panel DP-130P/135P/150P/150PA ON LINE ENERGY CLEAR/STOP 129% INVOICE LETTER SAVER PHOTO 100% AUTO LEGAL LETTER LETTER INVOICE START 2SIDED ZOOM DARKER LEGAL INVOICE (50~200%) LIGHTER For DP-150PA DP-135FP/150FP/150FX REDIAL/ ENERGY 2SIDED 2 SIDED SORT DP-150FX SAVER RESET... - Page 11 External View and Control Panel Control Panel DP-1510P/1810P DP-1810F...
- Page 12 External View and Control Panel Control Panel DP-2010E Name Function ON LINE LED : Printer is operational online Off : Printer is offline STOP key Used to cancel the print job. Printer Status 1=On Line 2=Off Line Not Used Security Print 1=Print 2=Delete Letter/A4 Tray Selection...
- Page 13 External View and Control Panel Control Panel DP-2000 2SIDED 2SIDED 1SIDED 1SIDED ENERGY SAVER INTERRUPT FUNCTION FUNCTION RESET MULTI-SIZE FEED SORT SORT COPY COPY COPY COPY STAPLE STAPLE DP-2000 SHIFT SHIFT CLEAR COPIED BLANK MEMORY STAMP MEM XMT ORIGINAL COPY REDIAL / COPY SIZE...
- Page 14 External View and Control Panel Control Panel DP-2500/3000 ENERGY SAVER INTERRUPT INTERRUPT FUNCTION RESET DP-2500 CLEAR ORIGINAL COPY REDIAL/ MULTI-SIZE MULTI-SIZE COPY COPY SIZE SIZE PAUSE PAUSE SORT FEED LEDGER LEDGER ADD TONER FLASH/ SUB-ADDR SUB-ADDR STOP LEGAL LEGAL ON LINE LINE CONTRAST CONTRAST...
-
Page 15: Printer Section
Printer Section Installing the Printer Driver Windows 98/Me/NT/2000/XP Insert the Panasonic Document Management System CD-ROM. Click on the desired language. Click on the button. Next Click Printer Driver. Note: The Fax Gateway and Firmware Update Utility is only available on U.S.A. and Canada only. - Page 16 Installing the Printer Driver Windows 98/Me/NT/2000/XP Click Install Printer Driver. Select your machine's model(s) and click the button. Next Click the button if you would like to change your current default printer to the one that you are installing. Select your new default printer from the New Printer List and click the button.
- Page 17 Finish computer. The Panasonic/Panafax Printer Driver is installed, and the Panasonic/Panafax Printer icon(s) are added to the Printer folder. If you are installing the Printer Driver for network printing, please contact your network administrator for the IP Address of the machine and proceed to the next section to install the LPR Monitor service after your computer has rebooted.
-
Page 18: Installing The Lpr (Line Printer Remote) Monitor
Installing the LPR (Line Printer Remote) Monitor Windows 98/Me Insert Panasonic Document Management System CD-ROM. Click on the desired language. Click on the button. Next Click Printer Driver. Note: The Fax Gateway and Firmware Update Utility is only available on U.S.A. and Canada only. - Page 19 After your computer is rebooted, click the Start button, point to Settings, and then click Printers. The Printers folder appears. Right-click on your desired printer (Ex. Panasonic DP-3000) and select Properties from the pop-up menu. Continued on the next page...
- Page 20 Installing the LPR (Line Printer Remote) Monitor Windows 98/Me The printer properties dialog box appears. The following step is to Register the LPR Port for network printing. Before proceeding, ensure that the Printer is installed, connected to the Network, is turned ON and operating properly.
- Page 21 Installing the LPR (Line Printer Remote) Monitor Windows 98/Me The LPR Port Name dialog box appears. Type the IP Address of the machine and "lp"as the queue name separated by a ":" Ex: 10.74.229.105:lp Click on the button. If an error occurs because the queue name was already used for the same IP Address, select a different unique name such as "lpr".
-
Page 22: Windows Nt 4.0
Installing the LPR (Line Printer Remote) Monitor Windows NT 4.0 Log in using an account with the administrator's right. Click on the Start button, point to Settings, and click Control Panel. The Control Panel window appears. Double-click on the Network applet. The Network dialog box appears. - Page 23 After your computer is rebooted, click the Start button, point to Settings, and then click Printers. The Printers folder appears. Right-click on your desired printer (Ex. Panasonic DP-3000) and select Properties from the pop-up menu. Continued on the next page...
- Page 24 Installing the LPR (Line Printer Remote) Monitor Windows NT 4.0 The following step is to Register the LPR Port for network printing. Before proceeding, ensure that the Printer is installed, connected to the Network, is turned ON and operating properly. Select Ports click...
- Page 25 Installing the LPR (Line Printer Remote) Monitor Windows NT 4.0 The Printer Ports dialog box appears. Click on the button. Close Select the printer port and click the button. The printer properties dialog box is closed and you have now configured the printer as a network printer.
-
Page 26: Windows 2000/Xp
Log in using an account with the administrator's right. Open the Printers folder. Right-click on your desired printer (Ex. Panasonic DP-3000) and select Properties from the pop-up menu. The printer properties dialog box appears. Select the Ports Tab and click on the button. - Page 27 Installing the LPR (Line Printer Remote) Monitor Windows 2000/XP Select Standard TCP/IP Port and click the button. New Port ... Click on the button. Next Enter the IP Address and the Port Name and click the button. Next Note: The Port Name is automatically entered by Windows 2000/XP.
- Page 28 Installing the LPR (Line Printer Remote) Monitor Windows 2000/XP Select Custom and click the Settings... button. 1. Under the Protocol, select LPR. 2. Under the LPR Settings, enter the Queue Name (Ex. LPR1) and check the LPR Byte Counting Enabled. 3.
- Page 29 Installing the LPR (Line Printer Remote) Monitor Windows 2000/XP Click on the button. Finish Click on the button. Close Click on the button. Apply Click on the button. The printer properties dialog box is closed and you have now configured the printer as a network printer.
-
Page 30: Configuring The Printer Driver Settings
Configuring the Printer Driver Settings Windows 98/Me To change the printer settings, open the dialog box for the printer properties by the following steps. Click the Start button, point to Settings, and then click Printers. Right-click the desired printer icon in the printers folder, and select Properties in the pop-up menu. - Page 31 Configuring the Printer Driver Settings Windows 98/Me General Tab 1. Comment Enter comments to the properties, if any. If another user sets up this printer on his or her computer when sharing the printer, the comment specified here will also appear on that computer. However, the comment displayed for an already set-up user will remain unchanged even if the comment is modified later.
-
Page 32: Details Tab
Configuring the Printer Driver Settings Windows 98/Me Details Tab 1. Print to the following port Displays either the port to which the printer is connected or the path to the network printer. To change the printing destination, either select the printing destination port from the list or enter the network path here. - Page 33 Configuring the Printer Driver Settings Windows 98/Me button Spool Settings... Specify the method of sending (spool) documents from the program to the printer. • Spool Data Type Select spool data type (EMF format or RAW format). Specifying RAW format results in longer time before placing an application operational after printing on the application.
- Page 34 Configuring the Printer Driver Settings Windows 98/Me Sharing Tab 1. Not Shared/Shared As Select whether to display or use this printer with other computers. 2. Share Name Specify the name of the shared printer. The displayed name can be used as it is or a new name may be entered.
- Page 35 Configuring the Printer Driver Settings Windows 98/Me Paper/Layout Tab 1. Paper Size Select a document size. 2. Paper Source Specify where the paper you want to use is located in the machine. If you choose Auto Selection, the printer driver will automatically select an appropriate tray according to the Paper Size. 3.
- Page 36 Configuring the Printer Driver Settings Windows 98/Me Handling Tab 1. Sorter Select whether to Stack or Sort when printing multiple copies. 2. Printing on both sides (Duplex) (For DP-150FX/2000/2010E/2500/3000) Select duplex printing for printing on both sides. Note 1) Duplex Printing is allowed only when the Dual-Path Exit Guide Unit, Paper Transport Unit and Automatic Duplex Unit (DA-FK200/FK210/MD200) are mounted.
- Page 37 Configuring the Printer Driver Settings Windows 98/Me 6. Staple (For DP-2000/2500/3000) Specifying staple printing is allowed if the output bin is set to outer. Note 1) Staple printing is allowed only with Electronic Sorting Board (DA-ES200 : For DP-2000 only) and 1-Bin Finisher (DA-FS200) mounted.
- Page 38 Configuring the Printer Driver Settings Windows 98/Me Quality Tab 1. Halftone Select method of expressing halftone. Select the setting according to the data to be printed and your preference • Normal: Select the halftoning method to be used. Select it according to the details of data and your preference.
- Page 39 Configuring the Printer Driver Settings Windows 98/Me Device Options Tab 1. Security Print Password (For DP-1810F/2000/2500/3000) Set the password for Security Print, to enable the feature. 2. Duplex Unit (For DP-2000/2500) Check this checkbox if the Automatic Duplex Unit (DA-MD200) is installed. 3.
-
Page 40: Windows Nt 4.0 (Administrator)
Configuring the Printer Driver Settings Windows NT 4.0 (Administrator) To change the printer settings, open the dialog box for the printer properties by the following steps. Log onto the computer/network with an account rights of Administrator. Click the Start button, point to Settings, and then click Printers. - Page 41 Configuring the Printer Driver Settings Windows NT 4.0 (Administrator) General Tab 1. Comment Enter comments to the properties, if any. If another user sets up this printer on his or her computer when sharing the printer, the comment specified here will also appear on that computer. However, the comment displayed for an already set-up user will remain unchanged even if the comment is modified later.
- Page 42 Configuring the Printer Driver Settings Windows NT 4.0 (Administrator) Ports Tab 1. Print to the following port(s) Displays a list of available ports for printing (Port), their status (Description) and printers that are connected to these ports (Printer). button Add Port... Delete Port...
- Page 43 Configuring the Printer Driver Settings Windows NT 4.0 (Administrator) Scheduling Tab 1. Available Schedules the printer for operation. Specify operating hours when From-To is selected. 2. Priority Sets printing priority. The slider allows the priority to be adjusted from 1 through 99. 3.
- Page 44 Configuring the Printer Driver Settings Windows NT 4.0 (Administrator) Sharing Tab 1. Not Shared/Shared Select whether to display or use this printer with other computers. 2. Share Name Specify the name of the shared printer. The displayed name can be used as it is or a new name may be entered.
- Page 45 Configuring the Printer Driver Settings Windows NT 4.0 (Administrator) Security Tab button Permissions Set printer access privileges. button Auditing Displays the persons who used this printer and how they used. button Ownership Set the ownership of the printer. 1. In order to utilize these features, you need to have selected Audit... from User Manager's NOTE Policies and have enabled File and Object Access in the Audit Policy dialog box.
- Page 46 Configuring the Printer Driver Settings Windows NT 4.0 (Administrator) Device Settings Tab 1. Halftone Setup button Halftone Setup... Select the halftoning method to be used (halftones specific to the printer). Select it according to the details of data and your preference. •...
- Page 47 Configuring the Printer Driver Settings Windows NT 4.0 (Administrator) • Luminance (CIE Y) Adjust the luminosity of the print image. 2. Duplex Unit (For DP-2000/2500) Check this checkbox if the Automatic Duplex Unit (DA-MD200) is installed. Duplex printing function is enabled. 3.
-
Page 48: Windows Nt 4.0 (User)
Configuring the Printer Driver Settings Windows NT 4.0 (User) To change the printer settings, open the dialog box for the printer properties by the following steps. Select Print in the File menu of the application. Select the printer model in the name box. Click the button in the Print dialog box. - Page 49 Configuring the Printer Driver Settings Windows NT 4.0 (User) Page Setup Tab 1. Paper Size Select a document size. 2. Paper Source Specify where the paper you want to use is located in the machine. If you choose Auto Selection, the printer driver will automatically select an appropriate tray according to the Paper Size.
-
Page 50: Advanced Tab
Configuring the Printer Driver Settings Windows NT 4.0 (User) Advanced Tab 1. Paper Size Select a document size. 2. Orientation Select the print orientation (Portrait/Landscape). 3. Paper Source Specify where the paper you want to use is located in the machine. If you choose Auto Selection, the printer driver will automatically select an appropriate tray according to the Paper Size. - Page 51 Configuring the Printer Driver Settings Windows NT 4.0 (User) Advanced Tab 1. Metafile Spooling With Metafile Spooling enabled, the file is spooled in EMF format (metafile compression). With the function disabled, the file is spooled in RAW (non-compression) format. Specifying RAW format results in longer time before placing an application operational after printing on the application.
- Page 52 Configuring the Printer Driver Settings Windows NT 4.0 (User) 4. Staple (DP-2000/2500/3000) Specifying staple printing is allowed if the output bin is set to outer. Note 1) Staple printing is allowed only with Electronic Sorting Board (DA-ES200 : For DP-2000 only) and 1-Bin Finisher (DA-FS200) mounted.
- Page 53 Configuring the Printer Driver Settings Windows NT 4.0 (User) 5. Output Tray Specify the output destination. Note 1) Output Tray selection is allowed only with Dual-Path Exit Guide Unit, Paper Transport Unit, Exit Tray (Outer) or 1-Bin Finisher (DA-FK200/FK210/XT200/FS200) is installed. 2) Post cards cannot be output from the outer tray.
-
Page 54: Windows 2000/Xp (Administrator)
Configuring the Printer Driver Settings Windows 2000/XP (Administrator) To change the printer settings, open the dialog box for the printer properties by the following steps. Log onto the computer/network with an account rights of Administrator. Click the Start button, point to Settings, and then click Printers. - Page 55 Configuring the Printer Driver Settings Windows 2000/XP (Administrator) General Tab 1. Printer Name Name of the printer specified upon installation is displayed. 2. Location and Comment Enter a comment about the location of the printer installation and information about the printer. If a printer is shared, the location and comment specified in this field appears when another user sets up this printer on his/her computer.
- Page 56 Configuring the Printer Driver Settings Windows 2000/XP (Administrator) Sharing Tab 1. Not Shared/Shared As Specify if this printer is displayed or used on a computer of other users. For sharing a printer, specify the share name of a printer to be shared. A name specified here appears when other users view the printer information on a network button Additional Drivers...
- Page 57 Configuring the Printer Driver Settings Windows 2000/XP (Administrator) Ports Tab 1. Print to the following port(s) Displays a list of ports that allows printing, their status (description), and printers connected to the ports. button Delete Port... Add Port... Adds/deletes a new port or a new network path. button Configure Port...
- Page 58 Configuring the Printer Driver Settings Windows 2000/XP (Administrator) Advanced Tab 1. Always available/Available from Specify the operation schedule for a printer. Selecting Available from allows specifying an operation time. 2. Priority Specify the priority in printing. Priority is adjustable from 1 to 99. Document of higher priority are printed before those of lower priority.
- Page 59 Configuring the Printer Driver Settings Windows 2000/XP (Administrator) 9. Enable advanced printing features Enables advanced printing features. Optional features of the printer (page ordering, booklet printing, numbering on sheets) are enabled. These features can be disabled if a problem occurs due to incompatibility.
- Page 60 Configuring the Printer Driver Settings Windows 2000/XP (Administrator) Security Tab Displays a list of users and groups that are assigned access to this printer. A list of standard access permitted/prohibited for each group or user is displayed. Check the checkbox for permitting or prohibiting access.
- Page 61 Configuring the Printer Driver Settings Windows 2000/XP (Administrator) Device Settings Tab button Halftone Setup... Select the method of expressing device halftone (printer-specific halftone). Select the settings according to printing data and preference. • Halftone Pattern Select the pixel size to be used for halftones. The greater the value, the coarser the image would become.
- Page 62 Configuring the Printer Driver Settings Windows 2000/XP (Administrator) 2. Duplex Unit (For DP-2000/2500) Check this checkbox if the Automatic Duplex Unit (DA-MD200) is installed. Duplex printing function is enabled. 3. Output Tray (For DP-2000/2500/3000) If Exit Tray (Inner) and Dual-Path Exit Guide Unit (DA-XN200/FK200) are installed, select inner option. This allows specifying Inner 1 and Inner 2 as output bins for printer output.
-
Page 63: Windows 2000/Xp (User)
Configuring the Printer Driver Settings Windows 2000/XP (User) To change the printer settings, open the dialog box for the printer properties by the following steps. Select Print in the File menu of the application. Click the button in the Print dialog box. Properties... - Page 64 Configuring the Printer Driver Settings Windows 2000/XP (User) General Tab 1. Select Printer Select a printer for printing. 2. Page Range Select a page range for printing. 3. Number of Copies (1-99) Specify the number of copies. 4. Collate Upon printing two or more copies, pages are output for each copy.
- Page 65 Configuring the Printer Driver Settings Windows 2000/XP (User) Layout Tab 1. Orientation Select the print orientation (Portrait/Landscape). 2. Print on Both Sides (Duplex) (For DP-150FX/2000/2010E/2500/3000) Select duplex printing for printing on both sides. Select the binding side (None/Flip on Short Edge/Flip on Long Edge) for duplex printing. Note 1) Duplex Printing on post card is not allowed.
- Page 66 Configuring the Printer Driver Settings Windows 2000/XP (User) Paper/Quality Tab 1. Paper Source Specify where the paper you want to use is located in the machine. If you choose Auto Selection, the printer driver will automatically select an appropriate tray according to the Paper Size. button Advanced...
- Page 67 Configuring the Printer Driver Settings Windows 2000/XP (User) Advanced 1. Paper Size Select a document size. 2. Resolution Select the printer resolution (300dpi/600dpi). 3. Scaling Specify custom zoom when printing a document by zooming in/out at a desired rate. If the zooming rate is specifiable in an application, specify "100%"...
- Page 68 Configuring the Printer Driver Settings Windows 2000/XP (User) 7. Staple (For DP-2000/2500/3000) Specifying staple printing is allowed if the output bin is set to outer. Note 1) Staple printing is allowed only with Electronic Sorting Board (DA-ES200 : For DP-2000 only) and 1-Bin Finisher (DA-FS200) mounted.
- Page 69 Configuring the Printer Driver Settings Windows 2000/XP (User) 8. Output Tray (For DP-2000/2500/3000) Specify the output destination. <Auto Selection, Outer, Inner 1, or Inner 2> Note 1) Output Tray selection is allowed only with Dual-Path Exit Guide Unit, Paper Transport Unit, Exit Tray (Outer) or 1-Bin Finisher (DA-FK200/FK210/XT200/FS200) is installed.
-
Page 70: Setting Print Conditions: Setting On The Device
Setting Print Conditions: Setting on the Device DP-1510P/1810P Function Settings Reset Key DP-1810F Function Settings Reset Key DP-2010E Function Settings Reset Key 4 LTR/A4 TRAY SEL. 1:PORTRAIT 2:L-SCAPE Press the PRINTER key. Press the FUNCTION key. Press 4 and the SET key. Select the desired output paper orientation After setting, press the SET key. - Page 71 Setting Print Conditions: Setting on the Device DP-2500/3000 Function Settings Reset Key ENERGY SAVER INTERRUPT FUNCTION RESET DP-2500 CLEAR ORIGINAL ORIGINAL COPY COPY REDIA REDIAL/ L / MULTI-SIZE COPY COPY SIZE SIZE SIZE SIZE PAUSE PAUSE SORT FEED LEDGER ADD TONER ADD TONER FLAS FLASH/...
-
Page 72: Print Operation
Print Operation Printing from Windows Applications If the printer driver is installed properly and a printer is selected as the default printer in the printer setup, printing can be accomplished from any Windows application with simple operations. To print from most Windows applications, use the Print... command on the File menu. Selecting the Print... command typically displays the following Print dialog box: After selecting the print range to be printed and the number of copies, click on to start printing. -
Page 73: Printing On Network
Print Operation Printing on Network For sharing a printer by connecting two computers via crossed-cable or using a hub, a connection among computers must be established. Establishing a connection among computers is verified by displaying the connected computers in Network Neighborhood on the desktop. - Page 74 Print Operation Printing on Network Client workstation (PC that uses other computer's printer) Click the Start button, point to Settings, and then click Printers. Double-click Add Printer in the printers folder. Add Printer Wizard appears. Click on the button. Next Select Network Printer.
-
Page 75: Document Management System Section
Document Management System Section Installing the Document Management System Windows 98/Me/NT/2000/XP Insert the Panasonic Document Management System CD-ROM. Select the language. Click on the button. Next Click Panasonic-DMS. Note: The Fax Gateway and Firmware Update Utility is only available on U.S.A. and Canada only. - Page 76 Installing the Document Management System Windows 98/Me/NT/2000/XP Verify the installation destination and click the button. Next Select your machine's model(s) and click the (Add) button. Then, click the button. Next Click the Typical button. Enter the program folder name and click the button.
- Page 77 Installing the Document Management System Windows 98/Me/NT/2000/XP The required files are copied. <For DP-1810F on Windows 98/NT only> Click on the button. When the setup process is completed, a message is displayed prompting you to restart your computer. Click the button to restart your Finish computer.
- Page 78 Log on to the with account rights Administrator when installing Windows NT 4.0. Click on the button. Next Click on the button. Finish The Panasonic Document Management System folder is added to the Start menu, and the installation is completed.
- Page 79 3. By installing this software, the system selects LPT1 as the parallel port to be connected to the device. For connecting the device to a port other than LPT1, change connection ports by selecting [Panasonic], [Panasonic Document Management System], and [Port Selection Utility] from the Start menu.
-
Page 80: Document Manager
Manager and Document Viewer (See page 103) in combination, a number of documents (image files) can be classified, managed, browsed, and edited. → → Selecting Panasonic Panasonic Document Management System Document Manager in Programs of the Start menu displays the main window of the Document Manager. 1. Title Bar Displays the title of a screen. - Page 81 Document Manager Main Window 7. Document Window Displays a list of documents in the selected folder. Documents are displayed in thumbnails (reduced images). Page number and buttons are displayed at the bottom of a thumbnail image for grouped documents (configured with two or more pages).
-
Page 82: Basic Operations
Document Manager Basic Operations The Document Manager allows editing and managing documents displayed in thumbnail images by dragging and dropping. The function enables various operations as described below: • Selecting Documents Clicking thumbnail images in the document window allows selection of documents. Dragging a mouse cursor on the screen or clicking with the Shift key held down allows selecting two or more documents at one time. - Page 83 Document Manager Basic Operations • Copying/Moving Documents Dragging a thumbnail image in document window and dropping it onto a folder in the folder window allows moving the document to the folder. Dragging & dropping with the Ctrl key held down copies a document. Dragging a document and dropping it onto another document in a document folder results in grouping the two documents together.
-
Page 84: Setting Plug-In
Document Manager Setting Plug-in • Import document (from scanner) Selecting Acquire Image... in the File menu displays a window for the Document Scanner (See page 86). The operation imports a document read on the scanner into a folder. • Import document (from file) Selecting Open in the File menu displays a dialog box for selecting files. -
Page 85: File Menu
Document Manager File Menu • New Folder Create a new folder under a folder that is currently selected. Path of a folder to be created can be specified as required. • Shared Folder Create a new shared folder. Documents in “shared folder “ can be shared through a network from different computers. - Page 86 Document Manager File Menu • Properties Display the file properties. • Backup Backs up the documents stored in the selected folder. • Acquire Image... Using a scanner, etc. selected in Select Source, import a document to a folder that is currently selected. •...
- Page 87 Document Manager File Menu • Print Print a document selected in the document window. • Print Setup Specify layout and printing size for a document to be printed. 1. Horizontal Position and Vertical Position Adjust the printing position on a sheet. 2.
- Page 88 Document Manager File Menu • Launch to another application Opens a document selected in the document window with a specified application. Selecting External Application Setup displays a dialog box for adding/changing/deleting the application. Clicking the Add button displays a dialog box to Add External Application.
- Page 89 Document Manager File Menu • Trash Can - Open Trash Can Opens the Trash Can and displays any files. Selecting documents and clicking the button restores Undo documents that have been discarded. Click the button to delete the selected Delete document.
-
Page 90: Edit Menu
Document Manager Edit Menu • Undo Undo the last editing operation done. • Cut Delete a selected document from a folder and copy it to the clipboard. • Copy Copy a selected document onto the clipboard. • Paste Paste a document from the clipboard onto a selected folder. •... -
Page 91: View Menu
Document Manager View Menu • Tool Bar Switch between displaying/hiding the tool bar. • Status Bar Switch between displaying/hiding the status bar. • List Format/Thumbnail Format Switch between list display and thumbnail display in the document window. • Arrange Folders Sort the document folders by name or date. -
Page 92: Document Menu
Document Manager Document Menu • Open Open a selected document. Activates the Document Viewer (See page 80) and opens a document for editing. • Duplicate Makes a copy of the selected document in a folder. • Rotate Rotate the selected document. - Rotate Right - Rotate 180 Degrees - Rotate Left... - Page 93 Document Manager Document Menu • Ungroup Cancel the grouping for grouped documents. Either dividing all pages into individual documents or releasing only specified documents from a group can be selected. • Enhancement Apply the following correction to a selected document: - Correct Skew Detect any inclination of a document and automatically correct it.
-
Page 94: Image Converter
Windows 98/Me 1. Click the Start button, point to Settings and then click Printers. 2. Right-click on Panasonic Document Manager and select Properties from the dropdown menu. The Properties dialog box appears. • Paper/Layout tab - Paper Size Sets the document paper size. -
Page 95: Windows Nt 4.0
Image Converter Windows NT 4.0 1. Click the Start button, point to Settings and then click Printers. 2. Right-click on Panasonic Document Manager and select Document Defaults from the dropdown menu. The Document Properties dialog box appears. • Page Setup Tab - Paper Size Sets the document paper size. -
Page 96: Windows 2000/Xp
Image Converter Windows 2000/XP 1. Click the Start button, point to Settings and then click Printers. 2. Right-click on Panasonic Document Manager and select Printing Preferences from the dropdown menu. The Printing Defaults dialog box appears. • Layout tab Sets the document orientation. -
Page 97: Document Scanner
Document Scanner Main Window Upon image scanning, an image is imported directly into a document using a TWAIN-compatible application (image editing software, etc.). Selecting Acquire Image... in the File menu displays for the Document Scanner dialog box. Preview Window Displays images of a preview scan. The black frame represents the actual scanning area (Output Size). You may adjust/select the final scanning area by resizing the black frame over the desired area of the image. - Page 98 Document Scanner Main Window Scanning Method Select the scanning method to be used. • Auto (Flatbed/ADF 1-sided) Auto select between the Flatbed or the ADF (Automatic Document Feeder) by sensing whether an original is set on the ADF. • Flatbed (Platen) Scan the document set on the Flatbed.
-
Page 99: Tool Menu
Document Scanner Tool Menu • Adjustment - Gamma Curve Display a dialog box for adjusting the gamma (color strength characteristics) of an image. (valid only when halftone or grayscale is selected) Adjust the gamma curve by dragging the slide bar or entering a value. Moving the slide bar in the + direction reduces the difference between the highlight (light portion) and halftone. - Page 100 Document Scanner Tool Menu • Adjustment - Highlight and Shadow Displays a dialog box for adjusting the highlight and shadow. (valid only when halftone or grayscale is selected) Adjust the highlight and shadow by dragging the slide bar or entering a value. Enhancing the highlight (bright portion) and the shadow (dark portion) makes clear shades on an image.
-
Page 101: Image Scanning
Document Scanner Image Scanning Image scanning is performed by the following procedures: Activate a TWAIN-compatible application. Select Acquire Image... in the File menu to display Document Scanner. Specify the image type, resolution, paper size of a document to be scanned and the scanning method to be used. - Page 102 Document Scanner Image Scanning Click the button to scan an Scan image into the document desktop. 1. Adjust parameters for an optimum scanning image, with the view on preview image. NOTE Preview scanning can be repeated any number of times. 2.
-
Page 103: Document Viewer
Double-clicking on the document (thumbnail) in the Document Manager screen or selecting Open in the Document menu displays the main window of the Document Viewer. → NOTE 1. The program is activated also by selecting Panasonic Panasonic Document → Management System... - Page 104 Document Viewer Main Window 1. Title Bar Displays the title of the screen and the name of the image file being displayed. 2. Menu Bar Displays the menu of the Document Viewer. 3. Tool Bar Displays the tool buttons of the Document Viewer. Tool buttons correspond to functions of the menus in the menu bar.
-
Page 105: Basic Operations
Document Viewer Basic Operations • Selecting Page Selecting a page by clicking in the page list displays an image of the selected page on the image window. Dragging and dropping a page in the page list can change the order of the pages. •... -
Page 106: Annotation Function
Document Viewer Annotation Function Document Viewer provides the functions for adding various graphics and text to an image. The graphics and text added to an image are called <Annotation>. The annotation function, unlike usual image editing applications, does not change an image itself but lays graphics and texts onto an image. -
Page 107: File Menu
Document Viewer File Menu • Open Opens an image file saved in the computer. Files of the following formats can be opened on the Document Viewer. - TIFF Tagged-Image File Format (TIFF). - JPEG Joint Photographic Experts Group (JPEG) format. - BMP Windows standard bitmap format. - Page 108 Document Viewer File Menu • Print Prints a document under the editing operation. For a document containing two or more pages, pages from-to can be specified for printing. • Print Setup Specify the layout, printing size, and printing of annotations for a document to be printed.
- Page 109 Document Viewer File Menu • Launch to another application Opens a document selected in the document window with a specified application. Selecting External Application Setup displays a dialog box for adding/changing/deleting the application. Clicking the Add button displays a dialog box to Add External Application.
- Page 110 Document Viewer File Menu • Trash Can - Open Trash Can Opens the Trash Can and displays any pages. Selecting page and clicking the button restores page that has Undo been discarded. - Empty Trash Can Deletes the pages in the Trash Can. If the page is emptied from the Trash Can, it is permanently deleted and does not stored in the Windows Recycle Bin.
-
Page 111: Edit Menu
Document Viewer Edit Menu • Undo Undo the last editing operation done. • Cut Delete a selected annotation from a folder and copy it to the clipboard. • Copy Copy a selected annotation onto the clipboard. • Paste Paste an annotation from the clipboard onto a selected page. -
Page 112: View Menu
Document Viewer View Menu • Drag Mode Changes from Drag Mode to Text Edit Mode. • Zoom In Zooms in an image. • Zoom Out Zooms out an image. • Fits to Page Width Fits the display to the page width. •... -
Page 113: Page Menu
Document Viewer Page Menu • Next Display the next page. • Previous Display the previous page. • Top Display the top page. • Last Display the last page. • Select Display a specified page. • Auto Paging Turns the pages automatically. - Move Forward Automatically step through pages forwards. - Page 114 Document Viewer Page Menu • Insert Page Inserts a page at the current position. • Replace Page Replace the current page with a new one. • Rotate Page - Rotate Right Rotate the page 90 degrees clockwise. - Rotate 180 Degrees Rotate the page 180 degrees - Rotate Left Rotate the page 90 degrees counterclockwise.
- Page 115 Document Viewer Page Menu • Copy Page to Clipboard Copy the entire page selected onto the clipboard. • Copy Select Area Copy Select Area To Clipboard • Select All Pages Select All Pages.
-
Page 116: Annotation Menu
Document Viewer Annotation Menu • Show Annotation The check box on/off setting specifies whether to display an annotation in the page list thumbnail. • Set Annotation Protect the annotation from re-editing. • Annotation Order - Change Order To Top - Change Order To Last - Change Order To Previous - Change Order To Next •... - Page 117 Document Viewer Annotation Menu • Header Edits a header common to each page. • Footer Edits a footer common to each page. • Edit Text Sets a format of a text in a selected annotation. • Properties Display Properties for annotation. 1.
- Page 118 Document Viewer Annotation Menu • Text Creates a text annotation. Select text annotation in annotation menu (or tool button), and drag the mouse in the image window to specify the display position. A dialog box for text setup will appear. Enter the text to display, and then specify text color and font.
- Page 119 Document Viewer Annotation Menu • Ellipse Creates an ellipse annotation. Select the ellipse annotation in the annotation menu (or tool button), and drag the mouse in the image window to draw an ellipse. 1. For specifying the thickness and colors of the rectangle, select the drawn rectangle and select NOTE Properties in the Annotation menu (See page 116).
- Page 120 Document Viewer Annotation Menu • White Block Creates a white rectangle (solidly white-painted rectangle) annotation. Select the white annotation in the annotation menu (or tool button), and drag the mouse in the image window to draw a white rectangle. • Black Block Creates a black rectangle (solidly black-painted rectangle) annotation.
- Page 121 Document Viewer Annotation Menu • Marker Creates a marker annotation. Select the marker annotation in the annotation menu (or tool button), and drag the mouse in the image window to draw a marker. • Label Creates a label annotation. Select the label annotation in the annotation menu (or tool button), and drag the mouse in the image window to draw label displays Text Format Setup dialog box.
- Page 122 Document Viewer Annotation Menu • Stamp Creates a stamp annotation. The stamp annotation pastes another image file like a stamp. Select the stamp annotation in the annotation menu (or tool button) and click the button. Then drag the mouse in the image window to specify the area, displaying the stamp dialog box.
- Page 123 Document Viewer Annotation Menu • Date Creates a date annotation. Select the date annotation in the annotation menu (or tool button), and drag the mouse in the image window to specify the area, displaying the Properties dialog box. Specify the format, color, and font of the date to be displayed. 1.
- Page 124 Document Viewer Annotation Menu • Page No. Creates a page number annotation. Select the page number annotation in the annotation menu (or tool button), and drag the mouse in the image window to specify the area. Double-click the Page No area to display the text the settings dialog box.
-
Page 125: Window Menu
Document Viewer Window Menu • Main Tool Bar Show/hide main toolbar. • Page Tool Bar Show/hide page toolbar. • Annotation Tool Bar Show/hide page adjustment toolbar. • Image Tool Bar Show/hide page adjustment toolbar. • Status Bar Show/hide statusbar. • Page List Show/hide page list. -
Page 126: Status Monitor
Status Monitor Task Bar Display The Status Monitor is a MFP utility that monitors and displays the current status of connected devices. Upon activation of Windows, the icon of the status monitor appears on the System Tray. Status Monitor The Status Monitor indicates the device status by icon lamp color as listed below. Lamp color Status Blue... -
Page 127: Task Bar Menu
Status Monitor Task Bar Menu Right-clicking on the status monitor in the System Tray displays the dropdown menu as shown below: 1. About Displays the version information about the status monitor. 2. Open Status Monitor Displays details about the current status of the device. 3. -
Page 128: Display Status Details
Status Monitor Display Status Details Right-clicking the status monitor icon in the Task Bar and selecting Open Status Monitor in the dropdown menu displays a dialog box for the status monitor. • Status Tab 1. Model Displays the name and number of a connected device. 2. - Page 129 Status Monitor Display Status Details • Configuration Tab 1. Model Displays the name and number of a connected device. 2. Configuration Display a list with the current device configuration (optional devices, etc.). 3. Status Displays the communication status between the status monitor and the device.
- Page 130 Status Monitor Display Status Details • Paper Tab The tab displays the type, size, and if there is any paper loaded in the paper tray. A comment by the user can be entered freely in the <Paper Type> field. 1. Changing the types of loaded paper does not change the comment in <Paper Type> unless it NOTE is rewritten by a user.
-
Page 131: Configuration Editor
This utility allows you to edit the machine configuration through the Parallel Port connected between the PC and the device. → → Startup Windows, and select Panasonic Panasonic Document Management System → Utilities Configuration Editor from the Programs in the Start menu to display the configuration editor dialog box. - Page 132 Configuration Editor Main Window • button Retrieve Retrieve Retrieve the current settings of the selected folder from the device. • button Write Write's the settings in the folder to the device. • button Open File Opens the settings in the folder from a file. •...
-
Page 133: User Parameters Folder
Configuration Editor User Parameters Folder Specify the originating party name and telephone number, etc. to be registered on the device for fax communications. -
Page 134: Fax Parameters Folder
Configuration Editor Fax Parameters Folder Display or change the Fax Parameter Settings. 1. The contents of the Fax Parameter differs depending on the model. NOTE... -
Page 135: General Functions Folder
Configuration Editor General Functions Folder Display or change the General Functions. -
Page 136: Copier Setting Folder
Configuration Editor Copier Setting Folder Display or change the Copier Settings. -
Page 137: Journal Folder
Configuration Editor Journal Folder Display the Fax communication journal. -
Page 138: Phonebook Setting Shortcut Activation Folder
Configuration Editor Phonebook Setting Shortcut Activation Folder When the Phonebook Folder is selected the Phone Book Editor utility will be started. -
Page 139: Phonebook Editor
Phonebook Editor Features This function allows registering, deleting, and modifying fax phone numbers in the main unit from a connected PC. Registering, deleting, modifying The operation described on the fax numbers can be operated on left is controllable on a connected the control panel of the machine. -
Page 140: Activation Procedure
Take the following steps to activate the phonebook editor software. Click Start at the bottom left of the PC screen. Start Select Programs. Select Panasonic. Select Panasonic Document Management System. Select MFP Utilities. Select Phone Book Editor. Phone Book Editor splash screen appears and the... -
Page 141: Main Window (For Dp-2500/3000)
Phonebook Editor Main Window (For DP-2500/3000) The screen shown below appears on the PC: Indication Description Reference Station Name Station name (Up to 200 stations with 15 characters each) Key Name Key name (Up to 10 characters) Telephone No. Telephone number (Up to 36 digits) About Version information of software Retrieve... -
Page 142: Main Window (For Dp-1810F/2000)
Phonebook Editor Main Window (For DP-1810F/2000) The screen shown below appears on the PC: Indication Description Reference Abbr. Dialing No. Tab Contains the abbreviated dialing number entries One-Touch Tab Contains the One-Touch Key entries About Version information of software ABBR. NO. Abbreviated Dialing Number Telephone No. - Page 143 Phonebook Editor Main Window (For DP-1810F/2000) Indication Description Reference Insert Entry Insert a blank entry in the phonebook list Page 150 Delete Entry Delete an entry in the phonebook list Page 151 Help Display an on-line help screen Exit Close the phonebook editor software ONE-TOUCH One-Touch Key...
-
Page 144: Main Window (For Dp-135Fp/150Fp/150Fx)
Phonebook Editor Main Window (For DP-135FP/150FP/150FX) The screen shown below appears on the PC: Indication Description Reference Directory Tab Contains the individual dialing station entries (Up to 100 stations) Group Tab Contains the group dialing station entries (Up to 10 groups) About Version information of software Station Name... - Page 145 Phonebook Editor Main Window (For DP-135FP/150FP/150FX) Indication Description Reference Group Name Group Name (Up to 15 characters) Numbers Number of telephone number stored in the group (Up to 10 numbers) Telephone No. Telephone number (Up to 36 digits)
-
Page 146: Retrieve/Write
Phonebook Editor Retrieve/Write This function retrieves the fax numbers in the connected device by PC and writes fax numbers from the PC to main unit. Click Retrieve. Retrieve Click the button. A list of fax numbers in the machine is displayed. - Page 147 Phonebook Editor Retrieve/Write Click the button. The phonebook information is written to the connected device.
-
Page 148: Open/Save File
Phonebook Editor Open/Save File This function opens the phonebook file stored in the PC, edits the file and then saves the file in the PC again. Click Open File Open File Click the button. The File Open dialog box appears 1. - Page 149 Phonebook Editor Open/Save File Click Save File after the editing is completed. Save File Click the button. The phonebook information is saved in the For Save File: 1. Select an existing file from the list or enter a new file name. 2.
-
Page 150: Insert Entry
Phonebook Editor Insert Entry This function adds lines in the list when editing the phonebook. The steps for inserting lines is as follows: Ex: Insert a line between the 2 and 3rd lines. Click the portion indicated as Click Insert Entry. A line is inserted as shown on the left. -
Page 151: Delete Entry
Phonebook Editor Delete Entry The steps for deleting lines is as follows: Ex: Delete the 3 line. Click the portion indicated as Click Delete Entry. The screen shown on the left appears. Click The line is deleted as shown on the left. -
Page 152: Panafax Desktop
Panafax Desktop General Description Panafax Desktop is a PC Faxing application specifically designed to compliment the Panasonic line of multi- function products. Document created on the PC can be easily faxed to a remote location directly without having to print a hard copy first and then put through the fax machine to send. - Page 153 Panafax Desktop Sending Document The Panafax Desktop window appears with the Fax image attached. To preview the Fax image, click on the Preview button on the tool bar at the left of the window. Click on the button to return to Close the Panafax Desktop window.
- Page 154 Panafax Desktop Sending Document Click on the (Send) button when ready to send the fax. Click on the button to start the transmission.
- Page 155 Panafax Desktop Sending Document Sending a Document to a recipient in the Personal Address Book The frequently used fax numbers can be registered tn the Panafax Desktop Personal Address Book. To register a recipient to the Personal Address Book, see page 157. From the Panafax Desktop main window.
- Page 156 Panafax Desktop Sending Document Click on the Personal Address Book tab and select the recipient(s) from the list. Clock on the button to register the recipient(s) to the recipient list. Then, click the (Send) button. Click on the button to start the transmission.
-
Page 157: Managing The Personal Address Book
Panafax Desktop Managing the Personal Address Book To register a recipient to the Personal Address Book, follow the steps below: Click on the (Personal Address Book) button to open the Phone Book dialog box. Click on the button. <Contact Tab> •... - Page 158 Panafax Desktop Managing the Personal Address Book Click on the button to save the entry. To add another entry, repeat from step 2. 1. The One-Touch/Abbreviated Dialing Numbers registered in the your machine are automatically NOTE uploaded in the Personal Address Book when activating the Panafax Desktop if the machine is corrected to your PC.
- Page 159 Panafax Desktop Managing the Personal Address Book To register a group of recipients, follow the steps below: Click on the (Personal Address Book) button to open the Phone Book dialog box. Click on the button. The Group Registration dialog box appears. Click on the button.
- Page 160 Panafax Desktop Managing the Personal Address Book The Add New Group Name dialog appears. Enter the group name and click button. Select the desired recipients. Click the button to add the recipient(s) to the Member list. To add another group, repeat from step 3. If finished, click the button to exit Group Registration.
-
Page 161: Receiving Document
Panafax Desktop Receiving Document If you have set the Fax Parameter No. 63 (PC-FAX RCV Mode) on your machine to “Upload & Print” or ”Upload”, the received faxes is automatically uploaded to the Panafax Desktop. When a fax is receive on the machine, it will proceed as follow: A receiving notice appears on the connected PC. -
Page 162: Cover Sheet
Panafax Desktop Cover Sheet The Cover Sheet is attached to the first page of every sending fax and contains information such as the recipient's name, sender's name, date, title, etc. Creating a Cover Sheet Click on the (Cover Sheet Editor) button. - Page 163 Panafax Desktop Cover Sheet [View] menu Show Grid Display the grid. Preview Display the preview of the cover sheet. Show Status Bar Display the status bar. Zoom Sets the ratio for the cover sheet editing screen. Scale unit Sets the scale unit of measure (cm/inch). [Options] menu Font Specifies the character font.
- Page 164 Panafax Desktop Cover Sheet Setting the Usage of the Cover Sheet Click on the (Configuration) button. The Options dialog box appears. Show the tab. Cover Sheet Select the Cover Sheet then set the usage. Click on the button. Apply...
-
Page 165: Tool Bar
Panafax Desktop Tool Bar Panafax Desktop main dialog box. Used to start the transmission. [Send] Used to view the cover sheet or transmission file. [Preview] Used to specify the resolution and paper size for the transmission. Also, used [Configuration] to set the Cover sheet usage. Used to select the file to be send. -
Page 166: Setup Menu
Panafax Desktop Setup Menu Dialing Settings Tab Specify the local and long distance call access number and whether or not to apply it when dialing. Sender Details Tab Used to identify yourself with various information on the Cover Sheet when sending a fax. - Page 167 Panafax Desktop Setup Menu Connection Tab Specifies the connection type and directory/folder path of the following components. • Scheduler • Send Log • Receive Log For details on setting up Client and Server connection, please refer to the section of Client and Server Setting on page 170.
-
Page 168: Configuration Menu
Panafax Desktop Configuration Menu Page Size Tab Set the page size to be used for the transmission. The selectable page sizes are depending on the capability of the machine connected to your PC. Quality Tab Set the quality to be used for the transmission. - Page 169 Panafax Desktop Configuration Menu Others Tab Set the other preferences.
-
Page 170: Client And Server Setting
The Panafax Desktop module can be setup on any Windows computer on a network to serve as a Fax Server with a compatible Panasonic MFP Fax/Copier connected. Other computer on the network with the Panafax Desktop module installed and setup as Client can then send and receive faxes through the Panafax Desktop Server PC. - Page 171 Panafax Desktop Client and Server Setting Setting the Panafax Desktop as a Client Install the Panasonic-DMS on a networked computer and select Client install on the Select Setup Type dialog box during the installation. Click to copy all the necessary files.
-
Page 172: Troubleshooting
Troubleshooting Troubleshooting Printing operation fails If the printing operation fails, check the following points first: • The connection cable (Parallel Printer Cable or Ethernet LAN Cable) is properly connected. • The length of the parallel printer cable is not longer than 20 ft. (6 m). •... -
Page 173: Document Is Not Printed Correctly
Troubleshooting Document is not printed correctly Problem Action Printing position is wrong or print is Paper size or printing orientation is different between the application settings and misses on the edge. the printer driver settings. Specify the settings again. The specified paper has not been loaded on the device. Specify the settings again or load the appropriate paper. -
Page 174: Error Messages Displayed On The Computer
Troubleshooting Error messages displayed on the computer Problem Action Error in writing to LPT1. Verify that the device is connected to the computer correctly. Unable to write to the Specified Verify that the power of the device is turned on. device. -
Page 175: Appendix
Appendix Printing/Scanning Area 0.1/2.5 0.1/2.5 0.1/2.5 Bottom (Unit: inches/mm) -
Page 176: Parallel Interface Connector
Appendix Parallel Interface Connector The printer has a parallel interface for connecting to the PC. Shape of Connector Signal lines and pin assignment Signal name Signal name DATA0 DATA1 DATA2 DATA3 DATA4 DATA5 DATA6 DATA7 nACK BUSY SELECT nNIT nAUTOFD* nFAULT Not Used Not Used... - Page 177 Appendix Parallel Interface Connector Signal name Function BUSY Signal indicating that printer is unable to receive data. Printer is able to receive data when this signal is Low. Signal indicating Paper Out of printer. This signal is Low when paper is loaded and is High when paper is out. SELECT Signal indicating that printer is under online status.
-
Page 178: Class 2 Fax Modem Section
Class 2 Fax Modem Section Installing the Panasonic Class 2 Fax Modem Installation (Windows 98/Me) The installation is required for transmitting/receiving of Faxes with a PC using general-purpose PC fax function software (recommended: WinFax PRO 10.0). Class 2 Fax Modem... - Page 179 Installing the Panasonic Class 2 Fax Modem Installation (Windows 98/Me) Click on the button. Next (Windows 98/Me only) 1. Select No, the device isn't in the list. 2. Click on the button. Next (This screen will only appear if a new device is found.)
- Page 180 Installing the Panasonic Class 2 Fax Modem Installation (Windows 98/Me) 1. Select Communications Port. 2. Click on the button. Have Disk... 1. Enter D:\English\PanaDMS\Setup. (Where "D" is your CD-ROM drive.) 2. Click on the button. Click on the button. Next Click on the button.
- Page 181 Installing the Panasonic Class 2 Fax Modem Installation (Windows 98/Me) Click on the button. Finish Click on the button and restart the PC. Repeat steps from "1" to "3." 1. Select No, the device isn't in the list. 2. Click on the button.
- Page 182 Installing the Panasonic Class 2 Fax Modem Installation (Windows 98/Me) 1. Select Modem. 2. Click on the button. Next 1. Select Don't detect my modem; I will select it from a list. 2. Click on the button. Next 1. Click on the button.
- Page 183 Installing the Panasonic Class 2 Fax Modem Installation (Windows 98/Me) 1. Select the Class 2 Fax Modem of your machine. 2. Click on the button. Next 1. Select Panasonic MFP Redirected Com Port (COM3*). * COM number depends on the PC.
-
Page 184: Installation (Windows Nt 4.0)
Installing the Panasonic Class 2 Fax Modem Installation (Windows NT 4.0) Installing the Panasonic Class 2 Fax Modem. The installation is required for transmitting/receiving Faxes with a PC, using general-purpose PC fax function software (recommended: WinFax PRO 10.0). Class 2 Fax Modem... - Page 185 Installing the Panasonic Class 2 Fax Modem Installation (Windows NT 4.0) Click on the button. Have Disk... 1. Enter D:\English\PanaDMS\Setup. (Where "D" is your CD-ROM drive.) 2. Click on the button. 1. Select the Class 2 Fax Modem of your machine.
- Page 186 Installing the Panasonic Class 2 Fax Modem Installation (Windows NT 4.0) Click on the button. Finish • Installation of the modem is completed. Close the Modems Properties screen.
-
Page 187: Installation (Windows 2000/Xp)
Installing the Panasonic Class 2 Fax Modem Installation (Windows 2000/XP) Installing the Panasonic Class 2 Fax Modem. The installation is required for transmitting/receiving FAX's with a PC, using a general-purpose PC fax function software (recommended: WinFax PRO 10.0). Class 2 Fax Modem... - Page 188 Installing the Panasonic Class 2 Fax Modem Installation (Windows 2000/XP) 1. Select Add/Troubleshoot a device. 2. Click on the button. Next 1. Select Add a new device. 2. Click on the button. Next 1. Select No, I want to select the hardware from a list.
- Page 189 Installing the Panasonic Class 2 Fax Modem Installation (Windows 2000/XP) 1. Select Modems. 2. Click on the button. Next 1. Select Don't detect my modem; I will select it from a list. 2. Click on the button. Next Click on the button.
- Page 190 Installing the Panasonic Class 2 Fax Modem Installation (Windows 2000/XP) 1. Select the Class 2 Fax Modem of your machine. 2. Click on the button. Next 1. Select the COM port shown at the bottom of the COM ports list.
- Page 191 memo...
- Page 192 PANASONIC MACHINE, INCLUDING BUT NOT LIMITED TO, ANY IMPLIED WARRANTY OF MERCHANTABILITY OR FITNESS FOR A PARTICULAR PURPOSE. PANASONIC DOCUMENT IMAGING COMPANY ASSUMES NO RISK AND SHALL NOT BE SUBJECT TO LIABILITY FOR ANY DAMAGE, INCLUDING, BUT NOT LIMITED TO DIRECT, INDIRECT,...