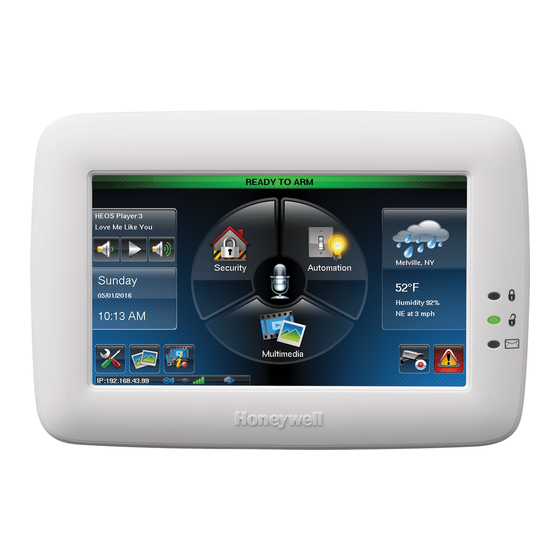
Honeywell Tuxedo Touch WIFI Installation And Setup Manual
Home automation system
Hide thumbs
Also See for Tuxedo Touch WIFI:
- User manual (64 pages) ,
- Quick installation manual (2 pages)

Related Manuals for Honeywell Tuxedo Touch WIFI


Summary of Contents for Honeywell Tuxedo Touch WIFI
- Page 1 Installation and Setup Guide 800-10300V3 4/13 Rev. A...
-
Page 3: Table Of Contents
Table of Contents About the System ..........................5 Safe Mode ............................5 Compatibility ............................ 5 Software Upgrades ........................... 6 System Information ......................... 6 Mounting ............................7 Wiring ............................... 8 Specifications ............................ 9 Front Panel LEDs ..........................9 Navigation Icons..........................10 Weather Forecast .......................... - Page 4 Enroll/Adding Z-Wave Devices ....................... 33 Enroll/Add a Light Module, Switch or Outlet Module ..............33 Enroll a Door Lock Device (Entry Control) ................... 34 Enroll a Honeywell Thermostat ..................... 34 Editing Z-Wave Device Names ....................... 35 Edit a Device Module Name ......................35 Remove/Delete Z-Wave Devices .....................
-
Page 5: About The System
About the System This guide provides information to install and set-up Honeywell’s Tuxedo Touch WIFI Home ™ Automation and Security System. The graphical touch-screen keypads are Advanced User Interface (AUI) devices, which combine wireless home automation and security. Your system may consist of one or more of the following: •... -
Page 6: Software Upgrades
• The keypad sound suppression feature available in some commercial panels is not compatible with the Tuxedo Touch WIFI keypad. • The ‘Voice Chime’ feature is a residential control feature only. -
Page 7: Mounting
About the System (cont’d) Mounting This keypad is for indoor use within the protected area only and should be mounted at a comfortable viewing level. Avoid mounting in areas of high condensation such as bathrooms or in locations where bright light or sunlight shines directly on the screen. The keypad can be mounted with or without the mounting plate. -
Page 8: Wiring
About the System (cont’d) Wiring Connect the Tuxedo Touch in parallel with keypads and other peripheral devices using the keypad data (ECP) bus. • If the Tuxedo Touch is used as the primary system keypad, maximum wire run length is 150 feet. •... -
Page 9: Specifications
About the System (cont’d) Supplementary external power supply must be Listed to CAN/ULC-S318 for cUL Burglary Installations and ULC-S527 for cUL Residential Fire Installations. Specifications Mechanical Specifications: Width: 8.23 inches (209.04mm) Height: 5.59 inches (141.99mm) Depth:1.13 inches (28.70mm) 9.6VDC 12VDC 13.8VDC Electrical Specifications: Backlight OFF, Sound OFF, WIFI ON... -
Page 10: Navigation Icons
About the System (cont’d) Navigation Icons To aid in the navigation through the Tuxedo Touch WIFI screens, a set of user-friendly icons has been provided. The appearance and function are described below. ICON ICON TITLE FUNCTION “Product/Training Accesses the “Product Introduction and Training Videos”. -
Page 11: Weather Forecast
About the System (cont’d) Weather Forecast The *Weather forecast is displayed on the “Home” screen. To set the weather forecast for a specific location, press on the “Weather” feature. Select USA, Canada or Other. Select Zip Code or Postal Code and enter the information on the data entry keyboard or press Country/City and select from the drop down list. -
Page 12: Initial Setup
Initial Setup Programming the Control Panel The keypad is not fully operational unless its address in the control panel has been enabled (set as an alpha console) AUI type device, and assigned to a partition (where applicable). For a list of alarm systems that the keypad can interface with, refer to the “Compatibility Table”... -
Page 13: Night Setup
Initial Setup (cont’d) Language Selection (if applicable) After initial ECP selection is set, the “Languages” menu is displayed. The Tuxedo Touch keypad allows you to select from four languages (English, French Canadian, Latin American Spanish, or Latin American Portuguese) with the default being English. Time and Date Setup If not already set from the control panel, set the current time and date. - Page 14 Initial Setup (cont’d) ACTION NOTES 2. At your PC: The IP Address is displayed in the lower left-hand corner on a) Open the browser and enter the IP the Tuxedo Touch Keypad “Home” screen. NOTE: If using an iPad, iPhone or PC browser with low Address displayed on the keypad into your bandwidth on the mobile type theme, to switch between browser.
-
Page 15: Account Setup
Initial Setup (cont’d) Setup a WLAN (Wi-Fi) Connection From the IP Setup screen, add a WLAN network connection as follows: ICON ACTION NOTES 1. At the Tuxedo Touch keypad: A pop-up window displays: a) Press the WIFI ON button. “This will switch off LAN Network, do you want - Use the scroll bar to locate a network to continue?”... -
Page 16: Setup
Setup You may access Brightness and Volume, Display & Audio Setup, System Setup and IP Setup from the "Setup" screen. Brightness and Volume Control From the "Home" screen, access the "Setup" screen as follows: ICON ACTION NOTES 1. From the Home screen, press the Setup icon. If changes are made, when you exit a pop-up 2. -
Page 17: Adjust The Screen Timeouts
Setup (cont’d) Adjust the Screen Timeouts When the keypad is left idle, it automatically: • Turns the “Backlight Off After” the selected backlight off time has expired (unless “Never” option is selected). • returns to the “Home” screen after the selected “To Homepage After” time has expired (unless “Never”... -
Page 18: Multi-Media
Multi-Media This feature allows you to access voice messages, play video files, display personal photos in a slide show format, and view up to four cameras at one time from your keypad. Multi-Media functionality is supplementary only and has not been evaluated by UL. Picture Setup The Picture feature allows the user to display up to 1000 personal photos on the touch-screen and can be accessed from the Home screen by pressing the Picture icon, or access this feature as follows:... -
Page 19: Camera Setup
Multi-Media (cont’d) Camera Setup The Camera feature allows you to enroll cameras and view up to four cameras at one time using the quadrant view feature. If using existing (mounted) cameras, go to Step 4 below. If this is a first time setup, scan/configure the cameras prior to mounting. - Page 20 Multi-Media (cont’d) ICON ACTION NOTES 7. When all cameras have been added, The screen displays: “INFO: Camera wifi setup is press the Camera WIFI icon to enter applicable only for discovered cameras” the camera wireless settings Enter the appropriate wireless information. SSID: ANY information from your router.
-
Page 21: Video (Audio) Setup
Multi-Media (cont’d) Video (Audio) Setup View the “SD Card Video Playback” training video and then access the Video (Audio) feature, by doing the following: ICON ACTION NOTES 1. Insert your personal media A Video Converter is required to convert videos for (SD/SDHC) card (with stored video proper playback on the Tuxedo Touch Keypad. -
Page 22: System Setup
System Setup From System Setup, you may access Power Mode Setup, CS Setup, User Setup, Time/Date Setup, and Advance Setup. Power Mode Setup Power Setup Mode allows you to reduce power consumption in the event of a system trouble such as AC Loss or Panel Low Battery. -
Page 23: Cs Options / Operating Modes
System Setup (cont’d) ICON ACTION NOTES Rev. 10 and higher supports 6 NOTE: When the ECP address is changed, and Apply AUIs. is selected, the keypad resets. The keypad should not be assigned as a Master *IMPORTANT: If multiple keypads are being Console. -
Page 24: Screen Security
System Setup (cont’d) The Safe Mode may be automatically entered by the program on a communication failure or may be entered manually on command. Automatic Entry In the rare event that the keypad cannot successfully communicate in its graphic mode with the control panel, the screen presents you with a message of “Problems detected. -
Page 25: Code Authority
System Setup (cont’d) ICON ACTION NOTES 4. If authority levels are correct, press BACK The Screen Security screen is re-displayed listing or Home to exit the menu. any changes. Note: The User Levels listed on this screen match 5. If changes are necessary, select the line to the User Levels in commercial panels. -
Page 26: User System Setup
User System Setup User Setup provides access to Add a User, Delete a User, and Edit a User. User Code Setup Each user must be assigned a name with a corresponding 4-digit user code in order to gain access to various features and functions. -
Page 27: How To Add An Existing User To A Second Keypad
User System Setup (cont’d) ICON ACTION NOTES 3. Press the USER SETUP icon. 4. Press the ADD USER icon and enter Use the Data Entry Keyboard to enter all required information. your Authorized Code. Enter the user name (6 characters max.; no spaces 5. -
Page 28: Time/Date Setup
User System Setup (cont’d) Time/Date Setup You can set the time and date from the Set Time & Date screen. When the time is set it is stored in the keypad and sent to the control panel when you press Apply and answer Yes to the following prompt. -
Page 29: System Information
User System Setup (cont’d) System Information To view the current software/firmware version installed on your system, do the following: ICON ACTION NOTES 1. From the "Home" screen, press the Setup The Interface Name, Host Name, MAC Address, icon. CRC, IP Address, Broadcast Address, and NetMask are also displayed. -
Page 30: Led Test
User System Setup (cont’d) Perform the Audio Test as follows: ICON ACTION NOTES 1. Press the Audio Test icon; "Testing.." is When you press Yes, "Passed" is displayed in the displayed while beeps sound from the test status column on the "Diagnostics" screen. speaker. -
Page 31: Night Setup Function
User System Setup (cont’d) ICON ACTION NOTES (Primary) state, press the Z-Wave Primary Select from two main categories of tests: Controller Shift to Secondary icon. • Z-Wave Role Shifting: Primary to Secondary 5. To shift the primary controller role to a and Secondary to Primary. - Page 32 User System Setup (cont’d) ICON ACTION NOTES 1. Press the System Setup and Advanced This is a local setting for the graphic keypad. If Setup icon. user has the maximum number of keypads on 2. Enter your Authorized Code, if required. the system, and wants to disable the same output for all, each keypad needs to be set 3.
-
Page 33: Automation
Automation The Automation feature allows access to Group Setup, Scene Setup, Z-Wave Setup and Output List. WARNING: Automation is intended for lifestyle convenience. Do not use automation for life safety and property protection. • Automation functionality is supplementary only and has not been evaluated by UL. •... -
Page 34: Enroll A Door Lock Device (Entry Control)
Enroll a Honeywell Thermostat Install a Honeywell Thermostat according to the manufactures instructions. Device should be mounted in the final location and tested before adding it to the system. To enroll a Honeywell Thermostat into a Z-Wave network, do the following:... -
Page 35: Editing Z-Wave Device Names
Automation (cont’d) Editing Z-Wave Device Names Edit a Device Module Name To edit a device name, do the following: ICON ACTION NOTES 1. At the Tuxedo Touch Keypad: Enter the new device name by entering it on the a) Press the Automation icon from the data entry keyboard. -
Page 36: Remove A Honeywell Thermostat
Automation (cont’d) Remove a Honeywell Thermostat To remove a Honeywell Thermostat from the Z-Wave network, do the following: ICON ACTION NOTES 1. At the Tuxedo Touch Keypad: Note: Honeywell is not responsible for property a) Press the Automation icon from the damages due to improper setting of the thermostat “Home”... -
Page 37: Output List
Automation (cont’d) Output List To access the Output List, from the “Home” screen, do the following: ICON ACTION NOTES 1. Press the Automation and Output icons. 2. Enter your Authorized Code. 3. Use the OFF or ON button to control outputs. Scene Setup The Scene feature is used to control a single device, or multiple devices based on pre-set “Conditions,”... - Page 38 Automation (cont’d) Scene Setup Options Options for adding a Condition (if needed) – After each selection press SAVE!!! In the “Condition” box, press the Add icon. To set the time, press the TIME button: “Set the occurrence” to Repeated, or Once. If “Repeated” was selected, choose the desired days of the week;...
-
Page 39: Create A Group
Automation (cont’d) Notes: 1. Motorized door lock bolts physically lock and unlock when activated, but if the door lock installed is a non-motorized type, activation allows the door to be manually unlocked without a key. “Compatible Devices” section for further information. Some thermostats do not update temperature status automatically (i.e., Wayne Dalton). -
Page 40: Updating Keypads (Controllers) With New Or Removed Devices
Automation (cont’d) ICON ACTION NOTES 3. At the Primary Controller: When the device information from the Primary a) Press the Add icon. Controller is downloaded to the Secondary Controller, the Secondary Controller displays: 4. At the Secondary Controller: “Controller Add Success” a) Press the Add icon. -
Page 41: Remote Services
Total Connect Server Setup screen by pressing the TC Server Info button (see next page). Remote Services Setup NOTE: If used for Remote Services, Tuxedo Touch WiFi should not be configured as a secondary controller. To use Remote Service, do the following: 1. - Page 42 Automation (cont’d) Controlling Automation (Z-Wave) Devices Remotely Use Total Connect to control Z-Wave devices: lamp modules (binary switch), dimmer modules (multilevel switch), thermostats, etc., from a smart phone, i-Pad , Android Tablet, Blackberry or PC. ® 1. Access the Total Connect account and navigate to the Automation section of the dashboard. 2.
-
Page 43: Compatible Devices
Yale Real Living Touchscreen Deadbolt Lock Schalge Link Deadbolt Lock Schlage Link Lever Lock Kwikset Smartcode Lever lock Kwikset Smartcode Deadbolt Lock Thermostats Honeywell ECC Wayne Dalton Zwave Thermostat Trane Zwave Thermostat Appliance HomeManageable Appliance Module Wayne Dalton Small Appliance Module... -
Page 44: Important Notes
Important Notes For additional troubleshooting procedures, refer to the Control Panel Installation Guide. General Notes • You may check to see whether the Chime Mode is ON or OFF by viewing the keypad Operating Modes screen as described in “Operating Modes” in Section 5 of the keypad Installation and Setup Guide. - Page 45 The features and functions that can be controlled vary by manufacturer and you will need to review the user manual that was provided to determine capabilities of each device. IMPORTANT: Honeywell is not responsible for property damages due to improper setting of the thermostat modes.
- Page 46 Important Notes (Cont’d) Effects of Home Construction on Wireless Range between Z-Wave Enabled Devices Note: The distances shown in the table below are typical examples. Actual performance in your home will vary. From the Remote (or repeating Z-Wave module) to the destination device: Type of Construction Number of Walls Wood Frame with Drywall...
- Page 47 (2) Cet appareil doit accepter toute interference reçue y compris les interferences causant une reception indésirable. RF EXPOSURE WARNING The Tuxedo Touch WIFI must be installed to provide a separation distance of at least 7.8 in. (20 cm) from all persons and must not be co-located or operating in conjunction with any other antenna or transmitter except in accordance with FCC multi-transmitter product procedures.
- Page 48 2 Corporate Center Drive, Suite 100 P.O. Box 9040 Melville, NY 11747 Copyright © 2013 Honeywell International Inc. www.honeywell.com/security Ê800-10300V3RŠ For Online Support visit: http://www.security.honeywell.com/hsc/resourses/MyWebTech 800-10300V3 4/13 Rev. A...