Sign In
Upload
Manuals
Brands
Yamaha Manuals
Musical Instrument
AW4416
Yamaha AW4416 Manuals
Manuals and User Guides for Yamaha AW4416. We have
9
Yamaha AW4416 manuals available for free PDF download: Operation Manual, Reference Manual, Service Manual, Manual Supplement, Tutorial, Supplement Manual, Manual
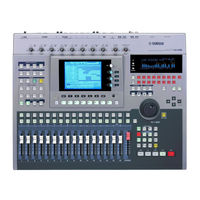
Yamaha AW4416 Operation Manual (507 pages)
Professional Audio Workstation
Brand:
Yamaha
| Category:
Musical Instrument
| Size: 5.93 MB
Table of Contents
Table of Contents
9
Before You Begin
16
Checking the Included Items
16
About the Internal Hard Disk
17
Installing an Internal Hard Disk
17
Installation
18
About the CD-RW Drives
20
Installing a CD-RW Drive
20
The SCSI ID of the CD-RW Drive
20
Installation Procedure
21
How to Remove the Transport Protection Pad
24
Removing the Transport Protection Pad
24
About External SCSI Devices
25
Attaching an External SCSI Device
25
Manual Eject (Emergency Disc Removal)
25
Connection Procedure
26
About SCSI Errors
27
About Terminators
27
About I/O Cards
28
Installing I/O Cards
28
Installation Procedure
29
Important Points You Must Observe
30
Turning the Power on
30
Turning the Power on or off
30
Setting the Internal Clock
31
Turning the Power off
32
Transporting the AW4416
33
Vibration During Use
33
Chapter 1 Welcome to the World of the AW4416
34
Features of the AW4416
34
Mixer Section
34
Recorder Section
35
CD-RW Drive (Option)
36
Other Features
36
Sampling Pad Section
36
Input Patch
38
Input Channels 1-24
39
Return Channels 1/2
40
Monitor Channels 1-16
41
Recorder Input Patching
41
Digital Cascade Connections
42
Oscillator
42
Stereo Output Channel
42
AUX Buses 1-8
43
Internal Effects 1/2
44
Output Patch
44
Monitor Output/Headphone Output
45
Top Panel
46
Analog Input/Output Section
46
Chapter 2 Parts and Their Functions
46
WORK NAVIGATE Section
47
UNIT Section
47
MIXER Section
48
FADER MODE Section
49
MIXING LAYER Section
50
[SEL] Keys, [ON] Keys, Faders
52
Display Section
53
Level Meter/Counter Section
54
RECORDER Section
55
AUTOMATION Section
56
SCENE MEMORY Section
56
CURSOR/JOG & SHUTTLE Section
57
Locate Section
58
Transport Section
59
SAMPLING PAD Section
60
Rear Panel
61
Phones Jack
63
Power Switch
64
Front Panel
65
Chapter 3 The User Interface of the AW4416
66
Display
66
Level Meters/Counter
69
Basic Operation of the AW4416
71
Accessing a Screen/Page
71
Using the Controls of the Top Panel
71
Using the Mouse
71
Turning a Button On/Off
72
Using the Controls of the Top Panel
72
Using the Mouse
72
Editing the Value of a Fader/Knob/Numerical Box
73
Using the Controls of the Top Panel
73
Using the Mouse
73
Using the Additional Function Buttons
74
Using the Controls of the Top Panel
74
Using the Mouse
74
Inputting Text
75
Using the Controls of the Tab Page
75
Using the Mouse
77
Selecting Channels
78
Connections
82
Chapter4-Connections and Setup
83
Word Clock Settings
83
Chapter 5 Recording on the AW4416
88
Preparations for Recording
88
Connections and Start-Up
88
Creating a New Song
90
Recording the First Tracks
93
Set the Input Level
93
Assign the Signals to Buses
96
Set the Tracks to Record-Ready Mode
97
Make Monitor Settings
98
Let's Record
100
Overdubbing
102
Set the Input Level
102
Assign the Signal to a Bus
103
Put the Track in Record-Ready Mode
104
Make Monitor Settings
105
Using EQ and the Dynamics Processor
106
Using the Four-Band EQ
106
Using the Dynamics Processor
107
Let's Overdub
109
Mixdown
110
Creating the MIX Balance of the Tracks
110
Using the solo Function
111
Using the Internal Effects
114
Other Convenient Functions
116
Fader Groups
116
Mute Groups
116
Automix
117
Recording the Stereo Track
117
Saving a Scene/Song
120
Saving a Scene
120
Saving a Song
121
Chapter 6 Transport/Locate Operations
124
Table of Transport Key Operations
124
Shuttle Function (Cue/Review Operation)
125
Nudge Function
125
Using the Nudge Function
125
Nudge Function Settings
127
Rollback Function
128
Locating to a Specific Point
129
Locating to the Zero Location of the Counter
130
Setting the Zero Relative Time Location
130
Locating to the Start/End Points
132
A-B Repeat
133
Performing A-B Repeat Playback
133
Setting the A/B Points
133
In/Out Points
135
Setting the in Point/Out Point
135
Markers
136
Locating to a Marker
136
Setting a Marker
136
Adjusting the Location of a Locate Point
138
Deleting a Locate Point
140
Deleting a Locate Point Using the Panel Keys
141
Deleting a Marker
141
Deleting an In/Out Point or A/B Point
141
Chapter 7 Punch-In/Out
142
About Punch-In/Out
142
Auto Punch-In/Out
142
Manual Punch-In/Out
142
Connect a Foot Switch
143
Make Input Monitor Settings
143
Preparations
143
Manual Punch-In/Out Recording
144
Auto Punch-In/Out
145
Make Input Monitor Settings
145
Preparations
145
Set the Auto Punch-In/Out Points
145
Set the Pre-Roll/Post-Roll Times
145
Rehearsing and Recording with Auto Punch-In/Out
146
Rehearsing with Auto Punch-In/Out
146
Recording with Auto Punch-In/Out
147
Chapter8-Patching
149
Patching to the Recorder Inputs
150
Patching to the Outputs
151
Patch Library
153
Storing to the Patch Library
153
Recalling a Patch Program
154
Patching Input/Output Jacks to an Insert I/O Point
155
Using the Quick Rec Function
158
Chapter 9 Track and Virtual Track Operations
162
The Track Structure of the AW4416
162
Switching Virtual Tracks
164
Pairing Tracks
166
Editing Tracks and Virtual Tracks
167
Tracks, Parts, and Regions
167
Naming a Virtual Track
168
Naming a Virtual Track or Region
168
Naming a Region
170
Track Editing Procedure
171
Virtual Track Editing Procedure
174
Editing Command List
176
TRACK Menu
176
PART Menu
177
REGION Menu
178
Chapter 10 Internal Effects
180
About the Internal Effects
180
Inserting an Effect into a Channel
180
Using aux Send/Return
180
Using aux Send/Return to Apply an Effect
181
Patching
181
Recalling an Effect Program from the Library
182
Switching between Pre-Fader and Post-Fader
184
Adjusting the Send Level
185
Adjusting the Send Level/Return Level
185
Inserting an Effect into a Desired Channel
186
Patching
186
Inserting an Effect into Monitor Channel 1
187
Recalling an Effect Program
189
Chapter 11 Song Management
190
About Songs
190
Saving/Loading a Song
191
Saving the Current Song
191
Loading a Song
192
Editing the Song Name/Comment
193
Deleting/Copying a Song
194
Deleting a Song
194
Copying a Song
196
Optimizing a Song
197
Importing Mixer Data of an Existing Song
198
Chapter 12 Sampling Pads
200
About the Sampling Pads
200
Assigning the Pad Outputs to Channels
201
Assigning a Region to a Sampling Pad
202
Trimming a Sample
205
Naming a Pad
208
Erasing a Pad Sample and Name
209
Recording Your Performance on the Sampling Pads
211
Copying a Pad Performance
213
Erasing a Pad Performance
216
Chapter 13 Scene Memory
218
About Scene Memory
218
About Scene Numbers
218
Parameters Included in a Scene
218
Storing a Scene
219
Recalling a Scene
221
Editing the Name of a Scene
222
Protecting a Scene
223
Changing the Order of Scenes
224
Using Keys to Store/Recall a Scene
226
Storing a Scene
226
Recalling a Scene
227
Chapter 14 Automix
228
What Is Automix
228
Creating a New Automix
229
Recording the First Section
231
Playing Back Automix
233
Overwriting Events
234
Automix Punch-In/Out
236
Editing the Fader Movements
238
Editing Automix Off-Line
240
Storing an Automix
243
Recalling an Automix
245
Chapter 15 MIDI
246
What You Can Do Using MIDI
246
MIDI Connectors and the to HOST Connector
247
Using the to HOST Connector for Direct Connection to Your
248
Computer
248
Connections
248
Setting the PORT SELECT Parameter
249
Switching AW4416 Scenes from an External Device
250
Using MTC to Synchronize the AW4416 and a MIDI Sequencer
253
Using MIDI Clock to Synchronize the AW4416 and a MIDI
255
Sequencer
258
Using MMC to Control the AW4416
258
Chapter 16 Backing up and Restoring Songs
260
Selecting the Backup Format
260
Backing up a Song
261
Restoring a Song
263
Disk Utilities
265
Formatting the Internal Hard Disk/External SCSI Device
265
Formatting an External Hard Disk
266
Formatting the Internal Hard Disk
266
Formatting Removable Media such as an MO Drive
268
Erasing CD-RW Media
269
Chapter 17 Mastering
270
About Mastering
270
Stereo Tracks that Can be Mastered
270
CD-R and CD-RW
271
Track at Once and Disc at Once
272
Mastering Mode Settings
273
Preparations for Mastering
273
Writing the Master
274
Finalizing
278
Playing CD-R/RW Media (the CD Play Function)
279
Reference Guide
282
Professional Audio Workstation Reference Guide
283
SONG Screen
289
Song List Page
289
Saving/Loading a Song
289
Setting Page
290
Make Various Settings for the Current Song
290
Song Edit Page
292
Deleting/Copying/Optimizing Songs
292
Tempo Map Page
293
Programming the Tempo Map
293
Shut down Page
295
Shut down the AW4416
295
QUICK REC Screen
296
Quick Rec Page
296
Simultaneously Recording 16 Inputs/16 Tracks
296
MASTERING Screen
298
Write CD Page
298
Using a CD-RW Drive to Create an Audio CD
298
CD PLAY Screen
300
CD Play Page
300
Use the CD-RW Drive to Play an Audio CD
300
SET up Screen
302
Patch in Page
302
Patching a Signal to a Channel/Track
302
Patch out Page
304
Patch Signals to Output Jacks
304
Patch Lib Page
306
Store or Recall Patching Settings
306
D.in Setup Page
308
Make Word Clock/Cascade Settings
308
Monitor Page
310
Monitor the Digital Input Signals
310
Dither out Page
312
Specify Dithering and Word Length of the Digital Outputs
312
Dither TRK Page
313
Specify Dithering and Word Length for Tracks
313
Solo Setup Page
314
Make solo Settings
314
FILE Screen
316
Backup Page
316
Backup a Song
316
Restore Page
318
Restore Backed-Up Songs
318
Disk Util. Page
319
Format or Erase a Disk
319
UTILITY Screen
321
Oscillator Page
321
Using the Test Tone Oscillator
321
Prefer.1 Page
322
Make Overall Settings for the AW4416 (1)
322
Prefer.2 Page
323
Prefer.3 Page
325
Make Overall Settings for the AW4416 (3)
325
MIDI Screen
327
MIDI Setup Page
327
Make Basic MIDI Settings
327
MIDI Sync Page
329
Make Settings Related to MIDI Synchronization
329
PGM Asgn. Page
331
Assign a Scene Number to each Program Change Number
331
VIEW Screen
332
CH View Page
332
View All Parameters of a Channel
332
Library Page
335
Store or Recall Channel Settings
335
PAN/ROUTE Screen
337
Pan 1-16/Pan17-24/Pan MONI Pages
337
Set Pan and Routing
337
Pair Ch/Pair BUS Pages
340
Set Channel/Bus Pairing
340
EQ/ATT/GRP Screen
342
Eq/Att Page
342
EQ and Attenuation Settings
342
Library Page
344
Store or Recall EQ Settings
344
Fadergrp Page
346
Set and Cancel Fader Groups
346
Mute Grp Page
347
Set and Cancel Mute Groups
347
DYN/DLY Screen
348
Dyn. Edit Page
348
Dynamics Processor Parameter Settings
348
Library Page
350
Storing and Recalling Dynamics Processor Settings
350
Dly/Ø1-16, Dly/Ø17-24, Dly/Ømoni
353
Set Delay and Phase
353
AUX1-AUX6 Screens
355
Pre/Pst IN, Pre/Pst MONI Pages
355
Make On/Off and Pre/Post Settings for the aux Sends
355
AUX7/EFF1 and AUX8/EFF2 Screens
357
Eff. Edit Page
357
Library Page
359
Store or Recall an Effect Program
359
Pre/Pst IN, Pre/Pst MONI Pages
361
Make On/Off and Pre/Post Settings for the Effect Sends
361
HOME Screen
363
1-24/Rtn Page
363
Monitor the Input Level of the Input Channels
363
MONITOR Page
364
Monitor the Input Levels of the Monitor Channels
364
Bus Page
365
Monitor the Output Levels of Buses 1-8/AUX Buses 1-8
365
Omni/St Page
366
Monitor the Output Levels of the OMNI out Jacks and Stereo Output
366
Option Page
367
Monitor the Output Level of Option I/O Cards
367
SAMP. PAD Screen
368
From Rgn. Page
368
Assign a Region to a Sampling Pad
368
CD Import Page
370
Assign CD-DA to a Sampling Pad
370
WAV Import Page
372
Assign a WAV File to a Sampling Pad
372
PAD Edit Page
374
Editing a Sample Pad
374
Trig. List Page
376
Recording and Playing Sampling Pad Operations
376
TRACK Screen
378
TR View Page
378
Viewing the Recorded Content for each Track
378
Track Page
382
Switching Virtual Tracks
382
Stereo Page
383
Playing or Erasing the Stereo Track
383
Mark Adj. Page
385
Adjust or Erase Locate Points or Markers
385
EDIT Screen
387
TR Edit Page
387
Edit Tracks
387
V.TR Edit Page
395
Edit Virtual Tracks
395
CD Import Page
397
Import CD-DA to an Audio Track
397
Wavimport Page
399
Import a WAV File to an Audio Track
399
TR Import Page
401
Import a Track from an Existing Song
401
AUTOMIX Screen
403
Main Page
403
Make Basic Automix Settings
403
Memory Page
407
Store or Recall Automix
407
Fader Edit Page
409
View Fader Events as a Bar Graph
409
Event List Page
410
Edit Events Off-Line
410
SCENE Screen
412
Scene Mem Page
412
Store or Recall a Scene
412
Fade Time Page
414
Specify the Fade Time
414
RCL. Safe Page
415
Make Fader Recall Safe Settings
415
Sort Page
416
Sort Scenes
416
Advertisement
Yamaha AW4416 Operation Manual (280 pages)
Professional audio workstation
Brand:
Yamaha
| Category:
Musical Instrument
| Size: 4.09 MB
Table of Contents
Operating Notes
5
Table of Contents
8
Before You Begin
15
Checking the Included Items
15
Installing an Internal Hard Disk
16
About the Internal Hard Disk
16
Installation
17
Installing a CD-RW Drive
19
About the CD-RW Drives
19
The SCSI ID of the CD-RW Drive
19
Installation Procedure
20
Removing the Transport Protection Pad
23
How to Remove the Transport Protection Pad
23
Manual Eject (Emergency Disc Removal)
24
Attaching an External SCSI Device
24
About External SCSI Devices
24
Connection Procedure
25
About SCSI Errors
26
About Terminators
26
Installing I/O Cards
27
About I/O Cards
27
Installation Procedure
28
Important Points You Must Observe
29
Turning the Power on or off
29
Turning the Power on
29
Setting the Internal Clock
30
Turning the Power off
31
Transporting the AW4416
32
Vibration During Use
32
Chapter 1 Welcome to the World of the AW4416
33
Features of the AW4416
33
Mixer Section
33
Recorder Section
34
Sampling Pad Section
35
CD-RW Drive (Option)
35
Other Features
35
Signal Flow Within the AW4416
36
Input Patch
37
Input Channels 1-24
38
Return Channels 1/2
39
Recorder Input Patching
40
Monitor Channels 1-16
40
Digital Cascade Connections
41
Oscillator
41
Stereo Output Channel
41
Buses 1-8
42
AUX Buses 1-8
42
Output Patch
42
Output Patch
43
Internal Effects 1/2
43
Monitor Output/Headphone Output
44
Chapter 2 Parts and Their Functions
45
Top Panel
45
Analog Input/Output Section
45
WORK NAVIGATE Section
46
UNIT Section
46
MIXER Section
47
FADER MODE Section
48
MIXING LAYER Section
49
[SEL] Keys, [ON] Keys, Faders
51
Display Section
52
Level Meter/Counter Section
53
RECORDER Section
54
AUTOMATION Section
55
SCENE MEMORY Section
55
CURSOR/JOG & SHUTTLE Section
56
Locate Section
57
Transport Section
58
SAMPLING PAD Section
59
Rear Panel
60
Scsi Connector
62
Power Switch
63
To Host Connector
63
Front Panel
64
Chapter 3 The User Interface of the AW4416
65
Display
65
Main Screen
66
Level Meters/Counter
68
Word Clock
68
Basic Operation of the AW4416
70
Accessing a Screen/Page
70
Using the Controls of the Top Panel
70
Using the Mouse
70
Turning a Button On/Off
71
Using the Controls of the Top Panel
71
Using the Mouse
71
Editing the Value of a Fader/Knob/Numerical Box
72
Using the Controls of the Top Panel
72
Using the Mouse
72
Using the Additional Function Buttons
73
Using the Controls of the Top Panel
73
Using the Mouse
73
Inputting Text
74
Using the Controls of the Tab Page
74
Using the Mouse
76
Selecting Channels
77
Chapter4-Connections and Setup
82
Word Clock Settings
82
Chapter 5 Recording on the AW4416
86
Preparations for Recording
86
Connections and Start-Up
86
Creating a New Song
88
Recording the First Tracks
91
Set the Input Level
91
Assign the Signals to Buses
94
Set the Tracks to Record-Ready Mode
95
Make Monitor Settings
96
Let's Record
98
Overdubbing
100
Set the Input Level
100
Assign the Signal to a Bus
101
Put the Track in Record-Ready Mode
102
Make Monitor Settings
103
Using EQ and the Dynamics Processor
104
Using the Four-Band EQ
104
Using the Dynamics Processor
105
Let's Overdub
107
Mixdown
108
Creating the MIX Balance of the Tracks
108
Using the solo Function
109
Using the Internal Effects
112
Other Convenient Functions
114
Fader Groups
114
Mute Groups
114
Automix
115
Recording the Stereo Track
115
Saving a Scene/Song
118
Saving a Scene
118
Saving a Song
119
Chapter 6 Transport/Locate Operations
121
Table of Transport Key Operations
121
Shuttle Function (Cue/Review Operation)
122
Nudge Function
122
Using the Nudge Function
122
Nudge Function Settings
124
Rollback Function
125
Locating to a Specific Point
126
Locating to the Zero Location of the Counter
127
Setting the Zero Relative Time Location
127
Locating to the Start/End Points
129
A-B Repeat
130
Setting the A/B Points
130
Performing A-B Repeat Playback
130
In/Out Points
132
Setting the in Point/Out Point
132
Markers
133
Setting a Marker
133
Locating to a Marker
133
Adjusting the Location of a Locate Point
135
Deleting a Locate Point
137
Deleting a Locate Point Using the Panel Keys
138
Deleting an In/Out Point or A/B Point
138
Deleting a Marker
138
Chapter 7 Punch-In/Out
139
About Punch-In/Out
139
Auto Punch-In/Out
139
Manual Punch-In/Out
139
Preparations
140
Make Input Monitor Settings
140
Connect a Foot Switch
140
Manual Punch-In/Out Recording
141
Auto Punch-In/Out
142
Preparations
142
Make Input Monitor Settings
142
Set the Auto Punch-In/Out Points
142
Set the Pre-Roll/Post-Roll Times
142
Rehearsing and Recording with Auto Punch-In/Out
143
Rehearsing with Auto Punch-In/Out
143
Recording with Auto Punch-In/Out
144
Chapter 8 Patching
145
Patching to the Input Channels
145
Patching to the Recorder Inputs
147
Patching to the Outputs
148
Patch Library
150
Storing to the Patch Library
150
Recalling a Patch Program
151
Patching Input/Output Jacks to an Insert I/O Point
152
Using the Quick Rec Function
155
Chapter 9 Track and Virtual Track Operations
158
The Track Structure of the AW4416
158
Switching Virtual Tracks
160
Pairing Tracks
162
Editing Tracks and Virtual Tracks
163
Tracks, Parts, and Regions
163
Naming a Virtual Track or Region
164
Naming a Virtual Track
164
Naming a Region
166
Track Editing Procedure
167
Virtual Track Editing Procedure
170
Editing Command List
172
TRACK Menu
172
PART Menu
173
REGION Menu
174
Chapter 10 Internal Effects
175
About the Internal Effects
175
Using aux Send/Return
175
Inserting an Effect into a Channel
175
Using aux Send/Return to Apply an Effect
176
Patching
176
Recalling an Effect Program from the Library
177
Switching between Pre-Fader and Post-Fader
179
Adjusting the Send Level/Return Level
180
Adjusting the Send Level
180
Inserting an Effect into a Desired Channel
181
Patching
181
Inserting an Effect into Monitor Channel 1
182
Recalling an Effect Program
184
Chapter 11 Song Management
185
About Songs
185
Song Structure and Size
186
Song Structure
186
Usable Hard Disks/Song Capacity
186
Work Area for Audio CD Production
186
Saving/Loading a Song
187
Saving the Current Song
187
Loading a Song
188
Editing the Song Name/Comment
189
Deleting/Copying a Song
190
Deleting a Song
190
Copying a Song
191
Optimizing a Song
192
Yamaha AW4416 Reference Manual (191 pages)
PROFESSIONAL AUDIO WORKSTATION
Brand:
Yamaha
| Category:
Musical Instrument
| Size: 1.55 MB
Table of Contents
Table of Contents
2
SONG Screen
8
Song List Page
8
Saving/Loading a Song
8
Setting Page
9
Make Various Settings for the Current Song
9
Song Edit Page
11
Deleting/Copying/Optimizing Songs
11
Tempo Map Page
12
Programming the Tempo Map
12
Shut down Page
14
Shut down the AW4416
14
QUICK REC Screen
15
Quick Rec Page
15
Simultaneously Recording 16 Inputs/16 Tracks
15
MASTERING Screen
17
Write CD Page
17
Using a CD-RW Drive to Create an Audio CD
17
CD PLAY Screen
19
CD Play Page
19
Use the CD-RW Drive to Play an Audio CD
19
SET up Screen
21
Patch in Page
21
Patching a Signal to a Channel/Track
21
Patch out Page
23
Patch Signals to Output Jacks
23
Patch Lib Page
25
Store or Recall Patching Settings
25
D.in Setup Page
27
Make Word Clock/Cascade Settings
27
Monitor Page
29
Monitor the Digital Input Signals
29
Dither out Page
31
Specify Dithering and Word Length of the Digital Outputs
31
Dither TRK Page
32
Specify Dithering and Word Length for Tracks
32
Solo Setup Page
33
Make solo Settings
33
FILE Screen
35
Backup Page
35
Backup a Song
35
Restore Page
37
Restore Backed-Up Songs
37
Disk Util. Page
38
Format or Erase a Disk
38
UTILITY Screen
40
Oscillator Page
40
Using the Test Tone Oscillator
40
Prefer.1 Page
41
Make Overall Settings for the AW4416 (1)
41
Prefer.2 Page
42
Make Overall Settings for the AW4416 (2)
42
Prefer.3 Page
44
Make Overall Settings for the AW4416 (3)
44
MIDI Screen
46
MIDI Setup Page
46
Make Basic MIDI Settings
46
Messages
46
MIDI Sync Page
48
Make Settings Related to MIDI Synchronization
48
PGM Asgn. Page
50
Assign a Scene Number to each Program Change Number
50
VIEW Screen
51
CH View Page
51
View All Parameters of a Channel
51
Library Page
54
Store or Recall Channel Settings
54
PAN/ROUTE Screen
56
Pan 1-16/Pan17-24/Pan MONI Pages
56
Set Pan and Routing
56
Pair Ch/Pair BUS Pages
59
Set Channel/Bus Pairing
59
EQ/ATT/GRP Screen
61
Eq/Att Page
61
EQ and Attenuation Settings
61
Library Page
63
Store or Recall EQ Settings
63
Fadergrp Page
65
Set and Cancel Fader Groups
65
Mute Grp Page
66
Set and Cancel Mute Groups
66
DYN/DLY Screen
67
Dyn. Edit Page
67
Dynamics Processor Parameter Settings
67
Library Page
69
Storing and Recalling Dynamics Processor Settings
69
Dly/Ø1-16, Dly/Ø17-24
72
Dly/Ømoni Pages
72
Set Delay and Phase
72
AUX1-AUX6 Screens
74
Pre/Pst IN, Pre/Pst MONI Pages
74
Make On/Off and Pre/Post Settings for the AUX Sends
74
AUX7/EFF1 and AUX8/EFF2 Screens
76
Eff. Edit Page
76
Edit Internal Effects 1/2
76
Library Page
78
Store or Recall an Effect Program
78
Pre/Pst IN, Pre/Pst MONI Pages
80
Make On/Off and Pre/Post Settings for the Effect Sends
80
HOME Screen
82
1-24/Rtn Page
82
Monitor the Input Level of the Input Channels
82
MONITOR Page
83
Monitor the Input Levels of the Monitor Channels
83
Bus Page
84
Monitor the Output Levels of Buses 1-8/AUX Buses 1-8
84
Omni/St Page
85
Monitor the Output Levels of the OMNI out Jacks and Stereo Output
85
Option Page
86
Monitor the Output Level of Option I/O Cards
86
SAMP. PAD Screen
87
From Rgn. Page
87
Assign a Region to a Sampling Pad
87
CD Import Page
89
Assign CD-DA to a Sampling Pad
89
WAV Import Page
91
Assign a WAV File to a Sampling Pad
91
PAD Edit Page
93
Editing a Sample Pad
93
Trig. List Page
95
Recording and Playing Sampling Pad Operations
95
TRACK Screen
97
TR View Page
97
Viewing the Recorded Content for each Track
97
Track Page
101
Switching Virtual Tracks
101
Stereo Page
102
Playing or Erasing the Stereo Track
102
Mark Adj. Page
104
Adjust or Erase Locate Points or Markers
104
EDIT Screen
106
TR Edit Page
106
Edit Tracks
106
V.TR Edit Page
114
Edit Virtual Tracks
114
CD Import Page
116
Import CD-DA to an Audio Track
116
Wavimport Page
118
Import a WAV File to an Audio Track
118
TR Import Page
120
Import a Track from an Existing Song
120
Advertisement
Yamaha AW4416 Service Manual (154 pages)
Brand:
Yamaha
| Category:
Musical Instrument
| Size: 12.88 MB
Table of Contents
Professional Audio Workstation Service Manual
47
Circuit Boards
5
Parts List
17
Overall Assembly
19
Bottom Chassis Assembly
20
Ss355 Te-17
43
Tc74Vhc245F
44
Table of Contents
47
Specifications
49
Mixer Section
50
Recorder Section
51
Panel Layout
60
Top Panel
60
Mixing Layer Section
62
Rear Panel
68
Dimentions
69
Circuit Board Layout
70
Disassembly Procedure
72
Hard Disk Installation
76
CD-Rw Drive Installation
78
Installation Procedure
79
I/O Card Installation
82
Lsi Pin Description
84
Hd6437042Af28 (Xy715A00) Cpu Hd6437042Af53 (Xy721A00) Cpu Hd6437042Af28 (Xw647A00) Cpu
85
YSS904-F (XV989A00) DSP5 (Digital Signal Processor)
86
YSS910-S (XV988A00) DSP6 (Digital Signal Processor)
87
CI-DRC (XY629A00) Gate Array
88
LR38791 (XY631A00) Gate Array
89
LR38792 (XY630A00) Gate Array
90
SPC7214F0B (XY625A00) SCSI Control
91
Ak4528Vf (Xy624A00) Adc/Dac
92
DS12887 (XV618A00) Real Time Clock
92
MBCG46183-129 (XV833A00) Gate Array
92
SED1335F0B (XQ595A00) LCDC (LCD Controller)
93
IC Block Diagram
95
Test Program
99
Display Message List
137
Popup Messages
139
MIDI Implementation Chart
145
MIDI Data Format
146
Yamaha AW4416 Tutorial (34 pages)
PROFESSIONAL AUDIO WORKSTATION
Brand:
Yamaha
| Category:
Musical Instrument
| Size: 0.31 MB
Table of Contents
AW4416 Professional Audio Workstation
1
A Note about the Tutorial
2
Contents
2
Table of Contents
3
Laying down the Basic Tracks
5
Rhythm First
5
Separation
5
Scratch" or "Guide" Vocals
6
Microphone Selection
6
Overdubs
7
To Process or Not to Process
7
Load the Demo Song
8
Load the Demo Song from the CD-ROM Onto the AW4416 Hard Disk
8
Load the Demo Song from the Hard Disk
9
Mixdown
10
Phase 1: Listen to the Tracks and Make a Plan
10
Do It
10
Contents
11
Phase 2: Set up a Rough MIX
12
Start with the Drums
12
Add the Claves/Electronic Drums Track
13
Add the Bass Track
13
Add the Guitar Tracks
13
Add the Organ & Piano Tracks
13
Add the String Tracks
13
Add the Lead Vocal
14
Add the Chorus
14
Listen
14
Save the Song
14
Phase 3: Assemble the MIX Part by Part
15
Tracks 1 & 2: Drums
15
Track 3: Claves/Electronic Drums
16
Track 4: Bass
16
Track 5: Rhythm Guitar
17
Track 6: Lead Guitar
17
Track 7: Organ
17
Track 8: Piano
18
Tracks 9 & 10: Strings
18
Tracks 11 & 12: Female Chorus 1 & 2
18
Track 13: Male Chorus
19
Track 14: Lead Vocal
19
Save the Song
19
Phase 4: Add Ambience
20
Engage the "Effect 1 Sends" and Select an Effect
20
Add Ambience to the Tracks as Required
21
Tracks 1 & 2: Drums
21
Track 3: Claves/Electronic Drums
21
Track 4: Bass
21
Tracks 5 & 6: Rhythm & Lead Guitar
21
Track 7: Organ
22
Track 8: Piano
22
Tracks 9 & 10: Strings
22
Tracks 11, 12, & 13: Chorus
22
Track 14: Lead Vocal
22
Save the Song
23
Phase 5: Finalize the MIX & Set up Automation
24
The Automix
25
Phase 6: Use the Virtual Tracks to Create an Alternate MIX
27
Yamaha AW4416 Manual Supplement (48 pages)
Version 2.0 Manual Supplement
Brand:
Yamaha
| Category:
Musical Instrument
| Size: 0.72 MB
Table of Contents
Table of Contents
2
Operation
3
Extensions to the Quick Rec Function
3
Quickly Assign Input Sources to Tracks
3
Shortcut Key Definitions
5
Added/Modified MIDI Functions
6
Changes in the MIDI Setup Page/MIDI Sync Page
6
Using Control Changes to Operate AW4416 Parameters
9
Using Parameter Changes to Perform AW4416 Operations
11
Transmitting Internal AW4416 Settings Via MIDI (Bulk Dump)
11
Newly Added MIDI Remote Function
13
Additional Functionality for Automix
19
Mini YGDAI Plug-In System Compatible I/O Card Operations
21
Backing up an I/O Card
21
Restoring to an I/O Card
22
Reference
23
QUICK REC Screen
23
Quick Rec 2 Page
23
UTILITY Screen
25
CTRL Key Asgn. Page
25
MIDI Screen
27
CTL Asgn. Page
27
Bulk Dump Page
31
Remote a 1-8/Remote a 9-16/ Remote B 1-8/Remote B
33
MIDI Data Format
37
Yamaha AW4416 Supplement Manual (20 pages)
Additions And Changes In Version 1.2, 1.3
Brand:
Yamaha
| Category:
Musical Instrument
| Size: 0.26 MB
Table of Contents
Table of Contents
1
Messages Displayed While Mastering Is Being Executed
2
Successive Mastering Operations
2
Defrag the Internal Hard Disk
3
About the Defrag Function
3
Executing Defrag
3
Using the EXPORT Command to Write a WAV File
5
Writing Audio Data from a Track to a WAV File
6
Writing Audio from a Virtual Track to a WAV File
10
Use the APPEND Command to Join Regions
10
Joining Regions Within a Track
11
Joining Regions Within a Virtual Track
12
WAVE DISPLAY Popup Window Linked with Locate Operations
13
Changed Procedure for Deleting a Locate Point or Marker
14
Tempo Map Editing
15
Use the [REC TRACK SELECT] Keys to Specify Tracks
15
Use the [BANK] Key / Pads 1-8 to Specify a Pad
16
Use Pads 1-8 to Select a Pad Track
16
Changed Range for the Rollback Time Setting
17
Changed Range for the Fade Time Setting
17
Lit/Dark Status of the [UNDO]/[REDO] Keys
17
Shortcut for Saving the Current Song
17
Use the TRACK [CUE] Key to Monitor the Stereo Track
17
Cue/Review Function
18
Automatic Updating of the End Point
18
Use the [SEL] Key to Temporarily Cancel Fader Grouping
18
Synchronized Operation as MTC and Word Clock Slave
19
Yamaha AW4416 Manual (3 pages)
Installing an internal hard disk
Brand:
Yamaha
| Category:
Storage
| Size: 0.14 MB
Yamaha AW4416 Supplement Manual (1 page)
Limitations on simultaneous use of I/O cards
Brand:
Yamaha
| Category:
Musical Instrument
| Size: 0.04 MB
Advertisement
Related Products
Yamaha AW2400
Yamaha AW2816
Yamaha AW16G Recording 101
Yamaha AW 1600
Yamaha AW 16 G
Yamaha AW 16G
Yamaha Electone A-55N
Yamaha AES920 Series
Yamaha AvantGrand N1
Yamaha AvantGard N3
Yamaha Categories
Motorcycle
Musical Instrument
Electronic Keyboard
Receiver
Amplifier
More Yamaha Manuals
Login
Sign In
OR
Sign in with Facebook
Sign in with Google
Upload manual
Upload from disk
Upload from URL