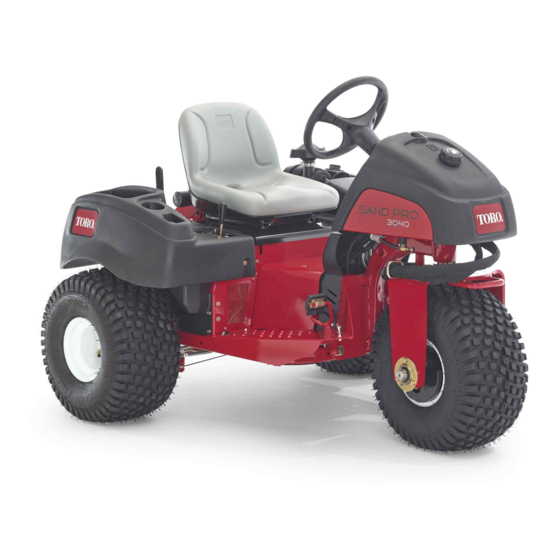
Toro Sand Pro 3040 Operator's Manual
Tooth rake traction unit
Hide thumbs
Also See for Sand Pro 3040:
- Service manual (262 pages) ,
- Operator's manual (44 pages) ,
- Manual (12 pages)
Summary of Contents for Toro Sand Pro 3040
- Page 1 Form No. 3424-841 Rev A Tooth Rake Sand Pro ® /Infield Pro ® 3040 and 5040 Traction Unit Model No. 08751—Serial No. 400000000 and Up *3424-841* A Register at www.Toro.com. Original Instructions (EN)
-
Page 2: Table Of Contents
Contents Whenever you need service, genuine Toro parts, or additional information, contact an Authorized Service Dealer or Toro Customer Service and have the model Safety ............... 3 and serial numbers of your product ready. Figure 1 Safety and Instructional Decals ...... -
Page 3: Safety
Safety Safety and Instructional Decals Safety decals and instructions are easily visible to the operator and are located near any area of potential danger. Replace any decal that is damaged or missing. decal106-5517 106-5517 1. Warning—do not touch the hot surface. -
Page 4: Setup
Setup Loose Parts Use the chart below to verify that all parts have been shipped. Procedure Description Qty. Tooth rake assembly Drawbar Bolt (1/2 x 1-3/4 inch) Flange nut (1/2 inch) Hex nut (1/2 inch) Flange-head bolt (3/8 x 1 inch) Flange nut (3/8 inch) Assemble the rake. -
Page 5: Assembling The Rake
Loosely mount the tongue tube to the rear hole in the hanger assembly with a flange-head bolt (3/8 x 1 inch) and a flange nut (3/8 inch). Torque the nuts as follows: Assembling the Rake • Flange nut (1/2 inch)—104 to 126 N∙m (77 to 93 ft-lb) •... -
Page 6: Mounting The Tooth Rake To The Traction
Mounting the Tooth Rake to the Traction Unit Parts needed for this procedure: Bolt (3/8 x 2-1/2 inches) Washer (3/8 x 7/8 inch) Spacer Locknut (3/8 inch) Procedure g220791 Figure 6 Remove any attachment from the rear of the machine. 1. - Page 7 g220790 Figure 7 1. Jam nut 4. Lift-yoke shoulder 2. Adjustment nut 5. Heavy washer 3. 1.5 to 2 mm (0.060 to 0.080 inch) If the gap is not correct, loosen the jam nut and tighten or loosen the adjustment nut on the link assembly as needed to change the gap (Figure...
-
Page 8: Product Overview
Product Overview g262222 Figure 8 1. Attachment adapter 5. Prong 7. Tooth rake hanger 3. Lift arm 2. Handle 4. Finishing rake 6. Trowel 8. Locking lever Operation Raking Tips If the sand is deep enough, you can rake right up to Read this section on raking before raking a trap. -
Page 9: Entering And Leaving The Trap
Setting the Least Amount of Tine of the trap almost to the end, turn to either direction as sharp as you can, and come right back next to the first Engagement pass. Spiral outward as shown in the drawing, and leave the trap at a right angle in a level area. -
Page 10: Adjusting The Rake Stop Bolts
Using Drag Weights Figure 14 1. Pry slot You can attach optional weights onto the finishing rakes if the sand is damp or coarse or if there are deep footprints in the traps. Order Part No. 18-7570 from your authorized Toro distributor. -
Page 11: Maintenance
Maintenance Greasing the Attachment Adapter If the locking lever on the attachment adapter does not pivot freely and easily, apply a light coat of grease to the area shown in Figure g220788 Figure 15... - Page 12 Notes:...
- Page 13 Notes:...
- Page 14 Notes:...
- Page 15 The Way Toro Uses Information Toro may use your personal information to process warranty claims, to contact you in the event of a product recall and for any other purpose which we tell you about. Toro may share your information with Toro's affiliates, dealers or other business partners in connection with any of these activities. We will not sell your personal information to any other company.
- Page 16 Countries Other than the United States or Canada Customers who have purchased Toro products exported from the United States or Canada should contact their Toro Distributor (Dealer) to obtain guarantee policies for your country, province, or state. If for any reason you are dissatisfied with your Distributor's service or have difficulty obtaining guarantee information, contact the Toro importer.


