Table of Contents
Advertisement
Quick Links
Advertisement
Table of Contents

Related Manuals for Omicron CIBANO 500 PTM


Summary of Contents for Omicron CIBANO 500 PTM
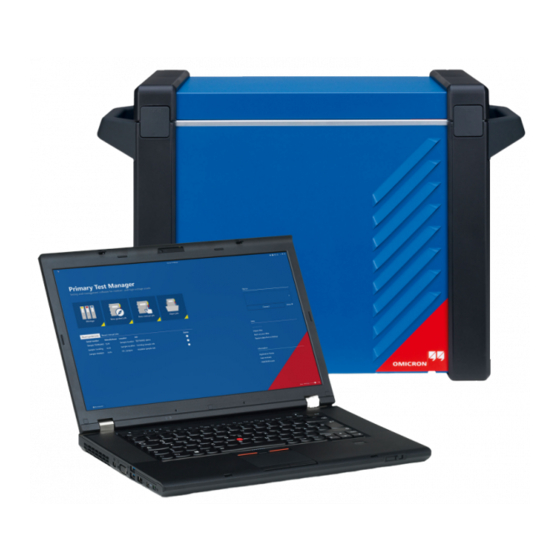
- Page 1 CIBANO 500 PTM User Manual...
- Page 2 All rights including translation reserved. Reproduction of any kind, for example, photocopying, microfilming, optical character recognition and/or storage in electronic data processing systems, requires the explicit consent of OMICRON electronics. Reprinting, wholly or in part, is not permitted. The product information, specifications, and technical data embodied in this manual represent the technical status at the time of writing and are subject to change without prior notice.
-
Page 3: Table Of Contents
Contents Contents Using This Manual ..........7 Operator Qualifications and Safety Standards. - Page 4 CIBANO 500 PTM User Manual Create New Manual Tests ......... 45 5.3.1...
- Page 5 Customer Area – Stay Informed ........207 OMICRON Academy – Learn More ....... . . 207...
- Page 6 CIBANO 500 PTM User Manual Index ............209...
-
Page 7: Using This Manual
Manual will help you to prevent danger, repair costs, and avoid possible down time due to incorrect operation. The CIBANO 500 PTM User Manual always has to be available on the site where CIBANO 500 is used. The users of CIBANO 500 must read this manual before operating CIBANO 500 and observe the safety, installation, and operation instructions therein. -
Page 8: Symbols Used
CIBANO 500 PTM User Manual Symbols Used In this manual, the following symbols indicate safety instructions for avoiding hazards. Symbol Description Caution: Equipment damage or loss of data possible Warning: Personal injury or severe damage to objects possible... -
Page 9: Safety Instructions
Do not turn on CIBANO 500 and do not operate CIBANO 500 without understanding the safety information in this manual. If you do not understand some safety instructions, contact OMICRON before proceeding. Maintenance and repair of CIBANO 500 and its accessories is only permitted by qualified experts at OMICRON Service Centers except for hardware update options delivered with the relevant Supplementary Sheet. -
Page 10: Operating The Measurement Setup
Do not modify, extend, or adapt CIBANO 500 and its accessories. • Use only the CIBANO 500 original accessories and cables and only use the OMICRON accessories together with OMICRON devices as described in this manual. • Use only adequately rated power cords. - Page 11 • Do not operate CIBANO 500 and its accessories in the presence of explosives, gas or vapors. • If CIBANO 500 or its accessories do not seem to function properly, stop using them and contact your regional OMICRON Service Center.
-
Page 12: Orderly Measures
CIBANO 500 PTM User Manual Orderly Measures The CIBANO 500 PTM User Manual always has to be available on the site where CIBANO 500 is operated. The users of CIBANO 500 must read this manual before operating CIBANO 500 and observe the safety, installation, and operation instructions therein. -
Page 13: Introduction
Introduction Introduction Designated Use CIBANO 500, in conjunction with its accessories or as stand-alone unit, is a test system for commissioning and maintenance of circuit breakers. The following tests can be performed using CIBANO 500 according to IEC and ANSI standards: •... -
Page 14: Connections And Operating Controls
CIBANO 500 PTM User Manual Connections and Operating Controls CIBANO 500 is available in two interface options: ®1 • 4×EtherCAT ® • 1×EtherCAT , 3×AUX In this User Manual, both options are referred to as CIBANO 500 and the different option features are described, if applicable. -
Page 15: Front Panel
Introduction 2.2.1 Front Panel Emergency Stop button Press the button to immediately shut off all current and voltage outputs. See 2.2.4 "Emergency Stop Button" on page 19 Measurement Start/Stop button Press the button to enable the Warning lights indicating safe operation and CIBANO 500 outputs and start a possible hazardous voltage and/or current measurement. -
Page 16: Side Panel
2.2.2 Side Panel A - OUTPUT / INPUT (CAT III / 300 V) Warning symbol Configurable output/input (A) Output: AC or DC voltage or current Table 2-1 "Warning Input: analog or binary Lights" on page 18. B - OUTPUT / INPUT (CAT III / 300 V) V IN (CAT III / 300 V) Configurable output/input (B) Analog voltage input/... - Page 17 A - OUTPUT / INPUT (CAT III / 300 V) Warning symbol Configurable output/input (A) Output: AC or DC voltage or current Table 2-1 "Warning Input: analog or binary Lights" on page 18. B - OUTPUT / INPUT (CAT III / 300 V) V IN (CAT III / 300 V) Configurable output/input (B) Analog voltage input/...
-
Page 18: Warning Lights
CIBANO 500 PTM User Manual 2.2.3 Warning Lights CIBANO 500 provides the following warning lights to indicate safe operation and possible hazards. Table 2-1 Warning Lights Warning Description CIBANO 500 State Operating Condition Light Green light on the CIBANO 500 is up Safe operating front panel is on. -
Page 19: Emergency Stop Button
Introduction 2.2.4 Emergency Stop Button Pressing the Emergency Stop button immediately shuts off all CIBANO 500 outputs and stops the running measurement. After pressing the Emergency Stop button, Primary Test Manager does not allow starting a measurement. To restart the measurement after the reason for the emergency stop has been resolved, release the Emergency Stop button by carefully turning it, click the Start button in Primary Test Manager, and then press the Measurement Start/Stop button. - Page 20 CIBANO 500 PTM User Manual...
-
Page 21: Functional Scheme
Functional Scheme Functional Scheme Voltage External I/O A I/O B input booster Embedded Power supply Communication interfaces ® Figure 3-1 CIBANO 500 (4×EtherCAT ) option... - Page 22 CIBANO 500 PTM User Manual The following table describes the terminals of the functional scheme of ® CIBANO 500 (4×EtherCAT ) option. ® Table 3-1 Terminals of CIBANO 500 (4×EtherCAT ) Option Terminal Description Mains interface Mains phase Mains neutral...
- Page 23 Functional Scheme Voltage Voltage External I/O A I/O B input inputs booster Embedded Power supply Communication interfaces ® Figure 3-2 CIBANO 500 (1×EtherCAT , 3×AUX) option...
- Page 24 CIBANO 500 PTM User Manual The following table describes the terminals of the functional scheme of ® CIBANO 500 (1×EtherCAT ,3×AUX) option. ® Table 3-2 Terminals of CIBANO 500 (1×EtherCAT ,3×AUX) Option Terminal Description Mains interface Mains phase Mains neutral...
-
Page 25: Voltage Operating Mode
Functional Scheme ® Table 3-2 Terminals of CIBANO 500 (1×EtherCAT ,3×AUX) Option Terminal Description Voltage input Voltage input 1 Voltage input N Voltage Operating Mode The following figure explains the CIBANO 500 voltage operating mode. High-range voltage mode Half current Double current double voltage half voltage... - Page 26 CIBANO 500 PTM User Manual Figure 3-3 "The CIBANO 500 voltage operating mode" shows the switching of the internal amplifiers in the voltage operating mode. In this case seven channels are available: A1…A3 and B1…B4. Three channels of these seven channels can be used synchronously but all either of the section A or the section B.
-
Page 27: Current Operating Mode
Functional Scheme Current Operating Mode The following figure explains the CIBANO 500 current operating mode. High-range current mode Half voltage Double double voltage half current current Low-range current mode Figure 3-4 The CIBANO 500 current operating mode Figure 3-4 "The CIBANO 500 current operating mode" shows the switching of the internal amplifiers in the current operating mode. - Page 28 CIBANO 500 PTM User Manual...
-
Page 29: Installation
Installation Installation This section describes how to put the CIBANO 500 test system into operation. The CIBANO 500 operation is controlled by the Primary Test Manager software. Consequently, before operating CIBANO 500, you must install Primary Test Manager and connect CIBANO 500 to a computer. Connect CIBANO 500 to the Computer CIBANO 500 communicates with the computer through Ethernet interface. -
Page 30: Start Primary Test Manager And Connect To Cibano 500
Start Primary Test Manager and Connect to CIBANO 500 To start Primary Test Manager, click Start on the task bar, and then click OMICRON Primary Test Manager, or double-click the OMICRON Primary Test Manager icon on the desktop. To connect to CIBANO 500, select the device in the list, and then click Connect. -
Page 31: Connect Cibano 500 To The Test Object
Installation Connect CIBANO 500 to the Test Object Warning: Working on the high-voltage equipment can be extremely dangerous. Before connecting CIBANO 500 to a test object, observe the safety rules (see1.1 "Safety Rules" on page 9) and all additional relevant laws and internal safety standards. - Page 32 CIBANO 500 PTM User Manual 2. Do one of the following: • Assure that the points of connection carry no voltage. Voltage on the connection points can impact the safety of the operator but implies no danger to the test set. Clamp CIBANO 500 to the circuit breaker’s trip and close coils without disconnecting other parts of the station.
- Page 33 Installation CB MC2 CB MC2 CB MC2 EXTERNAL Circuit MODULES breaker CIBANO 500 AUX 1 AUX 2 Trip coil Close coil – Figure 4-4 Typical measurement setup for testing high-voltage circuit breakers...
- Page 34 CIBANO 500 PTM User Manual...
-
Page 35: Using Primary Test Manager
Using Primary Test Manager Using Primary Test Manager After starting Primary Test Manager for the first time on your computer, the following dialog box appears. Figure 5-1 Selecting the test system In the Test Sets in Use dialog box, select the test systems available for your test. - Page 36 CIBANO 500 PTM User Manual After starting Primary Test Manager, the home view opens. In the home view, you can select different user tasks designed to support you during diagnostic testing and management of test objects and test data. Figure 5-2...
-
Page 37: Title Bar
Click Settings to open the Settings dialog box (see 5.1.1 "Settings" on page 37). Help Click Help to open the CIBANO 500 PTM User Manual (see 5.1.2 "Help" on page 41). About Click About to open the About dialog box (see 5.1.3 "About"... - Page 38 CIBANO 500 PTM User Manual The Settings dialog box displays the general, global settings, transformer, circuit breaker, and current transformer areas. General area In the general area of the Settings dialog box, you can set the Primary Test Manager language, the profiles for naming conventions, and the test systems available for the test.
- Page 39 Using Primary Test Manager 4. In the circuit breaker area, set the circuit breaker naming conventions (see "Circuit breaker area" later in this section). 5. Click OK to close the Settings dialog box. To delete your own profile, select the profile in the Profiles list, and then click Delete current profile.
- Page 40 CIBANO 500 PTM User Manual Circuit breaker In the circuit breaker area of the Settings dialog box, you can set the circuit area breaker terminal name schemes. Figure 5-5 Settings dialog box: circuit breaker area Note: Some of these settings have no effect on the Primary Test Manager in the current version but it is recommended to do the settings correctly because they are relevant to future software versions.
-
Page 41: Help
5.1.2 Help In the Help dialog box, you can open the Primary Test Manager technical documentation and send data to OMICRON Technical Support. To open the Help dialog box, click Help in the title bar. Figure 5-6 Help dialog box... -
Page 42: About
Figure 5-7 About Primary Test Manager dialog box To activate a license, enter the license key in the About Primary Test Manager dialog box. For detailed information about the Primary Test Manager licensing, contact your OMICRON local sales representative or distributor. -
Page 43: Status Bar
Using Primary Test Manager Status Bar Note: The status bar is displayed in any Primary Test Manager view. The status bar displays information about the status of the test system and provides access to the zoom function. The following table describes the statuses of the test system. Table 5-3 Test System Statuses Symbol... - Page 44 CIBANO 500 PTM User Manual Figure 5-9 Connected to device dialog box Note: For connecting to a test system not included in the list, see 9.1 "Connecting to CIBANO 500" on page 175. Right-click the CIBANO 500 symbol in the status bar, and then do one of the following: •...
-
Page 45: Create New Manual Tests
Using Primary Test Manager Create New Manual Tests Primary Test Manager assists you to create new manual tests. To open the Create new manual tests view, click the Create new manual tests button in the home view. Figure 5-10 Create new manual tests view The workspace of the Create new manual tests view depends on the selected button in the left pane (see Figure 5-11 "Left-pane buttons"... -
Page 46: Select Tests
CIBANO 500 PTM User Manual If you click the Tests button, the workspace displays the General pane and the Tests pane again. Figure 5-11 Left-pane buttons Note: You can change the default test names. To rename a test, click the corresponding button in the left pane, and then click the test name. - Page 47 Using Primary Test Manager If a test is open, the workspace is divided into the following panes: • Hardware configuration Displays the test-specific controls of the test set. For information on the hardware configuration options, see 6 "Application" on page 57. •...
-
Page 48: Process Tests
CIBANO 500 PTM User Manual 5.3.2 Process Tests By using the commands on the menu bar, you can process the selected tests. The following table describes the commands on the menu bar. Table 5-4 Menu Bar Commands Command Action Close Closes all selected tests and guides you to the home view. -
Page 49: Display Measurement Results
Using Primary Test Manager Table 5-5 Test Control Commands (continued) Command Action Supply motor Starts the circuit breaker’s motor. To stop the circuit breaker’s motor, click Stop. Clear result Deletes the results of the selected measurement. Delete measurement Deletes the selected measurement row. Add measurement Adds a new measurement row to the currently open test. - Page 50 CIBANO 500 PTM User Manual By clicking the arrow next to Cursors & Settings in the upper-right corner of the window, you can open a workspace for setting the cursors and graphical options. Cursors tab The graphical display provides two cursors for measuring the analog traces data.
- Page 51 Using Primary Test Manager On the Settings tab, you can do the following settings. Table 5-6 Graphical Display Settings Setting Description Divisions Number of the graphical display divisions according to the ruler on the Y-axis Show samples Select the Show samples check box to display only the measured values.
-
Page 52: Generate Test Reports
CIBANO 500 PTM User Manual 5.3.5 Generate Test Reports With Primary Test Manager, you can generate and configure test reports. To generate a test report, click the Report button in the left pane. Figure 5-16 Generating a test report... - Page 53 Using Primary Test Manager The following table describes the report data. Table 5-7 Report Data Data Description Title Title of the report. Appears as the report header. Identifier of the report Report ID Client Customer for which the report is designated Logo Logo to appear in the report To insert your own logo, click Select image, and...
-
Page 54: Open Manual Tests
CIBANO 500 PTM User Manual Open Manual Tests With Primary Test Manager, you can open existing manual tests. To open a manual test: 1. In the home view (see Figure 5-2 "Primary Test Manager home view" on page 36), click the Open manual tests button. - Page 55 Using Primary Test Manager 2. In the Open dialog box, browse to the file you want to open. Figure 5-18 Open manual tests view The Open manual tests view displays the open tests in the left pane. To view the test results, click the corresponding button.
- Page 56 CIBANO 500 PTM User Manual...
-
Page 57: Application
Typical MV circuit breakers are opened and then removed from the rack according to the specifications of the circuit breaker manufacturer and the substation regulations. OMICRON recommends to completely disconnect the circuit breaker from the station, including the secondary connections, and to ground the circuit breaker on one side. -
Page 58: Test Set And Software Start-Up
CIBANO 500 PTM User Manual 6.1.2 Test Set and Software Start-Up To put CIBANO 500 into operation and start Primary Test Manager: 1. Connect properly the CIBANO 500 grounding terminals to the substation ground. 2. Connect CIBANO 500 to a computer with the delivered Ethernet cable and switch the computer on. -
Page 59: Contact Resistance Test
Application 6.1.3 Contact Resistance Test The Contact Resistance test measures the static resistance of the circuit breaker’s main contacts. A typical MV circuit breaker has manual operation buttons at its front plate to control the circuit breaker’s spring. If the spring is not charged, first charge the spring as described in 6.1.8 "Motor Current Test"... - Page 60 CIBANO 500 PTM User Manual Table 6-1 Hardware Configuration Options of CIBANO 500 CIBANO 500 Option A-OUTPUT / INPUT (CAT III / 300 V) Current + Current + Current + Not connected in this test B-OUTPUT / INPUT (CAT III / 300 V) Current –...
- Page 61 Application Tips & Tricks: The delivered Kelvin clamp is the perfect solution for connecting to a massive conductor like a copper busbar or similar. It is recommended to use only the red connectors of the Kelvin clamps (which is the current path) when connecting to the contact fingers of a MV circuit breaker.
- Page 62 CIBANO 500 PTM User Manual Figure 6-4 Edit automatic assessment limits dialog box Table 6-3 Automatic Assessment Limits Setting Description Absolute limits R meas ≤ R max Maximum limit of the resistance value R meas ≥ R min Minimum limit of the resistance value...
- Page 63 Application 3. Start the measurement by pressing the Measurement Start/Stop button. The blue ring on the Measurement Start/Stop button flashes for approx. 3 seconds, and the lightning symbol in Primary Test Manager and the red warning light on the front panel are flashing. Note: You can suspend the measurement anytime manually by pressing the Emergency Stop button or the Measurement Start/Stop button on the CIBANO 500 front panel.
-
Page 64: Timing Test With Cibano 500 (4×Ethercat ® ) Option
CIBANO 500 PTM User Manual ® 6.1.4 Timing Test with CIBANO 500 (4×EtherCAT ) Option The Timing test measures the contact timing of the circuit breaker. Depending on the selected sequence all relevant timing values are automatically calculated. Connection To connect the test object to CIBANO 500: 1. - Page 65 Application Table 6-5 Hardware Configuration Options of CIBANO 500 CIBANO 500 Option V IN (CAT III / 300 V) External source or disabled Neutral connection of V IN A-OUTPUT / INPUT (CAT III / 300 V) Main contact A (preferred), close A, motor A, or disabled Main contact B (preferred), close B, motor B, or disabled...
- Page 66 CIBANO 500 PTM User Manual 4. Connect CIBANO 500 to the trip and close coils of the circuit breaker for all phases according to the wiring diagram displayed in Primary Test Manager and the following figure. CIBANO 500 Trip coil Close coil –...
- Page 67 Application Measurement To perform a measurement: 1. In Primary Test Manager, enter the settings of the Timing test. Table 6-6 Timing Test Settings Setting Description CIBANO 500 Coil supply with Click CIBANO 500 to supply the coil with CIBANO 500. Click External source to supply coils with the source connected to V IN.
- Page 68 CIBANO 500 PTM User Manual Table 6-6 Timing Test Settings (continued) Setting Description Motor supply Motor supply with Click CIBANO 500 to supply the motor with CIBANO 500. Click External source if the motor is supplied from the station supply or battery without any...
- Page 69 Application Figure 6-7 Edit automatic assessment limits dialog box: absolute limits Table 6-7 Absolute Assessment Limits Setting Description Operating times t min Minimum operating time limit t max Maximum operating time limit Coil currents I min Minimum coil current limit I max Maximum coil current limit...
- Page 70 CIBANO 500 PTM User Manual Figure 6-8 Edit automatic assessment limits dialog box: relative limits Table 6-8 Relative Assessment Limits Setting Description Operating times t ref Operating time reference value –t dev Allowed negative deviation +t dev Allowed positive deviation...
- Page 71 Application The following table explains the sequences of the Timing test. Table 6-9 Timing Test Sequences Sequence Action With this sequence, the opening time of the circuit breaker is measured. Only for the O and C sequence it is recommended to perform the test twice, once with nominal voltage and once with 20 % undervoltage to assure the functionality of the circuit breaker for a weak station battery.
- Page 72 CIBANO 500 PTM User Manual Table 6-9 Timing Test Sequences (continued) Sequence Action With this sequence, a tripping operation after the circuit breaker has been closed under a fault condition (trip-free) or the verification of the correct operation of the anti-pumping system is simulated.
- Page 73 Application 4. Start the measurement by pressing the Measurement Start/Stop button. The blue ring on the Measurement Start/Stop button flashes for approx. 3 seconds, and the lightning symbol in Primary Test Manager and the red warning light on the front panel are flashing. Note: You can suspend the measurement anytime manually by pressing the Emergency Stop button or the Measurement Start/Stop button on the CIBANO 500 front panel.
- Page 74 CIBANO 500 PTM User Manual Table 6-10 Timing Measurement Data Data Description Operating times for breaker Open time Contact open time Open synch. Open synchronization time Close time Contact close time Close synch. Closing synchronization time Reclose time Contact reclose time of OC operation...
-
Page 75: Timing Test With Cibano 500 (1×Ethercat ® , 3×Aux) Option
Application ® 6.1.5 Timing Test with CIBANO 500 (1×EtherCAT , 3×AUX) Option The Timing test measures the contact timing of the circuit breaker. Depending on the selected sequence all relevant timing values are automatically calculated. Connection To connect the test object to CIBANO 500: 1. - Page 76 CIBANO 500 PTM User Manual Table 6-11 Hardware Configuration Options of CIBANO 500 CIBANO 500 Option V IN (CAT III / 300 V) External source or disabled Neutral connection of V IN A-OUTPUT / INPUT (CAT III / 300 V)
- Page 77 Application 4. Connect CIBANO 500 to the trip and close coils of the circuit breaker for all phases according to the wiring diagram displayed in Primary Test Manager and the following figure. CIBANO 500 Spring charged Trip coil Close coil Mechanical Motion linkage...
- Page 78 CIBANO 500 PTM User Manual Caution: Ensure that the DC coils are connected with the right polarity. Most coils have free running diodes that will be damaged if the voltage polarity is reversed. 5. Depending on the test requirements, connect CIBANO 500 to the motor of the circuit breaker.
- Page 79 Application Measurement To perform a measurement: 1. In Primary Test Manager, enter the settings of the Timing test. Table 6-12 Timing Test Settings Setting Description CIBANO 500 Coil supply with Click CIBANO 500 to supply the coil with CIBANO 500. Click External source to supply coils with the source connected to V IN.
- Page 80 CIBANO 500 PTM User Manual Table 6-12 Timing Test Settings (continued) Setting Description Motor supply Motor supply with Click CIBANO 500 to supply the motor with CIBANO 500. Click External source if the motor is supplied from the station supply or battery without any...
- Page 81 Application Figure 6-11 Edit automatic assessment limits dialog box: absolute limits Table 6-13 Absolute Assessment Limits Setting Description Operating times t min Minimum operating time limit t max Maximum operating time limit Coil currents I min Minimum coil current limit I max Maximum coil current limit...
- Page 82 CIBANO 500 PTM User Manual Figure 6-12 Edit automatic assessment limits dialog box: relative limits Table 6-14 Relative Assessment Limits Setting Description Operating times t ref Operating time reference value –t dev Allowed negative deviation +t dev Allowed positive deviation...
- Page 83 Application The following table explains the sequences of the Timing test. Table 6-15 Timing Test Sequences Sequence Action With this sequence, the opening time of the circuit breaker is measured. Only for the O and C sequence it is recommended to perform the test twice, once with nominal voltage and once with 20 % undervoltage to assure the functionality of the circuit breaker for a weak station battery.
- Page 84 CIBANO 500 PTM User Manual Table 6-15 Timing Test Sequences (continued) Sequence Action With this sequence, a tripping operation after the circuit breaker has been closed under a fault condition (trip-free) or the verification of the correct operation of the anti-pumping system is simulated.
- Page 85 Application 4. Start the measurement by pressing the Measurement Start/Stop button. The blue ring on the Measurement Start/Stop button flashes for approx. 3 seconds, and the lightning symbol in Primary Test Manager and the red warning light on the front panel are flashing. Note: You can suspend the measurement anytime manually by pressing the Emergency Stop button or the Measurement Start/Stop button on the CIBANO 500 front panel.
- Page 86 CIBANO 500 PTM User Manual Table 6-16 Timing Measurement Data Data Description Operating times for breaker Open time Contact open time Open synch. Open synchronization time Close time Contact close time Close synch. Closing synchronization time Reclose time Contact reclose time of OC operation...
-
Page 87: Dynamic Contact Resistance Test
Application 6.1.6 Dynamic Contact Resistance Test The Dynamic Contact Resistance test is typically not done on MV circuit breakers and can be performed only with the CB MC2 modules in connection with CIBANO 500. For more information, see 6.2.6 "Dynamic Contact Resistance Test"... -
Page 88: Minimum Pickup Test
Start button Primary Test Manager stops running and a missing license message appears. For getting the license, contact your regional OMICRON Service Center. Connection To connect the test object to CIBANO 500: 1. - Page 89 Application Table 6-17 Hardware Configuration Options of CIBANO 500 CIBANO 500 Option V IN (CAT III / 300 V) External source or disabled Neutral connection of V IN A-OUTPUT / INPUT (CAT III / 300 V) Motor A or disabled (preferred) Motor B or disabled (preferred) Motor C or disabled (preferred) Common neutral connection for outputs/inputs in...
- Page 90 CIBANO 500 PTM User Manual Measurement To perform a measurement: 1. In Primary Test Manager, enter the settings of the Minimum Pickup test. Table 6-18 Minimum Pickup Test Settings Setting Description CIBANO 500 Rated coil supply voltage Rated voltage of the coil power supply Click AC or DC for AC or DC coil supply voltage respectively.
- Page 91 Application Table 6-18 Minimum Pickup Test Settings (continued) Setting Description Assessment settings Manual Click Manual to select the manual assessment settings. Automatic Click Automatic to select the automatic assessment settings. Click Edit test limits to adjust the assessment limits (see Figure 6-14 "Edit automatic assessment limits dialog box"...
- Page 92 CIBANO 500 PTM User Manual Figure 6-14 Edit automatic assessment limits dialog box Table 6-19 Automatic Assessment Limits Setting Description Absolute limits V pickup ≥ V min Minimum value of the pickup voltage V pickup ≤ V max Maximum limit of the pickup voltage...
- Page 93 Application 4. Start the measurement by pressing the Measurement Start/Stop button. The blue ring on the Measurement Start/Stop button flashes for approx. 3 seconds, and the lightning symbol in Primary Test Manager and the red warning light on the front panel are flashing. Note: You can suspend the measurement anytime manually by pressing the Emergency Stop button or the Measurement Start/Stop button on the CIBANO 500 front panel.
-
Page 94: Motor Current Test
Start button Primary Test Manager stops running and a missing license message appears. For getting the license, contact your regional OMICRON Service Center. Connection To connect the test object to CIBANO 500: 1. - Page 95 Application Figure 6-15 Hardware configuration of the Motor Current test Note: You can control three circuit breaker’s motors simultaneously. In this case connect the phase contact of the motor 1 to the A1 socket, the phase contact of the motor 2 to the A2 socket, the phase contact of the motor 3 to the A3 socket, and the neutral motor contacts to the AN socket.
- Page 96 CIBANO 500 PTM User Manual Table 6-21 Hardware Configuration Options of CIBANO 500 (continued) CIBANO 500 Option B-OUTPUT / INPUT (CAT III / 300 V) Trip or disabled Close or disabled Supply or disabled Neutral connection of outputs in group B Motor or disabled 4.
- Page 97 Application Measurement To perform a measurement: 1. In Primary Test Manager, enter the settings of the Motor Current test. Table 6-22 Motor Current Test Settings Setting Description Motor supply Motor supply with Click CIBANO 500 to supply the motor with CIBANO 500.
- Page 98 CIBANO 500 PTM User Manual 2. In the measurements area, click Start. The blue ring on the Measurement Start/Stop button is on. Warning: Stay in the safe area during the test. Any component of the circuit breaker can carry dangerous voltages.
- Page 99 Application Disconnection Note: Do not disconnect the test object from CIBANO 500 if you intend to make further measurements. To disconnect the test object from CIBANO 500: 1. Press the Emergency Stop button on the CIBANO 500 front panel. 2. Disconnect all cables from the circuit breaker. 3.
-
Page 100: Testing High-Voltage Circuit Breakers
CIBANO 500 PTM User Manual Testing High-Voltage Circuit Breakers The high-voltage (HV) circuit breakers are typically tested with the CB MC2 and CB TN3 modules in connection with CIBANO 500. If you want to test the HV circuit breakers without the CB MC2 modules, see 6.1 "Testing Medium-Voltage Circuit Breakers"... -
Page 101: Test Set And Software Start-Up
Application If there is a longer distance between the location of CIBANO 500 and the dangerous area (that is, the test object), a second person with an additional Emergency Stop button is required. Warning: Never use the CIBANO 500 test set without a solid connection to ground with at least 6 mm cross-section. -
Page 102: Testing Circuit Breakers With Cibano 500 And The Cb Mc2 Modules
CIBANO 500 PTM User Manual 6.2.3 Testing Circuit Breakers with CIBANO 500 and the CB MC2 Modules One or two This section describes testing circuit breakers with three CB MC2 modules. For interrupters per testing with less CB MC2 modules, see "Three to six interrupters per phase"... - Page 103 Application Three to six If you do not need to measure the static resistance and timing of the individual interrupters per interrupters you can proceed as described in "One or two interrupters per phase phase" earlier in this chapter but by bridging more than one interrupter at the same time.
- Page 104 CIBANO 500 PTM User Manual If the circuit breaker has three separate drives it makes also sense to connect to one drive after the other. If the circuit breaker has only one central drive or all drives are interconnected, all phases are operated together but phase by phase is measured.
- Page 105 Application You do not need to additionally test the synchronicity between the phases, however, if requested you can do it by connecting one CB MC2 module to each phase as a last test and by bridging more interrupters with one channel of the CB MC2 module.
-
Page 106: Contact Resistance Test
CIBANO 500 PTM User Manual 6.2.4 Contact Resistance Test The Contact Resistance test measures the static resistance of the circuit breaker’s main contacts. Connection Warning: During the test, the CB MC2 must be the only power source for the circuit breaker’s main contacts. - Page 107 Application 5. Repeat steps 2 to 4 for all interrupters you want to test. 6. In Primary Test Manager, select the Contact Resistance test. 7. In Primary Test Manager, set the hardware configuration and check whether Primary Test Manager recognized all connected CB MC2 modules. Figure 6-22 Hardware configuration of the Contact Resistance test Table 6-23...
- Page 108 CIBANO 500 PTM User Manual Measurement To perform a measurement: 1. In Primary Test Manager, enter the settings of the Contact Resistance test. Table 6-24 Contact Resistance Test Settings Setting Description CB MC2 Test current Current of the test (typically 100 A)
- Page 109 Application Figure 6-23 Edit automatic assessment limits dialog box Table 6-25 Automatic Assessment Limits Setting Description Absolute limits R meas ≤ R max Maximum limit of the resistance value R meas ≥ R min Minimum limit of the resistance value Relative limits R ref Reference resistance value...
- Page 110 CIBANO 500 PTM User Manual 4. After the measurements have finished, the lightning symbol in Primary Test Manager stops flashing, the green warning light is on, and Primary Test Manager displays the measurement results. Table 6-26 Contact Resistance Measurement Data...
- Page 111 Application If the circuit breaker has an even number of interrupters per phase, the test is typically performed with the circuit breaker grounded on both ends. In this case no compensation is needed because the voltages of the two channels of each CB MC2 module cancel out each other which results in no current through the ground loop.
-
Page 112: Timing Test
CIBANO 500 PTM User Manual 6.2.5 Timing Test The Timing test measures the contact timing of the circuit breaker. Depending on the selected sequence the open time, close time, trip-free time, and so on are automatically calculated. With the CB TN3 modules, you can also measure the displacement of the circuit breaker’s main contacts during operation. - Page 113 Application 7. In Primary Test Manager, set the hardware configuration and check whether Primary Test Manager recognized all connected CB MC2 modules. Figure 6-24 Hardware configuration of the Timing test Table 6-27 Hardware Configuration Options of CIBANO 500 CIBANO 500 Option V IN (CAT III / 300 V) External source or disabled...
- Page 114 CIBANO 500 PTM User Manual V IN These inputs can be configured to connect an external source such as a station (CAT III / 300 V) battery or an external power supply. Generally the input is not used but if you need to test the behavior (voltage) of the station battery under real load conditions this option is available.
- Page 115 Application Table 6-28 Hardware Configuration Options of the CB MC2 Module CB MC2 Option Visual check Click the LED symbol to identify the connected CB MC2 module by flashing LED. Phase Phase to which the CB MC2 module is connected Editable name of the CB MC2 module Name Charge status...
- Page 116 CIBANO 500 PTM User Manual 8. Connect CIBANO 500 to the trip and close coils of the circuit breaker for all phases according to the wiring diagram displayed in Primary Test Manager and the following figure. 3 × CB MC2...
- Page 117 Application Circuit breakers with three drives are either tested phase by phase (see 6.2.3 "Testing Circuit Breakers with CIBANO 500 and the CB MC2 Modules" on page 102) or you can connect the three trip and close signals together. If you want to record the supply current for three coils simultaneously you can configure the sockets by clicking them.
- Page 118 CIBANO 500 PTM User Manual Table 6-29 Timing Test Settings: CIBANO 500 (continued) Setting Description Manual Click Manual to select the manual assessment settings. Automatic Click Automatic to select the automatic assessment settings. Click Edit test limits to adjust the assessment limits.
- Page 119 Application Table 6-29 Timing Test Settings: CIBANO 500 (continued) Setting Description Perform a trip-free sequence Perform an O-CO sequence O-CO CO-CO Perform a CO-CO sequence O-CO-CO Perform an O-CO-CO sequence 1. Only available if CIBANO 500 is selected as source 2.
- Page 120 CIBANO 500 PTM User Manual Figure 6-26 Edit automatic assessment limits dialog box: absolute limits Table 6-31 Absolute Assessment Limits Setting Description Operating times t min Minimum operating time limit t max Maximum operating time limit Coil currents I min...
- Page 121 Application Figure 6-27 Edit automatic assessment limits dialog box: relative limits Table 6-32 Relative Assessment Limits Setting Description Operating times t ref Operating time reference value –t dev Allowed negative deviation +t dev Allowed positive deviation Coil currents I ref Coil current reference value –I dev Allowed negative deviation...
- Page 122 CIBANO 500 PTM User Manual The following table explains the sequences of the Timing test. Table 6-33 Timing Test Sequences Sequence Action With this sequence, the opening time of the circuit breaker is measured. Only for the O and C sequence it is recommended...
- Page 123 Application Table 6-33 Timing Test Sequences (continued) Sequence Action O-CO With this sequence, a reclose sequence (OC) under a fault condition is simulated. If the fault is not released, the circuit breaker must open (O) immediately and remain in this position. Initially, the circuit breaker must be in the closed position.
- Page 124 CIBANO 500 PTM User Manual 5. After the measurement has finished, the lightning symbol in Primary Test Manager stops flashing, the green warning light is on, and Primary Test Manager displays the measurement results. The Timing measurement data depends on the sequence of the trip and close commands.
- Page 125 Application Table 6-34 Timing Measurement Data (continued) Data Description Total travel Total distance travelled by the contact during operation (excluding possible overshoot). The row labeled with the CB TN3 channel displays the maximum of all measurement results for this channel. Stroke Total distance travelled by the contact during operation (including possible overshoot).
-
Page 126: Dynamic Contact Resistance Test
Without the license, you can configure the test but after pressing the Start button Primary Test Manager stops running and a missing license message appears. For getting the license, contact your regional OMICRON Service Center. Connection Warning: Before connecting anything to the circuit breaker ensure that it is grounded on both ends on all phases and it is closed to have proper grounding between the interrupters. - Page 127 Application 7. In Primary Test Manager, set the hardware configuration and check whether Primary Test Manager recognized all connected CB MC2 modules. Figure 6-28 Hardware configuration of the Dynamic Contact Resistance test Table 6-35 Hardware Configuration Options of CIBANO 500 CIBANO 500 Option V IN (CAT III / 300 V)
- Page 128 CIBANO 500 PTM User Manual V IN These inputs can be configured to connect an external source such as a station (CAT III / 300 V) battery or an external power supply. Generally the input is not used but if you need to test the behavior (voltage) of the station battery under real load conditions this option is available.
- Page 129 Application Table 6-36 Hardware Configuration Options of the CB MC2 Module CB MC2 Option Visual check Click the LED symbol to identify the connected CB MC2 module by flashing LED. Phase Phase to which the CB MC2 module is connected Editable name of the CB MC2 module Name Charge status...
- Page 130 CIBANO 500 PTM User Manual 8. Connect CIBANO 500 to the trip and close coils of the circuit breaker for all phases according to the wiring diagram displayed in Primary Test Manager and the following figure. 3 × CB MC2...
- Page 131 Application Circuit breakers with three drives are either tested phase by phase (see 6.2.3 "Testing Circuit Breakers with CIBANO 500 and the CB MC2 Modules" on page 102) or you can connect the three trip and close signals together. If you want to record the supply current for three coils simultaneously you can configure the sockets by clicking them.
- Page 132 CIBANO 500 PTM User Manual Measurement To perform a measurement: 1. In Primary Test Manager, enter the settings of the Dynamic Contact Resistance test. Table 6-37 Dynamic Contact Resistance Test Settings: CIBANO 500 Setting Description CIBANO 500 Coil supply with Click CIBANO 500 to supply the coil with CIBANO 500.
- Page 133 Application Table 6-37 Dynamic Contact Resistance Test Settings: CIBANO 500 Setting Description Automatic Click Automatic to select the automatic assessment settings. Click Edit test limits to adjust the assessment limits. In the Edit automatic assessment limits dialog box, click Absolute limits (see Figure 6-30 "Edit automatic assessment limits dialog box: absolute limits"...
- Page 134 CIBANO 500 PTM User Manual Table 6-37 Dynamic Contact Resistance Test Settings: CIBANO 500 Setting Description Perform a trip-free sequence Perform an O-CO sequence O-CO CO-CO Perform a CO-CO sequence O-CO-CO Perform an O-CO-CO sequence 1. Only available if CIBANO 500 is selected as source 2.
- Page 135 Application Table 6-38 Dynamic Contact Resistance Test Settings: CB MC2 Setting Description CB MC2 Test current Current of the test V DC range DC voltage measurement range Select the Measure PIR check box to measure timing of the pre-insertion resistors. C-O threshold Resistance threshold to detect whether the main contact is open or closed.
- Page 136 CIBANO 500 PTM User Manual Figure 6-30 Edit automatic assessment limits dialog box: absolute limits Table 6-39 Absolute Assessment Limits Setting Description Operating times t min Minimum operating time limit t max Maximum operating time limit Coil currents I min...
- Page 137 Application Figure 6-31 Edit automatic assessment limits dialog box: relative limits Table 6-40 Relative Assessment Limits Setting Description Operating times t ref Operating time reference value –t dev Allowed negative deviation +t dev Allowed positive deviation Coil currents I ref Coil current reference value –I dev Allowed negative deviation...
- Page 138 CIBANO 500 PTM User Manual The following table explains the sequences of the Dynamic Contact Resistance test. Table 6-41 Dynamic Contact Resistance Test Sequences Sequence Action With this sequence, the opening time of the circuit breaker is measured. Only for the O and C sequence it is recommended...
- Page 139 Application Table 6-41 Dynamic Contact Resistance Test Sequences (continued) Sequence Action With this sequence, a tripping operation after the circuit breaker has been closed under a fault condition (trip-free) or the verification of the correct operation of the anti-pumping system is simulated. To test the trip-free time the circuit breaker must be in the open position before the test is started.
- Page 140 CIBANO 500 PTM User Manual 2. By using the Open breaker, Close breaker and Supply motor buttons in the measurements area of Primary Test Manager you can check whether all cables are correctly connected and bring the circuit breaker to the proper state.
- Page 141 Application Table 6-42 Dynamic Contact Resistance Measurement Data (continued) Data Description Maximum operating time limit/ t max/t dev Operating time deviation Assessment Assessment of operating times Contact travel characteristics Module Name of the CB TN3 module set in the hardware configuration Channel/command Channel of the CB TN3 module/...
-
Page 142: Minimum Pickup Test
Start button Primary Test Manager stops running and a missing license message appears. For getting the license, contact your regional OMICRON Service Center. Connection Warning: Before connecting anything to the circuit breaker ensure that it is grounded on both ends on all phases and it is closed to have proper grounding between the interrupters. - Page 143 Application Figure 6-32 Hardware configuration of the Minimum Pickup test Table 6-43 Hardware Configuration Options of CIBANO 500 CIBANO 500 Option V IN (CAT III / 300 V) External source or disabled Neutral connection of V IN A-OUTPUT / INPUT (CAT III / 300 V) Motor A or disabled (preferred) Motor B or disabled (preferred) Motor C or disabled (preferred)
- Page 144 CIBANO 500 PTM User Manual Table 6-43 Hardware Configuration Options of CIBANO 500 (continued) CIBANO 500 Option B-OUTPUT / INPUT (CAT III / 300 V) Trip or disabled Close or disabled Supply or disabled Common neutral connection for outputs/inputs in...
- Page 145 Application Measurement To perform a measurement: 1. In Primary Test Manager, enter the settings of the Minimum Pickup test. Table 6-44 Minimum Pickup Test Settings Setting Description CIBANO 500 Rated coil supply voltage Rated voltage of the coil power supply Click AC or DC for AC or DC coil supply voltage respectively.
- Page 146 CIBANO 500 PTM User Manual Table 6-44 Minimum Pickup Test Settings (continued) Setting Description Motor supply Motor supply with Click CIBANO 500 to supply the motor with CIBANO 500. Click External source to supply the motor externally. Voltage of the motor power supply...
- Page 147 Application 2. By using the Open breaker, Close breaker and Supply motor buttons in the measurements area of Primary Test Manager you can check whether all cables are correctly connected and bring the circuit breaker to the proper state. For testing the minimum pickup by the open sequence the circuit breaker must be closed and vice versa.
-
Page 148: Motor Current Test
Start button Primary Test Manager stops running and a missing license message appears. For getting the license, contact your regional OMICRON Service Center. Connection Warning: Before connecting anything to the circuit breaker ensure that it is grounded on both ends on all phases and it is closed to have proper grounding between the interrupters. - Page 149 Application Figure 6-34 Hardware configuration of the Motor Current test Note: You can control three circuit breaker’s motors simultaneously. In this case connect the phase contact of the motor 1 to the A1 socket, the phase contact of the motor 2 to the A2 socket, the phase contact of the motor 3 to the A3 socket, and the neutral motor contacts to the AN socket.
- Page 150 CIBANO 500 PTM User Manual Table 6-47 Hardware Configuration Options of CIBANO 500 (continued) CIBANO 500 Option B-OUTPUT / INPUT (CAT III / 300 V) Trip or disabled Close or disabled Supply or disabled Neutral connection of outputs in group B Motor or disabled 4.
- Page 151 Application Measurement To perform a measurement: 1. In Primary Test Manager, enter the settings of the Motor Current test. Table 6-48 Motor Current Test Settings Setting Description Motor supply Motor supply with Click CIBANO 500 to supply the motor with CIBANO 500.
- Page 152 CIBANO 500 PTM User Manual 2. In the measurements area, click Start. The blue ring on the Measurement Start/Stop button is on. Warning: Stay in the safe area during the test. Any component of the circuit breaker can carry dangerous voltages.
- Page 153 Application Disconnection Note: Do not disconnect the test object from CIBANO 500 if you intend to make further measurements. To disconnect the test object from CIBANO 500: 1. Press the Emergency Stop button on the CIBANO 500 front panel. 2. Disconnect the cables from the station battery, if connected. 3.
-
Page 154: Testing Circuit Breakers With Cibano 500 And The Cb Tn3 Modules
CIBANO 500 PTM User Manual Testing Circuit Breakers with CIBANO 500 and the CB TN3 Modules Within the scope of the Timing and Dynamic Contact Resistance tests, you can also measure the displacement of the circuit breaker’s main contacts during operation by using the CB TN3 modules. - Page 155 Application 8. In Primary Test Manager, set the hardware configuration and check whether Primary Test Manager recognized all connected CB TN3 modules. The following figure shows the hardware configuration of the CIBANO 500 ® (1×EtherCAT , 3×AUX) option with one CB TN3 module connected. For the hardware configuration options of CIBANO 500, see Table 6-11 "Hardware Configuration Options of CIBANO 500"...
- Page 156 CIBANO 500 PTM User Manual Measurement To perform a measurement: 1. In Primary Test Manager, enter the transducer settings. For the CIBANO 500 settings, see Table 6-12 "Timing Test Settings" on page 79. Table 6-50 Transducer Settings Setting Description Digital transducer settings...
- Page 157 Application 3. Start the measurement by pressing the Measurement Start/Stop button. The blue ring on the Measurement Start/Stop button flashes for approx. 3 seconds, and the lightning symbol in Primary Test Manager and the red warning light on the front panel are flashing. 4.
- Page 158 CIBANO 500 PTM User Manual Calibration With Primary Test Manager, you can calibrate analog transducers when using them. To calibrate an analog transducer: 1. In the Hardware configuration pane, select the analog transducer type. 2. In the Settings and conditions pane, click Calibrate.
-
Page 159: Dynamic Contact Resistance Test
Application 6.3.2 Dynamic Contact Resistance Test Connection Warning: Before connecting anything to the circuit breaker ensure that it is grounded on both ends on all phases and it is closed to have proper grounding between the interrupters. To connect the test object to CIBANO 500: ®... - Page 160 CIBANO 500 PTM User Manual 8. In Primary Test Manager, set the hardware configuration and check whether Primary Test Manager recognized all connected CB TN3 modules. The following figure shows the hardware configuration of the CIBANO 500 ® (4×EtherCAT ) option with one CB MC2 and one CB TN3 module connected.
- Page 161 Application Measurement To perform a measurement: 1. In Primary Test Manager, enter the transducer settings. For the CIBANO 500 and the CB MC2 settings, see Table 6-37 "Dynamic Contact Resistance Test Settings: CIBANO 500" on page 132 and Table 6-38 "Dynamic Contact Resistance Test Settings: CB MC2" on page 135.
- Page 162 CIBANO 500 PTM User Manual 2. In the measurements area, click Start. The blue ring on the Measurement Start/Stop button is on. Warning: Stay in the safe area during the test. Any component of the circuit breaker can carry dangerous voltages.
- Page 163 Application Calibration With Primary Test Manager, you can calibrate analog transducers when using them. To calibrate an analog transducer: 1. In the Hardware configuration pane, select the analog transducer type. 2. In the Settings and conditions pane, click Calibrate. 3. In the Transducer calibration dialog box, enter the maximum stroke of the transducer, and then click Start.
- Page 164 CIBANO 500 PTM User Manual...
-
Page 165: Transducer Installation
Transducer Installation Transducer Installation This section describes how to use the transducers for measuring the circuit breaker’s contact travel with CIBANO 500 and the related issues. The emphasis is on the attachment of the transducers to the circuit breaker. Angular Transducers The angular transducers are used to derive motion curves from a rotating part of the circuit breaker. - Page 166 CIBANO 500 PTM User Manual Articulating arm The articulating arm consists of two levers coupled by a ball joint. On the ends and screw clamp of the levers, the ball joints hold a threaded stub for interfacing with other mechanical components. All three joints can be fixed with a single set screw.
- Page 167 Transducer Installation Extensions Two types of extensions of length 100 mm and 50 mm are available to increase the range of the articulating arm. The extensions can be inserted at either end of the articulating arm. Figure 7-4 Articulating arm extensions Couplings Two types of couplings are available for the angular transducers: a flexible coupling and a coupling using a drill chuck.
-
Page 168: Installation And Measurement Setup
CIBANO 500 PTM User Manual 7.1.2 Installation and Measurement Setup The angular transducer has to be installed directly in front of the rotating shaft (axial alignment) of the circuit breaker. Before installing the transducer, check that there is enough space for mounting the screw clamp and the articulating arm. -
Page 169: Linear Transducers
Transducer Installation Linear Transducers The linear transducers are used to derive motion curves from a linearly moving part of the circuit breaker. Alternatively, the linear transducers can translate the rotation of a shaft into a motion curve if the diameter of the shaft is large enough. There is no mechanical connection between the circuit breaker and the transducer. - Page 170 CIBANO 500 PTM User Manual Magnetic tape The magnetic tape is the “scale” for the linear transducer. It is either fixed onto the flat surface of a moving part of the circuit breaker or wrapped around a rotating shaft. Usually, a double-sided adhesive tape is used for the mechanical bond between the tape and the circuit breaker.
-
Page 171: Installation And Measurement Setup
Transducer Installation 7.2.2 Installation and Measurement Setup Before installing the linear transducer, evaluate the options of attaching the magnetic tape on a part of the circuit breaker that undergoes a linear or a nearly linear motion during switching operation. Alternatively, evaluate the options of attaching the magnetic tape to a rotating shaft of the circuit breaker. - Page 172 CIBANO 500 PTM User Manual...
-
Page 173: Maintenance
2. Double-click the OMICRON Devices icon on the desktop. 3. In the OMICRON Devices window, right-click the CIBANO 500 device you want to upgrade, and then choose Upgrade device to open the CIBANO 500 device website in your default web browser. -
Page 174: Upgrading The Cibano 500 Firmware
CIBANO 500 PTM User Manual Upgrading the CIBANO 500 Firmware After upgrading the CIBANO 500 embedded software, you might need to upgrade also the firmware of CIBANO 500 or the firmware of the CB MC2 and CB TN3 modules. If a firmware upgrade is necessary, the following message appears after you selected a test. -
Page 175: Troubleshooting
1. Click the Start OMICRON Device Browser button 2. In the OMICRON Device Browser window, look for the device you want to connect to and read its IP address. 3. In the home view, click More beneath the Connect button, and then click Add device manually. -
Page 176: Cibano 500 Does Not Start
CIBANO 500 PTM User Manual CIBANO 500 Does Not Start A positive temperature coefficient (PTC) protection protects CIBANO 500 against accidental connection to too high voltages at the mains input. The PTC protection heats up and shuts down the CIBANO 500 power supply. The red lamp on the power switch remains on but CIBANO 500 stays off for more than two minutes. -
Page 177: Disconnecting External Modules
Troubleshooting 9.3.2 Disconnecting External Modules If the previously stored hardware configuration could not be restored with the currently connected test set, Primary Test Manager resets the hardware configuration to default. A notification in the Measurements pane informs you about the reset. Figure 9-4 Reset notification Click Confirm to hide the notifications. - Page 178 CIBANO 500 PTM User Manual...
-
Page 179: Technical Data
Technical Data Technical Data 10.1 CIBANO 500 Specifications All input/output values are guaranteed for one year within an ambient temperature of 23 ºC ± 5 ºC/73 ºF ± 10 ºF, a warm-up time longer than 25 min. and in a frequency range of 45 Hz to 65 Hz or DC. Accuracy values indicate that the error is smaller than ±... - Page 180 CIBANO 500 PTM User Manual Table 10-3 Current Source (A & B) Source Range max, 5 min max, 15 min DC source 3 × 0…±33.3 A 50 V DC source 3 × 0…±24 A 50 V 1. Within the above specified power limit For CIBANO 500 CAT I to CAT III is required depending on the application.
- Page 181 Technical Data The following figures display the output characteristics of CIBANO 500. High-range/ <2 h High-range/ <30 s Low-range/ <2 h Low-range/ <30 s Output current [A] Figure 10-1 DC output characteristics High-range/ <2 h High-range/ <30 s Low-range/ <2 h Low-range/ <30 s Output current [A] Figure 10-2...
- Page 182 CIBANO 500 PTM User Manual Table 10-4 Internal Measurement of Outputs (A) CAT III Range name Range value Accuracy DC: 0.1% rd + 0.05% fs 300 V 0…300 V AC: 0.03% rd + 0.01% fs 1. From 2 000 m to 5 000 m altitude only CAT II compliance or CAT III compliance with half voltage...
- Page 183 Technical Data Table 10-8 Command Switches Three channels, such as trip, close or motor (command switches can be routed to any socket in section A or B). Typical voltage drop = 3 V. Current per channel Duty cycle AC or DC Continuous 15 A AC or DC...
- Page 184 CIBANO 500 PTM User Manual Table 10-11 Interfaces Interface Rating Digital 2 × Safety, 1 × Serial, 1 × Ethernet ® ® Optional: 4 × EtherCAT , 1× EtherCAT Analog 1 × analog input (V IN) 3 × analog input/analog output/binary input (A) 4 ×...
-
Page 185: Aux Board (Optional)
Technical Data 10.1.1 AUX Board (Optional) Table 10-12 Voltage Input AUX Board CAT III Input Range Accuracy DC input 0…420 V 0.5% rd +0.1% fs AC input 0…300 V 0.5% rd +0.1% fs 1. From 2000 m to 5000 m altitude CAT III compliance only with half voltage 2. -
Page 186: Power Specifications
CIBANO 500 PTM User Manual 10.2 Power Specifications Table 10-15 Power Specifications Characteristic Rating Nominal 100 V…240 V AC Voltage Permitted 85 V…264 V AC Current Nominal 16 A Nominal 50 Hz/60 Hz Frequency Permitted 45 Hz…65 Hz Automatic circuit breaker with... -
Page 187: Mechanical Data
Technical Data 10.4 Mechanical Data Table 10-17 Mechanical Data Characteristic Rating 580 × 386 × 229 mm/ 22.9 × 15.2 × 9.0 inch Dimensions (W × H× D) (W = 464 mm/18.3 inch without handles) Weight 20 kg/44.1 lb 10.5 Equipment Reliability Table 10-18 Equipment Reliability... -
Page 188: Standards Conformity
CIBANO 500 PTM User Manual 10.6 Standards Conformity Table 10-19 CE Conformity, EMC, and Safety Standards CE Conformity The product adheres to the specifications of the guidelines of the Council of the European Community for meeting the requirements of the member states regarding the electromagnetic compatibility (EMC) Directive 2004/108/EC and the low-voltage Directive 2006/95/EC. -
Page 189: System Requirements
Technical Data 10.7 System Requirements Table 10-20 System Requirements Characteristic Requirement (*recommended) Operating system Windows 8.1 64-bit*, Windows 8 64-bit*, Windows 7 64-bit* and 32-bit, Windows XP with SP3 and later Multicore system with 2 GHz or faster*, single-core system with 2 GHz or faster min. - Page 190 CIBANO 500 PTM User Manual...
-
Page 191: Accessories
Accessories Accessories 11.1 CB MC2 Module 11.1.1 Designated Use The CB MC2 module is a probe for timing, static and dynamic resistance measurements on the circuit breaker’s main contacts. It facilitates measurements where current is injected over the circuit breaker interrupter while the circuit breaker is operated (tripped or closed). - Page 192 CIBANO 500 PTM User Manual Two green LEDs for indicating the ® EtherCAT state. ® RUN: Signals the state of the EtherCAT subordinate machine. L/A: Signals the state of the physical link and activity on this link. LEDs with the same functionality are also on the side panel of CIBANO 500 (see 2.2.2 "Side Panel"...
-
Page 193: Technical Data
Accessories 11.1.2 Technical Data Table 11-1 CB MC2 Specifications Characteristic Rating Current output Channels Current source 0…100 A DC Maximum output current duration 2×100 A @ 10 mΩ > typical 1.5 sec when circuit breaker is closed with 2×10 A @ 10 mΩ > typical 15 sec 100 % charged capacitor Maximum output voltage 2.6 V DC... - Page 194 CIBANO 500 PTM User Manual Table 11-2 Environmental Conditions Characteristic Rating Operating –30 ºC…+70 ºC/ –22 ºF…+158 ºF Temperature Storage –30 ºC…+70 ºC/ –22 ºF…+158 ºF Relative humidity 5%…95%, non-condensing Operating 5 000 m/16 400 ft Maximum altitude Storage 12 000 m/40 000 ft...
- Page 195 Accessories Table 11-5 CE Conformity, EMC, and Safety Standards CE Conformity The product adheres to the specifications of the guidelines of the Council of the European Community for meeting the requirements of the member states regarding the electromagnetic compatibility (EMC) Directive 2004/108/EC and the low-voltage Directive 2006/95/EC.
-
Page 196: Cb Tn3 Module
CIBANO 500 PTM User Manual 11.2 CB TN3 Module 11.2.1 Designated Use The CB TN3 module is used to evaluate the displacement of the circuit breaker’s main contacts during operation. The contact travel is measured by transducers connected to the CB TN3 module. The CB TN3 module supports digital transducers, providing three interfaces according to the EIA-422 standard. - Page 197 Accessories Two green LEDs for indicating the ® EtherCAT state. ® RUN: Signals the state of the EtherCAT subordinate machine. L/A: Signals the state of the physical link and activity on this link. LEDs with the same functionality are also on the side panel of CIBANO 500 (see 2.2.2 "Side Panel"...
-
Page 198: Technical Data
CIBANO 500 PTM User Manual 11.2.2 Technical Data Table 11-7 CB TN3 Specifications Characteristic Rating Analog interface Output Channels Voltage 5 V…30 V DC Current 10 mA…50 mA Voltage input Channels Range 30 V 0.1% rd + 20 mV Accuracy... - Page 199 Accessories Table 11-7 CB TN3 Specifications (continued) Characteristic Rating Digital interface Output Channels Voltage 5 V…30 V DC Current 10 mA…200 mA Max. power per channel Input Input signal 2 square-wave signals according to EIA-422/485 standard Max. input frequency 10 MHz Maximum sample rate 40 kHz Minimum resolution...
- Page 200 CIBANO 500 PTM User Manual Table 11-8 Environmental Conditions Characteristic Rating Operating –30 ºC…+70 ºC/ –22 ºF…+158 ºF Temperature Storage –30 ºC…+70 ºC/ –22 ºF…+158 ºF Relative humidity 5%…95%, non-condensing Operating 5 000 m/16 400 ft Maximum altitude Storage 12 000 m/40 000 ft...
- Page 201 Accessories Table 11-10 Shock, Vibration, and Protection Class Characteristic Standard Rating Shock IEC/EN 60068-2-27 15 g/11 ms, half-sinusoid, each axis IEC/EN 60068-2-6 Frequency range 10 Hz…150 Hz, continuous acceleration 2 g Vibration (20 m/s /65 ft/s 10 cycles per axis Protection class IEC/EN 60529 IP 42 (only in the pendent position)
-
Page 202: 3-Position Remote Safety Switch
11.3.1 Designated Use The 3-Position Remote Safety Switch is an emergency switch for use with the CIBANO 500 and CPC 100 OMICRON test systems. The 3-Position Remote Safety Switch triggers the emergency stop of the test system. Figure 11-5 3-Position Remote Safety Switch 11.3.2... -
Page 203: Operation
Accessories • Always test the 3-Position Remote Safety Switch under actual conditions before using it. • Test the function of the switch before any use in all three positions as described later in this chapter and put the damaged devices or devices not working properly out of service immediately. -
Page 204: Connection
CIBANO 500 PTM User Manual 11.3.4 Connection To connect the 3-Position Remote Safety Switch to the test system: 1. Remove the safety dongle and store it carefully for later use. 2. Plug in the serial interface connector of the switch into the SAFETY 1 or SAFETY 2 socket of the test system as shown in the following figure. -
Page 205: Technical Data
Accessories 11.3.5 Technical Data Table 11-13 3-Position Remote Safety Switch Specifications Characteristic Rating Operating voltage 12 V DC Interface 9-pin D-SUB connector with locking screws Cable Length 15 m/49.2 ft Table 11-14 Mechanical Durability Characteristic Rating OFF-ON-OFF (direct opening) 100,000 operations min. OFF-ON 1,000,000 operations min. - Page 206 CIBANO 500 PTM User Manual Table 11-17 Shock, Vibration, and Protection Class Characteristic Standard Rating Shock IEC/EN 60068-2-27 15 g/11 ms, half-sinusoid, each axis IEC/EN 60068-2-6 Frequency range 10 Hz…150 Hz Acceleration 2 g continuous Vibration (20 m/s ), 10 cycles per axis...
-
Page 207: Support
OMICRON Academy – Learn More www.omicron.at/academy www.omicronusa.com/academy Learn more about your product in one of the training courses offered by the OMICRON Academy. OMICRON electronics GmbH, Oberes Ried 1, 6833 Klaus, Austria, +43 59495... - Page 208 CIBANO 500 PTM User Manual...
- Page 209 Index Index environmental conditions 3-Position Remote Safety Switch 205 CB MC2 194 CB TN3 200 articulating arm 166 CIBANO 500 186 equipment reliability 3-Position Remote Safety Switch 206 CB MC2 194 CB TN3 201 CIBANO 500 187 status 43 title 37 button Emergency Stop 15 Measurement Start/Stop 15...
- Page 210 CIBANO 500 PTM User Manual mechanical data specifications 3-Position Remote Safety Switch 205 3-Position Remote Safety Switch 205 CB MC2 194 binary input (A) 183 CB TN3 200 CB MC2 193 CIBANO 500 187 CB TN3 198 mechanical durability command switches 183 3-Position Remote Safety Switch 205 current source (A &...
Need help?
Do you have a question about the CIBANO 500 PTM and is the answer not in the manual?
Questions and answers