
Related Manuals for bioMerieux PREVI Isola


Summary of Contents for bioMerieux PREVI Isola
- Page 1 USER MANUAL bioMérieux S.A. 69280 Marcy l'Etoile / France 29730 RCS Lyon 673 620 399 Version C Tel. 33 (0)4 78 87 20 00 - Fax 33 (0)4 78 87 20 90 http://www.biomerieux.com 03/2009...
- Page 3 R e v i s i o n s The list of revisions below summarizes replacements or additional pages in your User Manual. Version Date of printing Modifications Pages modified 10/2008 Creation Not used 03/2009 − New software version − Deletion of Modify button 2-24 −...
- Page 5 4501-1618 B en W a r n i n g The contents of this manual are based on the software release V 1.1. This manual is periodically updated. The updates shall be included in the new releases of the Software. Information supplied in this manual may be subject to modifications before the products described become available.
- Page 7 4501-1577 B en S O F T W A R E L I C E N S E A G R E E M E N T User: No.: Software: Release: Computer: Brand name: Printer: Brand name: Disk player: Brand name: The use of this Software is strictly governed by the following terms and conditions.
- Page 8 I V - L i a b i l i t y In no event shall bioMérieux S.A. be held liable for any consequences that may arise from any modifications made to the Software without its intervention, or, should the software be connected to the user’s network or system, for any malfunctions or damage to the software caused directly or indirectly by the network or system, in particular in the event of failure of the security system, or the consequences of installing software on the same hardware as this Software without the...
- Page 9 4501-1577 B en S O F T W A R E L I C E N S E A G R E E M E N T User: No.: Software: Release: Computer: Brand name: Printer: Brand name: Disk player: Brand name: The use of this Software is strictly governed by the following terms and conditions.
- Page 10 I V - L i a b i l i t y In no event shall bioMérieux S.A. be held liable for any consequences that may arise from any modifications made to the Software without its intervention, or, should the software be connected to the user’s network or system, for any malfunctions or damage to the software caused directly or indirectly by the network or system, in particular in the event of failure of the security system, or the consequences of installing software on the same hardware as this Software without the...
-
Page 11: Table Of Contents
Description ................................. 2-5 Instrument ................................. 2-6 Sample racks ..............................2-9 Sample tubes ..............................2-10 Tubes compatible for use with the PREVI Isola ..................2-10 Fill heights..............................2-10 Prepoured media (Plates) ..........................2-10 Plates compatible for use with the PREVI Isola ..................2-10 Input cassettes..............................2-11 Output cassettes .............................. - Page 12 Electrical connections ............................3-1 Hazardous Magnetic Fields Precautions........................3-1 Moving the Instrument............................... 3-1 Barcode Reader Installation............................3-1 Installation of the PREVI Isola and BCI ........................3-2 Checking installation ............................3-2 Powering up the Workstation ............................ 3-3 Connecting to BCI NET ............................. 3-3 Connecting to BCI RS232..........................
- Page 13 Remove plates from the cassettes in situ ....................4-33 Unloading unprocessed plates......................... 4-33 Unloading Sample Tubes............................4-34 Removing Waste..............................4-35 PREVI Isola biohazardous Waste Bin ......................4-35 PREVI Isola Waste Paper Bin ......................... 4-36 Powering Down the Instrument ..........................4-37 Examples of Correct Streaking Patterns ......................... 4-38...
- Page 14 Table of Contents Quality Control Intended Use................................5-1 Material ..................................5-1 Workstation Preparation............................5-1 Instrument Preparation.............................. 5-2 Sample Tube Preparation ............................5-2 Sample Run and Plate Incubation..........................5-2 Results ..................................5-2 Score determination ..............................5-3 Reference Appearance ............................. 5-3 Results ..................................5-4 Information Technology Security User Management..............................
- Page 15 Removal and Disposal of Materials and Waste....................... 8-22 Disposal of used consumables ........................8-22 Loading PREVI Isola Label Rolls..........................8-23 Replacing Fuses ..............................8-29 Replacing the PREVI Isola HEPA Filter........................8-29 Troubleshooting Introduction ................................9-1 List of Error Messages .............................. 9-2 Event Log................................
- Page 16 Table of Contents 11 Appendices Appendix A: Packing list............................11-1 Instrument kit ..............................11-1 User Manual kit ..............................11-1 Workstation PC kit ............................11-1 Appendix B: Stopping and Restarting the Data Server ................... 11-2 Stopping the data server..........................11-2 Restarting the data server..........................11-4 12 Glossary PREVI Isola User Manual...
- Page 17 Figure 2-4 : Front view of the PREVI Isola with covers on..................2-6 Figure 2-5 : Front view of the PREVI Isola – front covers removed ................2-7 Figure 2-6 : Back view of the PREVI Isola with covers on ..................2-8 Figure 2-7 : Sample racks ............................
- Page 18 Figure 4-10 : Inserting the cartridge ........................4-11 Figure 4-11 : “Load Applicators and Tips” screen ....................4-13 Figure 4-12 : Inserting the PREVI Isola Tip tray ..................... 4-14 Figure 4-13 : “Load Labels” screen ......................... 4-15 Figure 4-14 : "Main screen – consumable status" ....................4-17 Figure 4-15 : Sample tubes in racks........................
- Page 19 Figure 9-3 : Error Message ............................. 9-15 Figure 9-4 : Fatal Message ............................. 9-16 Figure 9-5 : PREVI Isola HEPA filter error message ....................9-17 Figure 9-6 : Unlocking the latch ..........................9-18 Figure 9-7 : Unhooking the latch ..........................9-18...
- Page 20 Figure 9-10 : Removing the PREVI Isola HEPA filter from its housing ..............9-20 Figure 9-11 : Covering the PREVI Isola HEPA filter as it comes out of its housing ..........9-20 Figure 9-12 : Covering the PREVI Isola HEPA filter until fully extracted..............9-20 Figure 9-13 : PREVI Isola HEPA filter in the plastic bag..................
- Page 21 L i s t o f T a b l e s 2. Description Table 2-1 : Workstation software buttons....................... 2-24 Table 2-2 : Alarm types ............................2-26 Table 2-3 : Navigation/action bar buttons....................... 2-27 4. Using the System Table 4-1 : Plate cassettes status icons........................4-9 Table 4-2 : Consumables status icons ........................
-
Page 23: How To Use This Manual
The user is advised to read and understand all the instructions in this manual to be able to derive the best performance from the PREVI Isola. F i n d i n g t o p i c s a n d p r o c e d u r e s This manual is divided into 12 chapters. -
Page 25: Description
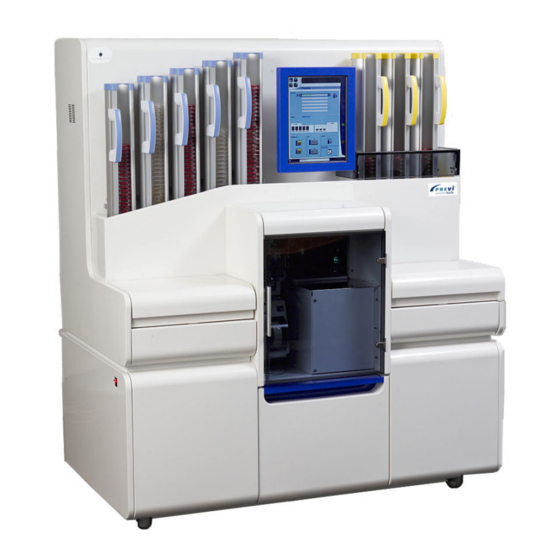
D e s c r i p t i o n I n t e n d e d U s e The PREVI Isola is an automated device intended to perform the inoculation and streaking of Prepoured Media (PPM) with liquid microbiological samples. -
Page 26: Workflow Principle
Description Workflow Principle W o r k f l o w P r i n c i p l e Specimen collection Specimen reception & sample preparation Sample Sample data User Sample data Sample Configuration Laboratory Manager Sample data Incubation Figure 2-1 : Workflow Principle PREVI Isola User Manual... -
Page 27: System Architecture
Data Server The database holding amongst other things, the plate panel definitions, and the sample assignments. PREVI Isola The plate processing instrument. Note: Four PREVI Isola instruments can be connected to a workstation. PREVI Isola User Manual... -
Page 28: System Components
(input , output − five types of sample racks − consumables (PREVI Isola Applicators, PREVI Isola Tips, PREVI Isola Labels, PREVI Isola Waste Bins) − a waste paper bin (for label backing) Figure 2-3 : System Components... -
Page 29: Workstation
− 1 printer (optional) Note: Since the PREVI Isola system operates on a Microsoft Windows OS, it can be connected to an external printer compatible with Microsoft Windows. To validate this printer, please perform the Printer Verification Protocol, page 6-14. -
Page 30: Instrument
Sample lid Provides access to the sample loading bay for loading/unloading of sample racks. Waste drawer CAUTION! The PREVI Isola contains moving mechanisms. Do not remove the process station lid while the instrument is in operation. PREVI Isola User Manual... -
Page 31: Figure 2-5 : Front View Of The Previ Isola - Front Covers Removed
Description Instrument Figure 2-5 : Front view of the PREVI Isola – front covers removed Input cassette Output cassette LCD touch-screen and graphic user interface Consumables tray Plate process station Sample loading bay with rack tray Waste drawer Label printer... -
Page 32: Figure 2-6 : Back View Of The Previ Isola With Covers On
The power connection socket contains two fuses. Power ON switch The Power ON switch is located on the left-hand side of the PREVI Isola. Rating plate The rating plate details essential regulatory information. -
Page 33: Sample Racks
S a m p l e r a c k s Test samples are loaded in racks designed to accept one of eight types of tubes, when the sample tray presents to the front right-hand side of the PREVI Isola. Each type of rack has an associated aspiration height. -
Page 34: Sample Tubes
Description Instrument S a m p l e t u b e s T u b e s c o m p a t i b l e f o r u s e w i t h t h e P R E V I I s o l a Tube Description Supplier’s Rack... -
Page 35: Input Cassettes
Each cassette is designed to hold up to 30 plates and the plates are loaded into the cassettes according to the agar type. The agar type is displayed on the PREVI Isola touch-screen as are the details of incubation requirements for completed plates. -
Page 36: Output Cassettes
T o u c h - s c r e e n The PREVI Isola touch-screen is used to operate the instrument and inform the user of the progress of streaking and the availability of consumables. Figure 2-13: Touch-screen... -
Page 37: Previ Isola Waste Paper Bin
P R E V I I s o l a W a s t e P a p e r B i n The PREVI Isola includes a waste paper bin for the label backing. Figure 2-14 : PREVI Isola Waste Paper Bin W a s t e d r aw e r The waste drawer provides access to the PREVI Isola Waste Bins. -
Page 38: Interlocks
Description Interlocks I n t e r l o c k s The following PREVI Isola covers are equipped with interlocks for safety reasons: − Consumable lid − Process station lid − Sample lid − Output cassettes guard − Printer access door −... -
Page 39: Consumables
Figure 2-16 : PREVI Isola Applicator Note: PREVI Isola Applicators are designed for single use. The PREVI Isola automatically discards used applicators to the PREVI Isola biohazardous Waste Bin. Discarded applicators may be biohazardous. P R E V I I s o l a Ap p l i c a t o r c a r t r i d g e... -
Page 40: Previ Isola Tips
Tips are designed for single use (1 tip = 1 sample). Figure 2-18 : PREVI Isola Tips in tray Note: PREVI Isola Tips are designed for single use. The PREVI Isola automatically discards used tips to the PREVI Isola biohazardous Waste Bin. Discarded tips may be biohazardous. Isola... -
Page 41: Previ Isola Hepa Filter
P R E V I I s o l a H E P A f i l t e r The High Efficiency Particulate Air (HEPA) filter removes airborne particles from within the PREVI Isola. PREVI Isola HEPA filter supplier Part Number bioMérieux... -
Page 42: Instrument Operating Principle
Description Instrument Operating Principle I n s t r u m e n t O p e r a t i n g P r i n c i p l e Start Plate Workflow Start Sample Workflow Retrieve Input Plate Index Next Sample Transfer to Plate Transfer Robot... -
Page 43: Figure 2-20 : Positioning A Barcode Label On A Tube
Description Instrument Operating Principle I n d e x n e x t s a m p l e The instrument indexes the next sample in the sample tray. R e a d s a m p l e b a r c o d e The sample tube is presented before an internal barcode reader in order to read the tube barcode and identify the sample. -
Page 44: Aspirate Sample
Description Instrument Operating Principle Tubes Rack Tube Height A[mm] B[mm] for B[mm] for name (mm) (7.5mil) (10mil) Sterelin 2mL 48.5 19.5 17.5 ® Greiner VITEK 74.6 45.6 43.6 ESwab (Swab) Sarstedt Monovette Tube (10mL) Sarstedt Tube (10mL) BD Vacutainer (10mL) Starplex Urine Container (90mL) Sarstedt Pot (40mL) -
Page 45: Perform Plate Workflow
Description Instrument Operating Principle P e r f o r m p l a t e w o r k f l ow R e t r i e ve i n p u t p l a t e The plate input robot (left-hand side) retrieves agar plates from the input cassettes for delivery to the plate transfer robot. -
Page 46: Label Plate
Instrument Operating Principle L a b e l p l a t e Plate barcode labeling is carried out by the barcode printer installed in the PREVI Isola below the plate transfer robot. A barcode label is applied to the base of each plate after completion of processing and prior to re-inversion of the base and re-application of the lid. -
Page 47: Workstation Software
P r i n c i p l e The PREVI Isola needs to know what types of plates are to be streaked and what type of incubation atmosphere they require. This is defined by plate panels which are assigned to specimen types (see Assigning Plate Panels to Specimen Types, page 3-15) or samples (see Assigning Plate Panels to Samples, page 3-22). -
Page 48: Table 2-1 : Workstation Software Buttons
Description Workstation Software M e n u b a r The menu bar includes three menus with submenus: Samples Configuration Help − Assign Samples − Plate Panels − About − Show Worklist − Specimen Types − Plate Cassettes Configuration − General Settings T i t l e a n d b u t t o n b a r The title and button bar displays the title of the submenu selected from the menu bar. -
Page 49: Instrument Software
Description Instrument Software I n s t r u m e n t S o f t w a r e The instrument software allows the user to operate the instrument through a graphical interface. M a i n s c r e e n a n d g e n e r a l l a y o u t All the screens of the instrument software have the same general layout. -
Page 50: Table 2-2 : Alarm Types
(when another screen is displayed). S t a t u s b a r The two most recently generated messages are displayed in the status bar, along with the current time and date, and the instrument name (PREVI Isola). 2-26 PREVI... -
Page 51: Table 2-3 : Navigation/Action Bar Buttons
Navigates to the “Load Labels” screen and moves the plate transfer robot out of the way of the printer so that the user has clear access to the printer (see Loading PREVI Isola Labels, page 4-15). Empty Waste Bin Only enabled when the main screen is displayed. -
Page 52: Working Area
Description Instrument Software W o r k i n g a r e a The working area is different for each screen. The working area of the main screen is composed of three parts. Figure 2-23 : Working area Sample processing status Plate cassette status Consumables status 2-28... -
Page 53: Getting Started
Avoid exposing the PREVI Isola to direct sunlight, excessive heat, humidity or dust. Leave sufficient space around the PREVI Isola (minimum 50 cm on each side and at the rear of the instrument) to allow airflow and easy handling of the instrument. The rear of prevent impacts with the wall. -
Page 54: Installation Of The Previ Isola And Bci
Installation of the PREVI Isola and BCI software is performed by bioMérieux or your local bioMérieux representative. Users are trained during installation of the PREVI Isola so that they are able to derive the best performance from the instrument. WARNING! -
Page 55: Powering Up The Workstation
P o w e r i n g u p t h e W o r k s t a t i o n IMPORTANT! The workstation must be running when the instrument is in use and when the LIS sends information to the PREVI Isola. • Power up the workstation. -
Page 56: Starting The Workstation Software
Getting Started Starting the Workstation Software S t a r t i n g t h e W o r k s t a t i o n S o f t w a r e • Open a Windows session. •... -
Page 57: Changing Work Sessions
Getting Started Starting the Workstation Software C h a n g i n g w o r k s e s s i o n s Each user has a login and personal password which are required to open a work session on the workstation software. -
Page 58: Defining Plate Panels
D e f i n i n g P l a t e P a n e l s The PREVI Isola needs to know what types of plates are to be streaked. This is defined by plate panels which are assigned to specimen types or samples. -
Page 59: Creating A Plate Panel
Getting Started Defining Plate Panels C r e a t i n g a p l a t e p a n e l • Click on the button. The plate panel composition part of the screen is refreshed. The field name and the composition table are empty. -
Page 60: Figure 3-6 : "Plate Panel" Error Message
Getting Started Defining Plate Panels If more than the maximum number of rows is created, an error message is displayed. Figure 3-6 : “Plate Panel” error message • Select a plate type and an incubation type from the drop-down lists. Note: A plate type or incubation type can be selected using either the full name or the abbreviated name. -
Page 61: Modifying A Plate Panel
Getting Started Defining Plate Panels M o d i f y i n g a p l a t e p a n e l IMPORTANT! Only plate panels that are not in use (i.e. not assigned to any specimen types or samples, or only to samples no longer in the database) can be modified. -
Page 62: Printing A Plate Panel
Getting Started Defining Plate Panels P r i n t i n g a p l a t e p a n e l To print plate panels, • Click on the button. A plate panel printing selection window is displayed: Figure 3-9 : “Plate Panel Printing”... -
Page 63: Defining Plate Types
Getting Started Defining Plate Types D e f i n i n g P l a t e T y p e s Figure 3-11 : “Plate Panels” plate types screen In the “Configuration” menu, • Select “Plate Panels” to display the “Plate Panels” screen. •... -
Page 64: Modifying A Plate Type
Getting Started Defining Plate Types If a field is not adequately filled i.e. missing mandatory information, or invalid contents, an error message is displayed and the invalid field is flagged ( ). Place the pointer on the icon to obtain more information about the error. •... -
Page 65: Defining Incubation Types
Getting Started Defining Incubation Types D e f i n i n g I n c u b a t i o n T y p e s In the “Configuration” menu, • Select “Plate Panels”. In the “Plate Panels” screen, •... -
Page 66: Modifying An Incubation Type
Getting Started Defining Incubation Types • Click on the button to cancel, • Click on in the title and button bar to save the new incubation types. Figure 3-13 : Incubation types • Proceed in the same manner for all the incubation types to be created. M o d i f y i n g a n i n c u b a t i o n t y p e IMPORTANT! Only incubation types that are not used by at least one plate panel or plate cassettes... -
Page 67: Assigning Plate Panels To Specimen Types
A s s i g n i n g P l a t e P a n e l s t o S p e c i m e n T y p e s The PREVI Isola needs to know what types of plates are to be streaked. This is defined by plate panels which are assigned to specimen types or samples. - Page 68 Getting Started Assigning Plate Panels to Specimen Types • Select a plate panel from the drop-down list (if the required plate panel is not found, it must be created: see Creating a plate panel, page 3-7). • The composition of the selected plate panel is displayed in the plate panel composition table in the lower part of the screen.
-
Page 69: Printing Plate Panels Assigned To Specimen Types
Getting Started Assigning Plate Panels to Specimen Types P r i n t i n g p l a t e p a n e l s a s s i g n e d t o s p e c i m e n t y p e s To print plate panels assigned to specimen types, •... -
Page 70: Automatically Assigning Plate Panels To Samples
However, if a row has been created for specimen details with a “<not defined>” plate panel, the plate panel of the specimen type will not be used. This ensures that certain specimen details will not be taken into account by the PREVI Isola unless they are assigned plate panels manually. -
Page 71: Defining Plate Cassettes Configurations
D e f i n i n g P l a t e C a s s e t t e s C o n f i g u r a t i o n s The PREVI Isola needs to know in which input cassette it can find each type of plate. This is defined by plate cassettes configurations. -
Page 72: Figure 3-17 : New Plate Cassettes Configuration
Getting Started Defining Plate Cassettes Configurations • Select a plate type from the drop-down list for each input cassette. • Select an incubation type from the drop-down list for each output cassette. Note: A plate type or incubation type can be selected using either the full name or the abbreviated name. -
Page 73: Modifying A Plate Cassettes Configuration
Getting Started Defining Plate Cassettes Configurations M o d i f y i n g a p l a t e c a s s e t t e s c o n f i g u r a t i o n •... -
Page 74: Assigning Plate Panels To Samples
Getting Started Assigning Plate Panels to Samples A s s i g n i n g P l a t e P a n e l s t o S a m p l e s Plate panels are normally automatically assigned to samples when the sample data are received from the LIS (see Automatically Assigning Plate Panels to Samples, page 3-18). -
Page 75: Viewing And Printing Worklists
Getting Started Assigning Plate Panels to Samples The samples will be added to the table. Figure 3-21 : “Sample Assignment“ screen with sample • Proceed in the same manner for each sample. • Click on the button to cancel, • Click on the button to save. -
Page 76: Figure 3-22 : "Worklist" Screen
Getting Started Viewing and Printing Worklists V i e w i n g a n d P r i n t i n g W o r k l i s t s The “Worklist” screen is used to view a list of samples with their processing state, in particular to check that all samples for which data have been received from the LIS have been processed successfully. -
Page 77: Figure 3-23 : Worklist "Print Preview" Window
Getting Started Viewing and Printing Worklists To print a worklist, • Click on the button. The report is displayed in a “Print Preview” window. Figure 3-23 : Worklist “Print Preview” window • Click on the “Print” button in the “Print Preview” window. A printing dialog box is displayed. -
Page 78: General Settings
Getting Started General Settings G e n e r a l S e t t i n g s In the “Configuration” menu, • Select “General Settings”. The “General Settings” screen is displayed. Figure 3-24 : “General Settings” screen The following parameters can be defined in the “General Settings” screen: Data retention period (days) This defines the number of days that data are stored in the database after the most recent modification. -
Page 79: Using The System
U s i n g t h e S y s t e m B a s i c W o r k f l o w Power Up Check and Load Consumables Applicators Pipettor Tips Labels Waste Bins Load Plates Prepare Samples Load Samples Process Samples... -
Page 80: Starting The System
S t a r t i n g t h e S y s t e m IMPORTANT! The workstation must be running when the system is started (see Powering up the Workstation, page 3-3). The PREVI Isola system is started as follows: − The UPS is powered up (optional device). −... -
Page 81: Figure 4-3 : Main Screen
Using the System Starting the System After the computer completes initialization, the main screen (see Main screen and general layout, page 2-25) appears: Figure 4-3 : Main screen The instrument is now in “Ready” status. PREVI Isola User Manual... -
Page 82: Prerequisites For Sample Processing
Make sure that there are sufficient consumables to process samples (see pages 4-5 to 4-15) • Make sure that the PREVI Isola Waste Bins are in place and empty (see Removing Waste, page 4-35). • Select the appropriate plate cassettes configuration and load the corresponding plates into the input cassettes (see Selecting Plates, page 4-5). -
Page 83: Selecting Plates
Please refer to the package inserts for use of the plates. Note: For information on compatible plates, refer to Plates compatible for use with the PREVI Isola, page 2-10. The instrument status should be “Ready” before changing the plate cassettes configuration. - Page 84 Using the System Selecting Plates The “Current Plate Cassettes Configuration” is displayed. To select a different plate cassettes configuration, • Scroll using the buttons in the “New Plate Cassettes Configuration” zone • Touch the button to accept the “New Plate Cassettes Configuration”. The new plate cassettes configuration will now be displayed in the “Current Plate Cassettes Configuration”...
-
Page 85: Loading Plates
Using the System Loading Plates L o a d i n g P l a t e s To load plates, • Remove the input cassette. IMPORTANT! Make sure that the plates are not contaminated. Plates must be loaded upside down (agar side up). The user is responsible for ensuring that the appropriate plate types are loaded into the correct input cassette. -
Page 86: Loading Plates Without Removing The Input Cassette
Using the System Loading Plates L o a d i n g p l a t e s w i t h o u t r e m o vi n g t h e i n p u t c a s s e t t e Plates can be loaded at any time without removing the input cassettes. -
Page 87: Plate Cassettes Status
When an output cassette is removed, the status of all the output cassettes becomes “Full”. During processing, when the level of plates falls below the sensor, the PREVI Isola considers that there are 5 plates remaining in the input cassette and starts counting down. -
Page 88: Loading Previ Isola Applicators
L o a d i n g P R E V I I s o l a A p p l i c a t o r s PREVI Isola Applicator cartridges should be replaced whenever they are empty. The instrument status should be “Ready” or “Paused” before loading applicators. -
Page 89: Figure 4-9 : Pulling The Top Lock
Using the System Loading PREVI Isola Applicators DANGER! Personal protective equipment must be worn when loading applicators. • Open the consumable lid. • Release the top lock by pulling it forward. Figure 4-9 : Pulling the top lock • Remove and dispose of the used applicator cartridge. - Page 90 Using the System Loading PREVI Isola Applicators IMPORTANT! Always load FULL applicator cartridges. • Close the consumable lid. IMPORTANT! Make sure the consumable lid is properly closed otherwise the instrument will not be able to start processing. • Touch the button to indicate that the applicator cartridge has been changed, •...
-
Page 91: Loading Previ Isola Tips
L o a d i n g P R E V I I s o l a T i p s PREVI Isola Tips should be replaced whenever a tip tray is empty. The instrument status should be “Ready” or “Paused” before loading tips. -
Page 92: Figure 4-12 : Inserting The Previ Isola Tip Tray
• Remove the lid on the new tip tray. • Load the new tip tray containing the tips. Figure 4-12 : Inserting the PREVI Isola Tip tray IMPORTANT! Use of PREVI Isola Tips is mandatory. Always load FULL tip trays. -
Page 93: Loading Previ Isola Labels
Loading PREVI Isola Labels L o a d i n g P R E V I I s o l a L a b e l s The instrument status should be “Ready” or “Paused” before loading PREVI Isola Labels. To load labels: •... - Page 94 Using the System Loading PREVI Isola Labels • Touch the button to indicate that the label roll has been changed. The printer will print a test label. • Open the printer access door and remove the test label. • Press the black feed button on the printer to pull the paper through.
-
Page 95: Monitoring Consumables And Waste Bins Status
Using the System Monitoring Consumables and Waste Bins Status M o n i t o r i n g C o n s u m a b l e s a n d W a s t e B i n s S t a t u s The consumables status is displayed on the main screen. -
Page 96: Previ Isola Waste Bins
− one for biohazardous waste (PREVI Isola Tips and PREVI Isola Applicators) − one for waste paper (label backing). Only the filling level of the PREVI Isola biohazardous Waste Bin is monitored. Empty High Full Table 4-3 : Waste bin filling level icons If the biohazardous waste bin is full, the instrument displays a warning to tell the user to empty it. -
Page 97: Sample Preparation
R e c o m m e n d e d p r o c e d u r e s U r i n e • bioMérieux recommends the use of PREVI Isola Rack 2, 4 and 5 tubes (see Sample racks, page 2-9). F e c e s •... -
Page 98: Placing Sample Tubes In Racks
IMPORTANT! Only recommended sample tube types should be used (see Tubes compatible for use with the PREVI Isola, page 2-10). Figure 4-15 : Sample tubes in racks • Ensure the sample tube barcode is facing the gap in the rack. -
Page 99: Loading Sample Racks
Using the System Loading Sample Racks L o a d i n g S a m p l e R a c k s The instrument status should be “Ready” before loading sample racks. To load sample racks: • Touch the button on the instrument touch-screen to display the “Load Samples”... -
Page 100: Figure 4-18 : Load Sample Racks
Using the System Loading Sample Racks • Load the sample racks with barcodes facing forwards. IMPORTANT! Ensure that the racks are level and seated securely on the sample tray. Figure 4-18 : Load sample racks Note: Partial filling of racks is acceptable – the instrument will determine that a sample tube location is empty as it will not read a barcode at that location. -
Page 101: Processing Samples
Figure 4-19 : “Preparing to start processing …” screen The PREVI Isola HEPA filter starts functioning when the button is touched and stops after 15 minutes of instrument inactivity (see Replacing the PREVI Isola HEPA Filter, page 9-17). PREVI Isola User Manual... -
Page 102: Figure 4-20 : Processing Screen
Using the System Processing Samples Processing begins when the animated icon appears on the “Processing” screen. Figure 4-20 : Processing screen The instrument begins processing the sample tubes starting from the top left of the screen. It continues until the last tube has been processed. 4-24 PREVI Isola User Manual... -
Page 103: Figure 4-21 : Barcode
Patient name (first 15 characters only) Patient date of birth (DD/MM/YYYY) PREVI Isola instrument number (1 to 4) Data on the labels of failed samples are crossed out as shown below. Processed plates are moved to the output cassette and are stacked sorted by incubation type (i.e. -
Page 104: Figure 4-22 : Sample Processing Status
Using the System Processing Samples Figure 4-22 : Sample processing status Status unknown The instrument has identified the type of rack but does not yet know whether a sample is present. No sample detected. The sample position has been processed, but the instrument has not been able to read the barcode or there is no sample in this position. -
Page 105: Processing Hints
Using the System Processing Samples When the instrument has completed processing all the loaded samples, it returns to “Ready” status. IMPORTANT! At the end of a run, the failed samples can be reprocessed by touching Figure 4-23 : “Processing Complete” screen The skipped sample tubes can be located on the screen in the sample working area. -
Page 106: Pausing The Instrument
• Perform the necessary action. IMPORTANT! When the Instrument is in “Paused” mode, it is possible to load PREVI Isola Tips, PREVI Isola Applicators and PREVI Isola Labels. IT IS NOT POSSIBLE, IN THIS MODE, TO LOAD SAMPLES. Once the action has been performed, •... -
Page 107: Stopping The Instrument
Using the System Stopping the Instrument S t o p p i n g t h e I n s t r u m e n t I n s t r u m e n t - g e n e r a t e d s t o p ( E r r o r c a s e ) The instrument will stop: −... -
Page 108: Figure 4-25 : "Shutdown Requested" Window - Instrument Processing
Using the System Stopping the Instrument The “Shutdown Requested” Window is displayed. Figure 4-25 : “Shutdown Requested” window – instrument processing • Touch the “Shutdown”, “Reinitialise” or “Cancel” button depending on what you want to If the error has been caused by a missing consumable, an open lid, a cassette that has been removed or any kind of fault that can be easily remedied, perform the necessary action and reinitialize. -
Page 109: User-Generated Stop
Using the System Stopping the Instrument U s e r - g e n e r a t e d s t o p The user may need to stop the instrument in the following situations: − to load additional samples. −... -
Page 110: Unloading Processed Plates
Using the System Unloading Processed Plates U n l o a d i n g P r o c e s s e d P l a t e s U n l o a d i n g p r o c e s s e d p l a t e s o n c o m p l e t i o n o f p r o c e s s i n g On completion of processing, the instrument returns to the “Ready”... -
Page 111: Unloading Processed Plates During Processing
Using the System Unloading Processed Plates U n l o a d i n g p r o c e s s e d p l a t e s d u r i n g p r o c e s s i n g R e m o ve a f u l l o u t p u t c a s s e t t e The user may want to unload processed plates during processing if an output cassette is complete. -
Page 112: Unloading Sample Tubes
Using the System Unloading Sample Tubes U n l o a d i n g S a m p l e T u b e s When processing is complete, the instrument presents the sample tray for unloading. To unload sample tubes: •... -
Page 113: Removing Waste
DANGER! To avoid contamination of the laboratory environment, never touch the button if the biohazardous PREVI Isola Waste Bin has not actually been emptied and do not open the waste drawer during processing. When replacing the PREVI Isola Waste Bin, take all the necessary precautions for handling biologically hazardous products. -
Page 114: Previ Isola Waste Paper Bin
Using the System Removing Waste P R E V I I s o l a W a s t e P a p e r B i n The waste paper bin fill level is not monitored by the software. It should be monitored by the user. -
Page 115: Powering Down The Instrument
Using the System Powering Down the Instrument P o w e r i n g D o w n t h e I n s t r u m e n t The instrument status should be “Ready”. To power down the instrument, •... -
Page 116: Examples Of Correct Streaking Patterns
Using the System Examples of Correct Streaking Patterns E x a m p l e s o f C o r r e c t S t r e a k i n g P a t t e r n s Figure 4-27 : Correct streaking patterns 4-38 PREVI... -
Page 117: Quality Control
Q u a l i t y C o n t r o l I n t e n d e d U s e This protocol applies to quality control of the PREVI Isola instruments. It consists in testing a suspension of E.coli (ATCC 25922) at 10 CFU/ml in NaCl 0.45g/l on 2... -
Page 118: Instrument Preparation
• Place TSA plates (at least 7) in the Instrument input cassette. • Load PREVI Isola Tips and PREVI Isola Applicators. • Select the media on the screen. S a m p l e T u b e P r e p a r a t i o n •... -
Page 119: Score Determination
Quality Control Score Determination S c o r e D e t e r m i n a t i o n Figure 5-1 : Score determination The plate is divided into 8 sections. In this example the score is 7. R e f e r e n c e A p p e a r a n c e Figure 5-2 : Reference appearance PREVI... -
Page 120: Results
Quality Control Results R e s u l t s The acceptance criteria are defined as follows: Parameters Criterion 15 to 65 5 to 7 Conform to the reference Plate 1 Plate 2 Conclusion Signature: Date: If the results are not conform, repeat the Quality Control. If non-conformity is confirmed, contact a bioMérieux Application Specialist. -
Page 121: Information Technology Security
Note: A user account contains the information which defines a user under Windows and PREVI Isola, in particular, the user name, password and user group membership. The PREVI Isola user groups are: For Windows: −... -
Page 122: Creating A New User Account
Information Technology Security User Management C r e a t i n g a n ew u s e r a c c o u n t A new user account can be created by the labadmin user. To access the User Management function: •... -
Page 123: Figure 6-3 : "New User" Screen
Figure 6-3 : "New User" screen The "New User" creation box is displayed. Figure 6-4 : "New User" creation box • Enter: − The user name (PREVI Isola workstation login). − The user’s full name. − The user’s description (optional). −... -
Page 124: Figure 6-5 : "New User" Creation Box With Data Entered
Information Technology Security User Management Figure 6-5 : "New User" creation box with data entered • Click "Create" (4) to create the new user account. The information entered and the options selected disappear from the screen. • Click "Close" (5) to close the window. PREVI Isola User Manual... -
Page 125: Assigning User Permissions And Rights
Information Technology Security User Management As s i g n i n g u s e r p e r m i s s i o n s a n d r i g h t s Permissions and rights are assigned to a user by the labadmin user. User permissions and rights are assigned by attaching the user to one or more user groups. -
Page 126: Figure 6-8 : "User Properties" - " Member Of " Tab Screen
Information Technology Security User Management • Click the "Member Of" tab (3) to display the list of groups to which the user belongs. Note: When a new user account is created, it is automatically a member of the "Users" group. Figure 6-8 : "User properties"... -
Page 127: Figure 6-10 : "Select Groups" Screen (Cont'd)
Information Technology Security User Management A second "Select Groups" window is displayed. Figure 6-10 : "Select Groups" screen (cont’d) • Click "Find Now"(6). The list of user groups is displayed at the bottom of the window. Figure 6-11 : "Select Groups" screen (cont’d) •... -
Page 128: Figure 6-12 : "Select Groups" Screen (Cont'd)
Information Technology Security User Management Note: Select the user group(s) by clicking on their name(s). To select several groups: Hold down the <Ctrl> key and click on the names you want. Figure 6-12 : "Select Groups" screen (cont’d) • Click "OK" to confirm. The "Select Groups"... -
Page 129: Figure 6-14 : "Properties" Screen - "Member Of" Tab Screen
Information Technology Security User Management The user’s “Properties” window is displayed with the list of user groups to which the user belongs. Figure 6-14 : "Properties" screen – "Member Of" tab screen • Click "OK" to confirm. PREVI Isola User Manual... -
Page 130: Disabling A User Account
D i s a b l i n g a u s e r a c c o u n t A user account can be disabled by the labadmin user. Note: When a user no longer uses the PREVI Isola, the user account should be disabled. To disable a user account, in the “Local Users and Groups” window: •... -
Page 131: Unlocking A User Account
IMPORTANT! After five unsuccessful attempts to enter the password, the user will not be able to open a work session on the PREVI Isola as the account will have locked. It can only be unlocked by a labadmin user. To unlock a user account, in the” Local Users and Groups” window: •... -
Page 132: Changing Of A Password By A User
Information Technology Security User Management C h a n g i n g o f a p a s sw o r d b y a u s e r If the labadmin user has given permission (see Assigning user permissions and rights, page 6-5) a user can change a password: •... -
Page 133: Antivirus
C:\Microstreak\Config − On the workstation computer, it is preferable to exclude the following folders from antivirus checking: D:\PREVI Isola\DataServer\bin D:\PREVI Isola\DataServer\Logs D:\PREVI Isola\DataServer\Data Before installing a new version of antivirus, it is recommended to perform a data backup as described in Manual data backup, page 7-1. -
Page 134: Printer Verification Protocol
Information Technology Security Printer Verification Protocol P r i n t e r V e r i f i c a t i o n P r o t o c o l The aim of the printer verification protocol is to validate the user’s printer to ensure that reports are printed correctly. -
Page 135: Data Backup, Restore And Audit Trail
D a t a r e s t o r a t i o n f r o m a r e m o v a b l e m e d i u m In the event of a problem affecting the database stored on the PREVI Isola, the restoration procedure can be used to recover the database previously saved on a removable medium. -
Page 136: Figure 7-1 : Event Viewer Shortcut
A u d i t t r a i l d a t a v i e w i n g u s i n g t h e e v e n t v i e w e r The PREVI Isola workstation software keeps a record of each creation, modification, and deletion of data performed by users. -
Page 137: Figure 7-3 : Event Viewer "As_Audit" Window
Data Backup, Restore and Audit Trail Audit trail data viewing using the event viewer • Click on “AS_Audit” (1) on the left-hand side of the screen. Figure 7-3 : Event viewer “AS_Audit” window • Click on the event you want to view on the right-hand side of the screen. The “Event Properties”... -
Page 138: Saving The Audit Trail
Data Backup, Restore and Audit Trail Saving the Audit Trail S a v i n g t h e A u d i t T r a i l The audit trail can be saved in a file which can then be opened on a Windows PC using the event viewer. - Page 139 Data Backup, Restore and Audit Trail Saving the Audit Trail The Save “As_Audit” as window is displayed. Figure 7-6 : Save “AS_Audit” As… window • Select the folder (2) in which to save the audit trail. • Enter a file name (3). •...
-
Page 140: Instrument And Workstation Log File Retrieval
Log into the workstation computer using a User account with Power User rights (i.e. bmx_admin or tmp_admin). Step 3 Navigate to D:\PREVI Isola\DataServer\Logs and copy the most recent log files. Step 4 Navigate to D:\PREVI Isola\DataServer\data and copy file AutoStreakerDatabase.sdf if a copy of the most recent database is required. -
Page 141: Full System Backup And Restoration
Data Backup, Restore and Audit Trail Full System Backup and Restoration F u l l S y s t e m B a c k u p a n d R e s t o r a t i o n F u l l S y s t e m B a c k u p The full system backup is performed at the time of installation and configuration of the workstation by bioMérieux Service Engineers. - Page 142 Data Backup, Restore and Audit Trail Full System Backup and Restoration The following message appears: “PROCESS COMPLETE, REMOVE CDROM AND PRESS ANY KEY TO REBOOT” At this stage, 2 are two possibilities: Do not change the SID and restart the computer: •...
-
Page 143: Maintenance
It is advisable to adopt a planned cleaning, decontamination and maintenance regime to ensure the PREVI Isola is maintained in a fully serviceable condition. A daily and a weekly program are advisable. -
Page 144: Presentation Of The Maintenance Menu
Maintenance Presentation of the Maintenance Menu P r e s e n t a t i o n o f t h e M a i n t e n a n c e M e n u Certain maintenance operations require the use of the “Maintenance” menu. To access this menu, •... -
Page 145: Maintenance Logs
Maintenance Maintenance Logs M a i n t e n a n c e L o g s The following maintenance logs are given as a guide. WEEK No.: MAINTENANCE YEAR: MONDAY TUESDAY WEDNESDAY THURSDAY FRIDAY SATURDAY SUNDAY Page 8-4 Clean tray under input cassettes Clean waste chute top, area Page 8-5... -
Page 146: Daily Maintenance Procedures
Maintenance Daily Maintenance Procedures D a i l y M a i n t e n a n c e P r o c e d u r e s CAUTION! Before carrying out the maintenance operations, switch off the instrument to avoid any damage to the system and harm to the user. -
Page 147: Clean The Waste Chute Top, The Area Around The Waste Chute Top And The Waste Chute Chimney
Maintenance Daily Maintenance Procedures C l e a n t h e w a s t e c h u t e t o p , t h e a r e a a r o u n d t h e w a s t e c h u t e t o p a n d t h e w a s t e c h u t e c h i m n e y Operator Time required: Approx. -
Page 148: Clean The Process Station Drip Tray
Maintenance Daily Maintenance Procedures C l e a n t h e p r o c e s s s t a t i o n drip t r a y Time required: Approx. 1 minute Performed by: A laboratory technologist Spare part(s) and consumables: Maintenance products: Quaternary ammonium based disinfectant... -
Page 149: Clean The Pipettor, Drip Tray And Area Under And Around The Drip Tray
Maintenance Daily Maintenance Procedures C l e a n t h e p i p e t t o r , d r i p t r a y a n d a r e a u n d e r a n d a r o u n d t h e d r i p t r a y Time required: Approx. -
Page 150: Clean The Sample Racks
Maintenance Daily Maintenance Procedures • Spray quaternary ammonium solution over the inner surface of the drip tray to the right of the process station and the area under and around the drip tray Figure 8-6 : Drip tray to the right of the process station •... -
Page 151: Clean The Sample Rack Tray And Sample Spill Tray
Maintenance Daily Maintenance Procedures C l e a n t h e s a m p l e r a c k t r a y a n d s a m p l e s p i l l t r a y Time required: Approx. -
Page 152: Figure 8-9 : Removing The Sample Spill Tray
Maintenance Daily Maintenance Procedures • Clean using lint-free paper moistened with quaternary ammonium based disinfectant. • Manually push the sample tray back inside the instrument. • Remove the sample spill tray by pushing it forward slightly and then sliding it to the right in order to have sufficient clearance to lift it up. -
Page 153: Clean The Tray Under Output Cassettes
Maintenance Daily Maintenance Procedures C l e a n t h e t r a y u n d e r o u t p u t c a s s e t t e s Time required: Approx. 1 minute Performed by: A laboratory technologist Spare part(s) and consumables:... -
Page 154: Clean The Waste Chute Deflector
Maintenance Daily Maintenance Procedures C l e a n t h e w a s t e c h u t e d e f l e c t o r • Open the waste drawer. • First remove the label backing deflector and clean it with lint-free paper moistened with quaternary ammonium based disinfectant. -
Page 155: Check, Replace Or Empty The Waste Bins, And Clean The Deflector
• Put the waste paper bin back into place making sure the label backing falls into the bin properly (see Figure 8-14). Figure 8-14 : PREVI Isola Waste Bins in drawer • Close the drawer. • Power on the instrument. -
Page 156: Weekly Maintenance Procedures
Maintenance Weekly Maintenance Procedures W e e k l y M a i n t e n a n c e P r o c e d u r e s C l e a n t h e i n s i d e o f i n p u t a n d o u t p u t c a s s e t t e s Time required: Approx. -
Page 157: Clean The Area Around The Applicator Cartridge And The Tip Tray
Maintenance Weekly Maintenance Procedures C l e a n t h e a r e a a r o u n d t h e a p p l i c a t o r c a r t r i d g e a n d t h e t i p t r a y Time required: Approx. -
Page 158: Figure 8-18 : Reference Block
Maintenance Weekly Maintenance Procedures • Put the white process station drip tray back in place. • Clean the reference block using lint-free paper moistened with quaternary ammonium based disinfectant. Figure 8-18 : Reference block • Clean the robot suction cups using lint-free paper moistened with quaternary ammonium based disinfectant. -
Page 159: Figure 8-20 : Cleaning The Agar Sensor
Maintenance Weekly Maintenance Procedures • Clean the agar sensor using lint-free paper moistened with quaternary ammonium based disinfectant. CAUTION! The agar sensor is an ultrasonic device that is extremely sensitive. It should be cleaned very delicately. Figure 8-20 : Cleaning the agar sensor •... -
Page 160: Clean The Printer And The Printer Platen
Maintenance Weekly Maintenance Procedures C l e a n t h e p r i n t e r a n d t h e p r i n t e r p l a t e n Time required: Approx. -
Page 161: Clean The Print Head
Maintenance Weekly Maintenance Procedures C l e a n t h e p r i n t h e a d • Open the process station lid and the printer access door. • Leave the print head to cool for one minute. Figure 8-22 : Print head •... -
Page 162: Clean The External Surfaces Of The Instrument
Maintenance Weekly Maintenance Procedures C l e a n t h e e x t e r n a l s u r f a c e s o f t h e i n s t r u m e n t Time required: Approx. -
Page 163: Maintenance Operations Performed By Biomérieux
S p i l l M a n a g e m e n t If any biohazardous spills occur in the PREVI Isola they must be removed rapidly, observing the usual safety precautions. Should a spill occur within the process station enclosure, or the sample tray or consumables tray, perform an emergency stop before commencing the cleaning procedure. -
Page 164: Removal And Disposal Of Materials And Waste
D i s p o s a l o f u s e d c o n s u m a b l e s It is recommended that used PREVI Isola Tip trays and PREVI Isola Applicator cartridges be disposed of before any new consumables are loaded. -
Page 165: Loading Previ Isola Label Rolls
Loading PREVI Isola Label Rolls L o a d i n g P R E V I I s o l a L a b e l R o l l s To load a PREVI Isola Label roll, •... -
Page 166: Figure 8-26 : Correct Position Of New Roll
Maintenance Loading PREVI Isola Label Rolls • Remove the labels on the first 70 cm of the new roll. • Orient the roll so that the printing surface faces forward. Figure 8-26 : Correct position of new roll • Place the roll between the hangers and close them onto the core. -
Page 167: Figure 8-28 : Feeding Label Backing Through The Printer
Maintenance Loading PREVI Isola Label Rolls • Feed the label backing through the printer as shown in the pictures below and as described on the instrument touch-screen. Figure 8-28 : Feeding label backing through the printer Figure 8-29 : Instructions for loading labels on instrument touch-screen... -
Page 168: Figure 8-30 : Pull Mechanism Slot (Top View)
Maintenance Loading PREVI Isola Label Rolls • Feed the label backing into the pull mechanism slot and then press the black feed button Figure 8-30 : Pull mechanism slot (top view) The label backing will be automatically pulled into the slot . -
Page 169: Figure 8-33 : Turning The Label Roll
Maintenance Loading PREVI Isola Label Rolls • Turn the label roll slightly to avoid folds in the labels. Figure 8-33 : Turning the label roll CAUTION! When replacing the label roll, take care not to remove the metal plate indicated in the picture below. -
Page 170: Figure 8-35 : Label Backing Coming Out Of Deflector
Maintenance Loading PREVI Isola Label Rolls • Open the waste drawer. • Check that the label backing is coming out of the deflector and is visible. Figure 8-35 : Label backing coming out of deflector 8-28 PREVI Isola User Manual... -
Page 171: Replacing Fuses
CAUTION! Before replacing fuses, shut the PREVI Isola down, turn off the main power switch and unplug the lead from the power-in socket. Two fuses are located in the main power inlet: Miniature Fuses, FSF 5 x 20 mm, 5A, 250 VAC. -
Page 173: Troubleshooting
PREVI Isola user and laboratory personnel. When correcting errors or faults, always: • Read the touch-screen error message before taking corrective action, • Ensure the PREVI Isola is in “Pause” status before clearing any internal malfunctions, • Wear appropriate personal protection. PREVI... -
Page 174: List Of Error Messages
Troubleshooting List of Error Messages L i s t o f E r r o r M e s s a g e s Event Description Action Required • Shut down (power off) the instrument and then restart it. Unknown error code. If the problem persists after restarting: •... - Page 175 Troubleshooting List of Error Messages Event Description Action Required • Please report repeated occurrences to bioMérieux 12003 Internal software error (number of input plates used). Technical Assistance. One or more plates will be marked as failed. This may be due to an earlier processing error. •...
- Page 176 Troubleshooting List of Error Messages Event Description Action Required • Shutdown the instrument (power off). 13010 The HEPA monitoring system detected a fault in the filtering. • Then check that the HEPA filter is correctly seated and latched, and that the filter is not blocked. If the problem persists after restarting, •...
- Page 177 Troubleshooting List of Error Messages Event Description Action Required • Restart the software. 14015 Pipette tip detected during initialisation indicating the camera lens or polarizing film is dirty. If the problem persists, • Contact bioMérieux Technical Assistance. • Check there is an allocated Plate Panel using the 14100 Sample has been skipped.
- Page 178 Troubleshooting List of Error Messages Event Description Action Required • Check Config directory for problems. 20110 Unable to read Configuration files. • Shut down (power off) the instrument and then restart it. 20200 Failed to communicate with MasterIO. Invalid serial port, serial port already in use, loose If the problem persists after restarting, cables, bad configuration, or hardware failure.
- Page 179 Troubleshooting List of Error Messages Event Description Action Required 21007 Unknown or incorrect operand used in sequence script. If scripts have been modified, then • Check for undefined operands. If no scripts have been modified, • Contact bioMérieux Technical Assistance. •...
- Page 180 Troubleshooting List of Error Messages Event Description Action Required • Remove the plates from the instrument and reinitialise the 35013 Plate lid did not seal when taking plate from Plate Input software. Robot to Plate Transfer Robot. Possible causes: No plate present, warped plate or plate If the problem persists, dropped when transferring from Input Robot to Transfer •...
- Page 181 Troubleshooting List of Error Messages Event Description Action Required • Remove the plates from the instrument and reinitialise the 35025 Plate lid failed to release seal after relidding. software. If the problem persists, • Contact bioMérieux Technical Assistance. • Remove the plates from the instrument and reinitialise the 35026 Unable to find septum on the process station.
-
Page 182: Event Log
Troubleshooting Event Log E v e n t L o g The “Event Log” screen is displayed when the user touches an alarm button after a warning or an error has occurred. • Touch a button to display or mask a type of event (Show Fatal, Show Errors, Show Warning, Show Info). -
Page 183: Error, Cause And Recovery
Pipettor tip failure already paused or stopped. • Replace pipettor trays (see Loading Pipettor trays are empty. PREVI Isola Tips, page 4-13) . • Remove the tip manually and reinitialize Pipettor fails to dispose of a used tip. the instrument. - Page 184 Troubleshooting Error, Cause and Recovery Error Cause Recovery • Pause the instrument, check the tip for Aspiration/dispense Damaged or incompatible tip. damage and compatibility. failure Misalignment of pipettor. • Contact bioMérieux S.A. or your local bioMérieux representative. • Repetitive shorter The pipettor is unable to dispense the Contact bioMérieux S.A.
- Page 185 Troubleshooting Error, Cause and Recovery Error Cause Recovery Label backing Waste paper bin too full. • Reach into the waste bin and clear any causing error 13007 waste paper that has backed up on the Label backing jammed in the deflector paper deflector.
- Page 186 Plates removed from the instrument following an error must be discarded and not put back into an input cassette. Before re-starting the PREVI Isola following power interruption, computer failure or touch-screen failure, the user should first check the plate transfer and process station areas for dropped or damaged plates.
-
Page 187: Recovery From Events With "Warning" Severity
Troubleshooting Recovery from Events with “Warning” Severity R e c o v e r y f r o m E v e n t s w i t h “ W a r n i n g ” S e v e r i t y If an event is expected to occur (e.g. -
Page 188: Recovery From Events With "Fatal" Severity
Troubleshooting Recovery from Events with “Fatal” Severity The user will need to perform the necessary actions as prompted by the instrument user interface to clear the fault. Once the fault is cleared, the user may resume processing via the instrument user interface. The instrument will return to the processing state and continue processing samples. -
Page 189: Previ Isola Hepa Filter
P R E V I I s o l a H E P A F i l t e r The PREVI Isola HEPA filter is monitored with an airflow sensor. An error message is raised in the following events:... -
Page 190: Replacing The Previ Isola Hepa Filter
Gently lower the HEPA filter lever. DANGER! The PREVI Isola HEPA filter must be removed with the utmost rigor as the user is in a potentially contaminated environment. Gloves, a lab coat, a face mask and protective glasses must be worn. -
Page 191: Figure 9-8 : Preparing To Place The Previ Isola Hepa Filter In A Plastic Bag
• Position the plastic bag so that it is ready to receive the HEPA filter (see figure below). Figure 9-8 : Preparing to place the PREVI Isola HEPA filter in a plastic bag • Slide the HEPA filter forward until it comes out of its housing. -
Page 192: Figure 9-10 : Removing The Previ Isola Hepa Filter From Its Housing
• Cover the extracted part of the HEPA filter with the plastic bag. Figure 9-11 : Covering the PREVI Isola HEPA filter as it comes out of its housing • Continue covering the HEPA filter until it has been fully extracted. -
Page 193: Figure 9-13 : Previ Isola Hepa Filter In The Plastic Bag
Close the plastic bag as soon as the filter has been removed from its housing and is in the bag. Figure 9-13 : PREVI Isola HEPA filter in the plastic bag • Dispose of the HEPA filter according to the usual laboratory procedures for biohazardous waste and in accordance with any applicable local regulations. - Page 194 Troubleshooting PREVI Isola HEPA Filter • Note the date of the filter change on the maintenance sheet. • Order a new filter from bioMérieux. IMPORTANT! It is mandatory to always have a replacement filter available. If the error persists after the filter has been changed, •...
-
Page 195: Pipettor
Troubleshooting Pipettor P i p e t t o r C l e a n a n d d e c o n t a m i n a t e t h e p i p e t t o r i f i t d e s c e n d s i n t o a s a m p l e t u b e If power supply is lost or if one of the instrument covers is opened during plate processing, the pipettor may descend into a sample tube and become contaminated. -
Page 196: Figure 9-16 : Cleaning The Black Pipettor Piston
Troubleshooting Pipettor • Clean the black pipettor piston (the part of the pipettor remaining on the instrument) using lint-free paper moistened with a 70% alcohol solution. Figure 9-16 : Cleaning the black pipettor piston • Clean the inside of the pipettor barrel using a swab moistened with a 70% alcohol solution. -
Page 197: Possible Issues After Cleaning
Troubleshooting Pipettor P o s s i b l e i s s u e s a f t e r c l e a n i n g Issue Possible Cause Recovery The pipettor fails to take a tip. The pipettor barrel has not been fully Check that the pipettor barrel is screwed on. -
Page 198: Examples Of Incorrect Inoculation And Streaking Patterns
Troubleshooting Examples of Incorrect Inoculation and Streaking Patterns E x a m p l e s o f I n c o r r e c t I n o c u l a t i o n a n d S t r e a k i n g P a t t e r n s Figure 9-20 : Incorrect inoculation and streaking patterns 9-26 PREVI... -
Page 199: Back Up Instrument Log Files
To anonymize patient data, • Open the Windows Explorer. • Select “Start“ / “Programs” / “PREVI Isola” / “DatabaseAnonymiser”. The following screen is displayed: Figure 9-21 : “Database Anonymiser” screen In D:\PREVIIsola\DataServer\Data, •... -
Page 201: General System Characteristics
Pollution degree: 2. Sound level: 60.4 dB(a) Note: The PREVI Isola bar code readers (internal or external) produce class 1 radiation according to standard IEC 60825-1. Class 1 laser beams are not considered harmful and do not cause burns (skin and eyes). -
Page 203: Appendices
U s e r M a n u a l k i t − 1 PREVI Isola User Manual (EN) − 1 PREVI Isola User Manual CD-ROM (Multilingual) (optional) − 1 BCI NET User Manual CD-ROM (optional) − 1 BCI RS232 User Manual CD-ROM (optional) W o r k s t a t i o n P C k i t −... -
Page 204: Appendix B: Stopping And Restarting The Data Server
Appendices Appendix B: Stopping and Restarting the Data Server A p p e n d i x B : S t o p p i n g a n d R e s t a r t i n g t h e D a t a S e r v e r S t o p p i n g t h e d a t a s e r ve r On the workstation computer: •... -
Page 205: Figure 11-3 : "Dataserver" Selection Window
Appendices Appendix B: Stopping and Restarting the Data Server • Click on “DataServer“ (1) in the name column. Figure 11-3 : “DataServer” selection window • Click on the “Stop the service” link (2). The “Service Control” dialog box is displayed. Figure 11-4 : “Service Control”... -
Page 206: Restarting The Data Server
Appendices Appendix B: Stopping and Restarting the Data Server R e s t a r t i n g t h e d a t a s e r ve r In the “Services” window, • Click on the “Start the service”... - Page 207 Refers to the form or structure of a colony. Colonial morphology Software application running in the background of the PREVI Isola external PC and Data Server communicating with the PREVI Isola user interface and LIS. The process of dispensing (pipetting) sample preparations onto agar plates.
-
Page 208: Glossary
Incubation conditions: atmosphere and temperature at which a streaked plate must be Incubation Types incubated. In the PREVI Isola context: the process of pipetting samples onto a fresh agar plate. Inoculate Material used to initiate a microbial culture. Inoculum... - Page 209 Any fluid, tissue, swab or other material collected for microbiological assessment. Specimen Any refinement of the specimen type that allows the PREVI Isola to know which plate Specimen Details panel has to be used for a sample (for example “positive urine”, “negative urine”, young child’s urine’, “pregnant woman’s urine’).
- Page 210 Laboratory space dedicated to a particular function in the microbiology laboratory. Workstation Software application running on the PREVI Isola external PC used to configure the Workstation Software system. 12-4...
- Page 211 N o t e s ..............................................................................................................................................................................................................................................................................................................................................................................................................................................................................................................................................................................................................................................................................................................................................................................................................................................................................................................................................................................................................................................................................................................................................................................................................................................................................................................................................................................................................................................................................................................................................................................................PREVI Isola User Manual NOTES-1...
- Page 212 Notes ......................................................................................................................................................................................................................................................................................................................................................................................................................................................................................................................................................................................................................................................................................................................................................................................................................................................................................................................................................................................................................................................................................................................................................................................................................................................................................................................................................................................................................................................................................................................................NOTES-2 PREVI Isola User Manual...
Need help?
Do you have a question about the PREVI Isola and is the answer not in the manual?
Questions and answers