Table of Contents

Related Manuals for bioMerieux PREVI Color Gram


Summary of Contents for bioMerieux PREVI Color Gram
- Page 1 S.A. 69280 Marcy l'Etoile / France 29675 Tel. 33 (0)4 78 87 20 00 - Fax 33 (0)4 78 87 20 90 version B http://www.biomerieux.com 03/2009 Printed in France / 673 620 399 RCS Lyon © 2008. bioMérieux, S.A.
- Page 2 The performance characteristics and the results of the products presented are subject to a proper and skilled use of the product in strict conformance with the User’s Manual. Photo and illustration credit: bioMérieux. bioMérieux, the blue logo and PREVI are used, pending and/or registered trademarks belonging to bioMérieux S.A. or one of its subsidiaries.
- Page 3 R e v i s i o n s The list of revisions below summarizes replacements or additional pages in your User’s Manual. Version Date of printing Modifications Pages modified 09/2008 Creation 03/2009 Addendum # 4501-1842 insert P 2-6...
-
Page 5: Table Of Contents
T a b l e o f C o n t e n t s 1. How to use this manual Warnings ................................1-1 Specific warnings..............................1-1 2. General Functional description............................2-1 Key features ................................2-1 Intended use................................2-1 Specifications ................................2-2 General ................................2-2 Performance ..............................2-2 Run timing sequence and reagent consumption - General references ............2-3 References ................................2-3 Description................................2-4... - Page 6 Table of Contents 5. Maintenance and cleaning Preventive maintenance plan ..........................5-1 Preventive maintenance chart..........................5-1 DAILY maintenance ............................5-2 WEEKLY maintenance ............................5-2 MONTHLY maintenance..........................5-3 YEARLY maintenance .............................5-3 Nozzle handling ..............................5-4 Disassembly..............................5-4 Cleaning................................5-5 Reassembly ..............................5-6 Unclogging the tubing ............................5-8 Volume test................................5-10 B line flushing procedure .............................5-13 Priming all lines simultaneously...........................5-16 Long-term storage ...............................5-16 Cleaning ................................5-18...
-
Page 7: How To Use This Manual
1 . H o w t o u s e t h i s m a n u a l This manual provides the appropriate instructions to install, operate and maintain the PREVI™ Color Gram instrument. W a r n i n g s Different types of warnings are used throughout the manual: •... - Page 8 How to use this manual Specific warnings IMPORTANT! Please read this manual carefully before using the PREVI™ Color Gram. In all cases of maintenance and repair, work should only be undertaken by a skilled technician. Untrained personnel should not attempt to dismantle the instrument. Only spare parts supplied or specified by bioMérieux should be used.
-
Page 9: General
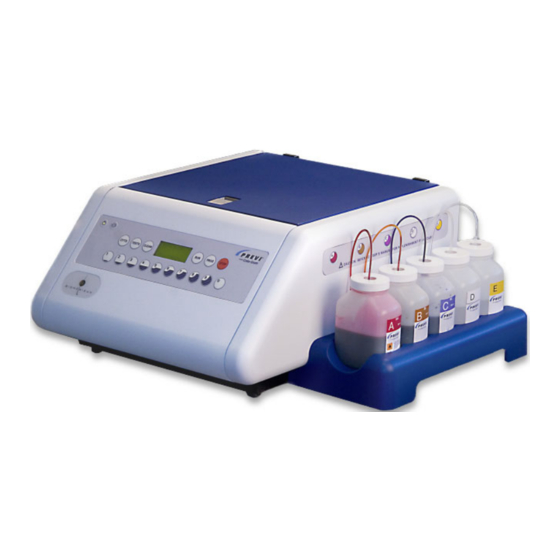
2 . G e n e r a l F u n c t i o n a l d e s c r i p t i o n The PREVI™ Color Gram is designed to Gram stain specimen smears on microscope slides. A Gram stain aids in the presumptive diagnosis of the illness, and it gives preliminary classification of the causative agent. -
Page 10: Specifications
Rotor speeds 950 rpm for drying Not provided by bioMerieux. Since distilled water and ethanol or methanol are not available from bioMérieux, it must be obtained locally. Water should be filtered (0.2 micron inline filter) to remove bacteria and particulates. -
Page 11: Run Timing Sequence And Reagent Consumption - General References
General References R u n t i m i n g s e q u e n c e a n d r e a g e n t c o n s u m p t i o n - G e n e r a l r e f e r e n c e s The following table includes the general references for a staining cycle at DECOLORIZER 3. -
Page 12: Description
General Description D e s c r i p t i o n PREVI™ Color Gram consists of: with safety lock Right side panel with 5 prime buttons for 5 Carousel 30 reagent channels : Carousel 12 Fuchsin or safranin (with or without acetone) Bowl (see page 2-5) -
Page 13: Back Panel
General Description B a c k p a n e l Volume button: (signal tone setting) Exhaust vent Power switch: Fuse door; alternative current (see "Specifications", page 2-2). Waste tubing Power cord B o w l Spray nozzle orifices: - Distilled water Rear E - Ethanol or methanol C - Crystal Violet B - Iodine... -
Page 14: Nozzle
General Description N o z z l e Compression screw Nozzle housing Swirl cone O-ring N o z z l e c l e a n i n g s o l u t i o n The nozzle cleaning solution is used for the PREVI™ Color Gram maintenance operations. The 2.5 L concentrated nozzle cleaning solution (reference 29525) is contained in a 5-liter bottle. -
Page 15: Installing The Previ™Color Gram
3 . I n s t a l l i n g t h e P R E V I ™ C o l o r G r a m CAUTION! If you observe any damage on the packaging or equipment, please contact your bioMérieux representative before installing the instrument. -
Page 16: Installation Procedure
Installing the PREVI™Color Gram Installation procedure I n s t a l l a t i o n p r o c e d u r e CAUTION! Ensure that the distance between the back panel of the PREVI™Color Gram and the wall is at least 30 cm (12 inches). -
Page 17: Connecting Power
Plug the power cord into the mains (AC power). Turn the power switch ON ( I ). bioMérieux After 2 seconds the digital display will PREVI Color Gram show: Version X.X X: firmware version. … … PREVI™ Color Gram User’s Manual... -
Page 18: Installing Reagent Bottles
Installing the PREVI™Color Gram Installation procedure I n s t a l l i n g r e a g e n t b o t t l e s DANGER! Reagents used in the PREVI™ Color Gram contain moderately hazardous chemicals that require care in handling. -
Page 19: Preparation Procedure
Installing the PREVI™Color Gram Preparation procedure P r e p a r a t i o n p r o c e d u r e IMPORTANT! To obtain optimum performance, thoroughly purge and prime each reagent delivery line using the following instructions. CAUTION! This procedure must be applied before the 1 use of the instrument. -
Page 20: Pattern And Volume Testing
Installing the PREVI™Color Gram Preparation procedure Flush with distilled water and wipe dry the bowl and the nozzles. Replace each spray nozzle by hand and then with the nozzle tool by turning clockwise. P a t t e r n a n d vo l u m e t e s t i n g For first use, please refer to both of the following tests: •... - Page 21 4 . O p e r a t i n g t h e P R E V I ™ C o l o r G r a m PREVI™ Color Gram routine process Orange line: run process Blue line: maintenance process Grey elements: optional part...
-
Page 22: Operating The Previ™ Color Gram Clean Reprime Stage
Operating the PREVI™ Color Gram CLEAN reprime stage CAUTION! The reagent AND waste liquid levels must be monitored by the user. To ensure proper staining and to protect the instrument, never allow : - a reagent line to run dry. When the reagent liquid level is near the bottom of a reagent bottle, replace the bottle, see "Replacing a reagent bottle", page 4-12. -
Page 23: Pattern Test
Operating the PREVI™ Color Gram Pattern test PRESS CLEAN TO REPRIME Press PRIME 15 % DECOLORIZER 3 FULL CAROUSEL Perform a PATTERN test. … Note: If a CLEAN cycle is aborted, a warning message will be displayed until the CLEAN cycle is completed. - Page 24 Operating the PREVI™ Color Gram Pattern test Hold a sheet of white paper in front of nozzle A. Press Check the quality of the pattern. If the pattern is not correct, see "Nozzle handling", page 5-4. Repeat steps 3, 4 and 5 for all the other PATTERN TEST nozzles...
-
Page 25: Loading Slides
Operating the PREVI™ Color Gram Loading slides L o a d i n g s l i d e s CAUTION! Never load chipped or cracked slides into the instrument. Failure to use slides in good condition can lead to breakage during the staining cycle. If slides do break in the bowl, see "Cleaning", page 5-18. - Page 26 Operating the PREVI™ Color Gram Loading slides TOP VIEW CAROUSEL Insert the slides into Specimen side the carousel. The slides must be inserted diametrically opposite one to the other to balance the carousel. Specimen side Label: toward the center Label: toward the outer rim Be sure that slides are loaded in balanced pairs.
- Page 27 Operating the PREVI™ Color Gram Loading slides Replace the lid by pressing the button and lowering the lid over the indexing posts. Click Release the button and press the lid handle until it clicks into place. Place the carousel in the bowl and close the lid.
-
Page 28: Starting A Staining Cycle
Operating the PREVI™ Color Gram Starting a staining cycle S t a r t i n g a s t a i n i n g c y c l e CAUTION! A new cleaning cycle should be performed if the time between runs exceeds 3 hours. -
Page 29: Unloading Slides
Operating the PREVI™ Color Gram Unloading slides U n l o a d i n g s l i d e s WARNING! Treat slides in accordance with good laboratory practice guidelines and local regulations. Remove the carousel from the bowl. Remove the carousel lid by pressing the button and lifting... -
Page 30: Clean Alcohol Purge Stage
Operating the PREVI™ Color Gram CLEAN alcohol purge stage C L E A N a l c o h o l p u r g e s t a g e CAUTION! The CLEAN cycle must be used each time the PREVI™ Color Gram is left on stand-by FOR MORE THAN 3 HOURS. -
Page 31: Alcohol Fixation (Ethanol Or Methanol)
Operating the PREVI™ Color Gram Alcohol fixation (ethanol or methanol) A l c o h o l f i x a t i o n ( e t h a n o l o r m e t h a n o l ) Automated fixation can be used in place of manual fixation. -
Page 32: Monitoring Reagent Level
Operating the PREVI™ Color Gram Monitoring reagent level M o n i t o r i n g r e a g e n t l e v e l CAUTION! The reagent and waste liquid levels must be monitored by the user. To ensure proper staining and to protect the stainer: - never allow a reagent line to run dry. -
Page 33: Emptying The Waste Container
The decolorizer cycle intensity can be changed according to the type of specimens or the staining results expected. IMPORTANT! Levels 2 and 3 have been validated by bioMérieux (level 3: default setting). Keys DECOLORIZER CYCLE ULTRA THIN SPECIMEN LEVELS RECOMMENDED BY BIOMERIEUX ULTRA THICK SPECIMEN PREVI™ Color Gram User’s Manual 4-13... - Page 34 Operating the PREVI™ Color Gram Other settings DECOLORIZER 3 FULL CAROUSEL Press PROGRAM 1 = DECOLORIZER 2 = FIXATION 3 = ADJUST STAIN Press DECOLORIZER 3 SELECT 1 - 9 Enter the required DECOLORIZER level. Example: for a very thick specimen press DECOLORIZER 8 FULL CAROUSEL See "Starting a...
-
Page 35: Stain Adjustment
Operating the PREVI™ Color Gram Other settings S t a i n a d j u s t m e n t These settings can be used if the desired staining is not achieved through the decolorizer settings alone. Once you have found the decolorized setting that works, you can adjust the amount of Crystal Violet (C) and Iodine (B) according to 3 settings: Low, Default and High. - Page 37 5 . M a i n t e n a n c e a n d c l e a n i n g DANGER ! Reagents used in the PREVI™ Color Gram contain moderately hazardous chemicals that require care in handling. Always use appropriate safety measures including gloves and eye protection when handling reagents.
-
Page 38: Maintenance And Cleaning Preventive Maintenance Plan
Maintenance and cleaning Preventive maintenance plan D AI L Y m a i n t e n a n c e IMPORTANT! Check reagent levels and expiry dates. CAUTION! This procedure is applicable when the time between two runs exceeds 3 hours. -
Page 39: Monthly Maintenance
Maintenance and cleaning Preventive maintenance plan M O N T H L Y m a i n t e n a n c e Disassemble and clean all the nozzles: see "Disassembly", page 5-4. Perform the B flushing procedure: see "B line flushing procedure", page 5-13. Perform the Pattern test: see "Pattern test", page 4-3. -
Page 40: Nozzle Handling
Maintenance and cleaning Nozzle handling N o z z l e h a n d l i n g D i s a s s e m b l y The maintenance kit and the cleaning solution are required. IMPORTANT! If the compression screw cannot be easily loosened, use light penetrating oil and a 5/8 inch wrench to loosen the nozzle. -
Page 41: Cleaning
Maintenance and cleaning Nozzle handling C l e a n i n g Place the nozzle parts in the 50 ml centrifuge tube position D Note the reagent letter on the tube. Fill with 25 ml of cleaning solution and cap the tube. -
Page 42: Reassembly
Maintenance and cleaning Nozzle handling R e a s s e m b l y Empty the tube into the bowl with a skimmer or your thumb to prevent nozzle loss. Inspect nozzle parts. Remove any material in the swirl cone grooves by sliding a piece of paper along the edge. - Page 43 Maintenance and cleaning Nozzle handling Reassemble the nozzle by inserting the swirl cone into the compression screw. Hold all the parts in a vertical position until reassembly is completed. Return the nozzle to its original location. Repeat instructions 1 to 8 for each nozzle. Prime each reagent channel.
-
Page 44: Unclogging The Tubing
Maintenance and cleaning Nozzle handling U n c l o g g i n g t h e t u b i n g Remove the carousel from the stainer. Remove the nozzle connected to the air locked pump. Screw the nozzle adapter of the unclogging tool (included in the nozzle... - Page 45 Maintenance and cleaning Nozzle handling Run the reagent into the tube of until the fluid runs free of bubbles. The plunger can be withdrawn further to accept more fluid. Do not pull the plunger completely out of the barrel of the tool. Remove the nozzle adapter tubing express the collected...
-
Page 46: Volume Test
Maintenance and cleaning Volume test V o l u m e t e s t The maintenance kit is required for this test that must be performed weekly. DECOLORIZER 3 FULL CAROUSEL Press 1 = PATTERN TEST 2 = VOLUME TEST 3 = B-LINE FLUSH 4 = PRIME LINES Press... - Page 47 Maintenance and cleaning Volume test Place the tube in position C. Repeat steps 3, 4, 5 and 6 for all the other nozzles , A, B and E). Tolerance Check each tube according to the Tube Minimum Maximum following table. 10 ml 12 ml If the volume is...
- Page 48 Maintenance and cleaning Volume test For future use: empty the contents • of the tubes into the bowl, • clean the tubes, • rinse the tubes with distilled water, (waste liquid thrown in the bowl), put the tubes back • into their original place in the main- tenance box.
-
Page 49: B Line Flushing Procedure
Maintenance and cleaning B line flushing procedure B l i n e f l u s h i n g p r o c e d u r e The maintenance kit is required for the following test that must be performed monthly. - Page 50 Maintenance and cleaning B line flushing procedure Remove the remaining distilled water. Load 200 ml of the diluted nozzle cleaning solution in the B line position… LOAD 200 ML LINE CLEANER ON B … and press PRESS RUN Note: pump approx. 100 ml of the cleaning solution through the B line. B LINE FLUSH 59 MIN 30 SEC...
- Page 51 Maintenance and cleaning B line flushing procedure LOAD 500 ML DI WATER ON B PRESS RUN … and press B LINE FLUSH DI WATER B 30 % Note: pump approx. 400 ml of distilled water through the B line. LOAD AT LEAST 200 ML IODINE B PRESS RUN Load 200 ml of...
-
Page 52: Priming All Lines Simultaneously
Maintenance and cleaning Priming all lines simultaneously P r i m i n g a l l l i n e s s i m u l t a n e o u s l y DECOLORIZER 3 FULL CAROUSEL Press 1 = PATTERN TEST 2 = VOLUME TEST... -
Page 53: Cleaning
Maintenance and cleaning Long-term storage Install a cap on the reagent bottle and set the bottle aside. Flush at least 250 ml of ethanol or methanol through the line and spray the nozzle by priming. Leave ethanol or IMPORTANT! Leave flushing fluids in the reagent lines during storage. methanol in the line. -
Page 54: Cleaning The Instrument And The Carousel
Maintenance and cleaning Cleaning C l e a n i n g DANGER! Prior to cleaning, disconnect the PREVI™ Color Gram from the main power supply to avoid any risk of fire and explosion. The cleaning procedure should be performed in a well ventilated room by authorized trained personnel wearing appropriate individual protection equipment. -
Page 55: Disinfecting And/Or Sterilizing
Maintenance and cleaning Disinfecting and/or sterilizing D i s i n f e c t i n g a n d / o r s t e r i l i z i n g All parts of the PREVI™ color Gram that came into contact with biological samples, patient samples, positive control samples or hazardous material must be treated as potentially infectious areas. -
Page 56: Disinfection Procedure
Maintenance and cleaning Disinfecting and/or sterilizing D i s i n f e c t i o n p r o c e d u r e Prepare a suitable container for all disposables. Mask the lid latch and locking pin holes with waterproof tape to protect the stainer interior. - Page 57 Maintenance and cleaning Disinfecting and/or sterilizing Wipe the exterior surfaces. Do not flood the display panel with excessive moisture. Any moisture that seeps through could damage the internal electronics. Repeat wipe down every 2 or 3 minutes for about 10 minutes total.
-
Page 58: Instrument Shipment
Maintenance and cleaning Instrument shipment I n s t r u m e n t s h i p m e n t WARNING! Before the PREVI™ Color Gram is returned to bioMérieux, it must at least be disinfected. A disinfection declaration must be completed by the operating authority, see "Disinfection declaration", page 5-22. -
Page 59: Fuse Replacement
Maintenance and cleaning Fuse replacement F u s e r e p l a c e m e n t DANGER! To prevent the risk of fire, the main fuses should only be replaced with fuses of the same type and rating. If fuse failure recurs, please call your bioMérieux representative. -
Page 61: Troubleshooting
6 . Tr o u b l e s h o o t i n g The following section provides suggestions to help you quickly solve routine problems that might be encountered with the PREVI™ Color Gram. These solutions are indexed to additional information found throughout this manual. - Page 62 Troubleshooting Error messages and Troubleshooting Table Theme Description and Error Recovery Procedure Messages If the display shows WRONG After you press RUN, make sure the slide carousel is properly loaded on the drive hub. ROTOR a few seconds: In staining mode, the instrument automatically detects whether the staining carousel is present before proceeding.
- Page 63 Troubleshooting Error messages and Troubleshooting Table Theme Description and Error Recovery Procedure Messages Make certain the rotor is balanced and that the If the display shows: carousel is seated correctly on the hub. Verify keyboard operation by observing the display while entering slide number settings.
- Page 64 Troubleshooting Error messages and Troubleshooting Table Theme Description and Error Recovery Procedure Messages STAINING Abnormal staining on entire Check reagent levels in bottles. surface of all slides. Make sure the external reagent dip tubes are securely attached to each bottle. Verify that each reagent pump is primed by opening the lid and pressing the manual prime button.
- Page 65 Troubleshooting Error messages and Troubleshooting Table Theme Description and Error Recovery Procedure Messages Specimens are washing off If you are heat fixing slides: Make sure you are using adequate heat. Try fixing some slides with slides. alcohol in addition to heat, to verify the fixation step. Try to make your smears as thin as possible for a given specimen, to minimize fixation problems.
-
Page 67: Preventive Maintenance Chart
7 . P r e v e n t i v e m a i n t e n a n c e c h a r t PREVI™ Color Gram User’s Manual...
Need help?
Do you have a question about the PREVI Color Gram and is the answer not in the manual?
Questions and answers